In 1979, the Volzhsky Automobile Plant began producing the VAZ-2105, one of the modifications of the classic family. This model is a “long-liver”, since its production lasted longer than any of the “Classics” - 30 years. It is noteworthy that before the appearance of this model, at first all the predecessors of this family until 1976 were equipped with one single gearbox - from the VAZ-2101. Since 1976, the gearbox has been modernized, but it was intended only for the VAZ-2106 and Niva. The main difference lay in the changed gear ratios; later this gearbox was designated as a box with a “high” row.
For the VAZ-2105, the box was redesigned again, which affected the gear ratios. The new gearbox became “intermediate” in this indicator between the 2101 and 2106 gearboxes. Subsequently, it was the VAZ-2105 gearbox that was left and all cars began to be equipped with it, and the production of the first two versions was stopped, and there were two versions of 2105 - a 4-speed and a five-speed. Also, over time, the index of this box has changed - instead of 2105, it began to be labeled as 2107 and 21074 (5-speed).
Gearbox device
In general, the concept of “remaking” the box is not entirely correct, since the design of the VAZ-2105 gearbox with 4 speeds was practically no different from the same gearbox 2101. The 2105 gearbox has a three-shaft layout, with constant gear meshing and manual control. Externally, the Kopeika and Pyaterki checkpoints can be distinguished almost only by the markings on the body of the box.
The VAZ-2105 gearbox diagram with 4 stages is presented below, and structurally it does not differ from modifications 2101 and 2106:
| 1 | Bottom cover; | 40 | Needle bearing of the front end of the secondary shaft; |
| 2 | Filler and inspection plug; | 41 | Synchronizer spring thrust washer; |
| 3 | Intermediate shaft second gear gear; | 42 | Fourth gear synchronizer ring gear; |
| 4 | Intermediate shaft third gear gear; | 43 | Sliding clutch for synchronizer of third and fourth gears; |
| 5 | Intermediate shaft; | 44 | Third and fourth gear synchronizer sliding clutch hub; |
| 6 | Front intermediate shaft bearing; | 45 | Synchronizer retaining ring; |
| 7 | Clamp washer bolt; | 46 | Synchronizer locking ring; |
| 8 | Intermediate shaft front bearing clamp washer; | 47 | Synchronizer spring; |
| 9 | Intermediate shaft constant mesh gear; | 48 | Third gear synchronizer gear and ring gear; |
| 10 | Constant mesh gear of the input shaft; | 49 | Second gear synchronizer gear and ring gear; |
| 11 | Spring washer; | 50 | Secondary shaft; |
| 12 | Retaining ring; | 51 | First gear synchronizer gear and ring gear; |
| 13 | Rear input shaft bearing; | 52 | First gear gear bushing; |
| 14 | Input shaft oil seal; | 53 | Secondary shaft intermediate bearing; |
| 15 | Transmission front cover; | 54 | Intermediate bearing lock plate; |
| 16 | Bearing mounting ring; | 55 | Secondary shaft reverse gear; |
| 17 | Clutch housing; | 56 | Elastic cushion for gear shift lever damper; |
| 18 | Gearbox input shaft; | 57 | Damper rubber bushing; |
| 19 | Reversing light switch; | 58 | Damper spacer; |
| 20 | Intermediate shaft reverse gear; | 59 | Damper locking sleeve; |
| 21 | Reverse intermediate gear; | 60 | Inner gear shift lever cover; |
| 22 | Reverse fork; | 61 | Secondary shaft rear bearing oil seal; |
| 23 | Gear shift lever release spring; | 62 | Flange of the elastic coupling of the propeller shaft; |
| 24 | Tension spring bolt; | 63 | Screw; |
| 25 | Gear shift lever guide cup; | 64 | Centering ring seal; |
| 26 | Ball joint of the lever; | 65 | Centering ring retaining ring; |
| 27 | Spherical washer; | 66 | Centering ring; |
| 28 | Spring; | 67 | Rear secondary shaft bearing; |
| 29 | Gear shift lever; | 68 | Drain plug; |
| 30 | First and second gear shift fork; | 69 | Mud deflector; |
| 31 | Third and fourth gear shift fork; | 70 | Speedometer drive gear; |
| 32 | Fork rod for first and second gears; | 71 | Speedometer drive; |
| 33 | 3rd and 4th gear fork rod; | 72 | Rear gearbox cover; |
| 34 | Locking blocks; | 73 | Reverse idler gear axis; |
| 35 | Reverse fork rod; | 74 | Rear intermediate shaft bearing; |
| 36 | Rod lock ball; | 75 | Intermediate shaft first gear; |
| 37 | Retainer spring; | 76 | Gearbox housing; |
| 38 | Retainer cover; | 77 | Sliding clutch for synchronizer of first and second gears. |
| 39 | Breather; |
Link on topic:
Description and installation of the Alliance heater on a VAZ car
Since the box from the VAZ-2105 is structurally similar to the 2101, the kinematic diagram of the gearbox is the same. But the gear ratios are different; on 2105 gearboxes they are:
- 1st – 3.67;
- 2nd – 2.10;
- 3rd – 1.36;
- 4th – 1.00;
- Rear – 3.53;
As for the differences in the design between gearboxes 2105 and 2101, they mainly come down to different numbers of teeth on different gears. So, on the intermediate shaft of the gearbox, a 1st speed gear with 14 teeth is used (15 for 2101), and their inclination angle is greater. The constant mesh gear of this shaft has 28 teeth (29 for 2101). The input shaft uses an 18-tooth gear (19 for 2101). Because of these features, the shafts with gear blocks of these two gearboxes are not interchangeable if you try to install them separately. But in the case of a complex replacement - the input shaft along with the intermediate shaft and all gear blocks, then installation is quite possible. As for the secondary shaft, modification 2105 differs from shaft 2101 in the first gear gear (its teeth have a different angle, although their number is the same, and its diameter is also slightly larger).
Speed "knocks out"
Fuzzy switching on or knocking out the speed occurs due to:
- Wear of the retainer holes in the axle, damage to its springs;
- Wear of synchronizer blocking rings, damage to its springs or wear of teeth;
Related link:
What kind of oil to fill in the engine, gearbox and axles for the winter in a VAZ
In this case, it will not be possible to eliminate the malfunction without removing the gearbox. But, it is not always necessary to completely disassemble it. For example, if the 4th gear slips out, you should immediately check the condition of the spring and the lock of the axis of this speed. It is by checking the fasteners that the search should begin. And then, by disassembling the box, we identify the true cause and eliminate it.
Difference between 4-speed and 5-speed gearboxes
As noted, the VAZ-2105 was equipped with two gearboxes - 4 and 5 speeds. At the same time, they took the 4-speed version as the basis for creating a 5-speed gearbox and modified it a little. Therefore, the gear ratios of the five-speed gearbox up to 4th speed are identical, but the added 5th speed has a gear ratio of 0.82. That is, this direct box still has 4th gear.
Let's take a more specific look at the differences between the five-speed and the four-speed on the VAZ-2105, and there are several of them:
- the 5-speed gearbox uses a slightly different rear gearbox cover, where the 5th speed gear block is located;
- the intermediate shaft has a threaded hole for mounting the 5th and reverse speed gear block;
- the presence of a 5th gear gear block with a synchronizer and a reverse gear, and the output shaft is slightly shortened;
- The rear speed intermediate gear axis of the 5-speed version is secured with a nut;
- a slightly different gear shift drive, as well as a speed selection mechanism;
- The sensor for turning on the rear speed light is also different;
Related link:
How to start a VAZ engine in winter
Since the 4-speed version was the basis for creating the 5-speed gearbox, it is quite possible to upgrade the 4-speed gearbox yourself at home, for which you should replace and add the specified gearbox components.
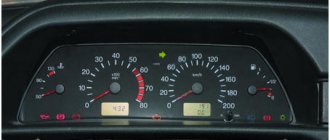
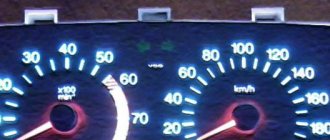
As for the control of the VAZ-2105 gearbox, the switching pattern is no different from the VAZ-2106 or any other modification with a 4-speed gearbox. In a 5-speed gearbox, to engage the last speed, it is enough to move the gearshift lever as far as possible to the right and push it forward, that is, in the direction opposite to the rear speed. Below are shown the switching diagrams for both gearbox modifications:
In general, the KPP-2105 is very reliable and can operate for a long time without any maintenance. In addition, it has good maintainability and repairs are not so difficult. Replacing the 2105 gearbox is usually done in case of wear of the bearing seats in the housing or if it is damaged - breakdown, cracks. In case of other breakdowns (wear or damage to gears, bearings, shafts, etc.), the functionality of the unit can be restored by replacing the broken elements. Also, replacement can be carried out in the case of installing a 5-speed modification instead of a 4-speed one, in the case where the unit was purchased as an assembly, and not only those elements that allow you to modernize the old gearbox.
But in any case, whether it’s a replacement, modernization or repair, nothing can be done while the gearbox is installed on the car. In any case, the unit will have to be dismantled, and you need to know how to remove the box.
Common faults
Now let's go over the main malfunctions that can occur with the gearbox. There are not many of them, but most of them are eliminated using the transmission removed from the car.
So, the main malfunctions of the VAZ-2105 gearbox are:
- Increased noise when the gearbox is operating (at a certain speed or at all);
- Difficulty switching to another speed;
- Unclear switching, speed loss;
- Lubricant leaks;
In turn, each malfunction can have several causes.
First stage. Removing the gearbox from the car
- the starter is removed;
- the “cross” is removed;
- the support cross member of the power device is disconnected;
- it is necessary to remove the flexible shaft, which is connected to the speedometer drive;
- The hydraulic drive cylinder must be separated from the crankcase. Important! The hose attached to it does not need to be touched;
- remove the bolts securing the clutch housing cover using a ten key;
- it is necessary to install a support under the gearbox;
- you need to take an extension cord and put it on a 19 socket type key;
- using a key and a “cross” hinge, you need to unscrew the bolts securing the cylinder block with the clutch;
- using a screwdriver that was inserted into the gap, it is necessary to press the clutch away from the cylinder;
- remove the starter from the directional bushings;
- the input shaft of the VAZ 2107 gearbox must be removed from the driven disk hub;
- we displace the primary shaft from inside the bearing ring located in the crankshaft;
- and finally, remove the gearbox from the car.
Noise Removal
The noise of the VAZ-2105 gearbox can occur due to wear of bearings, wear of gear teeth and gears, as well as synchronizers, and axial displacement of the shafts relative to each other.
If such a problem occurs, it will be necessary to remove the transmission from the car, since it cannot be repaired otherwise. Note that eliminating noise is one of the most difficult operations to perform, since it requires complete disassembly and reassembly of the gearbox with replacement of worn elements.
In addition to the standard set of keys and screwdrivers, you will additionally need a universal puller. Next, we’ll look at how to completely disassemble a VAZ-2105 5-speed gearbox.
So, all work is done on the removed gearbox:
- Drain the oil and remove the bottom cover. We immediately assess the condition of the gear teeth. If their damage is not noticeable, most likely the noise is coming from the bearings;
- We check the position of the gearshift lever (it should be in neutral), after which we dismantle the gear shift mechanism (link) from the gearbox;
- Remove the cover of the clamps and remove the springs and balls;
- We remove the elastic coupling from the secondary shaft, and then its hub (to unscrew the hub nut, unscrew the bolt securing the 3rd and 4th gear forks, engage 1st gear in the gearbox and displace the 4th gear synchronizer clutch. Two at a time the gears are engaged, the gearbox will be blocked and the nut can be unscrewed);
- We unscrew the speedometer drive, the sensor for turning on the reverse speed light and the exhaust system pipe mounting bracket;
- We unscrew the fastening elements of the rear gearbox cover (5-speed gearboxes have 5 external nuts and 1 internal nut, 4-speed gearboxes do not have an internal nut). Then remove the cover. In this case, the bearings are second. the shaft and the 5th gear block will be disassembled - the inner races will remain on the shafts, and the outer ones, together with the rolling elements, will be in the cover, and all this will need to be dismantled for replacement;
- Remove the speedometer drive gear and oil deflector from the secondary shaft;
- We dismantle the gear block of the 5th and reverse gears by unscrewing its fastening bolt installed in the shaft, as well as the reverse intermediate gear from the axle;
- Remove the 5th gear synchronizer from 2nd. shaft, the 5th and reverse gear shift fork together with the axle, then remove the 3rd and 4th gear axle block;
- We dismantle the synchronizer hub and the reverse gear from the second. shaft;
- We unscrew the bolts securing the pressure plate of the secondary shaft bearing and remove it;
- Unscrew the clutch housing from the gearbox;
- Unscrew the intermediate shaft bolt and remove the front bearing;
- We remove the rear bearing of the intermediate shaft, after which it can be pulled out of the box body;
- We remove the axles and forks of the remaining gears, as well as the axle block of the 1st and 2nd gears;
- We take out the input shaft;
- We remove the secondary shaft along with the gears;
Well, then troubleshooting of the component elements is carried out, worn and damaged components are replaced and assembly is carried out.
Note that this disassembly diagram is general and does not consider such nuances as removing retaining rings, sealing washers, engravers and other small elements.
Oil leaks
The last common cause is a lubricant leak. This can happen through loosely screwed plugs or a damaged bottom cover gasket. But most often it is the input shaft seal that leaks.
In the first case, the problem can be eliminated simply by pulling the plugs or replacing the gasket. And for this you do not need to dismantle the gearbox from the car. But in the case of a leak in the input shaft oil seal, you will have to remove the box, but you won’t need to disassemble it to replace the damaged rubber element as a whole.
Replacing the gearbox oil seal, if it concerns the input shaft, is not difficult. It is located in the clutch housing, but from the inside, that is, it will have to be disconnected from the gearbox housing. And then the damaged oil seal is removed and a new one is installed.
Then everything is put back together. In case of damage to other seals, the gearbox is disassembled and the damaged element is replaced.