Antifreeze, also known as coolant, plays a key role in the proper functioning of the car. Its main task, as the name suggests, is to cool the engine. If there is not enough antifreeze in the tank, there is a high risk that the car will overheat. This is fraught with many problems for the engine at once, so such a problem cannot be allowed. The driver is obliged to monitor the level of antifreeze in his car, and in this article we will look at how to do this correctly.
How to check coolant density
The density of antifreeze must be calculated correctly.
To do this, you need to fulfill several conditions. Firstly, it is important to maintain the temperature, which should be 20 degrees or a value close to it. If you measure density as soon as the car engine has been stopped, you will get incorrect data.
Therefore, it is better to use a regular thermometer and check the temperature.
Secondly, a special device is used to determine density - a hydrometer. You can also purchase a more expensive device - a refractometer, but there is no point in overpaying for it. A hydrometer is a flask with a rod, on which, like on a thermometer, there are gradations. At the end of the meter there is a rubber or plastic pipette with which liquid is taken. The body of the device is made of transparent plastic or glass, so high temperatures are also not allowed when using it.
Antifreeze density is also measured as antifreeze, and is determined by the following method:
Cool the engine to the required temperature of 20 degrees. Carefully open the expansion tank or radiator cap (depending on the type of cooling system design). Using a bulb located at one end of the hydrometer, collect the liquid. Place the hydrometer in a vertical position and secure it. Record the readings from the device.
If the data obtained differs greatly from the designations on the antifreeze label, then it is best to replace the liquid altogether.
To find out the density of antifreeze, the data table of which is presented below, you can use more modern hydrometers equipped with an additional scale that allows you to simultaneously measure the freezing temperature. In this case, you will not need to make any additional calculations.
| Ethylene glycol concentration, % | Mixture density, g/cm3 | Freezing temperature, °C | Ethylene glycol concentration, % | Mixture density, g/cm3 | Freezing temperature, °C |
| 26,4 | 1,0340 | -10 | 65,3 | 1,0855 | -65 |
| 27,2 | 1,0376 | -12 | 65,6 | 1,0860 | -66 |
| 29,6 | 1,0410 | -14 | 66,0 | 1,0863 | -67 |
| 32,0 | 1,0443 | -16 | 66,3 | 1,0866 | -68 |
| 34,2 | 1,0480 | -18 | 68,5 | 1,0888 | -66 |
| 36,4 | 1,0506 | -20 | 69,6 | 1,0900 | -64 |
| 38,4 | 1,0533 | -22 | 70,8 | 1,0910 | -62 |
| 40,4 | 1,0560 | -24 | 72,1 | 1,0923 | -60 |
| 42,2 | 1,0586 | -26 | 73,3 | 1,0937 | -58 |
| 44,0 | 1,0606 | -28 | 74,5 | 1,0947 | -56 |
| 45,6 | 1,0627 | -30 | 75,8 | 1,0960 | -54 |
| 47,0 | 1,0643 | -32 | 77,0 | 1,0973 | -52 |
| 48,2 | 1,0663 | -34 | 78,4 | 1,0983 | -50 |
| 49,6 | 1,0680 | -36 | 79,6 | 1,0997 | -48 |
| 51,0 | 1,0696 | -38 | 81,2 | 1,1007 | -46 |
| 52,6 | 1,0713 | -40 | 82,5 | 1,1023 | -44 |
| 53,6 | 1,0726 | -42 | 83,9 | 1,1033 | -42 |
| 54,6 | 1,0740 | -44 | 85,4 | 1,1043 | -40 |
| 55,6 | 1,0753 | -46 | 86,9 | 1,1054 | -38 |
| 56,8 | 1,0766 | -48 | 88,4 | 1,0660 | -36 |
| 58,0 | 1,0780 | -50 | 90,0 | 1,1077 | -35 |
| 59,1 | 1,0790 | -52 | 91,5 | 1,1987 | -34 |
| 60,2 | 1,0803 | -54 | 93,0 | 1,1096 | -33 |
| 61,2 | 1,0813 | -56 | 94,4 | 1,1103 | -32 |
| 62,2 | 1,0823 | -58 | 95,0 | 1,1105 | -28 |
| 63,1 | 1,0833 | -60 | 95,5 | 1,1107 | -27 |
| 64,0 | 1,0843 | -62 | 96,5 | 1,1110 | -24 |
| 64,8 | 1,0850 | -64 | 97,0 | 1,1116 | -22 |
If, before checking the density of antifreeze, you did not cool the car engine to 20 degrees, then the measured density, which is designated as t, can be brought to the required temperature using the formula:
P20 = Pt + γ(t – 20) ,
Where:
- P20 is a designation for the density of antifreeze at 20 degrees (usually indicated in g/cm3 in the table);
- Pt is the density of the refrigerant at the measuring temperature (measured in g/cm3);
- t is the actual coolant temperature at the time of measurement (indicated in the table as °C);
- γ – correction for the density of ethylene glycol (taking into account that for each degree there is 0.000525 g/cm3).
It is recommended to carry out such a check not only before diluting the antifreeze, but also simply to be sure that the cooling system contains liquid of the required density.
How to check antifreeze and antifreeze. Simple ways to check coolant quality
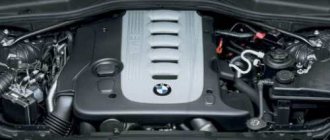
Troubles a diesel engine “cold” and/or “hot”
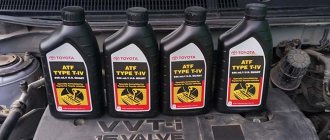
Having chosen and purchased an antifreeze fluid for the cooling system, every car enthusiast wants it to actually have the properties stated on the label.
According to recent studies, the share of counterfeit products in the antifreeze liquid market ranges from 40 to 50%. Despite the nice plastic container and neatly made stickers on it, there may be a liquid inside that only vaguely resembles domestic antifreeze or foreign antifreeze.
Where is the guarantee that the inside of the canister is not colored water, flavored with battery electrolyte, or water with added sugar or salt?
Why is counterfeit dangerous?
What happens to antifreeze (or antifreeze) poured into the cooling system when its temperature drops to the value (for example, -40 0 C) indicated on the packaging? It crystallizes and the antifreeze loses its fluidity, turning into a kind of jelly.
At the same time, it does not increase in volume, therefore it does not put pressure on the internal walls of the radiator and the “jackets” of the cooling system.
The picture is completely different if instead of a non-freezing liquid in the cooling system there is a counterfeit made from ordinary water. Having reached zero temperature, the water freezes, noticeably increasing in volume, and since the cooling system is conditionally sealed, the resulting ice simply crushes and breaks the radiator channels, water pump and engine cylinder block.
Even if the counterfeit antifreeze still contains some part of ethylene glycol and it does not freeze but crystallizes as the temperature drops, it is unlikely that the counterfeiters bothered to add special anti-corrosion additives to its composition that envelop the non-freezing liquid with a protective film.
Consequently, an aggressive liquid, which is a mixture of water and alcohol, will immediately begin to corrode parts of the engine cooling system. It is unlikely that the engine will withstand at least one season of operation in such conditions.
It is almost impossible to check the presence of protective additives at home, but anyone can find out whether an antifreeze liquid can cope with the cold.
Litmus paper
By moistening the litmus paper with the coolant, the quality of which needs to be determined, and then comparing the color it acquires with a special color scale, it will not be difficult to determine its pH with sufficient accuracy.
If there is no such scale, it doesn’t matter; the approximate acid-base balance of antifreeze can be determined “by eye.” Coloring litmus pink will indicate that there is an excess of acid in the liquid being tested (pH ranges from 1 to 5), and this is direct evidence of counterfeiting.
The blue color of litmus paper will indicate a pronounced alkaline environment with pH > 10, therefore such antifreeze or antifreeze is also a fake, and of disgusting quality.
If the litmus turns green, you know that this is a decent quality antifreeze with an acid-base balance of pH ranging from 7 to 9.
Hydrometer
In addition to measuring the density of the electrolyte, modern aerometers can determine the freezing point of antifreeze. Such hydrometers have a scale graduated in degrees next to the density scale.
Having collected antifreeze or antifreeze into the hydrometer using a rubber bulb, it is necessary to determine the line of contact of the tested liquid with the hydrometer rod. Finding the line in the green color scale area will indicate the crystallization temperature of antifreeze in the range from -30 to -40 0 C.
If the indicator points to the red scale, then the coolant has partially lost its properties and will begin to crystallize at a temperature from -20 to -30 0 C. The yellow scale corresponds to the temperature range from -10 to -20 0 C.
If the test liquid in the hydrometer comes into contact with the hydrometer rod in the area of the blue scale, such antifreeze should be replaced immediately, since it has become completely unusable and will behave like ordinary water.
Test freezing
Having collected 100-150 ml of the test liquid into a small plastic bottle, you need to squeeze the bottle a little before tightening the cap, releasing the air from it - in case the antifreeze turns out to be fake. Further
Why do you need to check antifreeze?
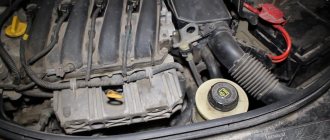
It is recommended to check the car's coolant level twice a year - before the start of the summer and winter seasons. But this recommendation is somewhat incorrect, because the cooling system performs a very important function - maintaining the optimal temperature regime of the power plant. If there is not enough antifreeze, this is fraught with very serious problems. Therefore, it is better to check the coolant level every time you open the hood of the car, since this operation is simple and takes a couple of minutes.
Checking the level every time the owner looks into the engine compartment almost completely eliminates missing the moment when there is not enough antifreeze in the system. A reason to check the fluid level in the cooling system may also be an increased engine temperature while driving.
Romanuss1 › Blog › Antifreeze density. How to check and what should it be? A few words about antifreeze
Checking the density (concentration) of antifreeze using a hydrometer
Not many people know, but antifreeze (and antifreeze) can be checked for density. “For what,” you ask? YES it’s simple - it should be at a normal level, high enough to allow the coolant to work at low and sometimes critically low temperatures. After all, when you buy antifreeze, you don’t know its composition, but what if it’s just water that’s been tinted with regular dye! How to check this? Let's figure it out
As I already wrote above, antifreeze also has its own density, it characterizes exactly the right liquid for your car, it will not freeze, and most likely will not boil (more on this below), many of us do not check this parameter, but in vain ! After all, low-quality fluid can cause destruction of the radiator, and in difficult cases the engine block will simply burst.
How is density formed? Indeed, you can - “what causes the density in the coolant, how is it formed there”?
Guys, it’s very simple - density indicates the presence of either acid or alcohol, sometimes salt or even sugar. That is, roughly speaking, it shows how many mass fractions of a particular substance are in distilled water.
Although the composition of antifreeze is not always just water and alcohol, it is usually:
Distilled water Special alcohols, usually propylene glycol or ethylene glycol Additives Dyes Fragrances and surfactants
How much antifreeze should there be?
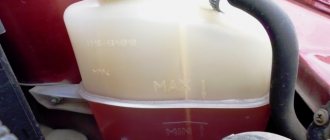
If you check the tank, then the optimal level will be between the “Min” and “Max” marks. If the fluid is at the “Min” level or below, the power plant will not have enough fluid even after heating and expansion. Air may be sucked into the system, which, after heating, will only increase the pressure in the system, causing the engine temperature to be elevated and possibly squeezing out the liquid from the reservoir or causing one of the system pipes to break off. But if the level is at “Max” or higher, then after heating the excess antifreeze will simply flow out of the tank.
In those cars where antifreeze is poured into the radiator, there is also a mark on the neck, but this only indicates the normal level. It is usually located at the bottom of the neck. This is where you need to navigate.
A low level of liquid in the cooling system carries the risk of: increased temperature of the power plant and its overheating, increased pressure in the system when heated, and the possibility of splashing due to air entering the system.
How to determine what is flooded?
Why does the alternator belt whistle when cold or hot and what needs to be done?
It will not be possible to check and recognize using color what is in the car. Antifreeze is always colored blue. But modern antifreezes are also available in blue.
If you don’t know what’s in the car, you can determine the type of consumables based on several factors:
- Smell and taste. Antifreezes are usually odorless, and if you touch the liquid, it will be more oily, unlike traditional antifreeze.
- Determining the type of liquid can be done by diagnosing the compatibility of the refrigerant with ordinary water. You need to take a little substance from the expansion tank and mix it with tap water in a 1:1 ratio. Afterwards, the container with the refrigerant is placed in the freezer for about one hour. If, as a result, the liquids separate, the mixed substance becomes cloudy and sediment forms at the bottom, then you use Antifreeze. If high-quality antifreeze is poured into the cooling system of your car, then such problems will not arise.
- Another factor is resistance to negative low temperatures. Pour a small amount of refrigerant into a separate bottle and place it in the freezer. When using Antifreeze, the liquid will quickly freeze, but if a good refrigerant is added, this will not happen.
- Using a hydrometer, you can diagnose the density indicator of a substance. The test should be carried out at an air temperature of 20 degrees. With this condition, the refrigerant density parameter should be about 1.073-1.079 g/cm3. If so, then you are using antifreeze.
For diagnosis, you can resort to the old “old-fashioned” method:
- You will need a plate or other metal device. You will also need a rubber product, for example, a piece of hose from the cooling system.
- Take some fluid from the reservoir under the hood of your car. You need to pour it into a jar or bottle, where you should also place a plate and a piece of hose.
- After 20 minutes, look at the result. Russian-made consumables create a protective layer on all components of the cooling system. Accordingly, you will see a barely noticeable film on both the plate and the piece of hose. If the metal is corroded, and a film has formed only where rust is present, then you use antifreeze. Remove the products from the container and check them by touch.
How can you tell what kind of antifreeze is in your car from the factory?
To understand what brand of refrigerant to add to the refrigeration system, you need to know what is initially added from the factory. You won't be able to determine this on your own. An accurate conclusion can only be given by the results of laboratory tests. Alternatively, you can contact your dealer or read the service manual. It indicates which standard of refrigerant should be used.
You can learn about mixing refrigerants and the results from the video filmed by the Avto-Blogger.ru channel.
Is it possible to fill something in if you don’t know?
If the situation is urgent, for example, while driving you had to stop because the engine overheated, then you can also pour water into the cooling system. If this happens during the cold season, we recommend that you do not ride on water for a long time, but rather drive to the nearest service station or garage to solve the problem. Even when adding fluid in the warm season, after using the car, the cooling system is flushed. In cold weather, water will quickly freeze, and it has the property of expansion, so freezing will damage the expansion tank and pipes.
It is possible to mix only those refrigerants that correspond to each other in composition and standard. Mixing antifreeze and antifreeze is not allowed. This will lead to a chemical reaction, as a result of which the liquid will lose its properties and will not be able to perform its duties. Precipitates form in the cooling system, which prevents the normal circulation of consumables through the lines. Due to the loss of properties, corrosion will appear on the internal parts of the radiator device, which over time will lead to serious damage to the unit.
If you had to mix Antifreeze with antifreeze, then do not delay the replacement process. It is necessary to drain consumables. When changing, the engine is flushed, and the procedure is repeated several times. This is done until clean water without deposits or traces of scale begins to come out of the cooling system. Then we can assume that the cleaning was completed successfully. For washing it is allowed to use special means. When filling, take into account the engine specifications and the manufacturer's recommendations for the use of antifreeze.
Loading …
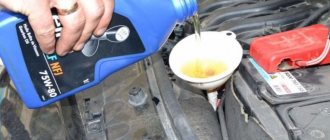
What and how much should I add?
Finally, about what kind and how to add antifreeze. It is necessary to top up only when the engine is cooled down in order to know the level accurately; when it is heated due to expansion, it will not be possible to accurately determine the level. It is necessary to top up to the mark in the radiator, and if there is none, then almost to the edge of the neck; the excess will be squeezed out through the cap when heated. The tank is topped up to the level located between the marks.
Only the antifreeze that is filled should be poured into the system. Mixing different types of antifreeze is not allowed. If you don’t have liquid on hand to top up, you can use distilled or plain clean water. But it is important to take into account that adding water will significantly reduce the freezing threshold of antifreeze, so you can add it only in the summer, and before the winter period, completely change the fluid in the system.
We looked at how to check the coolant level, how to add antifreeze, and what problems a lack of it in the system can cause. If you periodically monitor the level and, if necessary, replenish it, the cooling system will not fail at the most inopportune moment and will ensure the optimal temperature of the power plant.
How to check antifreeze for freezing?
There are several ways to determine the freezing point of coolant. Let's look at each of them in detail.
First way
To check the coolant freezing point you will need:
- thermometer;
- pharmaceutical syringe;
- cup.
Let's get started:
- Using a syringe, pump out about 100 grams of coolant from the expansion tank or packaging.
- Pour it into a glass and place it in the freezer. Place a thermometer there along with the consumables.
- Every 3-5 minutes you need to check visually when the coolant begins to become cloudy. At this moment, it is time for crystallization to begin.
- At the moment when the consumable begins to become cloudy, check the coolant temperature with a thermometer.
Second way
Device for measuring density hydrometer disassembled
The idea is that you need to measure the density of the consumable using a special device and calculate the temperature at which crystallization begins using a table. A hydrometer can be purchased at any automotive store. The correspondence table is provided below. The test should be carried out in a room with a temperature of 20 degrees Celsius. Wait some time until your consumables reach this temperature.
- Open the cap of your vehicle's expansion tank.
- Take a hydrometer and collect some coolant in it. To do this, lower the pipette into the expansion tank and, using the so-called “bulb”, take out enough coolant so that the float of the device floats freely in it.
- You need to visually determine the coolant concentration using the hydrometer scale.
- Compare the resulting figure with the table below.
| Propylene glycol solution | Beginning of coolant crystallization | Density at 20˚C | Ethylene glycol solution | Freezing point | Density at 20˚С |
| 30% | -13˚С | 1,023 | 30% | -15˚С | 1,038 |
| 35% | -20˚С | 1,028 | 35% | -20˚С | 1,045 |
| 40% | -25˚С | 1,032 | 40% | -25˚С | 1,052 |
| 45% | -30˚С | 1,035 | 45% | -30˚С | 1,058 |
| 50% | -35˚С | 1,038 | 50% | -35˚С | 1,064 |
| 55% | -45˚С | 1,040 | 55% | -43˚С | 1,071 |
| 60% | -55˚С | 1,042 | 60% | -50˚С | 1,077 |
| 65% | -60˚С | 1,043 | 65% | -60˚С | 1,083 |
| 70% | -65˚С | 1,044 | 70% | -70˚С | 1,088 |
Remember that all the properties and characteristics of the consumable material are indicated on the canister label. So take a few minutes to familiarize yourself with them so that you don't have any questions later.
Also take time to choose the coolant. Do not buy consumables from untrusted suppliers, dubious car markets or from dealers who stand on the side of the road. Often such sellers sell low-quality coolant, the use of which will not lead to anything good.
Also consider your engine specification. Sometimes antifreeze may simply not suit the characteristics of the engine or cooling system. The requirements of the motor should be taken into account as this is a very important point. It is especially not recommended to fill foreign-made cars with Russian antifreeze. Of course, the technology for its production is being modernized, but initially such consumables were designed for domestic cars.
Verification methods
There are several options for checking the density of antifreeze with your own hands. Moreover, such procedures are easy to perform at home or in the garage.
Before measuring the current density of antifreeze, you should decide on the method used. Each of them requires the presence of certain devices.
To check the current density of antifreeze at home, you can use:
- hydrometer;
- refractometer;
- folk methods.
With such measurements of the density of antifreeze, the motorist will find out the current state of the liquid and decide on further actions with it.
Hydrometer
The easiest way to check the current density of filled or purchased antifreeze is with a hydrometer.
This is an affordable measuring device that clearly reflects the density values of automotive antifreeze. You can purchase it at any auto parts store. The purchase will cost an extremely modest amount.
Now briefly about how you can measure the density of antifreeze using a conventional hydrometer:
- take the device in your hand;
- immerse it in a container with liquid;
- using a bulb, take a little substance into the flask;
- look at the division of the hydrometer.
It is on the scale that it is easy to determine the current density relevant for antifreeze.
If it is cold or hot, then the data will be incorrect.
Refractometer
There is another option for measuring the density of antifreeze using a special refractometer.
It perfectly displays the density of both green antifreeze and red, for example. Color does not play a special role here, since this does not affect the density of antifreeze.
To check the current density of antifreeze, the following manipulations should be performed with the coolant and the measuring device:
- using the screw located under the cap of the device, bring the dividing mark to zero for water;
- drop a small amount of liquid onto the prism;
- sharpen the eyepiece;
- take readings.
Using the device is extremely simple. Plus, the measurement accuracy is noticeably higher. The only problem is that not every car enthusiast is ready to spend that kind of money.
Folk way
In some cases, the density parameters of antifreeze are checked using a simple folk method.
Actually there are 2 options here:
- use the freezer;
- leave the coolant outside.
The experiment is extremely simple. The idea is to take a small amount of coolant, pour it into a container and expose it to low temperatures. If it's outdoors, just use an outdoor thermometer to accurately know the current temperature. The freezers of modern household appliances have a regulator.
Thus, it will be possible to understand at what temperature the composition crystallizes and how many degrees below zero it can withstand.
Normal indicators
It is very important to know about the normal density of antifreeze in order to build on these values and draw conclusions based on the measurement results. Experiments show that depending on the temperature, the current density of antifreeze will change
The only question is what indicator is considered normal
Experiments show that the current density of antifreeze will change depending on the temperature. The only question is what indicator is considered the norm.
To determine the proper level, a special table will help. It reflects the density of antifreeze, such as G11 or G12, for example.
Manufacturers of cooling fluids mostly produce compounds whose density varies from 1.069 to 1.072 g/cm³. This is the most popular range, allowing the liquid not to crystallize down to a temperature of -40 degrees Celsius.
But if the concentration is higher or lower than normal, then there is a possibility of freezing already at 10–20 degrees Celsius below zero.
The most convenient way is to use an information table. By comparing the parameters obtained as a result of testing with the data from the table, you can understand at what temperature the coolant used will freeze.
| Ethylene glycol content, % | Coolant density, g/cm3 | Freezing temperature, -C |
| 97,8 | 1,112 | 20 |
| 93,0 | 1,110 | 30 |
| 85,4 | 1,104 | 40 |
| 78,4 | 1,098 | 50 |
| 72,1 | 1,092 | 60 |
| 65,3 | 1,086 | 65 |
| 63,1 | 1,083 | 60 |
| 58,0 | 1,078 | 50 |
| 52,6 | 1,071 | 40 |
| 45,6 | 1,063 | 30 |
| 36,4 | 1,051 | 20 |
| 26,4 | 1,034 | 10 |
How to check correctly?
Now about how to check the antifreeze level.
Cooling systems in different cars are slightly different; some have an expansion tank that controls the level, while others do not. In cars whose cooling system includes this reservoir, checking the level is very simple. The tank is usually made of light plastic, and the antifreeze has a certain color. There are also marks on the tank wall indicating the minimum and maximum levels. Therefore, to check the fluid level, you don’t even need to unscrew the cap; you just need to look at the level on the wall of the tank and compare it with the marks.
In cars whose cooling system does not include a tank, topping up and level control is done through the neck located on the radiator. That is, we unscrew the radiator cap and look at the level.
Now some features of the test. It is performed only on a cold and idle engine, for a number of reasons. When heated, antifreeze expands, so when monitoring the level in the tank, the quantity data will be incorrect.
As for cars in which the fluid is checked in the radiator, checking when the engine is hot can lead to injury. The fact is that after heating, pressure forms in the system, and if you remove the radiator cap, there is a high probability of hot antifreeze splashing out through the neck, so it is very easy to get burned. It is best to check the level in the morning, before the trip. The engine will cool down completely overnight, and the level readings will be most accurate.
Density factors
Most car enthusiasts know about the existence of a coolant concentrate, which can be dissolved with purified water to obtain coolant for the vehicle’s engine system. This concentrate is ethylene glycol (dihydric alcohol). The density of the solution is determined by the content of dihydric alcohol, acids, and water masses.
The modern type of coolant is not only a mixture of alcohol and distilled water. Various additives, coloring substances are added to the composition to obtain the desired shade, surfactants, flavors and much more. Despite this mixing of various elements, the basis still remains alcohol and purified water. Additives account for about 5% of the total volume of the solution, therefore, they do not affect the final density properties of the technical fluid.
How to check antifreeze level
Filling/topping up antifreeze, as well as monitoring its level in the system, is done using an expansion tank. In most cases, on the tank body there are marks MAX and MIN (sometimes FULL and LOW), which indicate the maximum and minimum coolant levels. But sometimes there is only MAX, less often there are no marks on the tank at all, or it is located so inconveniently that it is impossible to visually assess the amount of liquid, not to mention its condition.
For those who don’t know, antifreeze is tested hot or cold, the answer is only cold! This is due to two factors. The first is that antifreeze expands when heated and its level will appear higher. Second, checking for hotness is simply dangerous, as you can get burned.
Minimum and maximum risks on the tank
Ideally, the antifreeze level should be approximately 1...2 cm below the maximum risk. If there are no marks on the tank, then fill the expansion tank with antifreeze to approximately half the volume. Well, the check accordingly needs to be done visually. If the tank is dark, use a stick or a long thin object.
If antifreeze does not leak anywhere, then its level does not change for a long time, since it circulates in a sealed system and cannot evaporate anywhere. A low level may indicate a leak and it is not necessarily visible, as liquid may leak into the cylinders.
When the check shows that the level is higher than necessary, then this is also worth paying attention to, especially if it gradually increases or gases (bubbles) come from the expansion tank or radiator. Most often this indicates a broken cylinder head gasket.
As a result, the level rises due to air pollution or oil ingress. You can check the oil in antifreeze visually by touching the coolant. Gases in antifreeze are checked through the sense of smell (the smell of exhaust gases), as well as by drilling the liquid in the tank. As the speed increases, the number of bubbles in the expansion tank will increase. To find out whether there are gases in antifreeze, methods are used aimed at checking the integrity of the cylinder head gasket.
Most often, owners of Hyundai Solaris and Kia Rio cars, and other cars of these brands, have difficulty checking the antifreeze level. This is because their tank is placed in a very inconvenient place, as is its design itself. Therefore, to find out what level of coolant in the system you will have to take a flashlight and illuminate it from behind the radiator. The reservoir is located on the right side of the fan shroud, in the front of the engine compartment. On the side of the tank there is a scale with the letters F and L. In addition, you can also see the level in the radiator by unscrewing its cap. It is located next to the expansion tank (3 pipes converge to it).
Probable leak locations
Where can antifreeze go? It is still a liquid, so it can evaporate when heated. To make evaporation less intense, the tank or radiator is tightly closed with a lid. But complete blockage is also not allowed, so there are bypass valves in the lid.
They are needed to relieve pressure in the system if it has risen above the critical norm. It is through this valve that antifreeze evaporates, especially in the summer season. It is very hot in the summer, and if you drive in a traffic jam, the cooling system will not have time to fully remove heat from the engine; it will operate at an elevated temperature. In this case, the antifreeze heats up more than normal, part of it goes into a gaseous state (steam), increasing the pressure in the system, and when the pressure rises above normal, the steam will be released through the valve.
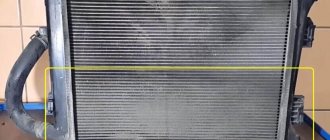
Antifreeze may also leak due to a leak in the system or a crack in one of the rubber pipes. Because of this, the coolant will simply leak out through a leak or crack. In this case, it is very easy to detect a leak - by drips on the pipes and traces of liquid on the asphalt under the car while parked.
The most unpleasant leak is due to a breakdown of the cylinder head gasket (cylinder head). As a result of the breakdown, the cooling system channel is connected to the cylinder, or the crack leads outward. It is very dangerous if a breakdown connects the channel to the cylinder. Not only will the liquid “fly out into the pipe” in the literal sense, but if the repair is untimely, a “water hammer” may occur due to the large amount of antifreeze in the cylinder, and this is already fraught with serious problems, since as a result of this effect the destruction of the piston is possible, connecting rod bend.
It is noteworthy that a cylinder head gasket failure is usually a consequence of engine overheating due to insufficient antifreeze.
Consequences of a cylinder head gasket failure