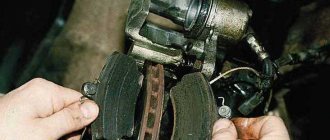
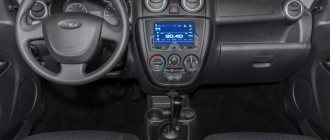
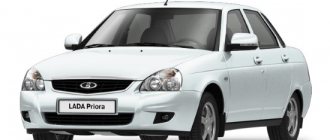
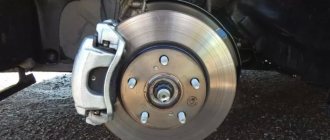
Replacing Lada Granta pads Can be done by any car enthusiast. At the front, the Lada Granta has disc brakes with a floating caliper. As practice shows, the front pads wear out about twice as fast as the rear ones, but they are also easier to replace. There is a drum mechanism at the back of the Lada Granta. Replacing the rear pads is more difficult; in addition to the usual set of tools, you will need a pit or overpass. After all, you will need to get under the bottom and loosen the handbrake cable, without which you simply won’t be able to remove the drums. How to check brake pad wear can be found on the website dexpens.com, where you will find detailed instructions on this matter.
Articles of brake pads Lada Granta
Let's denote that the Granta's brake circuit is presented in a classic style: front disc and rear drum pads. This type/scheme was borrowed from Kalina, Priora, and earlier models.
| № | Article/OEM/brand | Price, rub.)* |
| 1. | Original catalog items 21100-3501080 | from 900 |
| 2. | 21100-3501089 | from 1200 |
| 3. | Disc TRW LADA Granta Article: GDB1384 | from 1450 |
| 4. | rear TRW Granta, Kalina, Datsun art. GS8210 | from 1300 |
| 5. | Allied Nippon ADB2794 (set) | from 3200 |
| 6. | Allied Nippon ADB2795 with calipers from Lada Priora 2110 | from 1100 |
| 7. | Allied Nippon ADB0173 | from 1100 |
| 8. | Rear brake pads Grant Sport / Kalina article number: 21905-3502080-87 | from 1100 – 1200 |
| 9. | Front brake pads LADA Granta Sport / LADA Kalina-2 Sport | from 1200 |
*Prices are current as of September 18, 2018.
Related link:
Replacing the Lada Granta generator bracket
The list presented is not exhaustive and is for informational purposes only. The manufacturer allows the purchase and subsequent installation of components not listed in the list. The main requirement for parts is quality workmanship and professional installation. Among foreign analogues, Lada Granta liftback brake pads are in high demand:
- BOSCH 0 986491700, 0 986495214;
- ICER 181308;
- Lucas – Girling E9 90R-01111/479;
- LYNXauto BD-4601, LYNXauto BD-4605;
- FENOX BP40005O7;
- FERODO FDB527;
- TRW 21170.
What you need to know about Granta Sport pads
In the Sport modification, all four calipers are disc type. Friction linings are metallic and semi-metallic. Ceramic and organic friction linings are not installed on the Lada model. The difference between the last two types is the presence of ceramic and Kevlar fiber.
There is no need to mention the advantages of organics and ceramics, since everyone knows that they are developed using the most modern technologies and provide maximum braking effect. The exorbitant cost is a significant drawback, which for many becomes a stumbling block.
Grant brake pad life
The manufacturer in the operating manual indicates a replacement interval of 30,000 km. Taking into account the conditions of use of the machine, the quality of spare parts, and climatic temperatures, we reduce the period for replacing brake pads on Grant by a third.
To maintain the brake system in good condition, it is enough to carry out maintenance every 15,000 km. If defects or damage are found, replace with new elements.
Rear pads for Lada Granta Sport
The rear brakes on the Grant are disc, and the pads are changed almost identically to the front ones.
There are small differences:
- The wheel does not turn;
- The caliper does not fold up, but is completely removed;
- To retract the piston, you need to not only push it in, but also turn it clockwise.
How to choose and which ones are better to buy brake pads for Granta
The supply of brake system elements for Grant is carried out by. Specialization: trucks and cars. Since the end of 2012, JSC TIIR has been supplying front overlays made of composite material (1118-3501090). The peculiarity of the components is the absence of anti-creaking plates in the design. A special mastic is applied to the back side to suppress noise, vibrations, and squeaks.
The technology showed a number of shortcomings and in 2013 TIIR supplied new pads under the index (2192-3501090-10). They are also made of composite material under the number TIIR-299. Anti-squeak plates “Nulok” for Lada Granta are installed on the outside. The rear circuit is equipped with disc-type pads (21920-3502090-10). Components are also supplied by JSC TIIR. The number of the composite material TIIR is 444.
Related link:
Expert advice on replacing the clutch cable on a Lada Grant
Diagnostics of friction lining wear level
Most modern cars are equipped with special digital wear sensors. When the programmed level is reached, an indicator light is activated on the central instrument panel, indicating a breakdown of the brake circuit.
Unfortunately, the Lada is not yet equipped with digital sensors; you need to navigate by the actual thickness of the body of the lining. The maximum permissible threshold for using the body is 1.5 mm. Above the specified limit, the operation of the technical device is not safe. The degree of wear can be determined by removing each wheel and measuring the thickness with a caliper.
Alternative option: turn the steering wheel to the extreme left/right position, visually assess the thickness without resorting to dismantling work. The above recommendation only applies to the front circuit. For rear wheels, unconditional removal of discs.
When is it time to change brake pads
The service interval for Grants is 15 thousand km, or one year. The maintenance regulations dated 06.2021 require checking the condition of the front linings at every service, and the rear ones at every second.
The front linings are more accessible for technical inspection. Their thickness is visually determined by removing the wheel. They are visible through the caliper slots.
The ease of rotation of the wheel when the brake pedal is released can be easily assessed by turning it by hand. Such a check will not be superfluous, for example, when changing tires during the season.
Defects involve partial disassembly, inspection of all components, measurement of the residual thickness of parts, checking the functionality, mobility of components, and the tightness of the system. The maximum permissible thickness of the linings on the front and rear axles is 1.5 mm.
It is not possible to look under the rear drum to judge the thickness of the lining by eye. The drum must be removed.
The main signs of wear on the Lada Granta pads are a metallic grinding sound, an increase in pedal travel, a drop in the fluid level in the reservoir, an increase in braking distance, the car pulling to the side, beating, and deterioration in the effectiveness of the handbrake.
The mileage of pads before replacement is very individual. They structurally have different rigidity, and therefore resource.
Typical causes of wear on brake system components
- Long-term operation without intermediate prevention;
- Mechanical damage to the caliper or steering knuckle, resulting in deformation of the lining;
- Deformation, and as a result, creaking of brake pads on Grant;
- Purchase and subsequent installation of low quality parts;
- Violation of installation technology;
- Aggressive driving style of a vehicle;
- Insufficient amount of fluid in the expansion tank of the master cylinder;
- Damage to the supply line DOT – 4;
- Working cylinder jammed.
1447430332_snimok8888888888888
We remove the brake pads from their guide.
We remove the brake pads from their guide.
We remove the brake pads from their guide.
Attention! Once the caliper has been rotated relative to the shoe guide, do not press the brake pedal as the piston may come out completely from the cylinder.
We clean the pad seats in the caliper and the pad guide from dirt and corrosion. Before installing new pads, it is necessary to move the piston as much as possible inside the cylinder. This operation can be performed in different ways.
Sequence of actions when replacing pads on Granta yourself
Front
- We place the car within the perimeter of the repair zone, squeeze the parking brake, and engage first gear. We fix the rear row of wheels with wheel chocks;
- Jack up the side and remove the wheel;
- We unscrew the upper and lower guides, move the caliper to the side, do not unscrew the line;
- Carefully pry up the anti-squeak plates with a screwdriver and remove the pads;
- We troubleshoot the caliper, clean it, and blow it out if necessary;
- We install new linings.
Related link:
Replacing the clutch sensor on the Lada Grant: expert advice
After replacing the front pads, check the level in the tank. It is located in the engine compartment. We carry out a similar procedure with the second wheel. Service center technicians recommend replacing the circuits at the same time. For example: front / rear, all four calipers. Subsequent replacement after 30,000 km.
Rear So, to change the rear brake pads on a Grant, do the following:
- fix the front wheels, do not release the parking brake;
- jack up the rear side, remove the wheel;
- tapping the rim evenly with a hammer to knock it off its seat;
- remove the pressure plate, spacer bar;
- unpin the base of the fixation, the ear of the handbrake cable;
- remove the old ones and install new friction linings;
- The mechanism is pinned in the reverse order.
Be sure to check the fluid level in the expansion tank and replenish the missing amount.
Memo
- We replace the pads only as a set;
- When replacing, secure the vehicle with anti-rollbacks;
- For replacement, we select only suitable analogues;
- After completing the work, monitor the brake fluid level. If necessary, top up.
Please note that after replacement the brakes are ground in . Therefore, squeaking and heating of the wheel rim is acceptable in the first 2-3 hundred kilometers after work.
Did you like the article or have something to add? Write!
At the same time, you can read about the best cars for 600 thousand.
Owner reviews of Grant brake pads
| № | Positive |
| 1. | Vitaly, 38 years old: since I am familiar with equipment, I fix numerous breakdowns myself. I rarely go to the service center. I didn’t expect that the factory brake linings on the Grant last so long (37,000 km). |
| 2. | Kirill, 39 years old: I work as a taxi driver, I drive many kilometers per shift. I often change brake pads, the reasons are obvious. I didn’t change traditions, I buy domestic ones. |
| 3. | Vyacheslav, 41 years old: the right cylinder jammed and had to be urgently repaired at a service station. The technician pointed out the need to replace the set of friction linings. The domestic manufacturer suits me quite well, my advice to car enthusiasts. |
| 4. | Alexander, 44 years old: frequent trips around the city greatly wear out the friction linings on the Grant. I carry out repairs myself. In the store I always buy “original” ones according to the catalog numbers from the instruction manual. |
| 5. | Mikhail, 35 years old: after the accident, the question of choosing a pad manufacturer arose. The standard ones are not the best, but they are enough for me, my positive review. |
| 6. | Vitaly, 42 years old: I recently carried out maintenance on the Grante and was pleasantly surprised by the service life of the pads. Mileage over 32,000 km. |
| Negative | |
| 1. | Nikolay, 35 years old: I didn’t like the efficiency of the brake circuit, so I replaced it with new ones from Renault Logan. The quality is immediately noticeable. |
| 2. | Vladlen, 33 years old: I practice tuning on Grant, improving everything little by little. The other day I installed a set of new Allied Nippon ADB2795 pads. Japanese quality is always at its best. |
Related link:
Replacing spark plugs on a Lada Grant. Which candles are better
Conclusion Replacing Grant brake pads with your own hands is not at all difficult; every car owner can do it. 15 minutes of time is enough and the functionality of the node is restored. A moderate driving style, original spare parts, DOT - 4 class fluid will increase the service life of the Lada Granta brake system by 10 - 15%. Which brake pads to put on the Grant - obviously original, factory ones.
Step-by-step instructions for replacing rear brake pads
Now let's proceed directly to the process of replacing the rear brake pads. For clarity, we will illustrate each step. The first thing you need to do is loosen the parking brake or handbrake cable, in other words.
Step 1: climb under the car and remove the thermal shield by unscrewing four 10mm nuts.
Step 2: remove the rubber muffler hangers, on one side and the other.
Step 3: move the casing forward, towards the engine.
So we got to adjusting the handbrake....
Step 4: loosen the cable by unscrewing the nuts almost completely.
After we are done with the handbrake, we proceed to replacing the rear brake pads.
Removing the brake drum
Step 5: remove the rear wheel, after first lifting the car with a jack and installing a safety support.
Step 6: to remove the brake drum, take a 7 key and unscrew the guides.
Step 7: after unscrewing, the guides can be screwed into the threaded holes that are located nearby.
By the way, these threaded holes are precisely intended for dismantling the brake drum. It turns out to be something like a puller. When tightened, the guides rest against the hub and remove the drum from the brake pads. But since we have loosened the handbrake and the pads do not interfere with us, the brake drum can be easily removed without their help.
Step 8: remove the brake drum.
However, this is not always the case. If you do not loosen the handbrake, then in some cases it will be very difficult to remove the brake drum. Let's demonstrate this with a simple diagram.
The brake drum cannot be removed
During prolonged use, a groove or depression forms inside the brake drum from the brake pads. To ensure that the parking brake works properly, the handbrake cable is periodically tightened. As a result, a moment comes when the brake pads enter this very opening and do not come out of it even with the parking brake lever lowered. The diagram shows exactly this situation.
With this position of the brake pads, as you yourself understand, removing the brake drum will be very problematic, since the pads will play the role of a retaining ring. And only when we loosen the handbrake will the pads return to their original position. Like in this illustration, for example.
Once the brake pads are clear of the burnout area, the brake drum can be easily removed.
Although in our case there is no wear on the brake drum yet, loosening the parking brake cable made its removal much easier.
Problems with dismantling the brake drum with a mileage of more than 200 thousand km
Now, forget about everything that was mentioned above, if the mileage of your car has exceeded 200 thousand, or the age of the car is approaching ten years. If you or the previous owner have never changed the rear brake drums and working brake cylinders, then the situation with dismantling the brake drums can turn into a real challenge.
Everything that was said earlier applies to the situation when the rear brake cylinders are in good condition and the pistons in them are not jammed. Let's go back to the diagram.
Rear brake cylinder jammed
Everything is the same here, just imagine that the brake cylinder is already “tired” from time to time. One of its piston may not move at all (jammed), while the second one barely moves, extending only a couple of millimeters.
Even if we loosen the handbrake, a jammed brake cylinder will prevent the pads from compressing and leaving the wear zone. Removing such a drum will be very problematic. If the drum rotates freely, but is not removed, then know that the culprit is the bead formed as a result of wear, which clings to the pads and prevents the removal of the drum.
A heavier hammer will solve the problem.
The question arises: What to do? Each case is individual, but in general there is not much choice. Arm yourself with a heavier hammer and a block of wood that you will place against the back of the brake drum. The diagram shows places for striking.
The principle is the same as when tightening wheel bolts: “cross to cross”. First you hit in one place, then in the diametrically opposite one, etc. Here is the part of the brake drum that you need to hit.
Then everything depends on your skill, but we sincerely hope that it won’t come to that.
Maximum permissible brake drum wear
In general, the manufacturer has determined the maximum permissible wear of the brake drum. If its internal diameter becomes larger than 201.5 mm, then such a drum must be replaced.
Average life of rear brake cylinders and brake drum
The average service life of a brake drum is 100 -150 thousand km. It all depends on driving style and operating conditions. With the rear brake cylinders, not everything is so simple - it’s a complete lottery. But on average they work for 1-2 years without problems. As soon as you notice that the brake cylinder has begun to “sweat”, replace it immediately. If you change worn out parts of the brake system in time, then you definitely won’t need a HAMMER.
