Many people have their own cars, of various brands, configurations, tuned and simply “gray” cars for everyday driving. Some make various gadgets for cars with their own hands, some send them to special services, and others simply admire how people do it. Actually, this is what I would like to talk about - tuning!
I didn’t have a car before and somehow didn’t need one, but in my heart I always wanted to sit, steer and enjoy the speed. The first step to buying a car was getting a driver's license, which I also went to study for spontaneously. In general, I studied for 3 months in DOSAAF and on February 29, 2008 I received my driver’s license. From time to time there was a desire to buy a car, but there was no money to buy it, and I began to think about it – where should I go?
Time passed, years flew by, rumors circulated about a crisis. By that time, we had managed to save up a little cash, which we finally decided to invest in some kind of automobile before it disappeared. One wonderful morning, we got ready and went to the car market in Saratov to choose a car for me. I had to borrow a considerable additional amount of cash from friends, otherwise my savings were not enough.
We set off on the road, drove and drove, and finally arrived. Let's go to the market.
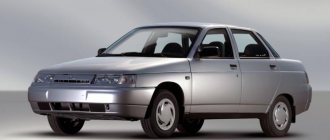
There were a lot of cars in Saratov, some not for our money, others too dead, in general, we wandered and wandered and saw a red VAZ2110 (my favorite color). After some time, after a lot of walking, it was finally decided to buy the first car I liked and finally go home.
The path to home was not close, about 200 km. At first, I thought that my friend would drive and drive my car to my native Kamyshin, but I still drove it back myself. This is my very first time when I drove for so long, because the last time I held it in my hands was back in February and that was for about 10 minutes. For the first 10-20 minutes I couldn’t come to my senses that I was sitting behind my own car, My hands were shaking a little and I still couldn’t believe that I was going. Literally, after driving 50 kilometers, I already began to feel much more confident, fell back on the seat and began to enjoy the trip.
Everything would be fine, but in Krasnoarmeysk at the traffic police checkpoint we were stopped to check our documents. And I stupidly took only my license with me, and the rest of the documents remained with my mother, who drove ahead in another car with a driver. Luckily they stopped about 300 meters from us. The inspector had to wait for some time, to which he made a menacing expression on his face. They brought the documents, checked everything, but still got to the bottom of the fact that there was no first aid kit, fire extinguisher and sign. And the fact that the car even had transit license plates and had just been purchased did not bother him; he had to pay some fine to the Inspector’s fund. We got into the car, refueled and hit the road.
We got home quickly, we drove for about 3 hours in total, although it could have been longer, but I was still a beginner at that time, and the car was not tested, you never know what would break down, so I kept the speed around 100-110 km/h . But still there was a desire to experience the drive and therefore I accelerated once to 155 km/h, the car behaved amazingly on the road, I remained satisfied throughout the journey.
Here is a short story about the steps to buying my first car, which is with me to this day and makes me happy. From time to time I do something for the soul in it, a little tuning, etc. which I will tell you about in my Logbook.
Express your opinions about my work, and just like that, we can discuss something, further work, plans.
Consists of a connector secured with a clamp to the steering shaft bracket and two switches. The left switch controls the turn signals and headlights, while the right switch controls the washer and windshield wipers. The steering column switch connector has spring-loaded horn contacts.
Closed contacts of the steering column switch
1 – lever for switching direction indicators and headlights. If, with the ignition on, the lever is in position: I – the direction indicators are off; the low beam of the headlights is on if the headlights are energized by the external lighting switch; II – left turn indicators are on (not fixed position) III – left turn indicators are on (fixed position) IV – right turn indicators are on (not fixed position) V – right turn indicators are on (fixed position) VI – (self) high beam is on headlights light regardless of the position of the external lighting switch (not fixed position) VII – (pull) the main beam of the headlights is turned on if the headlights are energized by the external lighting switch (fixed position)
2 – switch lever for windshield wipers and washers. If the lever is in position: I – windshield wiper is off II – intermittent windshield wiper is on (not fixed position) III – intermittent windshield wiper is on (fixed position) IV – first speed windshield wiper is on V – on second speed of the windshield wiper VI – (toward, regardless of the position of the lever) the windshield washer is switched on (not a fixed position) VII* – the rear window wiper is switched on (fixed position) VIII* – the rear window washer is additionally switched on (not a fixed position)
* – for cars 2111 and 2112 Removing the steering column switch
Use a Phillips screwdriver to unscrew the screws connecting the steering column casings: two near the steering wheel...
...and two below.
We unscrew the self-tapping screw securing the lower casing to the steering column switch...
...and two self-tapping screws screwed into the steering column bracket.
By lowering the steering column adjustment lever down, remove the lower casing.
Lowering the steering column down, remove the upper casing.
Disconnect the connector...
...and, squeezing the latches (top and bottom) with your fingers, remove the steering column switch.
We also remove the right steering column switch.
...and, having disconnected the horn wires, remove the connector.
Replacing the steering column switch in a VAZ 2110 is carried out for the following reason: this element of the car is not as beautiful and functional as on foreign cars. On a VAZ 2110, replacing the steering column switch can be easily done on your own. You just need to follow the instructions and do everything in accordance with it.
Modification of the steering columns on the VAZ 2110
If the driver is not interested in the replacement process itself, but only needs to eliminate the clicking of the steering column switches, then we can advise simply carrying out modifications.
Eliminating clicks
- We remove the switches from the VAZ 2110. Usually, no difficulties arise in this process.
- We disassemble the steering columns by snapping off the top cover with a screwdriver (small size).
- We find a small slide inside the switch (it is this that is responsible for the loud switching).
- Now you need to find a suitable rubber, for example, a car door seal (old and no longer needed). This very piece of rubber will need to be glued to the points of contact between the scenes.
Advice. To make the switching happen more smoothly, it is recommended to slightly file the plastic bump. We try to make the tip more rounded, otherwise it will jump. If this cannot be done, then you can use another method: weaken the spring.
- Let's put everything back together.
- We cover the switch body with some kind of vibration material. It is recommended to do the same with the steering shaft casing.
Closing the openings of the steering column switches
Openings can be closed easily and simply
Sitting behind the wheel of a VAZ 2110, you cannot help but notice the large gaps located near the steering column switches. This looks very unaesthetic and not at all practical. Let's try to close them:
- Take a piece of black carpet.
- We cover the steering column switch with Moment glue.
- We wait until the required time dries.
- We glue the carpet directly onto the steering column switch, closing the gap.
Note. It is not necessary to use only carpet. If you don’t have it, then you can take a piece of modelin or even an old felt boot.
You can easily replace the switch yourself, following the instructions. Thus, it will be possible to save the price of services in specialized workshops. During the work process, it is recommended to study photo and video materials.
Replacing the steering column switch in a VAZ 2110 yourself
How to replace the steering column switch on a VAZ 2110
Replacing the steering column switch in a VAZ 2110 is carried out for the following reason: this element of the car is not as beautiful and functional as on foreign cars. On a VAZ 2110, replacing the steering column switch can be easily done on your own. You just need to follow the instructions and do everything in accordance with it.
Connector for the steering column of Priora, Grant, Kalina-2 of a new type for an airbag (since 2011)
The steering column switch is designed to quickly turn on (off) the turn signal, low or high beams, windshield wipers with adjustable speed, side lights, and windshield washer.
Each function is performed by closing a separate circuit with the switch paddles located under the steering wheel. The classic option was the presence of two or three switches. The cable that controls the lighting and turn signals has the following positions:
- lights are completely turned off;
- low beam works;
- high beam is on;
- high beam operation (non-fixed position, valid regardless of the type of lighting turned on);
- right turn;
- left turn.
The switch that controls the windshield wiper and washer has the following positions:
- everything is disabled;
- intermittent operation of windshield wipers;
- the first speed of the purifier in constant mode;
- second speed in constant mode;
- simultaneous operation of the windshield wiper and washer (non-fixed position).
If there is a rear window wiper, there are additional positions on the steering column for its control.
Malfunctions of the steering column connector
The basic design of the switch is extremely simple, which ensures its durability. At the same time, careless use can lead to failure of the switch. A sign of this is the impossibility of including one or more provisions.
To carry out diagnostics, it is necessary to determine the integrity of the circuit between the contacts in order to exclude the presence of a malfunction outside the steering column loop. To do this, just remove the connector and use a regular tester for control (you can use a 12 V light bulb and a current source), having previously closed the desired pair of contacts with a switch.
Another cause of the malfunction is oxidation of the contacts, which does not allow closing the electrical control circuit (the most pressing problem is for cars that are used only in the summer, and in the winter they are parked in rooms with high humidity or outside). In the second case, the problem is solved by simple cleaning followed by integrity monitoring. If the problem is in the circuit of the steering column switch itself, then it will need to be removed and completely disassembled to find the problem.
Practice shows that often repairing the steering column connector for Lada Priora, Kalina and other VAZ models does not make sense due to the affordable cost of the cable itself. Also, the design of the switch itself is made in a non-disassembled form, which requires drilling out rivets and solving a lot of issues that arise during assembly.
How to remove the steering column switch?
It is better to test the condition of the cable in the removed position. You can do this yourself using the following algorithm:
- remove the battery terminal to prevent electric shock;
- Using a screwdriver, unscrew 4 screws (2 on top and 2 on bottom) next to the steering wheel, which connect the two steering column casings;
- unscrew the self-tapping screw that secures the lower casing to the steering column switch;
- unscrew the two self-tapping screws located in the steering column bracket;
- dismantle the casings and disconnect the cable connector;
- squeezing the two clips, remove the connector itself from each side.
If you need to further check or replace the switch connector, you need to remove the steering wheel itself and disconnect the horn power wires. Assembly is carried out in reverse order.
Removing steering column switches on VAZ 2110,211 and 2112 cars
1. Remove » — » from the battery.
2. Using a Phillips screwdriver, unscrew the screws connecting the halves of the steering column casing: two near the steering wheel... 3. Two at the bottom.
4. Unscrew one self-tapping screw securing the lower half of the casing to the steering column switch...5. Two, in the steering column bracket.
6. Lower the column adjustment lever and remove the lower part of the casing.7. Having lowered the steering column, remove its upper part8. Disconnect the connector...9. Squeeze the clamps at the bottom and top and remove the steering column switch.
10.Also remove the right steering column switch.11. If you need to dismantle the connector of the steering column switches, then remove the steering wheel (Removing the steering column), using the “8” socket, loosen the pinch bolt...12. After disconnecting the horn wires, remove the connector.
Similar articles
Steering columns from Kalina, Priora and Chevy Niva
Note. On the VAZ 2110 you can easily and simply install switches from Lada Kalina, Chevrolet Niva or some foreign cars.
Features you need to know about
Replacing the steering column switch for a VAZ 2110
Let's look at some features of steering column switches from other cars that we want to install in the VAZ 2110:
- The main thing is the connector, which must match the VAZ 2110 and then there will be no problems.
- It is also recommended to pay special attention to the shape of the switch. For example, the steering column shifters from the Priora become further from the steering wheel than the tenth shift paddles. In this case, you have to lengthen the steering shaft or install another one from the same Kalina.
Steering column switches VAZ 2110
Note. There is another way: bend the steering column switch and cut off the excess part, and then glue it at a different angle, but this is not entirely correct. We need to think about safety, but a glued-on steering column does not fit in with this. Therefore, if we change the steering columns from Priora, Kalina or Niva, we will have to put up with a large distance of levers.
Conventional DIY installation of steering column stalks
- Disconnect the positive wire from the battery.
- Now remove the lower steering column casing by unscrewing the 7 fastening screws.
- Lower the steering column down.
- Remove the upper steering column casing.
VAZ 2110 replacement of steering column switches
- We find two plastic clips and squeeze them to remove the windshield wiper switch (see Replacing windshield wipers on a VAZ 2110 on your own) from the base.
- Disconnect the block with wires.
- We now remove the turn signal and headlight switch, again, squeezing the two plastic clips.
We take a test lamp at 12 and connect it to the corresponding contacts:
Replacing steering column switches VAZ 2110
- If the lever is in the first position, then everything is turned off.
- If the lever is in the second or third position, then the numbers of closed contacts will be 49a-49aL and this is a left turn indicator.
- If the lever is in the fourth or fifth positions, then this is a right turn indicator and the numbers of closed contacts: 49a-49aR.
- If the lever is in the sixth position, then these are low beam headlights and the numbers of closed contacts: 56-56b.
- If in position seven, then this is a high beam alarm and the numbers of closed contacts are 30-56a.
- High beam is position eight and the contact numbers here are 56-56a.
Preparation for replacement and necessary equipment
To replace the old switch you will need a Phillips screwdriver, a dry, clean cloth or thick napkins. And, of course, a new detail. Before changing the Kalina steering column switch , you have to carefully get to it, since such procedures are usually carried out rarely. Don't forget to disconnect the negative battery terminal.
The first stage of preparation is removing the steering wheel. First, move it to the lowest position. Using a Phillips screwdriver, carefully unscrew the 7 fasteners of the plastic casing. We remove first the lower and then the upper part.
The second stage is dismantling the old switch. It does not include anything complicated - you don’t even need tools, everything is attached with latches. For example, we will take the right lever, which is responsible for the on-board computer and wipers. Disconnect the small plug with the wires by pressing the latches and pulling towards you. Now, guided by the same principle, we pull out the large plug. You may have to make an effort here.
We see the steering column switch, which is held on by clamps. We clamp them and pull the lever towards ourselves. The other levers are removed in exactly the same way. The only thing worth mentioning is that they can be held by fewer or more plugs.
Steering column switches VAZ 2109
VAZ 2108 2109 21099 has steering column switches: on the right - wipers and washer, on the left - turns and high beam headlights. The steering column switches are connected to the vehicle's wiring and, in certain positions, close various contacts in the connector. It often happens that steering column switches fail. For example, when children were playing in the car and they love to click everything. Replacing the turn switches: 1) Unscrew the plastic protection of the steering mechanism.
Unscrew the steering wheel cover
2) Remove the turn switch with the connector along the slide from the installation location.
Remove the switch from the slide
3) Disconnect the electrical connector and change the turn switch.
Disconnect the electrical connector
Replacing the steering wheel wiper stalk is similar, it's just located to the right of the steering wheel. Often the reason why the turns of the nine do not work is the turn switch itself.
Switch contacts
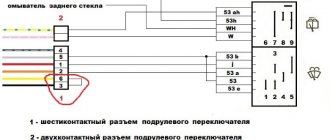
Checking the turn switch is done using a multimeter. The multimeter is set to test and it is called which contacts close at different switch positions. Contacts 49a-49aL close together if the left turn signal is on. Contacts 49a-49aR close together if the right turn indicator is on. Contacts 56-56b are closed if low beam headlights are selected. Contacts 30-56a are closed when signaling with high beam headlights (not fixed position). Contacts 56-56a are closed if high beam headlights are selected. Checking the windshield wiper and washer switch is similar to checking the turn switch; its circuit diagram is as follows: Contacts 53e-53.53a-j are closed to each other if intermittent operation of the windshield wiper (not fixed position) is selected. Contacts 53e-53, 53a-j are closed if intermittent operation of the windshield wiper is detected. Contacts 53a-53 are closed if the first windshield wiper speed is selected. Contacts 53a-53b are closed if the second wiper speed is selected. Contacts 53ah-W are closed if the washer and wiper are selected (not fixed position). The names of the contacts are marked on the side of the electrical plug on the steering column switch itself.
Switch replaced
Leave a comment Cancel reply
This site uses Akismet to reduce spam. Find out how your comment data is processed.
The electrical circuit of the VAZ-2110 is single-wire, that is, only one wire passes from the power source to the consumer, through which the plus is supplied. The downside to this combination is the weight of the car. Most circuits are energized when the ignition is turned on. This is done to reduce the load on the battery when the engine is not running and prevent its discharge.
Under constant power, regardless of whether the ignition is turned on, there are circuits for the sound signal, brake light, courtesy light and others whose operation must be independent of engine operation. The electrical circuit of the VAZ-2110 is identical to the electrical circuit of the VAZ-2111 (2112; 2114).
The circuit consists of four bundles, which are divided depending on their location. In particular, in the engine compartment there are two harnesses, one of which runs along the left wing, and the second connects the ignition system in carburetor cars or sensors and actuators with the controller, with the injection engine. There are also two harnesses in the cabin, one of which connects to the consumers on the left side, instruments, controls, and so on, and the harness that supplies the interior lighting and consumers located in the rear of the car. The harnesses are connected to each other through a mounting block, which acts as a switching device, and a plug connector located under the panel.
Wiring diagram for fog lights.
According to the factory connection diagram, the fog lights turn on after the headlights are turned on. In this case, you can leave the headlights on with the engine off, which will drain the battery. To prevent this situation, it is better to connect the relay control wire to the terminal from the ignition switch (red in the diagram). But if you want to leave the switch on together with the dimensions, then pin 30 of the relay is best connected to a wire receiving power through the ignition switch. It should be taken into account that the load on the ignition switch will increase.
The car is equipped with two block headlights manufactured by Bosch or JSC Avtosvet, which combine low and high beam headlights, side (parking) light lamps and direction indicators. Headlight units vary in design. Low beam headlight "Avtosvet" - with a flat screen and a lens between the lamp and the lens, the lens of the headlight unit is glued to the body, the side light lamp is located in the main beam headlight. Bosch low beam headlight - without lens, with a screen cap on the lamp, side light lamp - in the low beam headlight. The turn indicators for both headlight units are the same, the mounting points are the same: at the top - with bolts to the upper cross member of the radiator frame, at the bottom - with a nut to the stud on the mudguard bracket and a bolt - to the radiator frame strut.
The headlights are equipped with single-filament low and high beam lamps. When you turn on the low beam of the headlights, the low beam lamps light up, and when you turn on the high beam, all the lamps (both low and high beam) come on.
The voltage for the low and high beam lamps is supplied respectively through relays K4 and K5 of type 904.3747-10, located in the mounting block. The relay switching voltage at a temperature of 20±5°C is no more than 8 V, the winding resistance is 85±8.5 Ohms. Voltage is supplied to the relay windings if the exterior lighting switch key is fully pressed (then the choice between low and high beams depends on the position of the headlight stalk switch) or - regardless of the switch position - if the driver pulls the steering column switch towards himself (then the high beam switches on headlights).
Hydrocorrector of headlights. Serves to change the angle of the headlights depending on the vehicle load. It consists of a master cylinder mounted on the instrument panel, slave cylinders mounted on the headlights, and connecting pipes. The cylinders and tubes are filled with a special liquid with a low freezing point and do not communicate with the atmosphere. The hydraulic corrector is non-removable and cannot be repaired. If the pistons in the cylinders become sour, there are leaks from the cylinders or tubes, and also if the stroke of the actuator rods (in headlights) differs from the value of 7±0.5 mm, replace the hydraulic corrector assembly.
Exterior lighting, brake and reverse lights, interior and trunk lighting
The front side light lamps are located in the headlights (see the “Headlights” section), the rear lamps are located in the external rear lights (on the car’s fenders). The brake and reverse lamps are located in the inner rear lights on the trunk lid. (Removing the brake light switch, see “Removing the vacuum booster and brake pedal assembly”). The license plate lights are located on the bumper.
The parking light is on when the exterior light switch is pressed. The side light and brake light lamps are powered through relay K1 for monitoring the health of the lamps in the mounting block. If any of the lamps burns out or the contact in the socket or supply circuit is broken, the corresponding indicator lights up in the control unit. If there is no lamp control relay, there must be jumpers instead, otherwise the lamps will not light.
The license plate lamps turn on simultaneously with the exterior lighting, but are connected bypassing the control relay, so their serviceability is not diagnosed.
The glove box illumination lamp is turned on when the ignition is turned on by a switch under the box lid.
Voltage is also supplied to the switches of the interior courtesy lamp lamps and the driver's individual courtesy lamp when the ignition is turned on. In addition, the interior lamp lights up if one of the doors is open and the courtesy light switch is in the appropriate position. A few seconds after closing the door, the brightness of the lamp decreases and it goes out. This is controlled by the display unit of the on-board control system.
The instrument lighting turns on simultaneously with the exterior lighting. The brightness of the backlights is controlled by a rheostat on the instrument panel.
The reverse lamps come on when the ignition is turned on and the reverse switch located on the transmission is closed.
The trunk lighting turns on simultaneously with the side light lamps.
