Spar - what is this element and what features does it have?”> What is a spar? What consequences await the car if the spar “gets tired” or “goes away”? Can it burst? What does it look like? And, in the end, where is this element of the car located? We will answer all these questions in this article, and we will do it in a way that is clear to all drivers.
The spar is a rectangular tube, which can also be called a longitudinal beam of the body kit. They pass through the rear or front of the body. Body designs differ in many ways, which is why there are spars that pass right through between the bumpers.
Spars can be either composite (looks like a set of iron parts) or solid (made by stamping or milling - looks like a solid part). In a standard design there are usually two of them: left and right. Each is divided into three parts: rear, front and middle spar. In addition, the front left, wing spar and rear are higher, relatively. Relative to each other, they are most often located parallel, but in some frames they are at a small angle.
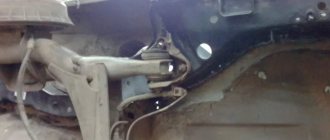
Spars are an integral part of any car, regardless of body type. In the photo you can clearly see where they are. As for the material, it is most often made of titanium or aluminum alloys for the car body, as well as composite layers. The main section in the part is the channel (looks like a U-shaped section) - in the most loaded places the section increases.
When is it necessary to repair or replace the spar on a VAZ 2109
The decision to straighten or replace a side member on a damaged car depends largely on the length of the deformed zone, the degree of deformation, and also on the qualifications of the repairman. If there is slight deformation of the spar over a long length, even if there is a small fold, the spar does not need to be replaced. Using a jack or square, you can restore the original shape and position of the spar while maintaining its characteristics. On the other hand, if there is significant deformation, the spar must be replaced, since straightening will cause a change in the metal structure and strength, which will lead to a change in the characteristics of the body itself.
If the metal is rotten, then the side members (front and rear) cannot be repaired or restored. Even if you weld, the rot will continue around it. In addition, welding on soft metal can disrupt wheel alignment, tires will begin to wear out faster, transmission parts will begin to break, and body deformation may occur. Such repairs will be enough for a couple of weeks.
During welding, spacers are placed on the spar to prevent it from being pulled to the side. Otherwise, the body may become deformed.
If possible, it is always better to purchase a new part, which costs more than temporary repair work. But, even with a limited budget, in some cases you cannot save. Therefore, replacement is much cheaper, but if the crack is the result of an impact or collision with a VAZ, welding will be sufficient.
When repairing a spar, you should never lose sight of the fact that it is a reinforcing element of the body and largely determines its rigidity. At the same time, it is not recommended to strengthen the spar during partial replacement, mainly in the front and rear parts of the body, since this increases the strength of the area intended for crushing, i.e. for depreciation. If the depreciation of this zone turns out to be insufficient, then in the event of an impact, the deformation of the body will pass further, to the car cabin, which should not be deformed.
Typically, a crack forms after an accident only if the body has also become deformed. Then it will be necessary to first level it, and only then begin welding work.
Design Features
So, we figured out that the spar is a simple pipe with a rectangular cross-section. Depending on the engineers’ ideas, they:
- are located in front and behind the car.
- extend along the entire length of the housing structure.
Due to the fact that various forces are constantly pressed on the side members, they must withstand serious loads: this includes the weight of the engine, the weight of people in the car, as well as a host of other automotive parts. Also, this part is constantly subject to shock load, which is transmitted from car wheels while driving.
If you look at the photo of the inside of the car, you will see that the frame frame looks like a ladder frame, similar to the letter "P", including the rear one. Ladder frames are commonly used for SUVs, crossovers, and trucks. Passenger cars are most often equipped with a load-bearing body structure.
Preparatory work for replacing the VAZ 2109 spar
Since spar replacement and repair are carried out using the same technology, the set of tools will also be the same.
Please note that it is better to purchase spars complete with other parts. This way you will be sure that they will fit each other perfectly and will not spend so much time installing them.
If you nevertheless decide to repair the side member on a VAZ 2109 yourself, first you will need to acquire the following tools for the job:
- welding unit (the most convenient and simplest option would be semi-automatic welding);
- grinder and discs, hard metal brush for the grinder;
- a set of new side members and connectors for the VAZ 2109;
- grinding tool;
- electric drill;
- metalworking tools;
- packaging of automotive mastic;
- 2 medium-sized paint brushes;
- can of primer;
- bottle of solvent.
Body repair is a harsh thing, or use a chisel to “CHISEL”
For everything about garage welding of rotten cars, see the new book on car repair from Khoma
In August 2009, a nice young lady approached me with a small request - to weld a hole in the side member of a VAZ-21093 car, in common parlance - “chisels”, they say, the husband is a diagnostician, “fumbles” with engines at 10c plus, but there is no one to do auto body work.
Well, helping your neighbor is a sacred thing, I thought and invited them to the show. The initial examination raised a lot of questions, ranging from year of birth to:
WHERE IS THE CAR'S FLOOR? Brief questioning of the owner revealed the following: the car was produced in 1996, stupidly stood in a pit for three years, after which it was bought outbid, hastily patched up, coated with various mastics and successfully sold off to the current owners, and since the diagnostician husband figured out that the engine was in good condition, he didn’t bother with the condition of the body…..But in vain!
The young lady was offered the following options:
— replace the floor, sills, rear side members
— completely change the body (the engine is excellent)
- cover it up again and sell it off to other less fortunate buyers at an even lower price (there was no recycling program at that time).
Ultimately, the decision was made - COOK!
Disassembling the interior took two hours, they opened the Shumka and “rejoiced”:
the floor of the car was practically destroyed by corrosion (see photos 1, 2, 3) The place of the “happy” driver, who almost ran along the “path with his own legs” (photo 4) looked especially impressive
Since the floor tunnel miraculously survived, only the “trough” was replaced
After cutting off the rags, cleaning off mastics and other offal, drilling out resistance welds on the side members, and carefully marking them, welding of the floor began.
By the way, everything was cooked using a domestic carbon dioxide semi-automatic PDG-165.
Next in line were the rapids.
After opening the outer panels, a view appeared no less gloomy than the appearance of the floor (photo 9, 10)
In order not to take risks, stretchers were installed in the body for rigidity (see photo 26, where the car looks quite naked) and this measure, I think, was not unnecessary - it’s better to be overdressed than underdressed.
The remains of the side members and jacks brought tears to my eyes... (photo 11, 12)
Having mercilessly chopped off pieces of old metal with a grinder and a chisel, we got to the living metal of the body. We welded in the amplifiers, connectors and front jacks. Buy a new book on auto repair from Khoma. We decided to wait a while before installing the doors to install the external sill panels in order to prevent the appearance of unnecessarily large gaps.
Finally, the turn came to the spars. This “hole” was what the sweet girl wanted to seal (photo 14)
The same photo shows that the edges of the wheel arches still have the same deplorable appearance. Removing the rear bumper and examining the trunk for integrity forced me to take up the camera again:
The left trunk well (see photo 21) and the rear panel (see photos 15, 32) also suffered from terrible rot. For further repairs, we had to remove the gas tank and the rear beam (photo 28). While they were filming, the soured brake pipes were told to live to death for a long time (see photo 23). There was no time to mourn for them, so the chisel, grinder and drill were used again. The edges of the arches were trimmed, the side members were drilled out, and the rear panel was cleaned down to bare metal. First, new spars were installed, and then new edges freshly cut from millimeter sheet metal were welded to them by spot welding, as well as parts of the rear panel (see photos 24, 25, 27, 16). At this point, the welding work was completed, but the owner expressed a desire , taking the opportunity to “make noise” of the interior, and treat it with anticorrosive... No sooner said than done, especially since the customer supplied the materials himself, with the exception of body iron.
So, the hidden cavities were treated with Movil, the interior was glued, the bottom was treated with bitumen mastic (the rear panel, of course, also got it) see photos 18, 19, 20.
I won’t describe the procedure for assembling the interior, it’s boring and not quick, because you have to return everything down to the screw to its appropriate place)))
Two weeks after the car was delivered, the owner received her car in a rather cheerful mood of body and spirit, she was incredibly pleased with the price and quality and drove for another year until she bought something foreign.....
I haven’t come with any breakdowns yet. Buy a new book on car repair from Khoma. Written by Roman aka Jagger, May 2010
We send all questions to
Rear spar on a VAZ 2109 and how to change it
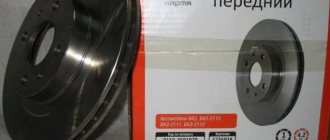
First of all, we bought the spar assembly 2108-5101373 and bought the left floor connector 2108-5101286 (there is no one at the market, we had to order it in Kharkov).
- Turn the machine on its side to make it easier to cook.
- We cut off the remaining rags and caries. We decided not to change, but to leave the old middle rear floor cross member 2108-5101272. It cracked where it was welded to the spar. We'll cook it. In this regard, cutting off and clearing this particular place was not easy, it was difficult to crawl up, I chopped the floor with a Bulgarian a couple of times. No problem, let's brew this.
- The spars were sandblasted to remove transport soil, since cleaning with machines is problematic and time consuming. We primed them with two primers as always and applied sealant. We prepared the connector, cleaned it, welded the nuts, and primed it. We grabbed it by welding to the spar. After he stood up to the spar, the fitting began. And then it turned out that it needed to be bent to fit the shape of the bottom, or the spar would not work. They bent it just right (you can see the difference in the photos). Everything became stress-free.
- We prepared the surface for welding, cleaned everything, welded the caries holes in the middle floor panel 2108-5101034 with two patches and made one in the rear floor panel 2108-5101042. Primed.
- We cleaned the welding spots, made holes for welding in the spar, and prepared for welding.
- We started welding from the bottom towards the rear and welded it completely, except for the part adjacent to the rear panel and to the glass, which we will replace.
The car is in ready condition for repair.
Rust has eaten away the metal. We clean and treat with a rust converter.
We make a patch on a rotten place
Let's brew this patch
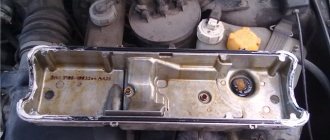
We weld a cracked cross member
The floor, as it turned out, was very rotten. We cut out the rotten places, prepare the patches and weld them
We clean off all metal residues after welding, strip the entire surface under the spar down to metal, degrease, prime with reactive primer
Prime with regular primer
Sandblasted spars
The surface is rough, it will adhere well to rough soil, degrease and prime
We weld the nuts in the connectors
We prime the connectors with 2 primers
Exactly welded connector to the spar
Here you can see how the connector is bent, now the spar fits perfectly into the seat without stress
We apply sealant where we consider it necessary inside the spar
We prepare and clean welding points
We weld the spar at all welding points
View of the welded connector of the bottom and side members
The installation of the spar is completed. Now, according to the plan, we will continue to strengthen the bottom from the bottom left with standard spare parts
Body repair is a harsh thing, or use a chisel to “CHISEL”
For everything about garage welding of rotten cars, see the new book on car repair from Khoma
In August 2009, a nice young lady approached me with a small request - to weld a hole in the side member of a VAZ-21093 car, in common parlance - “chisels”, they say, the husband is a diagnostician, “fumbles” with engines at 10c plus, but there is no one to do auto body work.
Well, helping your neighbor is a sacred thing, I thought and invited them to the show. The initial examination raised a lot of questions, ranging from year of birth to:
WHERE IS THE CAR'S FLOOR? Brief questioning of the owner revealed the following: the car was produced in 1996, stupidly stood in a pit for three years, after which it was bought outbid, hastily patched up, coated with various mastics and successfully sold off to the current owners, and since the diagnostician husband figured out that the engine was in good condition, he didn’t bother with the condition of the body…..But in vain!
The young lady was offered the following options:
— replace the floor, sills, rear side members
— completely change the body (the engine is excellent)
- cover it up again and sell it off to other less fortunate buyers at an even lower price (there was no recycling program at that time).
Ultimately, the decision was made - COOK!
Disassembling the interior took two hours, they opened the Shumka and “rejoiced”:
the floor of the car was practically destroyed by corrosion (see photos 1, 2, 3) The place of the “happy” driver, who almost ran along the “path with his own legs” (photo 4) looked especially impressive
Since the floor tunnel miraculously survived, only the “trough” was replaced
After cutting off the rags, cleaning off mastics and other offal, drilling out resistance welds on the side members, and carefully marking them, welding of the floor began.
By the way, everything was cooked using a domestic carbon dioxide semi-automatic PDG-165.
Next in line were the rapids.
After opening the outer panels, a view appeared no less gloomy than the appearance of the floor (photo 9, 10)
In order not to take risks, stretchers were installed in the body for rigidity (see photo 26, where the car looks quite naked) and this measure, I think, was not unnecessary - it’s better to be overdressed than underdressed.
The remains of the side members and jacks brought tears to my eyes... (photo 11, 12)
Having mercilessly chopped off pieces of old metal with a grinder and a chisel, we got to the living metal of the body. We welded in the amplifiers, connectors and front jacks. Buy a new book on auto repair from Khoma. We decided to wait a while before installing the doors to install the external sill panels in order to prevent the appearance of unnecessarily large gaps.
How to weld the rear spar on a VAZ 2109
About 1.4 million copies of VAZ-2109 cars were produced and it, along with classic VAZ models, became a truly people's car. Not least of all, this was achieved thanks to the high maintainability of the “nine”. In this article I would like to dwell on such an important problem as replacing side members on VAZ-2109 and 2108.
Replacing side members on a VAZ-2109
Replacement or welding
Welding of the spar is used in two cases:
- When fatigue cracks started to appear. Then it makes sense to put a patch over the crack and weld it using semi-automatic welding.
- When there are small pockets of corrosion. In this case, the metal is cleaned, treated with a rust converter and primed. If necessary, small patches are applied.
- Welding the spar is possible even if it is destroyed, but this will only be a temporary repair, and driving such a car is dangerous.
If the car was involved in an accident in which the side member was significantly deformed or rotted, then a complete replacement would be advisable. It is necessary to understand that you need to repair the spar if you have sufficient skills in body work and welding. For an inexperienced person, this process will be quite complicated, so if you are not confident in your own abilities, then it is better to trust the professionals.
Required tool:
- Semi-automatic welding.
- Bulgarian.
Semi-automatic welding
- Electric drill.
- Wire brush.
- Spars for VAZ-2109.
- Mastic, primer, solvent.
Removing the rear side member
Dismantling of the spar must be carried out on a slipway or with the machine turned over on its side. In addition, you need to completely remove all the trim and soundproofing of the trunk. After this, we clean the weld seams. Next, we will need to find all the resistance welding points of the spar and drill them out using a 7-mm drill. At the end of this process, we need to completely cut off the old spar. We clean the place of its attachment from rust and paint. This is done using a metal brush on an angle grinder and a rust converter. If necessary, we cut out the rotten body elements and put patches in their place.
Removing the rear side member
Installing the rear side member
Before installation, the mounting area is degreased and primed. The new spar also needs to be cleaned of transport soil, primed and holes made in it for welding points. If everything is done correctly and the geometry of the body is not damaged, then the new spar will fit into its seat without any problems. We weld the spar at the welding points to the body and cross member. At the end of this process, coat the seams with automotive mastic.
Front spar
The front spar is more loaded than the rear. This is because it bears the entire weight of the engine and gearbox. If we add to this operation on bad roads and aggressive driving, then its service life will be only about 4-5 years. In some cases, a special repair insert, which is welded into place of the damaged fragment, can save you from the labor-intensive process of completely replacing the spar.
Just as when replacing the rear spars, replacing the front ones must be done on the slipway. Otherwise, you can break the geometry of the body.
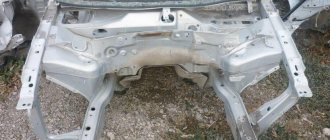
Before you begin replacing the side member, you need to remove the entire front suspension and engine and partially disassemble the interior. When disassembling the front part of the car, pay attention to the condition of the remaining body elements, such as glasses, radiator frame (most likely, the frame will have to be changed along with the side members, since it serves as a structural reinforcement), mud flaps. It is possible to partially replace the front spar. In this case, the old one is cut off, and a new one is welded in place of the cut out part. However, next we will look at the process of completely replacing the front side member.
Left front side member of VAZ-2109
Removing the front side member
The process is similar to removing the rear side member. We drill out the resistance welding points (this is partly done from inside) and remove it. After this, we clean the seat and, if necessary, put patches on the body and get rid of corrosion. We prime the new spar and drill holes in it for attaching the suspension arms.
Tasks of spars
The spar in a passenger car serves as a reinforcing part for the underbody, mudguards and luggage compartment floor. In large cars it acts as the main strength element of the body. In addition to its reinforcing task, the front spar acts as additional shock absorbers - it is located in the deformation absorption zone. After all, in order for the part of the car body where people are located to receive the least impact while driving, it is necessary to soften the impact - and this impact is taken by the front side member.
To ensure that vibration spreads evenly throughout the body, engineers create “deformable” zones in its front parts. In the longitudinal direction they have a weak force structure. Now passenger car manufacturers are trying to make it as thin as possible: they reduce the thickness of the section or walls, create special holes in the “safest” places where less load is applied. Designers also use folds when stamping parts. They are needed so that during an accident the spar folds into an accordion and does not break. In a collision, the side members take the brunt of the impact, which is why they are often deformed. But such a sacrifice is justified: due to the absorption of kinetic energy, the force of the impact on the cabin is reduced. In trucks, both the rear and front side members suffer.
Major renovation
To carry out a major overhaul of the G8 body, you will need to be well versed in body work. So to speak, the specifics of performing this operation must be studied inside and out.
Preparation
First of all, you need to start by dismantling the body parts:
- All electrical wiring located deep inside the doors is disconnected;
- The door opening retifier is removed. The limiter is usually fixed with fasteners at “10”;
- The fasteners connecting the door hinges and the body are also turned away.
After the main doors have been removed, you can begin to dismantle the rear door:
- The casing is removed, which is held in place with self-tapping screws;
- The room lighting supply and all wiring are turned off;
- The stops are disconnected;
- The bolts holding the hinges are turned out.
- The starting position of the hood fasteners is marked so that re-installation does not cause any problems.
Note. If a new engine compartment cover is installed, naturally, you will no longer need to mark the bolts.
- The front window washer tube is removed;
- The light bulb for the vehicle's engine compartment is de-energized;
- The wiring harness is pulled out;
- All bolts are removed;
- The hood is pulled out from the brackets (an assistant is definitely needed in this case).
Note. Again, if the same hood is put in place, you will have to stretch the wire along the internal channel to facilitate the subsequent task of installing the wiring.
We continue dismantling, removing the radiator grille and bumper:
- The grille is secured to the body by two bolts, which will need to be removed;
- Then you will need to press out the plastic latch;
- The grate can be removed if you apply some force.
As for the bumpers on the VAZ 2108, they are made of a plastic alloy and have good springy properties, allowing the parts not to burst during hard use. This body element is removed as follows:
- The two nuts holding the bumper to the body are unscrewed;
- The bumper is then completely dismantled.
Main part of the work
Having removed the attached body parts, the car owner will have to deal with the seats. They are also dismantled, the interior trim is removed, and the owner of a used G8, as a rule, sees such a sight.
Once you start working with a brush and a screwdriver, it becomes clear that rust reigns here, and everything is held together by sound insulation.
It is advisable to always start checking with the side members and beams. On such a used car, as a rule, the fastening of these two body elements leaves much to be desired. As soon as you drive into some hole or small ditch at speed, all hell breaks loose. The same can be said about brake pipes, which simply break with a small bend.
After dismantling the beam, an even more terrifying picture opens up. If you poke the iron with a screwdriver to determine its condition, you realize that there is nothing left of it here. Everything rotten will have to be cut out at the root, and first of all the “basin” and the side members.
Types and features of repairs
On a VAZ 2108, body repairs can be carried out in several areas. In this case, much will depend on the degree of damage to the vehicle, service life and much more. For example, work on a complete restoration of the body and partial processing/removal of scratches and chips will differ in complexity.
You can also correct the geometry of the body with your own hands. It will be enough to remove dents on your favorite V8, polish and paint the body.
Note. Polishing is an important procedure that helps not only improve the appearance of the body, but also protect it from further corrosion.
As for the car service, we immediately note that the price of repairs here is quite high. And this often explains the fact that many people strive to carry out repairs on their own, especially since most of the work can be done by anyone.
A corroded body, punctured in several zones, is already a “patient” that needs to be worked with. To begin with, you will have to remove the “tail” from such a body, and then treat them with anticorrosive. In particular, we are talking about doors, bumpers and other hinged elements.
Advice. The most difficult thing to unscrew on the “eight” is the nuts that have been exposed to aggressive environmental influences. For example, rear bumper nuts. To be able to remove them without much difficulty, it is enough to pre-lubricate the fasteners with brake fluid or pure gasoline.
How to treat holes in the body
Over time, no metal surface can avoid the appearance of defects, among which notches stand out. Holes in the body can be of different types. If they have rusted edges, then urgent intervention is required. Here's what you'll need to do:
- First, you will have to remove all the paintwork in order to be able to assess the scale of the upcoming work.
Note. The easiest way to remove paint from the body is to use an electric drill with a wire attachment.
- The second stage of work will involve the removal of corroded areas. First, the rotten edges bend inward. A hammer helps with this. Then a piece of tin or a special metal mesh with small holes is placed, and then putty is sealed on top;
- The final stage is polishing and painting.