Modern cars are equipped with car alarms during production. This allows you to protect your car from theft.
But the alarms installed by the manufacturer do not cope with this task very well. This is especially true for inexpensive cars, where they try to save money on whatever they can.
But there are a large number of third-party devices on the market, for example, the Sheriff alarm system.
Functional features and capabilities of the system
Models of Sheriff car security systems may have different characteristics and functions.
Let's look at the features characteristic of all Sheriff anti-theft systems:
- “Signalka” Sheriff can operate effectively over a wide temperature range. The manufacturer especially recommends using the anti-theft system for residents of northern regions.
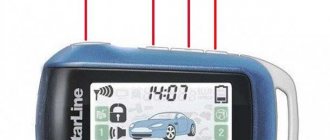
- Possibility of monitoring the condition of the machine remotely. Thanks to the key fob with feedback, there is a function to notify the car owner. If one of the security zones is triggered, the remote control display will display information about which area was affected.
- Remote vehicle control. Depending on the modification of the anti-theft installation, the system may have different engine starting options. In addition to the standard settings, you can change the activation time of the power unit and turn on the interior lighting function. The car owner can reprogram the remote control and change the starting configuration of the engine.
- The anti-theft system works with a security code. Signals are transmitted between the control unit and the remote control via a secure channel. According to the manufacturer, it is impossible to hack it with electronic scanners and grabbers.
- Easy to install alarm system. This is achieved as a result of the minimum number of electronic devices and equipment that is included in the kit. Thanks to the steps described in detail in the instructions, you can connect the anti-theft installation at home.
- Almost all models of modern Sheriff alarms allow you to control the operation of electric windows. This is only possible if there are door closers.
- Closing and opening of doors is carried out remotely. When the car is disarmed, the alarm disables the door and trunk locking.
- If necessary, the car owner can activate the silent arming mode. Its fundamental difference is that when the alarm is turned on and off, the siren will not sound.
- You can configure the alarm so that the protective mode will be activated automatically if the driver leaves the car or closes the last door.
- Modern models of anti-theft installations are equipped with a tag. It is used to identify the car owner as a result of data received from the key fob via the communication channel.
- You can set the doors to close automatically when the car starts moving.
- It is allowed to arm the car when the power unit is running. This option is most relevant if the driver plans to leave the car for a short time.
- There is a “panic” mode. When activated, the siren and vehicle lights are activated. The mode is designed to deter potential criminals.
- If the alarm functionality allows, you can configure the anti-theft installation to be disabled using a secret password or switch. The driver must know the code; it is programmed when installing and configuring the “signaling”.
- There is an option to notify the car owner about the condition of the car when using the immobilizer.
The user “Kolya Kolya” told how to link the Sheriff alarm control panel.
Types and characteristics of models
Let's look at the most popular models of anti-theft systems among consumers:
- Sheriff with automatic start. The main feature of this anti-theft system is the ability to automatically start the car’s power unit remotely. This function is especially convenient in winter, since the driver can warm up the engine and interior of the car in advance, while at home. The “alarm” kit includes a key fob with two-way communication, which allows you to monitor the condition of the car. The cost of such anti-theft systems will be from 5 thousand rubles and more.
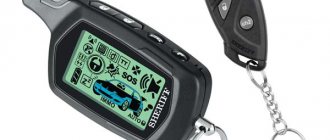
- Anti-theft installation Sheriff with feedback. The central processor installed in the car exchanges data with the control panel via a secure channel. As a result, the car owner will always know the condition of the car. All data on protection and impact on the body are displayed on the remote control screen. The cost of models with two-way communication averages from three thousand rubles.
- The APS-2500 model should be highlighted separately. This is a multifunctional security system equipped with a two-level sensitivity controller. It is possible to connect an additional sensor and channels for data transmission. If it is necessary to perform an emergency shutdown or activate the anti-theft system while the power unit is operating, you can use a PIN code. You can find this model on the market for 1800 rubles.
- Model ZX-750. Another alarm system with two-way communication. The main feature is that the maximum range of operation between the control module and the remote control is up to two kilometers. The anti-theft installation can monitor the operation of the light alarm. The average cost is from 4,500 rubles. The price may vary depending on the store and region where the alarm is purchased.
- BTX 5900LCD. This model belongs to the premium segment of the market and is positioned by the manufacturer as a business class alarm system. It has extensive functionality; you can configure remote engine start and automatic switching on of lights in the car interior. The average cost of the system is 6 thousand rubles.
- TX-35PRO. The system is equipped with a two-channel receiver, as well as a two-level shock controller. You can configure the device to work with four remote controls. The price of this alarm model is from 3 thousand rubles on average.
- APS-2600. The system belongs to the budget segment of the market, its average cost is about two thousand rubles. The alarm has no feedback; the kit includes two key fobs without a display. However, this alarm model allows you to effectively protect your car from burglary thanks to the included immobilizer, as well as a two-level shock sensor.
- The APS95LCD alarm has a feedback function. Signals are transmitted between the system and the remote control via a secure channel, which eliminates the possibility of impulses being intercepted by intruders. The shock controller can be adjusted to reduce or increase sensitivity. The presence of “Panic” and “Anti-grabber” modes allows you to ensure reliable system protection. The car owner can independently reprogram the anti-theft system. It is possible to automatically start the engine. This “alarm” differs from its predecessors in the design of the remote control. The cost of the alarm system is from 3 thousand rubles.
- Sheriff ZX-1070. This model of anti-theft installation is considered one of the most budget options. The package includes an upgraded remote control, and if necessary, you can configure the start of the power unit remotely. One of the varieties of this system is the Sheriff ZX-925 model. The fundamental difference is the presence of a special code intended for emergency unlocking of the system. The average cost of a car alarm is 2,500 rubles.
- ZX-900. The system is recognized as the most successful modification among the entire model range. Some market experts classify this “alarm” as a premium segment due to the large number of useful functions and capabilities. The alarm system is developed on the basis of the ZX-725 anti-theft installation. The car owner can independently program many options, including activating the lights in the car's interior. The average cost is from three thousand rubles.
Anti-theft system ZX-900
Alarm Sheriff APS-2600
“Signalka” ZX-1070
Methods for recognizing car alarm markings
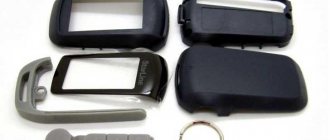
One of the methods for determining the name of the signaling is to disassemble the key fob. The remote control body is secured with plastic latches; only some modifications use self-tapping screws. Using a thin screwdriver, carefully pry up the clips and disconnect the top part of the remote control. Inspect the case carefully to see if there is any alarm information on it. Examine the circuit board and chip. Information about them can be found on the Internet and you can accurately determine the model of the security system.
Advantages and disadvantages
What are the advantages of signaling:
- Easy to install and operate. The company produces anti-theft systems that users can install themselves. To do this, the consumer must have minimal knowledge in the field of electrical engineering.
- Affordable price. Sheriff car alarms are currently one of the most purchased in Russia and the CIS countries. This became possible due to the low cost of the models. Of course, there are business class systems, the prices of which are always higher. But with a limited budget, the consumer can choose the best option with extensive functionality.
- Lots of useful features. Even the cheapest alarm models have options useful for the consumer.
The main disadvantages of alarms:
- Low range of the remote control. As a result of independent tests, it was revealed that the maximum range of the key fob does not correspond to that declared by the manufacturer. On average, the actual range is about two hundred meters.
- Some consumers note such a disadvantage as unclear installation and use instructions. Users may experience installation problems.
- There may be a problem such as false positives. This is not typical for all models of anti-theft installations, but users often note this drawback. According to experts, the minus is associated with poor interaction of the anti-theft system with the immobilizer.
- Despite manufacturers' statements about the reliability of the system, Sheriff car alarms are vulnerable to code grabbers. These devices are used by criminals to intercept dynamic system code. Practice has shown that Sheriff alarms are not resistant to such devices.
- Sometimes consumers face the problem of defects. Individual system components, such as the control unit or transceiver, may be defective. Because of this, users cannot disable or enable the anti-theft installation.
Garri Gudini showed how a code grabber works and how the alarm system reacts to it.
Video: operation of the automatic start of the Sheriff alarm using the example of a VAZ 2108
User Ramil Islamgaziev showed in his video how the automatic start of the Sheriff alarm works on a VAZ 2108.
Do you have any questions? Specialists and readers of the AUTODVIG website will help you ask a question
Was this article helpful?
Thank you for your opinion!
The article was useful. Please share the information with your friends.
Yes (66.67%)
No (33.33%)
X
Please write what is wrong and leave recommendations on the article
Cancel reply
Rate this article: ( 3 votes, average: 4.67 out of 5)
Discuss the article:
How to install?
How to install an anti-theft system:
- The installation procedure begins with installing the control unit in a place inaccessible to others. For example, you can place it behind the glove box or in the free space under the heater or air conditioner control unit. If there is space behind the dashboard, you can install the module there. Do not place it in the engine compartment or trunk due to high temperatures, possible interference and moisture. To install the unit behind the dashboard or under the heater control module, remove the plastic interior trim. The device is fixed using ties or bolts included in the package.
- The next step will be the installation of the siren; the device is installed in the engine compartment. It must be placed as far as possible from the power unit. Point the siren's horn to the side or in the direction of travel of the car, the main thing is that it is not directed downwards. Otherwise, dirt from under the wheels of the car may get on the siren. The wires from the device must be pulled into the cabin to the control module through a special technological hole.
- Then the hood switch is installed. This element is fixed on a metal surface, which must be securely connected to the vehicle body.
- Next, the shock controller is installed. This element is usually installed by specialists in the free space between the engine compartment and the interior of the car. There is a special jumper in this place. The controller must be securely fixed so that it does not operate without reason due to vibration.
- We recommend installing the LED indicator on the windshield. Its presence will allow attackers to know that the anti-theft system is activated.
- Limit switches are installed on all car doors, and the device is also mounted on the trunk door. Installation will require removal of the trim; the dismantling procedure is individual for each car.
- The antenna adapter is mounted on the windshield. When installing, ensure that the transceiver is placed as far away from metal as possible. The presence of metal components near the antenna will deteriorate signal reception and transmission, and interference may occur.
- Then you need to install the Valet service button. This key can be used to configure and program the system, as well as emergency shutdown. An attacker should not gain access to the Valet service button, since this way he can hack the alarm. Place the key in an inaccessible location. It is advisable not to place it next to the control unit. When installing, keep in mind that if the need arises, you will have to quickly access this element.
- The final step will be connecting all components. Electrical circuits are routed from the car siren, sensors, switches, antenna and service button to the control unit. Connection to the control module is carried out in accordance with the diagram included in the kit. When the components are connected, all interior trim elements are reinstalled.
Auto electrician Sergei Zaitsev spoke in detail about how the procedure for installing the Sheriff anti-theft system is carried out.
Connecting the device
Before installing the system, it is necessary to disconnect the battery in order to de-energize the on-board network. To do this, under the hood of the battery, you need to disconnect the terminal clamp from the negative terminal.
Connection procedure
The alarm connection is made as follows:
- First, the microprocessor module is installed, the device is placed in the cabin as discreetly as possible. It can be installed behind the instrument cluster to ensure a minimum length of wires when connecting.
- The siren is located in the engine compartment, in a place that is as hidden as possible and protected from moisture and high temperatures. The bracket that will fix it is first installed. The device is placed with the socket down to eliminate the possibility of moisture accumulation inside.
- Limit switches are installed on the doors, hood and luggage compartment. Triggers are not permitted in gutters.
- The sensitivity controller will be installed on a flat surface in the central part of the body. For installation, you should select a partition that separates the engine compartment from the passenger compartment.
- The transceiver with antenna is placed on the car window. There should be no metal products or body parts within 50 mm of the device to prevent a decrease in signal quality. The wire from the transceiver must not be twisted into a coil, otherwise interference may occur during signal transmission.
- The service button is placed secretly in the car interior.
Connection diagram
General connection map of the microprocessor alarm module:
Wiring diagram for connecting the Sheriff control unit
Table: features of connecting a 6-pin connector to implement engine autostart
| Color | Description |
| Blue | Contact IGN1, power output for connecting a relay. The electrical connection circuit must be protected with a 30 ampere safety device. The contact is designed to control the ignition line of the machine. |
| Red | Power output for power supply of electrical switching circuits IGN1. The electrical circuit is protected by a 30 amp fuse. |
| Yellow | Output for controlling the starting system of the car's starter mechanism. Can be used to configure engine start on machines equipped with a Start/Stop button. |
| Green | Power relay contact for controlling additional equipment via the ignition system |
| Red with blue stripe | Power supply input on the switching line of the built-in light signaling relays |
| Violet | Power relay output for controlling an additional electrical circuit of the ignition system. Used to work with machine auxiliary equipment. |
Typical user mistakes
To identify errors and difficulties in the operation of the security device, you need to perform the following steps:
- Enters the options settings menu.
- Using the control buttons, function SF1 is selected.
- The first button on the pager is pressed.
- The alarm will be triggered by a siren and external lighting devices, this will be an error code. Then the pulses generated by the system are deciphered.
Table: correspondence of errors and signals of the anti-theft system
| Pulse type | Cause of the problem |
| 1 long | No errors in alarm operation |
| 1 short | The signal from the engine speed sensor is not programmed |
| 2 short | No communication with parking brake position sensor |
| 2 short | Manual transmission selector is not in neutral position |
| 4 short | Manual transmission mode reserved for engine autostart |
| 5 short | There is no signal from the trigger installed on the hood of the car |
| 6 short | There is no connection with the limit switch located on the brake pedal |
| 1 long and 1 short | No battery charge signal for 60 seconds |
| 1 long and 2 short | No connection to tachometer |
| 1 long and 3 short | There is no communication signal with the generator device in the car |
| 1 long and 4 short | The power unit stopped due to the lack of pulses from the engine speed control sensor |
| 1 long and 5 short | Engine speed at idle exceeded the threshold of 4 thousand per minute |
| 1 long and 6 short | The voltage in the car's electrical network has become more than 16 volts |
| 1 long and 7 short | The alarm mode was activated when the car security was activated |
Instructions for use
Detailed operating instructions are included with the alarm.
basic settings
Using the APS-2500 model as an example, we will analyze the main nuances of using the system:
- To turn on the protective mode, you need to briefly press and release key 1 on the control key fob. The same button is used to disable security, lock doors and ignition switch.
- To activate the security function when the engine is running, button 1 on the remote control must be pressed and held for three seconds. To disable the mode, the key is briefly pressed and released.
- Activation of the “panic” mode is carried out by simultaneously pressing buttons 1 and 2; the keys must be pressed and held for two seconds. After turning on, the siren and turning lights of the car will begin to work.
- If the siren is activated while the security mode is on, then to turn it off you need to simultaneously press keys 1 and 2 for one second. To turn on the siren, similar steps are performed.
- To activate the second data transmission channel, you must hold down key 2 for more than one second.
- To enable silent arming mode, click button 2, and then immediately button 1. To disable the function, similar actions are performed.
- If you need to activate the security mode by disabling the controllers, then click button 1, and then immediately button 2.
Activating and disabling security with the Valet button
If you need to arm your car, but for some reason you don’t have a key fob, you can activate the function using the Valet service button:
- Quickly press, release, and then press and hold the service key again for more than three seconds. One siren beep will sound as confirmation.
- The LED light will blink quickly, indicating activation of the standby mode for closing the last open door. If the door is locked, the driver needs to open it and close it again. If it is open, then it must be locked.
- After the last door is locked, the security mode will turn on.
To disable security without a key fob, you need to do the following:
- Use the key to open the car door.
- This will automatically trigger the siren.
- Place the key in the lock and turn on the ignition.
- Within ten seconds after installing the key, briefly click on the Valet key.
Vladimir Taraban spoke about the capabilities and functionality of the Sheriff 2500 anti-theft installation.
Deactivation by PIN code
To disable the “alarm”, a personal code can be used (standard password is 11), it can be changed as follows:
- The vehicle's security mode is disabled.
- The ignition turns on, turns off, and then turns on again.
- Within ten seconds, the car owner must press the Valet service button as many times as the first digit of the code. If the password has not been changed, the key is pressed once.
- The car's ignition turns off and turns on again.
- After this, again within ten seconds you must have time to press the Valet service key as many times as the second digit of the password combination. In our case it is 1.
- The vehicle's ignition is switched off and reactivated.
- If you entered the code incorrectly, the siren should emit one beep.
- You must turn off the ignition within five seconds. The procedure for recording a new password is in progress. To do this, the Valet service button is clicked five times. One short and extended siren signal should sound. This indicates that the car alarm has successfully entered the mode of setting a new password.
- Then, within five seconds after the signals are heard, you need to press button 1 of the control key fob (this key is larger in size). The siren will sound once to confirm the action.
- Within ten seconds, use the Valet service button to set the first digit of the code. If you press it four times, the siren will emit 4 beeps.
- Then, within ten seconds, press the second button of the remote control, which is smaller in size. If everything is done correctly, the siren will emit two beeps. Within ten seconds you need to have time to set the second digit of the code; to do this, the Valet button is pressed the appropriate number of times. The siren will emit sound signals in confirmation.
- Then the ignition is turned off. There will be two siren signals - one short, the other longer. This indicates that the programming procedure was successfully completed.
If you lose or forget the password, you will not be able to fully use the alarm.
Andrey Tarakanov in his video spoke about the features of the Sheriff ZX-1095 anti-theft installation.
Conclusion
The Sheriff car alarm is a good system for protecting your car from theft. The high popularity of this solution is due to its low price (up to 5 thousand rubles) and a large number of functions. If you have the skills, you can install the alarm yourself; the kit comes with detailed instructions, but it is best to entrust this to a professional. However, you should not hope that it will protect your car from theft 100%. Its main function is to stall for time as long as possible. For complete protection, it is best to insure your car.
How to connect?
Let's consider connecting a 12-pin connector using the example of model 2500:
- The white contact is pulsed and is used to connect the turning lights of the car. The wire is connected to the positive output.
- The red contact must be protected by a 15 Amp fuse. This output is necessary to provide power to the built-in power circuits, we are talking about the side lights of the car.
- The red contact with the white stripe must be protected with a 5 Amp fuse. This output is necessary to provide power to the main electrical circuits of the anti-theft installation.
- The black and white output is used to provide power to the siren. The white wire is connected to the black strip of the red contact of the siren. The black output connected to the siren must be connected to ground, that is, the body of the car.
- The black contact is used for the power supply input; this element is connected to ground. It is important not to confuse this wiring with the black contact of the antenna adapter. The latter is connected to the control module separately.
- The dark blue output is the contact of the second CH2 channel. This element is a low current resistor contact and should be used to activate an external relay. This output must not be connected to the luggage lock opening circuit or to the input of the remote start elements, otherwise the central unit may be damaged. The contact is connected to output number 86 of the relay.
- The dark green contact is used to connect the negative polarity limit switches of the tailgate and hood. It is important that the switches are connected to ground, that is, the ground of the machine.
- The purple contact is used as an input for connecting door limit switches with positive polarity. The output is connected to one of the limit switches on the doors. It is not necessary to connect it to all elements, since on most machines the switches are connected in parallel. If the car uses limit switches with negative polarity, then there is no need to connect the purple contact to them.
- The brown output is used as an input for connecting door limit switches with negative polarity.
- The yellow contact is an input for connecting the ignition electrical circuits. This output must be connected to the electrical circuit of the lock that receives 12 Volts, provided that the key is located in the ignition or starter position. Before connecting, you need to make sure that the standard electrical circuit of the machine is not supplied with power if the key is in the off position.
- Orange output – pulse contact with negative polarity. This circuit is used to control the operation of the starter disable relay. The output must be connected to relay contact number 86. To do this, connect contact 85 from the relay to the car’s ignition circuit, which receives 12 Volt power if the key is installed in the lock in the ignition or starter position.
Connection diagram
Possible problems and their solutions
What operational difficulties may consumers encounter:
- The anti-theft installation does not pick up the remote control signal well. Sometimes the car owner has to press the key fob button several times to turn the protection on or off. This problem may be associated with installing the antenna adapter near metal parts of the body. If you made such a mistake during installation, then you need to correct it and reinstall the transceiver in another location. If the problem is due to a low battery in the remote control, then the power source must be replaced.
- The alarm goes off for no reason. This problem is usually due to the sensor sensitivity being set incorrectly. It is necessary to adjust the controller in accordance with the recommendations given by the manufacturer in the service manual.
- When the security mode is activated, the car doors do not close, although the siren is activated and the indicator shows that the protection is on. This problem may be due to damage to the wiring or oxidation of the contacts on the central unit connector. To identify a damaged section of the electrical circuit, you will have to ring the wiring. If all circuits are intact, then check the condition of the contacts on the control module connector. Damaged components must be replaced. When the problem is related to oxidation, the contacts simply need to be cleaned.
As practice shows, malfunctions in the operation of the anti-theft system are usually associated with errors made during operation.
Download installation instructions for Sheriff alarm systems for different models in PDF format
You can download service manuals for setting up and managing Sheriff car alarms using the following links:
| Manuals in Russian for operation and installation of alarm systems | |
| Operation and installation instructions Sheriff APS-2500 | |
| Operation and installation instructions Sheriff ZX-750 | |
| Operation and installation instructions Sheriff APS-35 PRO | |
| Operation and installation instructions Sheriff APS-2600 | |
| Operation and installation instructions Sheriff ZX-1070 | |
| Instructions for use and installation of Sheriff ZX-900 |
What is the price
Approximate prices for the purchase of Sheriff anti-theft systems:
| Name | price, rub. |
| Sheriff ZX-925 | 6500-7000 |
| Sheriff ZX-757 | 8500-9000 |
| Sheriff ZX-945PRO | 5000-5500 |
| Sheriff ZX-1070PRO | 9500-10500 |
| Sheriff APS-2400 | 4000-4500 |
| Sheriff ZX-750PRO | 7000-8000 |
| The price is valid for three regions: Moscow, Chelyabinsk, Krasnodar. | |