Every car, without exception, needs timely maintenance. This is quite normal, because different components have certain operational properties. And the breakdown of any device causes a lot of inconvenience to the driver.
However, you shouldn’t give up right away. Every problem can be resolved if the right approach is taken. Thus, it will be quite easy to explain the reasons for each breakdown.
One of these troubles that prevents the driver from driving a VAZ-2110 normally is a breakdown of the idle speed sensor (IAC or IAC).
General concepts. Idle speed sensor VAZ 2110
One of the most common troubles that prevents you from fully driving a car is the idle speed sensor of the VAZ 2110 and modifications. Although this device is called a sensor among drivers, it will still be correctly called the idle speed controller, abbreviated as IAC, because all automobile sensors are measuring equipment, and this product serves to automatically stabilize and maintain idle speed by supplying air to the engine VAZ 2110 with the throttle valve fully closed.
IAC is an important component of the engine and plays a significant role in the stable and uninterrupted operation of any VAZ vehicle.
Idle speed control
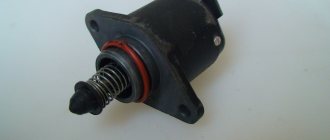
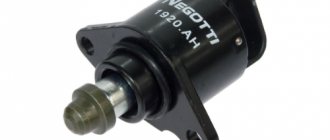
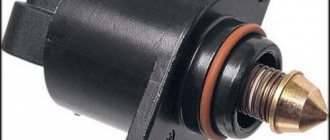
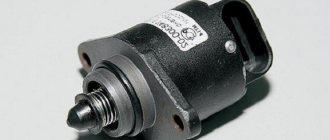
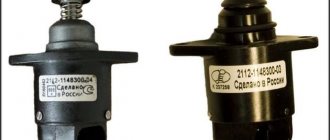
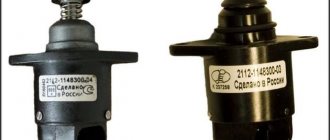
The VAZ 2110 idle speed sensor (abbreviated DXX) is an actuator, simply a valve consisting of an electric motor, a spring, and a rod on which a shut-off needle is installed (you can see it in the photo). It is through which the volume of air is dosed. That is, when the throttle of a VAZ 2110, 2112 is completely closed, and the controller determines that the idle speed needs to be increased, the IAC generates a command to change the position of the needle. It moves, partially or completely opening the intake port, through which air bypasses the throttle and then mixes with fuel. As a result, the engine does not stall.
How to remove IAC
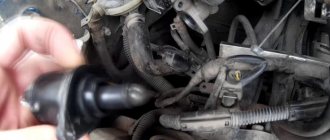
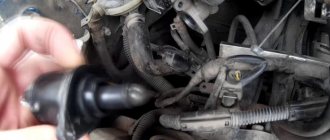
If signs of malfunction characteristic of the IAC are detected, then it will need to be removed (first for inspection). On the VAZ 2110, this sensor, which is small in size (easily fits in the palm of your hand), is located in a seat on the throttle body (can be seen in the photo).
Removing the idle air control
If necessary, its dismantling is quite easy - it is secured with only two screws. In extremely rare cases, it is necessary to remove the entire VAZ 2110 throttle assembly.
Dismantling is carried out in the following sequence:
- The VAZ 2110 is placed on the handbrake;
- The negative terminal of the battery is disconnected;
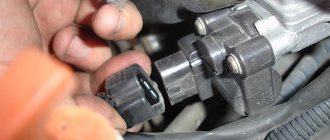
- The wiring harness connected to the IAC is disconnected;
- Be sure to clean the connection between the sensor and the throttle body to prevent dirt and rust from getting into the hole;
- Unscrew the fastening screws holding the idle speed sensor of the VAZ 2110.
Role of the device Idle speed sensor VAZ 2110
On injection engines that are installed on the VAZ 2110, the XX regulator serves to control the stable operation of the power unit. It is unlikely that you will be pleasantly surprised by a situation in which the idle speed starts to fluctuate, and every now and then the car will stall.
Some people do not know about another very important role of the idle speed sensor - warming up the power unit in case of low air temperature.
It is generally accepted that if there is an injector, there is no need to warm up the engine. The opinion is wrong. Do not overstress the engine, but first let it run for a while without increased speed. This will have a positive effect on the reliability and service life of the motor. .
How does the VAZ 2110 idle speed sensor work and how does it not work?
The VAZ 2110 idle speed sensor, or idle speed regulator, is designed to dose air into the intake manifold while the throttle valve is closed.
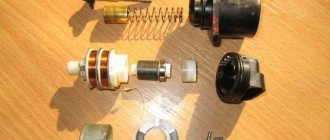
Idle speed sensor VAZ 2110 disassembled.
The device is not too complicated. It consists of a stepper electric motor, a calibrated spring-loaded cone and a rod. Installed in the intake manifold after the throttle valve . It is this regulator that is responsible for the smooth and smooth operation of the engine at idle speed.
Idle speed sensor VAZ 2110 on the throttle assembly.
Simply, the VAZ 2110 idle speed sensor regulator is a simple valve or actuator that controls the air supply when the damper is closed, according to commands from the electronic engine control unit. When starting the engine in cold weather, the ECU opens the idle speed control slightly and supplies more fuel to the combustion chamber, increasing the speed to speed up the engine warm-up.
Principle of operation.
Once the engine warms up to operating temperature, the stepper motor moves the conical valve stem forward and reduces the amount of air consumed, thereby reducing the speed. This is how the sensor works.
Signs of malfunction Idle speed sensor VAZ 2110
But it does not work in cases where:
- the engine does not hold idle, the speed fluctuates;
- the engine stalls at idle and when driving in neutral with the throttle closed;
- a cold engine does not start without an open throttle, that is, until we press the gas pedal, the engine will not start;
- low and unstable idle when the engine warms up.
In this case, the Check Engine lamp will not light up . If it lights up, then we look for the cause in the throttle position sensor. In the case where the symptoms are present, but the lamp does not light, the cause should be sought in our sensor. Therefore, now we will check its functionality.
Signs of IAC malfunction
Unfortunately, the 2110 VAZ DXX is not equipped with a self-diagnosis system, so the “CHECK ENGINE” light signal will not indicate a malfunction. Loss of performance on the VAZ 2110, 2112 is determined by the following main features:
- the engine “stalls”, for no apparent reason, at idle;
- idle speed “floats”;
- when a “cold” VAZ 2110, 2112 engine is started, there is no increased speed at all;
- The engine stalls, namely, after turning off the gear while driving.
The symptoms completely coincide with the failure of the VAZ 2110 TPS, but in the case of this sensor the “CHECK ENGINE” indicator will light up.
Causes of failure. Checking the idle speed sensor unit VAZ 2110
The reasons for the malfunction of the XX regulator are breaks in the electrical winding. engine and needle jamming due to dirt or corrosion. But the sensor is not always the “culprit” for missing idle speed. Therefore, before removing and checking the sensor, check its power supply circuit.
For all checks you will need a multimeter. The power circuit is checked with a device set to “voltmeter” mode. Diagnostics is simple - we disconnect the block with wires from the regulator, connect the “negative” probe of the multimeter to ground, and the positive one to the terminals marked with the letters “A” and “D”. With the ignition on, we take measurements. If the circuit is working properly, the readings should correspond to the rated voltage of the circuit. If there is no voltage, you should check the computer and relays responsible for powering the sensor.
To make it easier to check the sensor itself, remove it from the car. To do this, you only need a screwdriver. To remove a part you need:
- Disconnect the on-board network (remove the terminal from the battery).
- Find the regulator (installed on the throttle assembly).
- Disconnect the wiring (after operating the lock).
- Unscrew the two fastening screws;
- Remove the regulator.
The element is checked with the same multimeter, but switched to “ohmmeter” mode. We first connect the probes to terminals “A” and “B”, and then to “C” and “D”. With this measurement, the readings are 50-55 Ohms. Then we connect the probes to terminals “A” and “C”, and then to “B” and “D”. During this test, the ohmmeter shows infinity.
If the readings are correct, there is no break inside the sensor, and its incorrect operation is due to the needle getting jammed.
There is an alternative verification method that does not require the use of measuring instruments. This check is simple:
- Remove the sensor from the car.
- We connect the block with wires back to it.
- We power the on-board network (connect the battery).
- Holding the regulator in your hand, place your finger on it.
- We ask someone to turn on the ignition.
If the element is working properly, when the ignition is turned on, the needle will move, which will be clearly felt by your finger. Needle jamming can be eliminated by washing. For these purposes, use WD-40 or carburetor cleaning aerosol. We use these products to treat the needle and spring. Next, we dry the sensor and check its functionality. If a break in the winding in the regulator is detected or washing does not bring results, we replace the part.
Checking the operation of the mechanical part of the sensor
To check, remove the sensor from the throttle assembly.
However, if the electrical part is in order, you can check the mechanical part of the regulator by eye:
- Unscrew the sensor and remove it from the throttle body.
- We connect the contact block to the sensor.
- Turn on the ignition. When turned on, the valve should move forward. If this does not happen, the rod is coked or the stepper motor is not working properly.
- We measure the distance between the sensor body and the conical valve - nominal 24 mm.
We measure the distance with a caliper.
If we removed the sensor from the car and the electrical test passed, but we still did not achieve mobility of the cone valve, we try to clean the regulator using a soft swab, a cotton swab and WD-40 penetrating lubricant or an aerosol carburetor cleaner. Good luck to everyone and stable idle speed in any weather!
Sensor with carbon deposits
Soak the valve in cleaner.
Cleaned idle speed sensor for VAZ 2110.
Where is the idle speed sensor on the VAZ 2110?
The idle speed sensor is located on the throttle body. The idle speed sensor is located next to the throttle position sensor. The DXX is secured with two screws. It also happens that the sensor is mounted on the varnish.
Operating principle of the idle speed sensor (IAC)
The moment we turn on the ignition, the rod on the idle speed control fully extends and rests against a special calibration hole in the throttle pipe. Afterwards, the sensor counts the steps and returns the valve to its original position. The position of the initial valve depends on the firmware: for example, January 5.1 - 120 steps on a warm engine, Bosch - approximately 50 steps on a warm engine.
On a warm engine at the time of adjustment, the sensor is at around 30-50 steps. As the steps increase or decrease, the volume of air passing through the calibration hole constantly changes. Moreover, if the rod is extended, then the steps increase and vice versa. The stroke of the rod is 250 steps.
At the time of purchasing an idle speed sensor for a VAZ, the distance from the rod head to the flange should be no more than 23mm. Carefully measure the length of the protruding head.
The engine receives a certain amount of air necessary for normal engine operation, thereby regulating the idle speed.
The incoming air is analyzed by the mass air flow sensor (MAF) and, in accordance with its quantity, the Controller supplies the required amount of gasoline to the engine through the fuel injectors. Using the crankshaft position sensor (CPS), the controller monitors the number of engine revolutions and controls the idle speed control. This is how the process of supplying the required volume of air occurs.
On a cold engine, the controller increases the speed due to the idle speed sensor (IAC) and increases the engine speed when warming up. This mode allows you to immediately start moving without warming up.
It is recommended to install an idle speed sensor from the Omega group with the number 2112-114830. Also quite good RXX 2112-1148300-04 “KZTA”. It is worth noting that when purchasing you need to pay attention to the end mark 04. Sensors are produced with mark 01 02 03 04, so look at the mark of the old sensor and purchase the same one. If you put, for example, a sensor labeled 04 instead of 01, the sensor will not work. The following replacement is allowed: 01 to 03, 02 to 04 and vice versa.
Signs of a malfunction idle speed sensor VAZ 2110 (рхх)
Unfortunately, the idle air control is not equipped with a self-diagnosis system, so neither the on-board computer (BC) nor the illuminated check engine will notify us about this. But if you encounter the following problems, then the sensor needs to be checked (How to check the IAC?), cleaned (How to clean the IAC?) repaired (How to repair the IAC?) or replaced (How to replace the idle speed sensor?) in case of a malfunction.
- Stalls at idle.
- Idle speed fluctuates.
- When starting a cold engine, there is no increased speed.
- It stalls when the transmission is removed from the gearbox.
In principle, all the symptoms of death of ICH are similar to the symptoms of TPD. But the difference is that if the TPS dies, the on-board computer will show an error or the check engine will light up.
What decision needs to be made in this case?
Some see the solution to the problem in that the device simply needs to be changed. But replacing the idle speed regulator VAZ 22110 does not always lead to the expected result. This is possible if the culprit is a completely different reason. It can be hidden in the spark plugs and fuel filter.
The check begins with dismantling the fasteners that secure the throttle assembly. After the fastenings are loosened, it is gently moved slightly to the side. You need to see if there is voltage at the sensor. If yes, what are its indicators? And for this you will need to use the battery voltage, connect it to ground, and the device connect to the terminals, which are designated “A” and “D”.
Depending on the measurement results, certain conclusions can be drawn. If the needle on the scale shows less than 12 V, this most likely indicates a low battery. It may also happen that the instrument needle does not deviate at all. This indicates a break in the circuit. You should find this place.
The device may display a voltage exceeding 12 V. Then we can conclude that the problem lies in the resistance of the regulator. To measure it you will need a tester. Normal indicators are characterized by values of 50 or 55 Ohms. Additionally, a pairwise check is carried out. The resistance indicators should be infinitely large. If the measurement produces any other result, this indicates the need to replace the idle speed sensor.
Checking the serviceability of the IAC
Initially, put the car on the handbrake and place wheel chocks under the wheels. Next, gain access to the device, disconnect it from the supply wire block. The next step is to check the voltage using a regular voltmeter. Contacts to be checked: minus of the internal combustion engine and plus on the contacts of the wire block A, D.
To perform a proper check, turn on the ignition and evaluate the information you receive. The voltage on the device should be no more than 12 Volts. If the indicator is less, then there may be problems with the battery. If there is no voltage at all, then you need to check the electronic control unit and the entire circuit.
Next, carry out the inspection with the ignition on. Check pins A:B, C:D. The optimal resistance should be around 53 ohms. With the sensor removed and the ignition on, if you connect a power supply to it, the conical needle should move. If nothing like this happens, the node is faulty.
Otherwise, the malfunction lies in the operation of the regulator, but do not panic and immediately go to a service station. You can replace the unit in question or clean it yourself.
Cleaning IAC on a VAZ-2110
Servicing the regulator is a fairly simple matter and does not require much knowledge and skills from the motorist.
Initially, buy a carburetor cleaner and you can get to work.
- Disconnect the wire block from the sensor.
- Unscrew the two fasteners to remove the assembly.
- If necessary, completely clean the device from any dirt on the cone needle and spring.
- Do not bypass the seat on the throttle assembly; it also needs to be cleaned. Upon completion of the procedure, put everything in its place.
- If after the cleaning measures nothing has changed, all the symptoms of breakdowns remain, then the best solution would be to simply replace the regulator.
Installing the sensor in reverse order
Once the sensor and its seat are completely cleaned, complete assembly can begin. To do this, it is important to lubricate the rubber sealing ring with grease or unused oil and carefully install it in its normal place without damaging the integrity of the seal, without which operation of the vehicle will be impossible.
The work is done, now everyone knows perfectly well how to clean the idle air valve. It is safe to continue driving your vehicle.
Step-by-step replacement procedure
The replacement procedure is carried out in almost the same way as cleaning the device, but there are certain nuances:
- The battery is disconnected to prevent a short in the wiring.
- The plug with the electrical circuit is disconnected from the control device. If the car is equipped with an injection power unit, then to disconnect the connector you need to press on the plastic fastener.
- The bolts are unscrewed. As when cleaning, first unscrew the left fastener, and then the right one. The failed regulatory device is being dismantled.
- The surface on which the sealing element is mounted is also cleaned. The latter is checked for defects - abrasions, cracks, etc. If they are present, the sealing gum is replaced with a new one. Before installation, the seal is treated with engine fluid, after which it is mounted on the throttle seat.
- The controller is installed, a connector with wires for its power supply is connected. A wire is connected to the battery.
- After installation, a calibration procedure is performed. The microprocessor module must perform this independently; an electronic relay is used for this. To calibrate the new sensor, the ignition is turned on for a few minutes and then turned off. If the actions performed helped and the speed no longer floats, but remains at the same level, then the replacement procedure can be considered complete.
What do you need to know when replacing the IAC?
To change and install a controller that allows you to regulate idle speed, you need to pay attention to the position of the rod. It must not be allowed to be pushed forward too much. This can happen if the device is connected to the block and the ignition is activated before installation. It is not allowed to push the rod in by hand.
If the valve is installed with the needle extended and the retaining screws are tightened, damage to the unit may occur due to shearing of the worm gear. It is impossible to repair such a sensor. Depending on the vehicle model, after installing a new regulator, it may need to be calibrated. In some cars, this procedure is carried out using special equipment or a stand.
On VAZ cars, calibration is performed as follows:
- A terminal is connected to the negative output of the battery.
- The key is turned in the lock to turn on the ignition for ten seconds. There is no need to start the power unit.
- The ignition is turned off.
Learning to distinguish a fake from an original
Today, many people complain about the abundance of counterfeit products on the auto parts market.
If we talk specifically about the XX regulator for the VAZ 2110, then there are several key signs by which a fake can be distinguished from the original. Be guided by these data so as not to accidentally install a device of dubious quality and origin on your car.
Fake and original
- On fakes, the black body made of metal is 1 millimeter shorter than the real part.
- In the case of the fake, the three white rivets on the case have no heads. They must be present in the original. And the diameter of the caps is 3 millimeters.
- On fakes, the spring is made in white and has more frequent winding. In the original, the coiling is less frequent, and the spring itself is black.
- Pay attention to the rubber ring of the regulator. On fakes it is black and thin, but in the case of a real part, a reddish tint is noticeable. Plus the thickness is greater.
- Take a closer look at the tip. In fakes it is darker compared to the original spare part.
- There are no markings on the counterfeit packaging; the boxes are noticeably different in appearance.
- The original yellow sticker located on the case must have an outer frame. Manufacturers of counterfeits apparently forgot about it.
As you can see, recognizing a fake is not difficult. You just need to be more attentive to details.
The difference is in the boxes
Design, purpose and principle of operation of the sensor
IAC (idle air control) or IAC (idle air sensor) is a simple valve or actuator in design. Designed to control air flow when the throttle valve is locked. The control procedure is carried out in accordance with commands received from the microprocessor motor control module.
Russian car enthusiasts believe that the presence of an injector in a car allows it not to warm up the internal combustion engine, but this is not true. Do not overstress the power unit. When starting the internal combustion engine, it must run for a certain time without high speeds. The injector itself regulates idle speed, and the sensor is used to ensure stable speed when a load appears on the internal combustion engine. Both 8- and 16-valve engines use identical idle air controllers.
The device itself, presented in the form of a small-sized electrical unit, includes the following elements:
- spring element;
- electric stepper motor;
- a rod equipped with a needle at the end.
The presence of a working sensor makes it possible to correctly adjust the volume of fuel supplied to the combustion chambers. The volume of fuel can be less or more; we are talking about the supply of gasoline when driving at idle speed. The procedure for adjusting the fuel is carried out by pulling out or retracting the needle of the device, designed to shut off the gasoline supply channel.
Scheme of operation of the IAC on the “ten”
Where is the idle speed sensor located in a car?
The control device is mounted in the engine compartment. The sensor is installed next to the unit designed to control the dampers. The device is connected to this unit using special fixing screws.
Sensor compatibility, how to distinguish a fake
Domestic sensors are numbered 2112-1148300-хх, the last digits indicate - (Kostroma), “02” - KZTA (Kaluga), “03” and “04” - analogues of the above models equipped with caps. There is also a regulator 2112-1148300 manufactured by Omega (Moscow). It is generally accepted that sensors starting with the numbers 2112-1148300 are interchangeable, but experts recommend replacing them with completely identical ones
For example, change 2112-1148300-01 to a similar one or to 2112-1148300-03, and 2112-1148300-02 to a similar one or to 2112-1148300-04. To avoid buying a fake, a phenomenon that occurs on the auto parts market, pay attention to the following external signs (photo 2):
- high-quality font on packaging;
- presence of stickers with holograms on the body;
- the fake body is shorter than the original sensor;
- on the original there is no play in the locking needle;
- the needle should not rotate;
- the counterfeit spring is lighter in color and has more frequent turns;
- The O-ring of the original product has a distinct color and is thicker than that of the fake one.
What could be the sensor malfunctions?
Failures in the functioning of the regulator cause a large number of problems for the car owner. Accordingly, ignoring the problem for a long time can provoke an accident. Therefore, you should not neglect your own safety and it is advisable to identify the malfunction in the early stages.
Signals of a faulty regulator:
- The engine speed constantly fluctuates. You may notice a sudden increase/decrease in this indicator.
- When the engine is cold started, there is no increase in speed.
- When you turn on additional electrical appliances (headlights, stove, etc.), the idle speed decreases noticeably.
- The internal combustion engine stops at idle and when the gear is engaged.
In practice, there are other signs of IAC malfunctions, but in order not to make a mistake and confuse a sensor malfunction with other failures, it is important to know how the unit in question is checked
Choosing a replacement regulator
On the VAZ-2110 with both 8-valve and 16-valve injection engines, a sensor with catalog number 2112-1148300 is used. Additionally, at the end of the marking there is a prefix consisting of two numbers, for example, 01, 02, 03, 04. This index indicates the manufacturer of the regulator (01 and 03 - “Pegasus”, 02 and 04 - KZTA). When choosing a replacement regulator, pay attention to two nuances - the seal and the height of the needle protrusion above the body. Factory spare parts use a red seal, while counterfeits use a black rubber element. The height of the needle protrusion above the body is 23 mm.
Before installing a new regulator, it is recommended to coat the sealing ring with a thin layer of engine oil to ensure a tight fit of the part in the seat and eliminate the possibility of air leaks.
Communities › Lada 2110, 2111, 2112, 112, Bogdan › Blog › Diagnostics and replacement of IAC and DPD.
Hi all!
I hope the information from this post will be useful and will be useful to someone! Good luck on the roads and a full tank! The “symptoms” of a faulty throttle position sensor include the following:
1. Increased idle speed. 2. The engine stalls in neutral gear. 3. Idle speed floats. 4. Jerks during acceleration. 5. Deterioration in dynamics. 6. In some cases, the Check Engine light may come on.
Diagnosis of the throttle position sensor is carried out as follows:
1. Turn on the ignition, then check the voltage between the slider contact and the minus with a voltmeter. The voltmeter should show no more than 0.7 V. 2. Next, turn the plastic sector, thereby fully opening the damper, then measure the voltage again. The device should show at least 4 V. 3. Now turn off the ignition completely and pull out the connector. Check the resistance between the slider contact and any terminal. 4. Slowly, turning the sector, monitor the voltmeter readings. Make sure that the needle moves smoothly and slowly; if you notice jumps, the throttle position sensor is faulty and must be replaced.
Replacing the throttle position sensor:
1. Disconnect the wire from the “–” terminal of the battery. 2. Disconnect the block with wires from the throttle position sensor by pressing the plastic latch. 3. Unscrew the two mounting screws and remove the throttle position sensor from the throttle pipe. 4. Install the new sensor in the reverse order, but do not forget about the foam ring. The throttle position sensor does not require any adjustment, since the controller perceives idle speed (i.e. the throttle valve is completely closed) as the zero mark.
The “symptoms” of a faulty idle speed sensor include the following:
1. Spontaneous unregulated change in engine speed (sudden decrease or increase). 2. When turning on a “cold” engine, there is no increase in speed. 3. When using additional vehicle devices (heater, headlights), the idle speed is simultaneously reduced. 4. The engine stalls at idle and when shifting gears. It is necessary to remember that the readings of the VAZ 2110 injector idle speed sensor are not “readable” by the automatic on-board power system, and it is not integrated into the “Check Engine” alarm system.
Diagnostics of the idle speed controller is carried out as follows:
There are several ways to analyze the idle speed sensor, but the main ones - the simplest and most effective - are the methods described below:
1. First you need to “get” to the device, disconnect it from the connecting block of wires 2. Using the most common voltmeter, check for the presence of voltage - the “minus” goes to the engine, and the “plus” to the terminals of the same block of wires A and D. 3. Turns on ignition, and the received data is analyzed - the voltage should be within twelve volts, if less, then most likely there are problems with the battery charge; if there is no voltage, then you will have to check both the electronic control unit and the entire circuit. 4. Then we continue the inspection with the ignition on, and analyze terminals A:B, C:D one by one - the optimal resistance will be about fifty-three ohms; During normal operation of the IAC, the resistance will be infinitely high.
Also, with the sensor removed and the ignition on, if you connect a power supply to it, the conical needle of the sensor should move out; if this does not happen, it means it is faulty.
1. Remove the negative terminal of the battery. 2. Disconnect the IAC from the block harness. 3. Using a multimeter, we measure the resistance of the external and internal windings of the IAC, while the resistance parameters of contacts A and B, and C and D should be 40-80 Ohms. 4. If the instrument scale is zero, it is necessary to replace the IAC with a serviceable one, and if the required parameters are obtained, we check the resistance values in pairs B and C, A and D. 5. The instrument must detect an “open circuit.” 6. With such indicators, the IAC is in good working order, and if they are absent, the regulator must be replaced.
If the problem lies precisely in the operation of the regulator, then you should not rush and immediately go to a car service center, since you can clean the idle speed sensor yourself, as well as replace it.
Cleaning and replacing the idle air control.
The first thing you need to do is purchase a carburetor cleaner, and then get down to business: 1. The wire block is disconnected from the sensor. 2. Afterwards, both of its fastenings are unscrewed, and the sensor is removed. 3. If necessary, the IAC is completely cleaned of possible debris and contaminants on the cone needle and spring. 4. Also, do not forget to clean the mounting hole on the throttle assembly, where the conical needle of the sensor enters. 5. After cleaning, install everything in its original location.
If nothing has changed in the operation of the car - the same problems and inconveniences are present - then the regulator should be replaced.
It is worth noting that when purchasing you need to pay attention to the end mark 04. Sensors are produced with mark 01 02 03 04, so look at the mark of the old sensor and purchase the same one. If you put, for example, a sensor labeled 04 instead of 01, the sensor will not work. The following replacement is allowed: 01 to 03, 02 to 04 and vice versa.
Replacing the idle speed sensor can also be done without any problems:
1. The on-board system of the car is de-energized. 2. The block with wires is disconnected from the XX regulator. 3. The screws are unscrewed and finally the sensor is removed. 4. Attach the new device in the reverse order.
