Relay-timer for limiting the operating time of the heated rear window (mirrors)
Relay-timer for limiting the operating time of the heated rear window (mirrors) LTR-30 – turns off the heating after a set time. Switches current up to 30 A. Installation and installation are very simple: simply replace the standard relay. No additional connections or modifications are required.
Can be used on any cars.
Problem
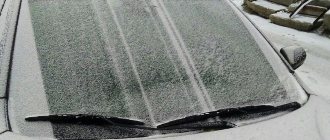
Whether in winter or rain, heated rear windows and mirrors are very necessary. But, having turned it on, we forget to turn it off and the heating works continuously throughout the entire trip. It would be logical for the heaters to turn off after a certain time , for example, after 20 minutes. During this time, the snow and ice have time to thaw and the water to dry, and then the need for a heater disappears.
It is equally important that the heaters only operate when the engine is running to prevent the battery from draining.
Connection
The LTR-30 relay is installed instead of the standard relay 904.3747.10 or 904.3747-11 to turn on the rear window heater and/or mirrors.
| Relay options LTR-30 |
When voltage is applied to the relay winding contacts 85-86, contacts 30-87 close. When connecting, it does not matter: contact “30” of the relay can be connected to the +12V on-board power supply of the car, and contact “87” - to the load (heater), the second end of which is connected to ground, and it is possible to connect vice versa, i.e. e. “87” – to +12V, and “30” – to the load. The control voltage can also be supplied to contacts “85” and “86” in any polarity.
| Relay diagram LTR-30 (simplified) |
Since the standard circuit for turning on the heated rear window, as a rule, does not have circuits for monitoring the ignition on via the power circuit (only the relay winding is turned off), the LTR-30 timer relay (replaced by relay K7 in the above circuit) has an on-board voltage control circuit for this purpose and turns on the heating only when the engine is running, and also turns it off when the ignition is turned off, even if the timer has not expired - so as not to drain the battery.
If everything is connected correctly, the relay is immediately ready for operation.
Operating principle of the LTR-30 relay
The relay has two operating modes:
1. When the relay is turned on briefly (up to 1 second) - voltage is applied to the relay “winding” - the relay operates in trigger mode. those. the first time - it turns on and the shutdown timer starts, the second short turn on - the load is turned off. This mode is convenient when using a non-locking button for turning on the heaters.
2. When the relay is turned on for a time of more than 1 second - voltage is applied to the “coil” of the relay for a time of more than 1 second - the load is turned on and the shutdown timer begins to work. After the set time has elapsed, the relay will open. The relay will also open if the voltage is removed from the relay “coil”.
When the relay is turned on (power is supplied to the relay winding), the power switch connecting contacts 30 and 87 closes and the LED indicating the relay status turns on.
After a set time (for example, 20 minutes), the relay will open contacts 30-87 and turn off the load until the voltage from the contacts of the relay winding is disconnected, while the LED reduces its brightness by half. If you remove the voltage from contacts 85-86 and apply it again, the time countdown will resume.
When the vehicle's on-board network voltage drops below 12.6V (can be changed), the relay turns off the load, continuing the timer countdown, and when the on-board network voltage increases again, the relay turns on the load - this ensures that the heaters operate only when the engine is running.
The shutdown delay time can be changed (see Relay programming).
In winter, you can use option “2” for daily heating of the rear window of the car: the heater switch is left in the “ON” position and every time you start the engine, the LTR-30 timer relay, withstand a 30-60 second delay to turn on for the engine to turn on operating mode will turn on the heated rear window for a specified time (for example, 20 minutes) and turn it off after this time or when the ignition is turned off. This mode will allow you not to touch the heating switch throughout the winter, making full use of the capabilities of the LTR-30.
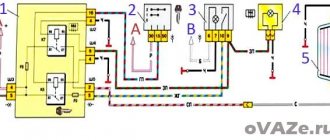
| Diagram of the rear window heating system 1 – mounting block; 2 – ignition switch; 3 – rear window heating switch; 4 – control lamp for turning on the heating; 5 – rear window heating element; KB – additional relay; K7 – relay for turning on the heated rear window; A – to power supplies. |
| Relay LTR-30 with cover removed |
Control is carried out by a processor from Microchip (USA).
Relay programming
To enter the shutdown delay time programming mode, it is necessary to turn the relay on and off 20 times with a frequency of approximately 2 on/off per second. If there is a break for more than 2 seconds, the countdown must be resumed. It is more convenient to program by installing the LTR-30 relay in place of the high beam relay - you can enter the programming mode by pressing and releasing the flashing lever of the high beam headlights. Entering the programming mode is indicated by a long (1.5 sec) ignition of the LED and high beam headlights, if the LTR-30 relay controls their inclusion.
Next, the counting of the positions of 5-minute time intervals begins: 1st – one blink (flash) of the LED and headlights, 2nd – two, third – three, etc. until twelve. After this, a long interval of indication lighting (2 seconds) is switched on, during which the “off timer” mode is set. The cycle is then repeated one more time. In the right place, i.e. At the desired position, you need to briefly press the switch lever (turn on the relay) of the headlights. The larger the position number, the longer the delay time. Programmable shutdown delay time - from 5 to 60 minutes, evenly distributed over 12 time interval positions. That is, for example, to set the shutdown delay time to 20 minutes (approximately), set position 4 (press the lever after the fourth series of four flashes).
Design of the rear window heating system
The system that helps clear the rear window of ice, snow or fog is not very complicated in design. The electrical circuit in general terms can be depicted as follows:
- C - generator.
- E230 - OZS system switch.
- J519 - on-board electrical network control unit.
- Z1 - heating element of the OZS system.
Although there may be some differences in different car models, nevertheless, if we consider it in detail, then in principle it includes the following main elements.
- Mounting block.
- Ignition switch.
- Heating switch ZS.
- Indicator lamp signaling the activation of the OZS.
- Heating element of the OZS system.
K6 - additional relay. K7 - OZS switching relay. A - connection to power systems.
In addition, the system has fuses, terminals and wires that connect all elements into a single whole.
When the ignition key is turned, the OZS is turned on by pressing a button, to which power is supplied through an additional relay K6. At the same time, the rear window heating relay K7 is activated, the heating element is connected and at the same time the control light comes on.
The design of the heating element on the rear window may also vary. In the standard version, it is a mesh of thin metal nickel threads, which are connected by two conductive busbars located on opposite sides. On one side, a 12V current is supplied to the bus, and on the other, the bus is shorted to ground. Such devices are attached to the glass using special glue.
On some car models, the heating element is applied to the glass using spraying, for example, aluminum. A thin film with good light transmission is attached on top of this coating using glue that conducts current.
System diagram
As can be seen from the diagram, using a K7 relay, type 904.3747-10, the glass heating element, which is located in the mounting block, is turned on. The system is designed in such a way that it does not work when the ignition is turned off; this is done specifically to prevent the battery from being discharged by the heating element. Therefore, power is supplied through an additional relay K6, which is activated and supplies voltage to element K7 only when the ignition is turned on. After the power has arrived, it is supplied to the heating element through a special fuse F8 which is connected directly to the power sources. Therefore, the first thing to do in case of this malfunction is to check fuse F8, relay K7-K8 and the wires that connect all the elements to each other. The malfunction can be identified using a tester, or by replacing the relay with a new part.
Principle of operation
Electricity is used to heat the rear window: threads of thin metal with increased resistance are stretched across the canvas. Under the influence of current, they heat up and dry the water droplets.
The principle of operation of this system is simple: the positive charge of the battery goes through the ignition switch to one of the switching devices, and the negative charge through the car body to the other. When the heating button is pressed, the devices close an electrical circuit, which includes the threads stretched onto the rear window.
Electrical diagram for connecting the heater
To successfully diagnose and repair the rear window heating system of a car at a professional level, you need to know the electrical connection diagram of the heater and understand the principle of its operation.
The photo shows a typical diagram of connecting a car's rear window heater to the on-board electrical wiring. Let's consider the principle of its operation.
The supply voltage from the positive terminal of the battery through the ignition switch and fuses is supplied to the heater switch and to the 30 (or 87) power contact of the relay. The negative terminal of the battery is connected to the car body, one of the glass heater terminals is also connected to the body. When you press the heater power button, voltage is applied to the relay winding, the relay is activated, the power contacts close and connect relay terminals 30 and 87 to each other. The current enters the heater, flows through a group of parallel-connected filaments and returns through the car body to the negative terminal of the battery.
Signs of breakdown
You can understand that there are problems with heating by the following signs:
- The glass begins to sweat when the warning light does not work. The first thing you need to do is check what voltage and serviceability of the fuses
- The glass does not heat up when the control lamp is on. The reason may be due to lack of voltage
- Condensation appears in some places; this may be due to a broken thread. Can be restored through repairs, special varnishes
- Defrosting does not occur even though the system is working properly. This can happen if the glass is heavily iced and there is not enough voltage; you need to clean the ice yourself.
There can be many reasons for the breakdown, ranging from the switch to the wiring itself, which can only be repaired by disassembling the entire dashboard.
If the reason is a broken thread, you can try to restore it. There are many different ways to solve this problem, which look like this:
- To eliminate a break, up to one millimeter, you need to prepare a special adhesive composition, for example (Kontaktol, Elekont), a syringe, or a glass cleaner. Special glue is applied to the area where there is a break, and insulating tape is tightly applied on both sides.
- You can use soft soldering or resort to the option of galvanic application of the material. But this procedure is labor-intensive and difficult to carry out in garage conditions.
- If the width of the gap exceeds two millimeters, you need to use a tinned copper core with a cross-section of 0.2 millimeters. It is better to perform soldering with POS-61 solder, but do not tinning the thread.
This is interesting: Car painting. Car airbrushing and tuning
What causes interior glass to sweat?
Why do the windows on a VAZ 2110 fog up? This is a question that baffles half of car owners. I’ll say right away that this most likely happens in cold weather due to increased humidity in the car interior, from which I’ll now explain:
- The most common reason is if the driver has a hangover, the windows sweat from fumes
- The second most common reason is that the interior heating radiator is leaking quietly, the liquid collects under the rugs, while the leak is small, it is almost unnoticeable, so it is worth checking the condition of this radiator
- Another reason for glass fogging may be the wrong direction of the stream of warm air from the stove; if the glass is blown, it dries, when it is not blown, it may begin to “sweat”, this, by the way, is the main reason why the windshield on a VAZ 2110 sweats
Sources of the problem
When the rear window heating malfunctions, you should pay attention to the main points:
- relay;
- wiring;
- circuit breakers;
- threads
You don't need any special skills to replace them. If you study the instructions and know where the heated relay for the car rear window or front structure is located, the wiring diagram, the fuse mechanism, then you can completely do without the help of a specialist.
System fuse
The element may burn out under certain circumstances, increasing the risk of shorting. As a result, the heating will not turn on because there is no power being supplied to it, because the fuse is a protective mechanism for the heating. To understand the location of the elements, you should refer to the vehicle's owner's manual. Algorithm of actions when the location of the fuse is found:
- Remove the device.
- Inspect for integrity.
- Carry out a performance check separately from the entire device.
- Determine the cause of the malfunction.
- Replace individual spare parts or the entire mechanism.
If necessary, the fragment is replaced with a new part, since it is unlikely that anyone will undertake to restore it - it is inexpensive.
Wiring
After diagnosing the fuse or replacing it, further searches for the malfunction of the rear window defroster (if it still does not function) must be looked for in the wiring. Cause:
- bummer;
- break on the fastening;
- fracture;
- burnout.
As a result, no current flows to the heating poles and the system does not work. You can perform simple diagnostic steps using a multimeter. To do this, you need to turn on the heating, and then measure the voltage at the heater terminals. They are usually located at the bottom of the glass or on the sides.
It is worth examining the entire length of the wiring for integrity and then, if there is a break anywhere, it will be found. Instructions:
- disconnect the terminals;
- clean connection contacts;
- replace wires.
Assembly is carried out after re-checking the operation with a multimeter.
Threads
If one or more thread strips are broken, then no current flows through them. Therefore, ice will appear in some areas, which impairs visibility and reduces driving safety. Complete disassembly of the heating equipment will help verify the break. The solution to the problem is to replace faulty elements with new ones.
Heating relay
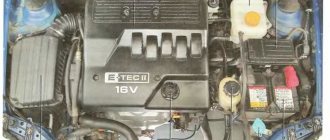
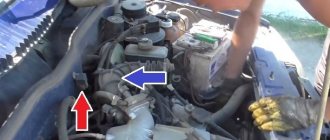
The relay is responsible for heating the windshield. If the start key does not turn on the device, you should check the relay. It turns off the heating when the car engine is turned off. The element is located in the mounting block. The exact location is specified in the vehicle manual.
Controls
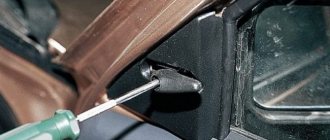
If the device does not start, the reason may lie not in the relay, but in the dysfunction of the power button itself. It is equipped with an indicator light, and if the sensor does not light up, it means that the device is faulty. The problem must be looked for in the contacts of the toggle switch, to which the threads do not conduct current. Solution: replacing the element.
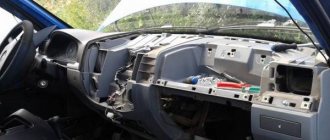
Additional block
It is located under the center console and is covered with a lid. One part is accessible from the right side.
Designation
p, blockquote 27,0,0,0,0 —>
- 15A - Ignition module, controller
- 15A - Canister purge valve, vehicle speed sensor, oxygen concentration sensor (heating), air flow sensor
- 15A - fuel pump, fuel pump fuse, injectors
- Electric fan relay
- Fuel pump relay
- Main relay (ignition relay)
The other part is on the left side of the console:
Decoding
p, blockquote 31,0,0,0,0 —>
- Central locking control unit
- Immobilizer block
- Relay for turning on rear fog lights.
On our channel we also prepared a video on this publication. Watch and subscribe.
p, blockquote 33,0,0,0,0 —> p, blockquote 34,0,0,0,1 —>
Do you know how to make the material better? Write in the comments.
Source
How to find the location of a broken glass heating filament
Now let's talk about how to check where the rear window heating thread has broken. To do this, you will need a voltmeter or ohmmeter of your choice. Do the following:
- Inspect the rear window - sometimes the break is visible to the naked eye: the thread is interrupted and resumes after a few millimeters.
- Turn on the heating and see where the water drops have not dried. Take a magnifying glass and look at this area more closely.
- Let the heating function remain active. One metal rod of the voltmeter needs to be connected to the positive heating terminal, and the second should be drawn along the thread from the side of the clamp with the “-” sign. Keep an eye on the indicators: the break will be where 0 volts is displayed.
- Take an ohmmeter and attach one probe to the common wire (the negative of the battery is connected to it), and carefully lean the other one against the center of each thread in turn. The break is where the resistance jumps to 4-6 ohms.
Restoring the conductive layer
First of all, purchase a special paste that conducts electricity from a car dealership. Then you need to remove the rear window. Prepare the work surface: clean it of dirt and dust, and also treat it with a degreaser. We clean the ends of the damaged thread. Apply tape and leave a small gap.
Apply the purchased paste and leave for a day. Then we remove the tape and make sure that the heating is working. If not, there is nothing left to do but replace the relay yourself. But the audible clicks indicate rather that the mechanism is in good condition. Therefore, most likely the problem in your case is with the thread.
Rear window defroster malfunctions
The operation of the rear window defogger is not paid attention to until the glass fogs up or becomes covered with frost. After turning on the heater, it suddenly turns out that after a few minutes the glass did not become transparent or visibility appeared only through part of the glass. Depending on the external manifestation, even without measuring instruments, one can immediately make an assumption about the cause of the failure.
This is interesting: Power steering hums when cold or constantly: causes and repair of power steering
Please note that the heated rear window and rear view mirrors of the vehicle can only be turned on when the ignition key is turned to the ON position. In some car models, the heater can only be turned on when the engine is running. This is done to prevent severe battery discharge, since the rear window heater, depending on the car model, consumes a current of 10 A to 25 A. For comparison, one car headlight consumes a current of only 5 A.
The heater does not turn on
If the indicator on the button for turning on the heated rear window does not light up after pressing it, then most likely the fuse has blown or the button itself is faulty. If the indicator lights up, but not a single thread heats up, then the cause of the malfunction may be the relay or connectors connecting the heater to the electrical wiring. In this case, using the documentation for a specific car model, it is necessary to determine the location of these parts and replace the one that failed. It is not always possible to quickly find the installation location of the relay, but there is a way to check its serviceability indirectly, which will be discussed below.
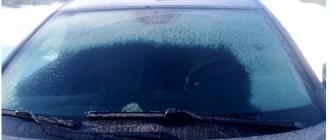
The glass is slowly fogging up
Sometimes there is a case when, after turning on the heater, the glass fogs up for a time significantly exceeding several minutes. In this case, if it is not very cold outside, the reason may lie in poor contact of one of the connectors of the electrical circuit. As a result, the contact resistance increases, the current is limited, and as a result, the power released on the glass heater filaments decreases. To check such a malfunction, it is necessary to measure the voltage at the input terminals of the heater and battery using a DC voltmeter (multimeter or pointer tester turned on in the DC voltage measurement mode). The voltages should not differ by more than one volt.
Horizontal streaks of fog remain on the glass
And finally, the most common case of malfunction of the rear window heating system of a car is the breakage of one or more heater threads applied directly to the glass. This type of malfunction is immediately visible by the horizontal stripe of remaining fog on the glass after turning on the heater.
The conductive tracks on the rear window have low mechanical strength and are easily destroyed when exposed to impact. Therefore, it is prohibited to remove frost and ice from glass using a scraper. Only wipe with a soft cloth is allowed. It is also necessary to ensure that when transporting long items they do not rest against the rear window. As a rule, individual heater filaments stop working as a result of their accidental mechanical destruction. In the area of the damaged thread, after turning on the heating, streaks of sweat or frost remain.
When renovating an apartment, I was transporting floor skirting boards in my car and did not notice how one of them rested against the rear window. After a while, when I needed to warm up the rear window, I saw the result of my carelessness. The two heater strips running through the middle of the glass did not heat up, which significantly impaired the view of the road. Upon visual inspection, one gap of about 1 mm wide was found on the non-functioning strips, as in the photograph. The question arose about the need to repair the rear window defroster.
Method number 2
This method involves the use of non-ferrous metal shavings as a conductive element. Also, to repair the thread, we will need a transparent varnish (it is advisable to use a thick one, like for nails).
Mix the shavings with a brush and apply to a strip previously sealed with tape, as in the previous case. After an hour, the varnish will completely dry. The method is quite old. It is not always possible to connect damaged contacts as needed. Therefore, if it is possible to buy conductive glue, it is better to use the first method. It will be much faster, easier and more reliable. The cost of a 10-gram tube with this composition is 78 rubles. This volume is more than enough to repair several damaged heating threads.
Features of problems with imported cars
On domestic cars, only the rear window is predominantly heated. Foreign-made vehicles have heated glass and mirrors. When heating starts in the aft section, other positions are heated in parallel. If pressing the button does not activate the mechanism, the relay and fuse are checked. On foreign cars, the electrical circuit contains several fuses, so it is important to find which of the elements corresponds to the rear window and which to the mirrors. For example, if the heating is not activated on a Chevrolet Lacetti, you should look for elements with indexes F6, Ef7, including relay K10.
Restoring the glass and mirror heating function is carried out through the electronic control board. It fails due to stripes breaking or contacts being soldered.
VAZ 2110 2111 2112 (injector) fuses and relays
VAZ 2110 2111 2112 (Lada 110 111 112) - a family of cars produced in 1995, 1996, 1997, 1998, 1999, 2000, 2001, 2002, 2003, 2004, 2005, 2006, 2007, 2008 and 2009 with sedan and hatchback bodies and a station wagon mainly with 8 and 16 valve gasoline engines ( injector , carburetor). In this article you will find a description of the fuse and relay blocks of the VAZ 2110 2111 2112 with diagrams , photographs and their locations. Electrical connection diagram. Let's highlight the fuse responsible for the cigarette lighter.
The purpose of fuses and relays in your VAZ 2110 (2111 / 2112) relay may differ from those presented and depend on the year of manufacture. The current purpose can be printed on the block itself.
How to restore heated rear window
When a damaged area of the heater filaments is found, it is worth thinking about how to restore the heating in full. Of course, you can restore it simply by replacing the glass, but this is a rather expensive operation, while there are several ways that allow you to eliminate the defect on your own, without too much effort. Before work, it is necessary to prepare the place where a break is detected and the heating filaments will be restored. To do this, the conductive path in the right place must be carefully cleaned of varnish and degreased with alcohol. A characteristic metallic sheen should be visible on the prepared area.
Track restoration can be done in the following ways:
- Using special conductive paste. It is applied to cold glass. When performing work, do not turn on the heating. The path, prepared as described above, at the site of damage should be limited on both sides with adhesive tape. The paste is then applied to the area that is not working. It hardens, as a rule, within 24 hours; you can check and use the heating after this day has passed.
- Using metal filings. This method allows you to restore functionality when there is no paste. For this, pre-prepared small iron filings are used. During the work process you will need transparent glue and a magnet. It must be secured over the area where the damage is detected, and then iron filings must be applied to this place. The magnetic field will force them to line up along the section of the track that is not working. Having leveled the sawdust and ensured electrical contact with the damaged area, they are covered with a layer of glue. You can check whether the repairs have been successfully completed and whether the heating is working in one and a half to two hours.
- Using shavings and paint, in this case shavings of non-ferrous metals are used. It is mixed with paint in such a way that a mass similar to plasticine is obtained. Using tape, a kind of stencil is formed around the damaged area. The heating is turned on, and the prepared mixture is applied to the desired area, and a characteristic hissing may occur at the point of contact, but after a while it disappears. This mixture hardens in twenty to thirty minutes; you can check and use the restored system after an hour.
This is interesting: How to adjust the side door on a Gazelle?
There are some other methods that allow you to restore a non-working heating system, but those described are the simplest and most accessible.
Unfortunately, such methods are unlikely to be applicable to windshield restoration. It uses thinner conductive tracks and the repair area will appear quite rough, impairing the driver's visibility. For a car, heated rear window is not a luxury, but can significantly improve driving safety. And if it does not work, then with the help of fairly simple techniques you can restore its functionality.
Repair materials
To fix problems with the rear window defroster, you will need:
- paste or glue capable of passing current (special ones, sold in automotive supply stores);
- or copper-brass powder and paint;
- or zinc chloride, material for joining workpieces POS-18, soldering iron;
- as well as a repair kit for heating filaments (if the gap is very large, several centimeters).
Conductive varnish, paste, paint
Special pastes, varnishes, and paints are characterized by excellent adhesion to glass. In addition, the composition includes crushed palladium, gold and silver, due to which the conductive properties are increased. Restoration of heating filaments using such means occurs quickly and efficiently. As a result of the repair, a long-term effect is achieved.
This repair composition is a two-component product, so before use, its two parts should be thoroughly mixed in a separate container. You need to use the varnish according to the standard scheme, applying it with a cotton swab or brush. In this case, the layer thickness should not exceed 2 mm. The product hardens in about 30 minutes, and after a day you need to carefully remove the remaining substance.
Steel powder, glue
This method is highly versatile since all components can be found in the garage, saving money.
For repairs, you will need steel or other metal powder, as well as a binder, which can be used as varnish or glue.
Repairs must be carried out in the following order:
- Install a magnet on the outside of the glass at the break point;
- clean the tear area, stick masking tape on the sides;
- use a file to grate the powder using any metal part;
- Place the resulting mass under a magnet from inside the glass;
- coat the iron powder with varnish or glue;
- let the composition dry, remove the tape.
Every driver should at least in general understand the principles of operation of the heated rear window and the possible causes of system failure. This will allow you to restore your performance on your own, since such work does not require special skills and abilities.
Methods for repairing heating element filaments
There are several ways to restore the functionality of a heating filament at home.
Using conductive pastes and adhesives
The easiest and most effective way is to use special repair kits, such as DONE DEAL DD6590, designed to repair rear window defroster threads and contacts by both amateurs and professionals. The good thing about this method is that it does not require tools or materials. It is enough to apply a little conductive paste from a syringe to the site of the thread break according to the attached instructions, wait until the paste hardens and the repair is completed. But this set costs more than $15.
The second method is similar to the previous one. But instead of a proprietary set, they use purchased conductive adhesives, for example, Elekont, a Moscow manufacturer. Glue is applied to the place where the thread breaks, overlapping the entire part of the thread by a centimeter on each side. To obtain a neat look, use a stencil made of electrical tape or adhesive tape. For reliability, the glue is applied twice. It is advisable to lay a piece of tinned copper wire with a diameter of 0.3-0.5 mm between the layers of conductive glue.
There is an opinion that conductive paste or glue for repairing glass heater filaments can be made independently by mixing paint or glue with brass filings in a one-to-one ratio. The resulting composition is applied in a thin layer through a stencil to the place where the thread breaks in several layers. But the reliability of this technology has not been confirmed by practice.
Electroplated copper deposition
Another method is galvanic copper deposition. The heater filament repair method seems attractive. But from personal experience I can say that the reliability of such coatings at home is low. So I was hesitant to use this technology.
Using soft soldering
A mechanical method of restoring the integrity of the rear window heater filaments, using soft soldering, has become widespread. I tested the reliability of this method when repairing rear window heating filaments in my own car. The step-by-step instructions below, written based on my experience, will allow you to easily repair the heater filament yourself in just a few minutes, with virtually no financial costs.
On the advice of theorists on the Internet, I made a big mistake and tried to clean the thread with sandpaper. As a result, instead of a break in the thread 1 mm wide, there was a break larger than 1 cm. The thread strip is very thin, only a couple of tens of microns, and can be erased instantly even with the finest-grained sandpaper. The heater threads are already not covered with anything, and it is enough to degrease the soldering area using a rag soaked in alcohol or acetone.
If the width of the thread break is less than 1 mm, then you can do without soldering an additional conductor. In my case, the width of the gap was large, and I had to first prepare a piece of copper wire for the jumper. A current of about 1 A flows through one heater thread. Based on this, we select a wire with a cross section of 0.17 mm 2 from the wire cross-section table, which corresponds to a diameter of 0.45 mm. The length of the copper jumper must be equal to the width of the thread break plus 2 cm. Before soldering, the jumper must be tinned with a thick layer of POS-61 tin-lead solder. There is no need to tin the heater thread.
In order for the solder to reliably adhere to the heater thread, before soldering the jumper, you need to lubricate the thread in the soldering zone with a thin layer of zinc chloride flux using a brush.
Next, the jumper is pressed against the heating thread and heated for one second with a 12 W soldering iron. The hand is moved to the side. The jumper should be held on by a thread. Trying to tug it to check the quality of soldering is unacceptable; it will fall off and also tear off a piece of the heater thread. Unfortunately, this has been verified empirically. As a result of experiments, I eventually had to solder a jumper 5 cm long.
After soldering one end of the jumper, the second is pressed tightly to the thread and is also heated with a soldering iron. After soldering is completed, in order to remove residual acid flux, the glass is thoroughly washed with water.
To top it off for reliability, although this is not necessary, I covered the soldered jumper on top with transparent “Moment” superglue based on cyanoacrylates, the heat resistance of which is about 70°C. The heater does not heat up above this temperature.
As a result, the time to repair a broken thread with your own hands, taking into account all the preparatory work, was no more than ten minutes. The repaired threads have been in service for more than three years.