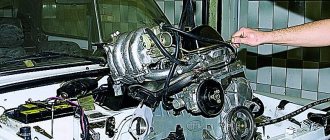
Valve adjustment algorithm for Lada Largus
The valve mechanism refers to the engine's gas distribution system. The efficiency of the power unit depends on its correct settings. Cars of the Lada Largus family are equipped with Renault engines with one gas camshaft and 8 valves - the K7M engine - and with two camshafts and 16 valves - the K4M engine. An important parameter for adjusting valves is the gaps between them and the camshaft cam. They must strictly comply with technical regulations. Sixteen-valve K4M engines are equipped with hydraulic compensators, and they do not provide the ability to adjust the clearances.
Which unit is better to choose?
If you want to buy a Largus, then you should buy a luxury package or a seven-door model, since in this case under the hood you will have a more reliable and modern engine model with sixteen valves. This is a more practical option, suitable both for traveling in big cities with a lot of traffic jams, and for driving on the highway.
These K4M engines are produced in Russia (marked P) and in Spain (marked with the letter D in the serial number). Despite the large number of jokes about the domestic automobile industry, the build quality of the Russian unit is in no way inferior to the Spanish one. Changes in the operation of the production line have led to the fact that motors produced from the domestic assembly line absolutely meet international standards. This was also noted by Francois Goujon, who is the head of.
When valve adjustment is required
Engine valves increase in size when exposed to high temperatures. For this reason, adjustment can only be carried out correctly on a cold engine. A schematic diagram of the valve mechanism is shown in the figure.
Lada Largus engine valve mechanism diagram
- Clearance adjustment nut.
- Lock-nut.
- Plate.
- Crackers.
- Spring.
- Oil scraper cap.
- Camshaft cam.
- Rocker.
- A – Thermal gap.
According to the manufacturer's regulations, thermal clearances must strictly comply with the following values:
- for exhaust valves – 0.25-0.30 mm;
- for intake valves – 0.01-0.15 mm.
It is recommended to perform the adjustment every 100 thousand kilometers, as well as when extraneous metallic sounds appear in the head and the camshaft clicking at idle.
WHY CHOOSE US
The procedure for adjusting the thermal gap in a car service is very similar for different types of engines.
In most cases, you need to do the following:
- cool the engine to the temperature determined by the manufacturer (within +15 - +20 C), which will allow you to more accurately measure the gaps;
- measure the valve clearances at least twice with the camshaft turned a full turn;
- adjust the valves with feeler gauges or using a special device with a micrometer.
Any adjustment requires a set of feeler gauges approximately 10mm wide. When using such tools, certain errors in setting the gaps are possible, so adjustment with a bar with a micrometer is considered more accurate. If you have the necessary tools and appropriate qualifications, the master is able to adjust the eight-valve gas distribution mechanism within 20-25 minutes.
Why do you need to adjust valves?
Timely adjustment of the valves will prevent unstable operation of the engine gas distribution mechanism. Valves provide the intake and exhaust process in the cylinders, and since all parts of the valve mechanism heat up, they will increase in size during engine operation. To prevent damage to the timing belt, the gaps between the valve head and the seat must be adjusted.
They check how the valves are adjusted at a certain frequency specified by the engine manufacturer (approximately 20-30 thousand km). You can obtain information on thermal clearances for motors of a certain brand in the relevant technical literature. Each such adjustment must be completed by a test run of the engine. This procedure helps to increase productivity and avoid early engine breakdowns and repairs in Kazan.
If you need to adjust the valves, contact our specialists. We will do everything quickly, efficiently and inexpensively! Call!
Total 12 companies found
Adjustment procedure for an 8-valve engine
The Lada Largus valves are adjusted in accordance with the technical regulations of the manufacturer. First, you need to place the car on a level surface, jack up the front wheel, engage fourth gear, open the hood and remove the air filter housing, disconnecting all the pipes. Then you should remove the high-voltage wires from the spark plugs, the connector from the ignition module, release the wiring harnesses and take them towards the passenger compartment.
Before removing the valve cover, you need to wipe it so that when removing it, dust or dirt does not get on the valve mechanism or the block head. For convenience, you can remove the ignition module.
The next stage is setting the top dead center (TDC). To do this, you need to slowly rotate the jacked wheel and make sure that the letter “F” appears on the stiffening rib of the camshaft drive gear. In this case, the piston of the first cylinder will be at TDC on the compression stroke, and both valves will be closed. Cylinder numbering starts from the flywheel side. Armed with a set of feeler gauges, pliers and a 10 mm wrench, you can make the adjustment yourself.
A feeler gauge with a thickness of 0.15 mm is used for the intake valve, and 0.25 mm for the exhaust valve. They need to be inserted sequentially into the gap between the rocker adjustment screw and the valves. The feeler gauge must fit in with a slight interference fit, otherwise the gap must be adjusted. While holding adjusting nut 1 with pliers (see Fig. 1), you need to loosen lock nut 2 with a 10 mm wrench. Then set the required gap with nut 1 and lock it with nut 2, holding it from turning with pliers.
Check again and repeat the settings if necessary. A similar procedure must be performed for the third cylinder, turning the crankshaft 180 degrees, then for the fourth and second. It is important to follow the order of working with the cylinders according to scheme “1342” so that the camshaft cam 7 is in contact with the rocker 8 at a minimum radius from the center of rotation.
How to remove the belt?
- Before performing actions, we determine the position in which the camshafts are present.
- For this purpose, we dismantle the air intake manifold resonator and remove the plugs that are present in special openings on the left end of the block head. It is convenient to remove the plugs using a screwdriver.
- Now, by rotating the crankshaft, we reach the position of the camshafts when their marks on the ends of the gears coincide with the upper plane of the head surface (viewed from the end of the engine).
- To immobilize the camshafts, we use a device installed in the corresponding grooves on the designated shafts.
- To check the correct position of the crankshaft, we resort to the hole located under the oil pressure monitoring sensor inside the unit. In normal mode, this hole is closed with a plug.
- After turning the protective plug into the hole, we screw a control bolt, the length of the threaded part of which is 75 mm, and the size and type of the thread itself is “M10”. If the crankshaft is in the correct position, then we see the possibility of completely screwing in this bolt, which will subsequently rest against the surface of a special pad located on the shaft. This action will also help secure the shaft from the risk of turning during repair operations.
- Now we loosen the tension on the belt drive. For this purpose, we “arm ourselves” with a size 13 wrench and loosen the nut securing the tension roller. We relieve tension in the belt by turning the designated roller against the clock.
- The loose belt is completely removed from the LADA Largus.
- Next, we take advantage of the opportunity to remove the tension mechanism and support roller (we also replace them). To dismantle the roller itself, we use a Torx wrench with size T50 in our tool kit.
You will need: remove the generator belt, the right wheel and the plastic shield of the engine compartment, prepare a “10”, “17” key, a “19” socket, and a screwdriver.
Procedure:
- _x000D_
- Remove the plastic engine cover. _x000D_
- Remove the timing drive protective cover by unscrewing the three fastening bolts. _x000D_
- Timing diagram. _x000D_
remove the plastic casing of the Lada engine remove the plastic timing casing Lada timing diagram 8 valves Set the piston of the first cylinder to the top dead center position:
- _x000D_
- Turn the crankshaft clockwise by the bolt until the mark on the toothed pulley aligns with the antennae on the rear timing cover. _x000D_
- Remove the window plug at the top of the clutch housing and make sure that the mark is not located opposite the scale slot. _x000D_
- Secure the crankshaft from turning by inserting a screwdriver through the window between the flywheel teeth. _x000D_
Turn the crankshaft clockwise until the timing marks are aligned, check the alignment of the timing marks, insert a screwdriver into the flywheel
- _x000D_
- Remove the bolt securing the generator drive pulley while holding the screwdriver. Remove the generator drive pulley. _x000D_
- Loosen the tension roller nut. Remove the timing belt by turning the pulley so that the belt is loosened as much as possible. _x000D_
- Remove the tension roller by unscrewing the nut securing it. _x000D_
remove the generator drive pulley remove the timing belt Lada Kalina 8 valves remove the timing belt tensioner pulley Lada 8 valves Have you noticed that the timing belt is eating or slipping? The reason may be a defective belt, rollers, or a pin that is overtightened.
Consequences of incorrect adjustment
The optimal value of thermal clearances was determined by analyzing the operation of the valve mechanism, gas distribution system and carrying out accurate calculations. With an increased distance, noise appears when the engine is running, especially when it is not warmed up, due to shock loads that negatively affect the entire timing system. This can lead to desiccation of the valve, its jamming, and when it meets the piston at TDC, the gap bends the valve on Largus.
Large thermal gaps do not allow the combustion chamber to be effectively filled with the working mixture, which reduces engine power and impairs the efficiency of its operation.
Too small thermal clearances reduce compression, lead to strong heating of the valve and seat and lead to their burnout. In such a situation, not only does camshaft wear increase, but more serious damage to the timing system may also occur. In both the first and second cases, the result of incorrect adjustment will be the replacement of valves on the Lada Largus, and the entire set will have to be changed
Price for the Lada Largus valve adjustment service
| Adjustment of valves |
Contact us by phone or write online, get advice and individual conditions for repairing your car.
To get a preliminary estimate of the cost of car repairs, write or just call +7 (499) 504 1663.
By using the Veles-Voyage.ru website, you automatically accept the rules for the processing and transfer of personal data
1) You call the car service and describe the problem to a qualified technician, who gives detailed advice and announces a preliminary cost.
2) Come to the car service for diagnostics, after which we open a work order in 2 copies, where we agree on the work plan and approve the cost.
3) Our specialists implement the planned plan, providing you with a photo report of the work done. If during the repair it turns out that the car needs additional repairs, this will be discussed with you in advance.
4) Upon completion, you receive a work order with a detailed description of the work performed, replaced units, materials with warranties, a car service seal and further recommendations for operating the vehicle.
Carrying out planned work.
We provide a guarantee on all work performed at the auto repair shop.
He is directly involved in the repair and maintenance of cars.
He has been working for 9 years with all popular brands of passenger cars and commercial vehicles, and has excellent knowledge of the material components of all vehicle components and the operational characteristics of vehicle parts and systems.
Veles-Voyage Technical Center takes care of its customers! We regularly prepare profitable promotions and special offers for you. Take advantage of promotions and grow with us.
Promotion until February 15! We give all new clients a 10% discount on car repairs. Choose a Professional car service and grow with us!
Promotion until February 15! Get 5% Discount on Maintenance Parts! When purchasing consumables from 4 thousand rubles. Call!
Promotion until February 15! Get a 10% discount on maintenance work for your car!
Timing diagram Lada Largus 8 valves
- 1 - crankshaft toothed pulley
- 2 - coolant pump toothed pulley
- 3 - tension roller
- 4 - rear protective cover
- 5 - camshaft gear pulley
- 6 - timing belt
- A - boss on the rear protective cover
- B - mark on the camshaft pulley
- C - mark on the oil pump cover
- D - mark on the crankshaft pulley.
Another feature of the engine is the location of the water pump (pump), which is rotated by the same timing belt. That is, in case of coolant leaks or characteristic noise/whistle/hum in the timing drive area, checking the belt is mandatory. If the pump bearing crumbles and the belt comes off, then in addition to replacing the water pump housing and belt, you will also have to go through the cylinder head, removing bent valves from there.
Video of the condition of the timing belt with mileage (120,000 km)
Since spark plugs need to be changed during routine maintenance, it is better to combine these operations, because it will be easier to turn the crankshaft when checking the belt. The surface of the toothed part of the belt must be free of folds, cracks, undercuts of teeth and separation of fabric from rubber. The reverse side of the belt should not have wear, exposing the cord threads, or signs of burning. There should be no delamination or fraying on the end surfaces of the belt. The belt must be replaced if traces of oil are found on it.
We remove the power unit protection and the right mudguard of the engine compartment.
Using the “18” head, we turn the crankshaft clockwise by the bolt securing the auxiliary drive pulley and visually assess the condition of the timing belt.
If the moving pointer is offset relative to the fixed one:
- clockwise - the belt will be tightened.
Pull up and remove the hatch cover.
To replace the timing belt, remove the accessory drive belt.
Attention! Be careful not to damage the surface of the teeth needed to operate the crankshaft position sensor (they are much larger). Remove the top (see
above) and lower timing cover
Remove the upper (see above) and lower timing drive covers.
In order not to disturb the valve timing, before removing the timing belt, it is necessary to set the crankshaft and camshafts to the TDC (top dead center) position of the compression stroke of the 1st cylinder.
Attention! Starting from this stage, work can be done in two ways. The second method is the “folk” one, which allows the work to be carried out with minimal labor costs, but requires the obligatory presence of an assistant and high thoroughness of the work, followed by a careful check of the result
A prerequisite for carrying out work in this way is your confidence that no one has disassembled the engine before you, even to a small extent. Then all parts will be installed in factory positions
The second method is the “folk” one, which allows the work to be carried out with minimal labor costs, but requires the obligatory presence of an assistant and high thoroughness of the work, followed by a careful check of the result. A prerequisite for carrying out work in this way is your confidence that no one has disassembled the engine before you, even to a small extent. Then all parts will be installed in factory positions.
To determine the position of the camshafts, it is necessary to remove two rubber-metal plugs from the holes in the left end of the cylinder head.
Similarly, remove the other plug.
To fix the camshafts when replacing the belt, a device should be made from a metal plate 5 mm thick (see sketch).
A bolt with an M10 thread and a length of about 100 mm can be used as an installation pin.
In this case, it will be impossible to turn the crankshaft clockwise.
When replacing the belt, you also need to replace the tensioner assembly and support roller.
When installing a new timing belt with arrows on it, we orient it so that the arrows coincide with the direction of movement of the belt (clockwise).
Then at the same time we put the belt on the tensioner roller and install the device on the stud of the coolant pump housing.
We turn the crankshaft two turns clockwise by the bolt securing the auxiliary drive pulley until the grooves on the ends of the camshafts coincide.
We unscrew the installation pin from the hole in the cylinder block and install the screw plug in place. We install the removed parts in reverse order.
The second method of replacing the timing belt of a 16-valve Lada Largus engine
Using a bolt with washers or a bushing, which is screwed into the end of the crankshaft, in the same way as in the first method, we turn the engine crankshaft and, accordingly, the camshafts to the position shown in the photo below.
We no longer turn the crankshaft. Let's move on to marking the flywheel.
Next, without touching either the camshafts or the crankshaft, carefully remove the old belt using the technology shown in the first method.
We remind you that the shafts turned spontaneously only at very small angles.
A combination of the two methods is also possible. In this case, we still fix the crankshaft with a threaded pin, as described in the first method.
If you rely on a strict maintenance sequence, then the Lada Largus timing belt is replaced every 60,000 km. Although this period may be temporary - 6 years, even despite his condition.
Engine characteristics
The initial version of the 1.6 liter engine with a power of 105 hp. With. was designed for AI-92 fuel. After the requirement to increase the environmental standard to Euro-5, some adjustments were made to the engine design, which is why the number of horses was reduced to 102. However, the Largus 16-valve engine did not undergo any major changes. The eight-valve version of the power unit initially produced 87 hp. s., and after the eco-standard - 84 l. With. As a result, the Romanian-made engine was replaced with a domestic version, maintaining the volume of 1.6 liters. More details about the motors:
- LADA Largus 8-valve. The initial model of the power unit was installed from a Renault K7M with an output of 84 hp. s., as stated earlier. The only difference from the similar K4M is the cylinder head. Later, it was decided to replace the engine with a domestic version, using the VAZ 11189 as a basis with a torque of 140 Nm and 87 hp. With. Already on Largus under the B0 platform, French engineers redid the engine mounts: from the body to the subframe.
Technical characteristics of the VAZ 11189 1.6 8kl engine
| Type | in-line |
| Number of cylinders | 4 |
| Number of valves | 8 |
| Exact volume | 1596 cm³ |
| Cylinder diameter | 82 mm |
| Piston stroke | 75.6 mm |
| Supply system | injector |
| Power | 87 hp |
| Torque | 140 Nm |
| Compression ratio | 10.5 |
| Fuel type | AI-92 |
| Environmental standards | EURO 5 |
Adjustment of valves
This procedure is necessary to compensate for thermal expansion in the valves relative to the lever. Considering from the point of view of design features, it is required to set a certain gap between the lever and, in fact, the end part of the valve. When the latter make a characteristic knock, you need to check the gaps. On the Lada Largus, valve adjustment is used when the engine has cooled down with a temperature of about 20 degrees Celsius. The size of the gaps should be as follows:
- exhaust valve - 0.4 +/- 0.05 mm;
- intake valve - 0.2 +/- 0.05 mm.
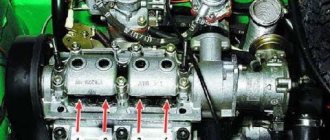
The valves are located in this way: near the windshield there are inlet valves, and closer to the radiator there are outlet valves (see photo).
To check the necessary measurements, you will need to dismantle the plastic of the cylinder head and unscrew the spark plugs to make it easier to rotate the crankshaft. Afterwards, the timing cover is removed and the top dead center is installed in the first cylinder at the compression end. This must be done carefully, taking into account the flywheel located nearby.
Now you need to rotate the adjustment screw and then set the desired gap. Tighten the locknut slightly using a wrench. Once the adjustment of all cylinders is completed, the crankshaft is turned again to final check the gaps. Assembly is carried out in reverse order. To check, you need to start and warm up the engine: the sound should be calm and even. If everything matches, then the Largus valve adjustment is set correctly.
Adjusting valve clearances
I unscrewed eight 8mm bolts and saw the “insides”
I jacked up this drive wheel, I’m right-handed and it’s more convenient to turn with my right foot
I spun the wheel until the letter “Fe” appeared. Then I had to lie, because the shaft was already in the right position. But that doesn't always happen
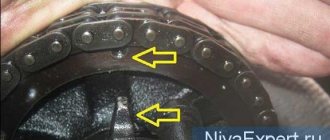
TDC of the first cylinder corresponds to the letter F on the pulley, or the green mark on the shaft.
I turn the wheel towards myself, adjusting the next edge on the shaft, which corresponds to TDC 3 cylinders
In the same way I adjust the edge without marks - this is the 4th cylinder
And the fourth side with the mark – cylinder 2
A couple of pictures of the timing belt
Adjusting thermal clearances in valves
First, select a level area on which to place the car. Next, use a jack to release one of the front wheels and engage fourth speed. In the engine compartment, remove the air filter, first disconnecting the pipes from it. Next, remove the spark plug high-voltage wires, remove the connector connected to the ignition module and carefully move all the wire harnesses towards the passenger compartment. Be sure to wipe the valve cover: this must be done so that any dirt on it is not transferred inside the mechanism. If you think that the ignition module is bothering you, remove it too. Further steps:
- Transferring the pistons to top dead center (TDC). To achieve this, spin the freed front wheel so that the Latin letter “F2” appears on the edge of the camshaft drive gear. In this case, the piston of the 1st cylinder (you need to count from the flywheel) will be in the TDC position, then both the intake and exhaust valves will be closed.
- Arm yourself with 0.2 and 0.4 mm probes. Using the first of them, check the valve operating on the inlet, the second - on the outlet. The feeler gauge should fit into the gap between the valve and the adjusting screw with little force. If this is not the case, the mechanism should be adjusted.
- Take pliers and tighten the adjusting nut with them. Unscrew the locknut with an open-end wrench to “10”. Achieve the required gap and secure it with a nut.
- The order of adjustment for cylinders is: 1,3,4,2. That is, the rocker should touch the camshaft cam within the smallest radius when viewed from the center of rotation.
- After completing the procedure, carry out a control check of the gaps and, if necessary, adjust those that do not meet the standard.
Your request has been accepted!
You will receive a notification when the product goes on sale to your contacts.
Valve adjustment on a Lada Largus car is performed on a cold engine; you will also need a new valve cover gasket.
Draining waste fluid
To drain oil from a Lada Largus, it is desirable to have a pit or overpass, since the main actions will take place from below the car. Therefore, we place the car above the technological ditch, go down into it and remove the engine protection from below. To do this, you need to unscrew the 6 bolts under the head by 10mm.
When everything is ready, we proceed directly to the drain:
- Raise the hood, then find the filler neck on the engine and unscrew the plug (Fig. 1). Fig. 1 Oil filler neck
- Now we go down under the car and place a waste container in the drainage area. You can use a cut canister or an old bucket.
- There are many complaints about the original drain plug regarding unscrewing, so it is better to prepare a new one for replacement (order code 21120101106100). The old one can be unscrewed with a 8mm hexagon, but there is a high probability that the splines will be torn off. Therefore, first you can take a hammer and gently tap it through a wooden plank. After this, the plug should come out easier. If the plug does not fit anywhere, you can use a gas wrench; it is located below the pan, so there is a place to grab it (Fig. 2).
- Now you need to unscrew the oil filter. You can try to do this from above from the engine compartment. It seems like there is access, but the filter often sticks, you don’t have enough hand strength, and you can’t get to it with a puller (Fig. 3). Fig. 3 Oil filter on top
- Another option is to do it from below; installing a puller here will not be difficult (Fig. 4). But before that, it is advisable to unscrew the crankshaft position sensor using a 10mm wrench. We also remove the wires going to it. Now you shouldn’t break anything, you can unscrew the filter itself. Fig. 4 Oil filter from below
To unscrew the filter element, it is advisable to have a special puller. If it is not available, you can try to unscrew the filter using improvised means. For these purposes, you can use, for example, an old alternator belt, a regular belt, a bicycle chain or a simple screwdriver.
Unscrewing the oil filter using improvised means. This method will allow you to drain as much of the oil as possible, after which you can proceed to further actions. The main thing is not to forget, everything that we unscrewed must be put back in place.
What is the 8-valve engine of Lada Largus 11189?
Engine 11189 is a kind of logical continuation of the VAZ-11183 engine, which you could find in cars such as Granta or Kalina. However, it has a slightly higher output of 87 hp. instead of 82 hp As I said above, this was achieved thanks to the installation of a new lightweight piston group from Federal Mogul. Of course, it was not possible to shoot 11189 of any high power, but this was not planned. The station wagon needed a simple and reliable unit that would not take the owner out of his head.
Advantages and disadvantages of the 8-valve Lada Largus engine
The main advantages of the 8-valve Lada Largus engine are its simplicity, reliability, relatively good service life, maintainability and low fuel consumption. In addition, this engine is powered by AI-92 gasoline, which will save your budget at least a little.
Among the shortcomings, I would like to note the bending of the valves when the timing belt breaks, the noisy operation of the internal combustion engine, the need to adjust the valve clearances, the low power of the internal combustion engine, as well as the frequent failure of attachments.
see also
Comments 10
The valves cost 200 rubles each, but you can find out how they let water through, otherwise I blew into them and the air barely passed through
There is an arrow on the valve indicating the direction. So, the liquid passes in one direction with little effort, but in the opposite direction it will not pass!
What's the point of three? The front ones instantly splash. But back it is necessary... Three strokes until the liquid reaches it is a lot.
Tell me how to do this, especially in the back!
You buy 3 Toyota valves 8532126020 Everything is done under the hood. The first photo shows how to install it on the main injectors, cut the hose as close as possible to the injector and place the valve in the gap. You do the same with the rear hose, but you put the valve under the grille, right next to the tank (2nd photo)…
I have Volvo fan injectors...
Seven on benches and three horses: what has changed in the updated Largus
“Largus” is a venerable participant in the Russian market, its age is not far from a decade, and only now the car has received its first noticeable update. But how extensive is it?
Dad's tramp, mom's cutie
Although the Largus audience is very loyal, it would not tolerate a serious price increase. Therefore, the update took place in maximum economy mode, which resulted in the use of a considerable number of parts borrowed from other Lada and Renault models.
Outside, for example, you can find headlights from the second generation Logan. Moreover, this is the simplest version of headlights from a pre-restyling car, where there is not a single diode. But for Largus they are also a plus, because they have a lamp for low and high beam instead of one for all occasions. And such headlights shine very well: brightly and competently in the shape and uniformity of the beam.
The new-old headlights fit well into the design, although only the front part of the car was updated. Tellingly, the shape of the chrome boomerangs on the bumper corresponds to the Xray Cross (it debuted at the Xcode concept), and not to the Vesta, Grant or the usual Xray.
The same updated front end contributed to improved aerodynamics. As before, the family consists of a van, a regular station wagon and a lifted version. For the first two options, the lift force on the rear axle decreased by 13%, and for the third - by 16%. Thanks to this, all modifications should become more stable on the track.
Another changed detail in the appearance is the mirrors. The shape is familiar from the higher trim levels of Vesta, but there is no electric folding drive. But the design of the mirrors is good, but visibility is more important. And everything is fine with this. It feels like the area of the mirror element itself is one and a half times larger than it was, and even the right mirror now does not overlap at all.
Well, one of the most inconspicuous things is that the washer nozzles moved from the hood under the windshield, to a newly created trim, the so-called “jabot”. Previously, the Largus had a fairly large space with exposed metal between the hood and the glass, which people covered with plastic covers on their own, but now everything looks decent from the factory. The injectors, by the way, shoot out in jets, not like a fan. But this is not scary, unlike carefully preserved wipers a la “nine”. They clean a small area. Are we waiting for another update?
From the world on a thread - "Largus" salon
Inside, even more borrowing has been prepared for the driver and front passenger. And this is only good for the car. The Vesta steering wheel is comfortable to grip, and the signal has finally moved to the center of the steering wheel from the steering column switch. The Xray seats have a more human profile and lateral support. In the front panel of the Duster there are extra compartments for small things, which in fact are not superfluous at all and can even accommodate a modern “shovel” smartphone.
The front door trims were also inherited from the Duster, meaning the driver’s side now houses the keys for all four power windows. The end of total economy on buttons, because of which previously the front ones were on the console, and the rear ones were completely on the floor. The tides on the doors under the buttons, by the way, are quite well felt by the driver’s left knee and the passenger’s right, but it’s better this way than looking for window controls throughout the cabin.
An additional bonus for the driver: now you don’t have to jump on it to raise the seat, because there is a very ordinary, but very convenient lever that works in both directions. The new central armrest will also not be superfluous. But the steering wheel, unfortunately, has not learned to adjust its reach.
There are some new options. In addition to the heating of the rear window, front seats and side mirrors, heating of the second row, windshield and steering wheel was added, which is extremely important in the climate of most of Russia. The front heating has also become three-stage and is controlled not from the seat, but from the center console. Cruise control with a speed limiter, a multimedia system and a rear view camera will also please many.
The display, however, has a rather serious drawback, inherited from the Duster. The screen is located under the central air ducts, and it is too low - you have to be distracted from the road. This is also aggravated by the fact that here, as on Xray, you cannot switch the track using the buttons on the steering wheel. You have to poke at the screen, which obviously cannot be done by touch. But the plus of the car is that now the central locking with remote control and the on-board computer are already in the “base”. By the way, the latter also included a reminder about the maintenance time.
Oil for Lada Largus 8 valve engine
In terms of lubricant, the 8-valve Lada Largus engine is very unpretentious. You can fill in oils with a viscosity of 5W-30 / 5W-40 / 10W-40 / 15W-40. The quality of the oil must be no lower than SM according to API and no lower than GF-4 according to ILSAC. 90% of motor oils in stores meet these requirements and cost quite reasonable money.
From my personal experience I will say this: you can fill in almost any motor oil. The main thing is that it is not fake. And you need to change the oil in a timely manner - preferably after 5-7 thousand kilometers.
How do you know when the valves need to be adjusted?
Adjusting the valves is a standard procedure. We recommend that Lada Largus owners contact the service every 100 thousand kilometers if the car runs on gasoline. If gas equipment is installed, then you need to check the gaps more often.
INTERESTING: The main sign of a changed thermal gap: the “clattering” of an unheated engine.
TIP: In critical cases, the “clicking” does not stop even after warming up. This means that the gaps have already changed too much and you need to urgently contact service.
If the engine begins to run louder than usual, then first of all you need to listen to the valves. Quite often, it is the changed thermal clearances that explain the increased noise.
