The quality of engine operation depends on high-voltage wires. If the engine runs rough, gains power poorly and fuel consumption increases, then the high-voltage wires are one of the elements that are worth checking.
Experienced motorists recommend inspecting the part every month to always keep the car in good condition. Today we will look at ways to regularly check and study critical cases.
Signs
You shouldn’t go to the ignition system wires for every internal combustion engine problem, because they are only responsible for it. More specifically, their zone of influence is associated with arson of the fuel mixture, so the symptoms are:
- problematic engine starting (especially in the rain);
- “glitches” of electrical appliances, for example, radio tape recorders;
- floating idle speed;
- jerky acceleration;
- reduction in engine power;
- increased fuel consumption.
But, most of the symptoms can be caused by wear of the spark plugs, so we will check the armored wires with visual inspections and various instruments (multimeter and oscilloscope).
Visual inspection
You may find external damage, but the best way is to start the engine at night. Then the breakdown will give itself away with a spark, especially if the engine compartment is very wet, but you should not water the engine.
Additional wire
You can also find the breakdown location with an additional copper wire. Take the wire, strip its edges, and twist some of them into a half ring. Then connect one part to the body, and move it in a semi-ring along each armored wire. You will also see sparking at the breakdown site. In this case, you can wet the wires a little, but only a little.
Screwdriver
This method will reveal the very fact of penetration, but not its exact location. The task is to wind several turns on a long screwdriver and touch the cylinder head block with its end. Sparking will confirm the fact of the malfunction.
Disconnecting wires
Start the engine and disconnect the spark plug wires one at a time while observing engine operation. If the motor operation does not change when disconnected, then this wire is faulty and must be replaced.
This method is not suitable for everyone, since the wires are not publicly available everywhere. Basically, this access is provided to carburetor internal combustion engines, but some injection engines, for example, AvtoVAZ, also have this feature.
The absence of a spark does not necessarily mean that it is in good condition; it is not necessarily a matter of complete breakdown. Also, remember to wear insulating gloves to prevent electric shock.
Purpose and service life
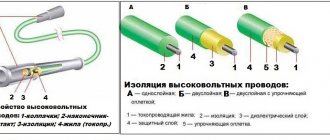
The work performed by the wires becomes clear from the name. During engine operation, high-voltage current is supplied to the spark plugs for the purpose of timely spark formation in the cylinders. The generated voltage reaches 50 kV. In the process of transmitting current, the side process of heating the wiring is almost inevitable. By using insulation, the car body and components are simultaneously protected from electric leakage.
The maintenance schedule for almost no model does not establish a service interval for replacing wires. Usually the installation of new spark plugs is normal. Most often, this indicator is set at 30 thousand km. When servicing the car privately and normal engine operation, the spark plugs work up to 50 thousand km. Typically, high-voltage ignition wires are visually inspected at this very moment.
Checking with a multimeter
Even the cheapest device will be suitable for ringing the wires and identifying a fault. The task is to measure the resistance of the conductor by removing the wire completely. See the photo for an example of connection.
Your task is to remove the wire, turn the multimeter into ohmmeter mode with measurements up to 20 kOhm and insert the probes.
The correct indicator depends on the specific car, here are some examples:
- AvtoVAZ - from 3.5 to 10 kOhm;
- Daewoo Nexia - from 3.1 to 12.8 kOhm;
- Chevrolet Lacetti - no higher than 3 kOhm.
Why does the number change with each wire - in most cars, each wire is longer than the previous one so that they do not bend. Length affects resistance - a law of physics.
If the values obtained are too high, then the central core has burnt out and the spark plugs will work less well. At the same time, it is not necessary that compliance with the resistance indicator indicates proper operation, but it must necessarily correspond to the standard.
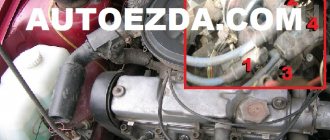
Do-it-yourself replacement of armored wires on a VAZ 2112
1 – tip of the wire of the first cylinder; 2 – tip of the wire of the second cylinder; 3 – tip of the wire of the third cylinder; 4 – plastic bracket securing the high-voltage wire of the third cylinder; 5 – ignition module; 6 – tip of the wire of the fourth cylinder; 7 – plastic bracket for fastening high-voltage wires of the first, second and fourth cylinders
In order to replace the armor wires of a VAZ 2112, you must perform the following procedure:
- We prepare the car for work (see “Preparing the car for maintenance and repair”) and turn off the ignition.
- Remove the engine decorative trim.
- Remove the wire tip from the spark plug well.
- Disconnect the other end of the high-voltage wire from the ignition module.
- Remove the wire from the first cylinder.
- Similarly, we remove the high-voltage wires of other engine cylinders.
High voltage wires are not interchangeable. The wires must be connected to the ignition module in accordance with the cylinder serial number
Checking with an oscilloscope
This is the most accurate method of checking, but its use requires you to have the device itself and knowledge in deciphering the values. If you have this, you can check this way, otherwise the previous methods of checking armored vehicles are enough for you to conclude about replacement or repair.
Procedure:
- attach the inductive and capacitive sensor of the device to the wires;
- turn on the oscilloscope;
- start the engine;
- watch the readings.
A professional will immediately understand the presence or absence of a problem using an oscillogram. Look at the photo of the graph; if yours is similar or identical, then the wire is broken and requires replacement.
The spark line must be smooth and without noise, otherwise the wire is broken or the spark plug is faulty. If the line reaches the maximum value of the coil, this is a complete break in the wiring.
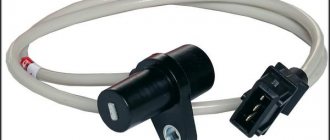
Studying the operation of an oscilloscope is quite useful, since in the future you can diagnose the operation of the entire ignition system and electronic sensors, for example, the operation of the crankshaft position sensor.
Connection diagram of VAZ 2112 armored wires to the ignition coil
Injection VAZ produced before 2004 with an old-style ignition module (4-pin low-voltage connector)
Actually, on the module body it is already indicated which cylinder the pins correspond to - but we duplicated them in red in case the module gets completely dirty, and you might not be able to see it in the photo.
Injection VAZ produced after 2004 with a new ignition coil (3-pin low-voltage connector)
As with the old-style ignition modules, the new coils are also marked with pins corresponding to the cylinders. But the connection order is different from the order on the old-style ignition module. Be careful!!!
Carburetor Feature
On a carburetor engine, you can unscrew the spark plug and place it on the cylinder head together with the armored wire. Next, crank the crankshaft a little with the starter and watch for a spark. The engine is a mass, so a strong spark must be produced. If there is little or no spark, then the problem is in the wire.
But, the method will work if all the candles are in excellent condition. After checking, you can additionally inspect the wire visually or “pierce” it with a multimeter.
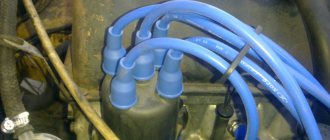
We also recommend that owners of carburetor internal combustion engines initially check the central high-voltage wire going to the distributor. This will help identify the problem if the engine does not start or the power has dropped very much. Perhaps the central one does not supply enough voltage to the others through the distributor.
A similar procedure cannot be carried out with an injection engine, because the electronic switch and engine control unit will fail.
What else can I recommend?
In addition to the listed components, there are also such as Bautler, xopc.
Products from Bautler, which have proven themselves to be highly reliable and efficient among consumers
Bautler uses rubber for the insulating layer, which causes a slight thickening of the product, but allows the ignition parts to work in more difficult conditions.
We also can’t help but say something about xopc’s products. It has been present in the automotive market since 1995. Experts note that today xopc is one of the largest manufacturers of silicone cables in the Russian Federation. To manufacture its products, xopc uses imported raw materials. The production process is carefully controlled at all stages of production.
I would also like to say a few words about armored wires for car ignition systems. The first samples of such parts began to be used on vehicles intended for the Armed Forces. They were subjected to additional shielding with metal braiding to protect radio-electronic devices from interference. Currently, such armored wires can only be found on older cars. The achievements of the developers make it possible to produce armored wires without visible metal shielding.
In conclusion, I would like to recommend that car enthusiasts, if they need to replace armored wires or high-voltage wires, first of all follow the vehicle’s operating instructions. You can choose an elephant or another brand, but this should not be to the detriment of the power unit.
Field repair
If urgent repairs are needed, then after identifying the problem wire, find the damaged area and clean it with a knife. Next, you will need a copper-based connector, which is secured with regular twisting.
Afterwards everything needs to be isolated, which is the main problem. Regular electrical tape requires 8-10 layers for safety, plus moisture forms between the layers during winding.
The method will not return all the power, but it will easily allow you to get to the nearest service station or postpone repair of the ignition system for a couple of days.
Causes of damage
There are few of them and for the most part they are natural:
- Aging - due to constant temperature changes and engine vibrations, the insulation gradually wears out, after which it is easily broken through. The same applies to the attachment points to the spark plugs. The core itself also wears out naturally due to the constant supply of high voltage.
- Damage occurs most often due to repairs. That is, the mechanic either severely snagged the wire during the repair process, damaging it, or replaced the wires incorrectly altogether. They are specially located separately and do not touch other engine parts. If you place them differently, they will be damaged at least by a hot internal combustion engine.
- Other malfunctions - most often associated with a broken ignition coil, which causes more power to be supplied to the wires. Neither the wires nor their insulation are designed for this, so penetration occurs.
Which high-voltage ignition wires are better: reviews from car enthusiasts
One of the car enthusiasts under the nickname TANJA-NEV shares her husband’s experience: “My husband bought a set of Tesla ignition wires on the automobile market. This is a thick cardboard box on which information about these products is written. The box described both the technical characteristics and the advantages of these particular ignition wires. Country of origin: Czech Republic, Blatna. Inside the box, right on the back of the lid, the date of manufacture of this product is indicated.
The conductors of this Czech kit have different lengths. During replacement and testing, a suitable new wire is taken and installed in place of the old one. The new conductor must be secured tightly to both the spark plug and the distributor. The wires, of which there are 5 pieces in the set, have rubber tips - it is by these that you need to hold the products during the installation process. External inspection of the kit showed its acceptable quality.
In addition, a small instruction is attached, which also describes in Russian the steps for correct replacement. Everything is quite simple. It is important to change the conductors one at a time and on a cold engine.
The wiring was replaced by my husband himself about six months ago, and to date the inspection has not revealed any problems. The products retain flexibility and elasticity, but the engine has added more power.”
The user VIK_91 had standard high-voltage wires in his car, which wore out over time, which manifested itself in the form of poor acceleration of the car and increased vibration when driving. The author writes: “At that time, the car was used by my father, who replaced the original wiring with SEIWA products. This gave some improvements in performance. While replacing the spark plugs, I encountered the problem of removing the spark plug wiring - it came off, and the contacts remained inside the spark plugs. As a result, I had to remove the contacts with tweezers and quickly restore the wires themselves. The restored electrics did not work for long, and they were checked and replaced not long ago. My choice fell on products from Masuma, which worked well in my previous car. They are quite flexible, provide reliable contact and are tightly connected to the candlestick.”
