The electronic control unit has become an integral part of a modern engine, and without its help it is impossible to ensure the normal operation of all systems and monitor their serviceability. The absolute pressure sensor, also known as MAP, is just one of many control devices that affects the stability of the engine and transmits information to the ECU.
In many cars, it is located on the engine intake manifold and records fluctuations in the pressure level in the intake tract. Subsequently, based on the DBP data, the electronic unit optimizes the composition of the combustible mixture entering the combustion chamber.
Now let's take a closer look at what an absolute pressure sensor is, how it works and why you can't do without it?
What is an absolute pressure sensor used for?
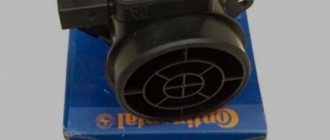
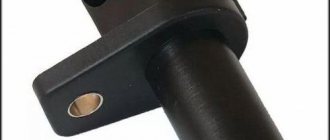
What an absolute pressure sensor might look like.
This small device is responsible for measuring absolute pressure. The concept of “absolute pressure” is not used by chance, because the initial reference point for measurements is the state of vacuum, which is taken as an absolute.
After the data enters the ECU, the electronics, taking into account the pressure and temperature in the intake manifold, determines the most suitable air density and its expected flow rate, which is necessary to prepare a fuel-air mixture of the appropriate quality. The control unit, according to the calculated mass of consumed air, issues control commands of the required duration, due to which the injection nozzles are adjusted. Although a pressure sensor is a very worthy replacement for a flow meter, sometimes they are installed together on the unit.
Why is DBP required?
The correct operation of a small device affects the composition of the combustible mixture supplied to the pressure chamber. The absolute pressure sensor relies on the vacuum state during measurement, setting it as an absolute value. This is the basic principle of its operation.
When the information enters the electronic control unit, the optimal air density and flow rate are calculated, and after that the fuel-air mixture is prepared. The ECU transmits certain commands, based on the mass of required air obtained during the calculation, and the injectors responsible for fuel injection are adjusted.
Absolute pressure sensors have become a replacement for the flow meter, however, in some vehicle models both devices may be present at once.
How does an absolute pressure sensor work?
Thanks to DBP, it is possible to control how much air flows through the throttle valve. Based on this indicator, an impulse command is generated that determines the amount of fuel required to form a balanced fuel-air mixture. There is a vacuum chamber inside the sensor, from which the air is initially removed. It correlates the pressure in the inlet fitting with the pressure in the vacuum chamber and, according to the resulting difference, creates an outgoing signal. In order for the sensor to detect pressure, a whole chain of actions is necessary:
- The highly sensitive DBP diaphragm is deformed by pressure in the intake manifold.
- The stretching of the diaphragm causes a change in the resistance on the surface position strain gauges; in other words, the so-called piezoresistive effect occurs.
- Voltage fluctuations are observed in proportion to the dynamics of the resistance of strain gauges.
- The method of connecting strain gauges provides high sensitivity, which, thanks to the DBP chip, increases even more, resulting in the output voltage varying in the range of 1-5 V.
- According to the voltage received at the ECU input, a pulse is generated that goes to the injectors. It determines the pressure at the intake valve. In this case, voltage and pressure are directly proportional to each other.
Where can I buy
Spare parts and other products for the car are easily available for purchase at auto stores in your city. But there is another option that has recently received significant improvements. You no longer need to wait a long time for a parcel from China: the AliExpress online store now offers the opportunity to ship from transshipment warehouses located in various countries. For example, when ordering, you can specify the “Delivery from the Russian Federation” option.
Follow the links and choose:
| Intake air pressure sensor 4Bar for Renault, Peugeot, KIA, Hyundai, Citroen | GKFLY car jump starter, external battery | Car charger, 2 USB ports, 5 V, 3.1 A |
| EANOP HUD car display, windshield projector | Baseus car humidifier | Car automatic parking sensors with 4 sensors |
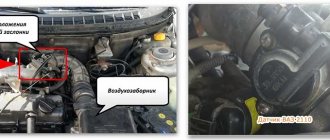
Where is DBP located?
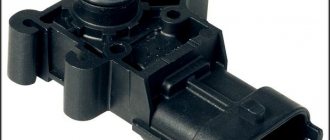
Mounting the DBP on the body.
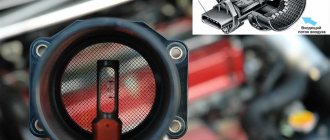
It has already been mentioned that the sensor must be looked for on the manifold. Let us only emphasize that it is used only on injection engines. This is especially true when the car is equipped with a turbocharged power unit and a compressor.
However, in many models its location is somewhat different - in the body part of the engine compartment and it is attached directly to the body. In this case, the inlet fitting and the inlet manifold are connected via a flexible hose. It should be noted that DBP is also installed when the car does not have a mass air flow sensor (MAF).
Symptoms of a malfunctioning absolute air pressure sensor
A whole group of “symptoms” can indicate a breakdown of DBP:
- Fuel consumption increases noticeably, which occurs due to the receipt of a signal from the sensor to the ECU about high pressure, the level of which is actually lower. In this case, the electronic unit gives a command to supply a mixture enriched more than necessary.
- The engine dynamics deteriorate, which does not return to normal even after warming up.
- Even in the summer season, white-colored exhausts appear.
- There may be a gasoline smell coming from the exhaust.
- The idle speed does not decrease for a long time.
- Switching is accompanied by sudden jerks or dips.
- An incomprehensible kind of noise, often developing into a hum.
Malfunctions and functionality check
The practice of operating a MAP sensor shows that failure of its performance is often associated with improper installation. It is necessary to understand that the device should be installed at a point located above the inlet manifold, as well as the gas distributor ramp and fine filter, with the connector (chip) facing down. This eliminates the accumulation of steam, dirt and condensation in the sensor housing, increases the reliability and correctness of its operation.
The first signs that the MAP sensor has failed are:
- arbitrary transition from gas to gasoline and vice versa;
- the car refuses to switch to gas;
- “floating speed” at idle;
- jerking when pressing the accelerator sharply;
- loss of pickup;
- increased gas consumption.
In addition to the subjective assessment, you can use a “scientific” approach using a voltmeter (to measure voltage) and a medical syringe (to create a vacuum). However, there are unlikely to be many people willing to bother themselves with such an experiment.
Most often, the cause of the problem is a breakdown of the pressure sensor; it stops recording changes in gas pressure. However, the vacuum sensor can also fail, for example if the pressure and vacuum hoses are mixed up. But there are manufacturers who combine these sensors to control one controller, then you can connect the hoses to the map sensor in any order.
Another reason may be oxidation of the wires or gas leakage due to wear of the rubber seals (rings), or loss of tightness of the plastic tee fitting. The defect is not difficult to detect by visual inspection, and also to correct (a repair kit is available for sale).
Most motorists, if the slightest problem arises with the normal operation of the 4th generation LPG, do not try to check the map sensor, but rush to change it. At the same time, in many cases there is a real opportunity to “reanimate” this device, after which it can successfully work for more than one year. Thus, you can save about 3 thousand rubles. Whether the game is worth the candle is up to everyone to decide for themselves.
How to check the absolute pressure sensor
The method for diagnosing DBP depends on the specification of the sensor device, which can be analog or digital. To confirm the functionality of the analog absolute pressure sensor, the following algorithm of actions is required:
- A sensor adapter is connected to the vacuum hose connecting the DBP and the inlet manifold, and a pressure gauge is connected to it.
- The engine starts and idles for several minutes. If the vacuum in the manifold is below 529 mm, it is worth checking whether the hose itself is leaking air. It would be a good idea to look at the sensor diaphragm and make sure there are no flaws in it.
- After taking the pressure gauge readings, you need to disconnect it and replace it with a vacuum pump. Next, you should create a vacuum of 55-56 mm Hg. and stop pumping. It can be considered that the DBP is not damaged when the vacuum remains unchanged for about 30 seconds, otherwise the device will need to be replaced.
Diagnostic measures
How to check the absolute pressure sensor and determine that it is working:
- first, connect an adapter for a pressure gauge to the vacuum hose connecting the device and the inlet manifold;
- The power unit is allowed to idle for some time. If there is a vacuum in the manifold - readings below 529 mm, you need to make sure that there is no damage to the hose, there are no defects in the sensor diaphragm;
- Having received the data from the pressure gauge, it is disconnected and a vacuum pump is installed in its place. A rarefied state is created (55–56 mm), after which pumping stops. If the state is held for about thirty seconds, then the sensor is working properly, and the problems with the car lie in something else. Otherwise, the faulty device must be replaced.
If the device is digital, diagnostics occurs somewhat differently:
- the tester is switched to voltmeter mode, a wire installed on the output contact of the device being diagnosed is connected to it;
- the power plant starts. If the voltage is maintained at 2.5 V, then the sensor is working, but if it deviates to one side or the other, it requires replacement;
- in tachometer mode and with the vacuum hose disconnected, the positive probe is connected to the signal terminal, and the negative probe is connected to ground. If the cause of the malfunction is not in the DBP, then the tachometer will show a value of 4400–4900 rpm;
- After connecting the vacuum pump, you can determine whether there are changes in the readings obtained by the tachometer. If they are, then you should consider replacing them.
Diagnostic measures indicate whether it is worth preparing for a complete replacement or whether cleaning the sensor is sufficient.
Video on the topic
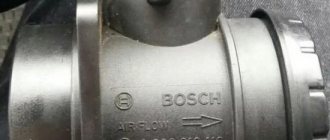
DBP Hyundai Accent (MAP-sensor) is necessary to measure the vacuum level in the intake manifold. For the correct operation of the injection system on the Hyundai Accent, a mass air flow sensor (on 8-valve engines) or a MAP sensor (on 16-valve engines) is used. Otherwise called an absolute pressure sensor (MAP), it is installed in the intake manifold. Please note that MAF and DBP are not the same thing; they work on different principles.
And what is better - think for yourself. If a platinum wire is installed in the MAF and the cost of the device exceeds 3-4 thousand rubles, then a new DBP costs no more than 1000 rubles, and a used one can cost 300-400 rubles. purchase.
Principle of operation
The entire filling of the injection engine is electronic, there are many sensors. And if one fails, problems begin - the engine “troubles”, operates unstably, or even stalls completely.
Now briefly about how the injection engine control system works. First, the system needs to know what the temperature is in the manifold (intake) at a certain point in time. This is necessary to accurately calculate the mass of air located in the collector itself.
Secondly, do not forget that during each stroke of operation, air is sucked into the combustion chambers. Over the entire cycle, the engine consumes a certain amount of air - a volume equal to that of all four cylinders. So, everything is quite simple - there is data on the volume of the cylinders, the air density and temperature are known. There is only one thing left: to calculate the mass of air that enters each cylinder.
How does a pressure sensor work?
This device measures the pressure in the intake manifold. The signal is sent to the electronic control unit and, using a special formula, it calculates the amount of air supplied to the fuel rail. Hyundai Accent cars use either a DBP or a mass air flow sensor. It is worth noting that on some cars these devices work together to increase the efficiency of the injection system.
The measurement occurs through the use of one of the technologies:
The second technology is the most modern and effective; with this technology you can achieve the highest measurement accuracy. If you decide to install a turbocharger on your car, you must install another sensor, structurally similar to DBP, between it and the intake manifold. It will allow you to adjust the pressure created by the turbine, based on the needs of the engine.
The design of the DBP consists of:
- Atmospheric chamber connected to the collector.
- Vacuum chamber.
- Strain gauges in the amount of 4 pieces, connected in a bridge circuit, are located in a vacuum chamber.
- The diaphragm is mechanically connected to strain gauges.
- Chip.
The work proceeds as follows:
- Air pressure begins to act on the diaphragm.
- Strain gauges move.
- The resistance of the strain gauges changes.
- The signal level at the microchip output changes.
- The engine control unit receives and processes the signal, and uses it to adjust the operation of the Hyundai Accent injection system manufactured by TagAZ.
Of course, when idling, all data is measured and parameters are adjusted. Depending on the pressure level, the signal sent to the ECU changes. The latter adjusts the position of the IAC (idle air control). If this does not happen, then we can talk about breakdowns in the fuel injection system.
Thanks to the use of a bridge circuit for switching semiconductors, the impulse created by them when the pressure changes increases. At the output of the device, the voltage during operation can vary in the range of 1..5 Volts.
The electronic control unit records the voltage value and, based on this parameter, understands what pressure is inside the manifold. The higher the output voltage, the higher the pressure. Sensors can be either analog or digital. In the first case, analog-to-digital converters are installed (after all, the ECU microcontroller will not be able to perceive a pure analog signal).
Checking the DBP sensor
Checking the absolute pressure sensor in the manifold comes down to the fact that you first need to make sure that it is clean, and therefore sensitive to changes in air flow, and then find out its resistance and the output voltage when the engine is running.
Cleaning the absolute pressure sensor
Please note that as a result of its operation, the absolute pressure sensor gradually becomes clogged with dirt, which blocks the normal operation of the membrane, which can cause partial failure of the DBP. Therefore, before checking the sensor, it must be removed and cleaned.
To clean, the sensor must be removed from its mounting location. Depending on the make and model of the vehicle, mounting methods and location will vary. Turbocharged engines typically have two MAP sensors, one in the intake manifold and one on the turbo. Typically the sensor is secured using one or two mounting bolts.
Cleaning the sensor must be done carefully, using special carb cleaners or similar cleaning agents. During the cleaning process, you need to clean its body, as well as the contacts. In this case, it is important not to damage the o-ring, contact elements of the housing and the membrane. You just need to spray a small amount of cleaning product inside and pour it back along with the dirt.
Very often, such simple cleaning already restores the operation of the MAP sensor and there is no need to perform further manipulations. So after cleaning, you can put the air pressure sensor in place and check the operation of the engine. If it doesn’t help, then you should move on to checking your DBP with a tester.
Checking the absolute pressure sensor with a multimeter
To check, find out from the repair manual which wire and contact is responsible for what in a particular sensor, that is, where are the power, ground and signal wires (signal in the case of a four-wire sensor).
To figure out how to check the absolute pressure sensor with a multimeter, you must first make sure that the wiring between the ECU and the sensor itself is intact and does not have a short anywhere, because the accuracy of the result will depend on this. This is also done using an electronic multimeter. With its help, it is necessary to check both the integrity of the wires for breaks and the integrity of the insulation (determine the value of the insulation resistance on individual wires).
Let's consider performing the corresponding check using the example of a Chevrolet Lacetti car. It has three wires going to the sensor - power, ground and signal. The signal wire goes straight to the electronic control unit. “Ground” is connected to the minuses of other sensors - the air temperature sensor entering the cylinders and the oxygen sensor. The supply wire is connected to the pressure sensor in the air conditioning system. Further checking of the DBP sensor is performed according to the following algorithm:
- It is necessary to disconnect the negative terminal from the battery.
- Disconnect the connector from the electronic control unit. If we consider the Lacetti specifically, then in this car it is located under the hood on the left side, near the battery.
- Remove the connector from the absolute pressure sensor.
- Set the electronic multimeter to the electrical resistance measurement mode with a range of approximately 200 Ohms (depending on the specific multimeter model).
- Check the resistance value of the multimeter probes by simply connecting them together. The screen will show the value of their resistance, which will later need to be taken into account when performing the test (usually it is about 1 ohm).
- One multimeter probe must be connected to pin number 13 on the ECU block. Connect the second probe in the same way to the first contact of the sensor block. This way the ground wire is “ringed”. If the wire is intact and its insulation is not damaged, then the resistance value on the device screen will be approximately 1...2 Ohms.
- Next you need to tug on the wire harnesses. This is done to make sure that the wire is not damaged and changes its resistance as the car moves. In this case, the readings on the multimeter should not change and be at the same level as in static conditions.
- Connect one probe to contact number 50 on the block block, and the second probe connect to the third contact on the sensor block. In this way, the power wire “rings”, through which a standard 5 Volt is supplied to the sensor.
- If the wire is intact and not damaged, then the resistance value on the multimeter screen will also be approximately 1...2 Ohms. Similarly, it is necessary to tug the harness in order to prevent damage to the wire in the speaker.
- Connect one probe to contact number 75 on the ECU block, and the second to the signal contact, that is, contact number two on the sensor block (middle).
- Likewise, if the wire is not damaged, then the resistance of the wire should be about 1...2 Ohms. You also need to tug on the wire harness to make sure the contact and insulation of the wires are reliable.
After checking the integrity of the wires and their insulation, it is necessary to check whether power is supplied to the sensor from the electronic control unit (supplying 5 Volts). To do this, you need to reconnect the ECU block to the control unit (install it in its seat). After this, we put the terminal back on the battery and turn on the ignition without starting the engine. Using the probes of a multimeter switched to the DC voltage measurement mode, we touch the sensor contacts - the supply and ground. If power is supplied, the multimeter screen will show a value of about 4.8...4.9 Volts.
The voltage between the signal wire and ground is checked in the same way. Before this you need to start the engine. Next, you need to switch the probes to the corresponding contacts on the sensor. If the sensor is in order, then the multimeter screen will display information about the voltage on the signal wire in the range from 0.5 to 4.8 Volts. Low voltage corresponds to idle engine speed, and high voltage corresponds to high engine speed.
Please note that the voltage threshold values (0 and 5 Volts) will never be on the multimeter in working condition. This is done specifically to diagnose DBP conditions. If the voltage is zero, the electronic control unit will display error p0107 - low voltage, that is, a wire break. If the voltage is high, the ECU will regard this as a short circuit - error p0108.
Testing with a syringe
You can check the operation of the absolute pressure sensor using a medical disposable syringe with a volume of 20 “cubes”. Also, for testing you will need a sealed hose, which must be connected to the dismantled sensor and directly to the neck of the syringe.
It is most convenient to use a vacuum hose for ignition adjustment for VAZ cars with a carburetor engine.
Accordingly, to check the DBP, it is necessary to remove the absolute pressure sensor from its seat, but leave the chip connected to it. It is best to insert a metal paper clip into the contacts, and connect the probes (or “crocodiles”) of the multimeter to them. The power test must be performed in the same way as described in the previous section. The power value should be within 4.8…5.2 Volts.
To check the signal from the sensor, you must turn on the car's ignition, but do not start the engine. At normal atmospheric pressure, the voltage on the signal wire will be approximately 4.5 Volts. In this case, the syringe must be in a “squeezed” state, that is, its piston must be completely immersed in the body of the syringe. Next, to check, you need to pull the piston out of the syringe. If the sensor is operational, then the voltage will decrease. Ideally, with strong vacuum, the voltage value will drop to 0.5 Volts. If the voltage drops only to 1.5...2 Volts and does not drop below, the sensor is faulty.
Please note that absolute pressure sensors, although reliable devices, are quite fragile. They are non-repairable. Accordingly, if the sensor fails, it must be replaced with a new one.
Signs of damage to the Hyundai Accent DBP and their causes
If the absolute pressure sensor on a Hyundai Accent is faulty, the following symptoms will certainly appear:
- Fuel consumption increases significantly. The sensor produces a high signal level, which indicates that there is high pressure in the intake manifold. But in reality the pressure is much lower. But the control unit sees a different picture and enriches the fuel mixture.
- Deterioration in vehicle dynamics; as the engine temperature rises, it does not change.
- You can smell gasoline from the exhaust pipe.
- Characteristic white exhaust color.
- At idle, high crankshaft speeds are maintained for a long time.
- Jerks when changing gears.
- The engine is unstable in any mode, regardless of load and speed.
Possible causes of malfunction
The MAP sensor is a fairly reliable device, but sometimes it fails, causing the engine to go into limp mode and not even start. There are several reasons for DBP malfunction:
- Poor connection between sensor and inlet fitting.
- Coke pipeline, which is quite flexible.
- Failure of the air temperature sensor, which is connected to the MAP and is sometimes combined with it in the housing.
- Relief of pressure in the vacuum tube due to damage or disconnection of the sensor.
- Breakdown of “mass” contact.”
- There is a fault inside the sensor.
Device diagnostics
To check the DBP of a Hyundai Accent, you must use one of the methods presented below. The first is to install some kind of diagnostic scanner that works using the OBDII protocol. It will show the error and help erase it after replacing the device. But you can do without it, you will need the following tool:
- Tachometer.
- Voltmeter.
- Vacuum (necessarily vacuum, not suitable for compressors) pressure gauge.
- Vacuum pump.
The photo shows a diagram of the connections of the devices and a graph of the linear dependence of pressure on voltage.
Diagnostics of an analog type absolute pressure sensor is as follows:
- You need to connect the adapter between the DD and the manifold to the hose. You need to connect a vacuum pressure gauge to the same adapter.
- After starting the engine, you need to let it idle. When the vacuum inside the manifold is 529 mmHg, you need to check for damage to the vacuum hose.
- Look at the Hyundai Accent DBP diaphragm - it may also have damage and defects.
- Remove the pressure gauge and install the pump in its place. Use it to create a vacuum of 55 mmHg. Art. Stop the pump and note the time - if the sensor is working properly, the vacuum value will not change for another 25-30 seconds. But if the pressure drops immediately or does not drop even after half a minute, the sensor must be replaced.
- Set the multimeter to voltage measurement mode.
- Turn on the ignition and check that there is power to the sensor - it should be 5 Volts.
- At the signal output, the voltage should be equal to half the supply - about 2.5 Volts.
- Now you need a tachometer (a device that measures rotation speed). The positive wire of the device must be connected to the signal terminal, the negative wire to the common terminal. If the sensor is working properly, then the tachometer will read 4400..4850 rpm.
- Connect the pump and create a vacuum. If the DBP of the Hyundai Accent is working properly, then the pressure will change along with the speed.
- When the pump stops, the speed stabilizes, the value should be 4400..4900 rpm.
In case of any deviations from the specified parameters, the faulty element must be replaced. But you can restore the sensor yourself, for this:
- Open the casing using a knife.
- Clean contacts from accumulated dirt, dust, and rust.
- After cleaning the Hyundai Accent DBP, fill everything with sealant and reassemble the device.
- Install it on the car and check if the system works properly. If it was not possible to repair, then most likely there is a breakdown in the strain gauges; it is unlikely to be eliminated.
This is probably the end of the story about the absolute pressure sensor installed on Hyundai Accent with 16-valve engines. If you have something to tell from your own practice, leave a comment. And finally, a short video on diagnosing a Hyundai Accent:
For the average motorist, an injection engine is like the Mariana Trench. Everyone knows perfectly well that there is something there, but only great scientists know what exactly and at what depth. In our case, they are large specialists with equipment for computer diagnostics. In a gasoline engine, stuffed with sensors, each of them can in one way or another affect performance, fuel consumption and dynamics. In a word, if something goes wrong, there’s no point in meddling with electronics with a screwdriver. We will have to deal with one of the many sensors today, namely the absolute pressure sensor.
Content:
How to troubleshoot P0107?
Using a diagnostic scanner or an ELM327 adapter with the Torque program, check the voltage of the MAP sensor with the ignition on and the engine running.
If the scanner reads less than 0.5 volts, stop the engine, disconnect the DBP connector and, using a digital multimeter, check for 5 volts on the reference circuit.
If there is no 5 volts in the reference signal circuit, you need to check the reference voltage at the control unit connector. If there is 5 volts at the ECU connector, but not at the DBP connector, then there is an open circuit in the reference voltage circuit between the ECU and DBP. The wiring harness must be inspected and repaired. If there is no 5 volt reference voltage at the ECU connector, you need to check the power and ground wires on the control unit harness. If you have a reference voltage of 5 volts at the DBP connector, you need to make a jumper between the reference and signal voltage of the sensor. Now check the DBP voltage on the scan tool. It should be between 4.5 and 5 volts. If so, replace the MAP sensor. If not, locate and repair the open/short in the signal circuit and retest. If everything seems fine, move everything you can. Start the engine and move the wiring harness, connector, tap the DBP
Note any changes in engine voltage or speed. If necessary, repair the connector, harness or sensor. If the wiggle test is successful, use a vacuum pump (or just your lungs) to create a vacuum on the MAP sensor vacuum port
As vacuum is added, the voltage should decrease. Without vacuum, the MAP sensor should read approximately 4.5 volts. If the scan tool sensor readings do not change, replace the DBP.
Source
What types of pressure sensors are there?
Depending on the design of the engine, there may be two, three or more sensors that control the supply and air pressure into the system. For example, in engines with a turbine, another sensor may be installed that monitors the compressor pressure. In principle, the design of these devices is identical - they are designed to measure pressure and send data to the electronic engine control unit.
The sensor that interests us measures the so-called absolute pressure, that is, it shows the pressure value not relative to atmospheric pressure, but relative to complete vacuum. Depending on the principle of operation of the device, it can be designed according to two schemes: a device based on a thin film, which reacts to changes in pressure and generates a certain electrical potential transmitted to the ECU; a more accurate and modern sensor design system is micromechanical.
Repair for error p0118
If OBD p0118 is detected in the memory of the electronic control unit, you must perform the following steps:
- Turn on the ignition in the car, but do not start the engine.
- Connect a diagnostic tool to the connector of the electronic control unit to scan for errors and obtain information about the internal parameters of the vehicle. Depending on the software installed on it, you need to select the “Coolant temperature” menu.
- If the temperature of the coolant according to the instrument readings is less than +135°C, then if there are no other errors in the computer memory, it is necessary to check the sensor grounding circuit (the wiring diagram should be looked at in the manual) for any faults in the wiring or any connections. At the same time, it makes sense to check the contacts of the temperature sensor directly.
- Disconnect the block (chip) with wires from the antifreeze temperature sensor. If the device indicates that the coolant temperature is higher than -42°C, this means that the signal wire of the sensor is shorted to ground, or the engine control unit is faulty.
- If, under similar conditions, the diagnostic tool shows that the coolant temperature is below -42 ° C, then in this case, the temperature sensor is most likely faulty, and accordingly, it must be replaced. However, before replacing it, it needs to be further checked.
Where to look if error p0118 occurs
It makes sense to check the condition of the sensor itself and its wiring using the following algorithm:
Broken sensor wires on the chip
- Disconnect the sensor connector and check its condition. Often, due to high temperatures and simply time, the plastic fasteners on the sensor dry out and begin to crumble. This may result in poor contact.
- On many coolant temperature sensors (in particular, those installed on modern VAZ cars) there is a lock (“eye”) on the connector housing on the outside. It may simply break off, and accordingly, the chip on the sensor contact will not be fixed, which will lead to loss of electrical contact. And even if the chip is in place, moisture and dirt can get inside the contact through the gaps formed, thereby worsening the contact.
- Check whether the temperature sensor receives power from the electronic control equal to 5 Volts. This can be done using a multimeter. To do this, you need to turn on the ignition (you don’t have to start the engine).
- Check for rust and debris on the contacts in the connector and on the sensor. If they are present, be sure to clean the contacts (preferably using a cleaner).
- Remove the coolant temperature sensor from its seat and visually inspect it (damage is unacceptable). If it is dirty, it needs to be cleaned. Next, you need to check it using a multimeter using one of three methods.
- “Ring” the wires going from the antifreeze temperature sensor to the ECU using a multimeter. Very often, the cause of error p0118 is a break in one or both sensor wires. If a break is detected, the wire must be replaced. As for the pins on the control unit, each car has its own electronic circuit; the contact numbers must be specified in the manual.
- Measure the insulation resistance between the two coolant temperature sensor wires. If it is close to zero, then there is a short circuit. In this case, you can try to find the place where the insulation is damaged and use heat-resistant insulating tape or heat shrink to repair it. However, it is still better to replace damaged wires with new ones.
- Measure the resistance between each wire and ground. If the corresponding value is close to zero, then there is a short circuit to the housing. Here the actions are similar to the previous point. It is advisable to replace the damaged wire with a new one.
If you don’t check the wiring, but simply replace the sensor, hoping that the whole problem is in it, then your expectations will often not be met, and you will waste your money, because often the problem lies precisely in damage to the wires or connector!
Upon completion of the repair work, do not forget to delete the error information from the ECU memory, otherwise it will hang until the full cycle of fixing it has been completed.
Conclusion
OBD error p0118 is not critical, and if it appears, the car can be used. However, it must be taken into account that in this case the engine will operate in emergency mode. In particular, the load on the exhaust cleaning system and EGR system will increase, problems with starting a cold engine will occur, the car will lose power and fuel consumption will increase slightly. Therefore, it is better not to delay diagnostics and repairs.
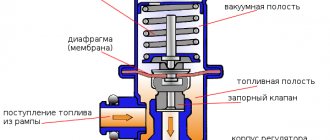
Operating principle and design of the device
The design of the device includes two chambers - vacuum and atmospheric. It is clear that the first chamber contains a vacuum, and the second chamber is directly connected to the intake manifold. In addition, the device body contains four strain gauges, which are attached to the diaphragm, and a silicon chip. Pressure acts on the diaphragm, and under its action it moves the sensitive elements, changing their resistance, as a result of which the silicon chip supplies a pulse of a certain value to the ECU. The strain gauges are connected in a bridge circuit to increase the impulse, and the voltage across the sensor can vary from one to five volts.
It is on the basis of the received voltage that the electronic control unit draws a conclusion about the pressure in the intake manifold. Higher pressure means higher voltage and vice versa. Depending on the design of the sensor, it can supply both an analog and digital signal, but for this it is necessary to integrate a special analog-to-digital signal converter circuit into the sensor body.
Symptoms of sensor failure
The not too intricate design of the sensor in new cars can be supplemented with a layer of special gel, which serves as a kind of protection for the sensitive element, which somewhat extends its service life. However, the sensor may fail, as indicated by the following symptoms:
- Gasoline consumption is increasing. This may be due to the fact that the sensor does not work at all or produces incorrect data from the ECU, which assumes that the pressure in the manifold is stable and continues to supply fuel in larger quantities than is actually necessary.
- The dynamics disappear against the backdrop of increasing consumption, and if acceleration does not improve after the engine has fully warmed up, most likely you need to go for diagnostics.
- Due to the constant overflow of gasoline in the throttle valve area, a persistent fuel smell may persist.
- Floating or uncontrolled idle speed.
- Dips in transition modes, when starting from a standstill, changing gears and changing the throttle.
How to check and replace DBP
In order to find out where the sensor is located, you need to find a fitting on the intake manifold, from which a tube goes to the fitting of the sensor itself. By the way, the cause of the listed troubles can be a clogged or broken hose, and the device itself can be mounted either on the engine shield or on the wheel arch. Checking the functionality of the sensor is carried out only on special diagnostic equipment or using an oscilloscope.
The device cannot be disassembled and cannot be repaired. The price of a new sensor is within a thousand rubles, depending on the make of the car. When replacing the sensor, it is necessary to take into account that each modification of the device may have its own pinout, since it has three contacts - ground, signal and power, and the replacement process itself is simple and will take several minutes. Successful diagnosis and effective repair to all!
How to clean DBP
During operation, the device gradually becomes overgrown with dirt, which reduces the sensitivity of the diaphragm. Because of this, symptoms may be observed that indicate a malfunction of the DBP. To clean it from contaminants, it is necessary to dismantle it.
Depending on the model of the car, the location of the sensor changes. If the engine is turbocharged, then there may be two of them, one of which will be located on the turbine, and the second on the intake manifold. In any case, bolts will be used for fastening - one or two, depending on the design.
To clean the sensor, you should stock up on carb cleaners or similar cleaning products. First, the housing is tidied up, and then the contacts are carefully cleaned. The most attention is paid to the O-ring and diaphragm. You need to be careful with them, the main thing is to prevent damage. It is enough to spray a certain amount of cleaning composition and then pour it out with the dirt removed.
Cleaning allows you to restore sensitivity to the sensors, and if the problem was only contamination, diagnostics will show that the sensor is in perfect order, and the engine will operate in standard mode. If the manipulations do not help, you should purchase a new replacement device.