The gas distribution mechanism (GRM) is responsible for supplying the fuel-air mixture to the engine cylinders and removing exhaust gases at precisely defined points in time. This is achieved through timely action on the parts of the valve mechanism, which ensures the opening and closing of the valves.
For proper operation, the rotation of the camshaft and crankshaft must be synchronized. The problem is solved due to the fact that the camshaft is driven from the crankshaft using a belt, chain or gear drive.
How to tighten the timing chain on a VAZ 2106
Before we begin tightening the slack timing chain, let's decide on the tools that we will need for the job. Here they are:
- open-end wrench 14;
- open-end wrench 36 (it will be needed to turn the crankshaft);
- 10mm socket head with wrench.
Sequencing
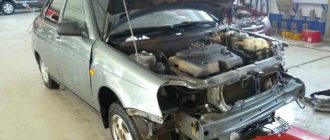
Before adjusting the chain, you will have to perform one preparatory operation: remove the air filter. The fact is that its body will not allow access to the timing chain. The filter is held on by four 10mm nuts, which are not difficult to unscrew.
- After removing the air filter housing, access to the carburetor opens. On the side of it there is a gas thrust. It is disconnected using a 10mm socket.
The throttle rod on the VAZ 2106 is removed with a 10 mm socket wrench
- A lever is attached to the rod. It is removed manually.
To remove the traction lever from the VAZ 2106, no special tools are required
- Then the hose supplying gasoline to the carburetor is removed from the bracket.
When removing the fuel hose, you should squeeze it firmly so that gasoline does not spill from it into the engine.
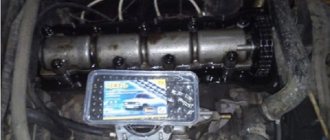
- Using a 10 mm socket wrench, unscrew the bolts holding the cylinder block cover.
The cylinder block cover is held on by six 10mm bolts, which are unscrewed with a socket head
- In the engine, near the air pump, there is a cap nut that holds the tensioner. It is loosened with an open-end wrench of 14.
If you do not loosen the cap nut first, you will not be able to turn the crankshaft.
- Once the cap nut is sufficiently loosened, the chain tensioner will release with a characteristic click. But sometimes you can't hear the click. This means that the tensioner fitting is clogged or rusted, so to discharge the tensioner, you will have to gently tap the tensioner with an open-end wrench.
- After this, you should lightly press the timing chain from the side (usually this is enough to understand whether the chain is slack or not).
- Now, using a 36mm open-end wrench, the car’s crankshaft is turned two turns clockwise (the tension of the timing chain will increase, and it will be more and more difficult to turn the timing shaft).
- When the chain reaches maximum tension and it is impossible to turn the crankshaft with a wrench, you must use a second open-end wrench to tighten the tensioner cap nut to 14 (in this case, the crankshaft must be held at all times with a wrench to 38; if this is not done, it will turn in the opposite direction and the chain will immediately weaken).
- After tightening the cap nut, you must manually check the chain tension again. After pressing on the middle of the chain, no slack should be observed.
When pressing on the timing chain, no slack should be felt.
- The cylinder block cover is installed in place, after which the timing system components are reassembled.
- The final stage of adjustment: checking the operation of the circuit. The car hood remains open and the engine starts. After this, you need to listen carefully. There should be no grinding, ringing or other extraneous sounds coming from the timing block. If everything is in order, the timing chain adjustment can be considered complete.
- If the car owner is faced with the task of not tightening, but slightly loosening the chain, then all of the above steps should be done in reverse order.
Preparing to replace the drive chain
Before tensioning the chain on the VAZ-2106, it needs to be replaced. To carry out the work you will need the following tool:
- Open-end and ring wrenches for “10”, “13”, “17”.
- Ratchet key set to "38". With its help, the crankshaft rotates.
- Phillips and flathead screwdrivers.
- Mounting blade.
- Hammer.
- Ratchet and socket set.
Be sure to purchase a new chain and gasket for the cylinder head cover. But, as practice shows, reusing the gasket is possible; the tightness is broken only after it completely breaks.
How to check
It is impossible to determine the condition of the chain purely by eye - and neither experience nor skill will help here.
To objectively check such an important part of the 2106 engine, there are two methods
In the first case it is necessary:
- place the chain sideways on the edge of the table, so that its end (10 cm) is in the air;
- put a ruler on top and determine how much it sags.
The element does not require replacement if the named parameter is no more than 1 centimeter. When it reaches 2 cm, this means that the chain has completely lost its serviceability.
To use the second (more accurate) method, you need a caliper. Further:
- stretch the element on the table;
- count 8 links;
- measure the length of the segment;
- repeat the manipulations in two other randomly selected places;
- if the result is that the fragments have a length of more than 122.6 millimeters, then the chain is worn out.
When is it time to change the chain?
Replacement or adjustment of the chain is necessary if the following symptoms are present.
- Loud knocks and grinding noises in the hood area after starting the engine. As the crankshaft speed increases, the noise frequency also increases.
- Fuel consumption cannot be called economical if the cylinder block is not operating properly. The increase in consumption occurs by a third or even two times.
- Gaps form in the engine's power output, which can be noticed both at idle and when accelerating.
- The vehicle's reaction to activating the gas pedal is not good enough; the reaction may be delayed by a couple of seconds.
The presence of these signs indicates the need to remove the chain and examine the degree of its wear. Excessive wear requires replacing the chain, but if signs of wear are insignificant, it is enough to tighten it.
Be sure to read our specialist's detailed article, which talks about replacing the timing chain.
We also recommend that you carefully study our expert’s article, in which he talks in detail about replacing the timing belt.
How to tension the timing chain of a VAZ-2107
The timing chain rollers and roller axles wear out over time and the chain lengthens. In addition, the teeth of the sprockets and the working surface of the tensioner shoe wear out. As a result
The chain tension weakens, the valve timing and ignition phases change - engine performance deteriorates, and its noise increases. If stretched significantly, the chain can jump, which leads to bending of the valves and engine failure.
The main sign of a weakening chain is a characteristic ringing rattling sound in the front of the engine, which appears with a sharp increase or decrease in speed. With significant stretching, the sound turns into a constant dull rattling sound.
Therefore, it is periodically necessary to restore the chain tension; the factory recommends adjustments every 10 thousand kilometers. For this purpose, the engine design includes a semi-automatic plunger tensioner.
The chain can be tensioned either with the valve cover removed or without removing it. The first method is more convenient, as it allows you to visually assess the degree of loosening and tension of the chain, and check the wear and integrity of timing parts. It is better to combine the work with adjusting the valve clearance.
However, this method is more labor-intensive, so we will analyze the chain tension without removing the valve cover, as initially recommended by the manufacturer.
For this we need:
- Socket or wrench 13
- Keys for 8, 10
- Flat blade screwdriver
- Special key for turning the crankshaft (optional)
- Torque wrench (optional)
To begin, remove the battery, opening access to the tensioner.
Using a “13” wrench, loosen the tensioner cap nut by about 0.5-1 turn. At the same time, the tensioner plunger should be released, “shooting” with a characteristic click - it often happens that it jams. If this does not happen, then you can lightly tap the nut, or unscrew it completely and remove the plunger with a screwdriver.
Now you need to turn the crankshaft 1-1.5 turns and stop it at the moment of greatest resistance to rotation, avoiding kickback in the opposite direction. This can be done using a special wrench for the crankshaft pulley ratchet nut, but it may not always be available, and getting to the nut, especially on the injector, is quite problematic. Therefore, in this case it is preferable to turn the crankshaft through the transmission (in no case with the starter!).
To do this, first fix the car by the wheels on a level surface, jack up the rear wheel, engage 4th direct gear, and release the parking brake. Slowly turn the wheel in the direction of travel 1-1.5 turns until the greatest rolling resistance occurs. Tighten the cap nut with a force of 5.2 kgf*m. We jack up the car and start the engine, check the degree of tension of the chain by the noise it makes.
If the adjustment does not help, then repeat the operation, making sure that the tensioner is working - it can be removed and checked. If this does not help, then perhaps the wear of the parts is critical and the length of the tensioner is simply not enough - it is necessary to remove the cover and inspect the parts, if necessary, replace the sprockets and timing chain.
Instructions for disassembling the mechanism
The first thing to do is remove the engine valve cover. Here you can see some signs of wear, for example, a chain dangling on the camshaft gear or a torn damper (or rather, its absence). It even happens that in the place where it stood, the chain selected a groove in the material of the head itself. For convenience, it is better to immediately align the round mark on the camshaft drive gear with the protrusion on its bed.
This is done by rotating the crankshaft with a 38mm wrench. For further disassembly, it is better to remove the radiator, first draining the antifreeze from it. There are craftsmen who replace the VAZ 2106 chain without removing the radiator, but this makes access to the timing mechanism very difficult, which will take up extra time. It is better to spend it on dismantling and installing the radiator, creating conditions for normal operation.
Once access to the front of the engine is open, you need to loosen and remove the generator drive belt. Then, using a 38mm wrench, loosen the pulley nut in this way: engage 4th gear, and ask an assistant to press the brake, and then unscrew the ratchet. This method will save you from the need to insert various pieces of hardware into the engine to stop the rotation of the crankshaft. Further disassembly is carried out according to this scheme.
- Remove the pulley from the crankshaft, clean the turnkey bolts on the 10th front cover of the cylinder block from dirt, and unscrew them. Three of them are located at the bottom and connect the cover to the oil pan. Remove it, clean off any remaining gasket, as well as the mating flange on the cylinder block.
Replacing the timing chain of a VAZ 2106
- Unlock the bolts of the two gears, loosen them and unscrew them. Remove these gears, then use a 10mm wrench to unscrew the travel stop (located to the left of the crankshaft axis), and then remove the old chain. The crankshaft gear is removed last; be careful not to lose the key.
- Use a 13mm wrench to loosen the chain tensioner nut, use a pry bar to gently press the chain tensioner shoe so that the plunger goes in, and then tighten the nut again. This is done because previously the chain tension was greater; the tensioner will not allow you to install a new one.
- Replacing the chain tensioner consists of unscrewing its working part (shoe) and replacing it with a new one, which is done in the next step.
- The chain damper is replaced in the same way. You need to unscrew 2 bolts with a 10mm wrench, remove the old element, and install a new one in its place and screw it on.
This photo report shows how to replace the timing chain of VAZ 2106, 2107 cars. Also, this method is suitable for all VAZ (Classic) car models, except for the VAZ 2105 engine, since it uses a belt drive.
Read more: DIY car battery charger
To drive the VAZ 2106/2107, a double-row roller chain is used. It transmits force from a sprocket mounted on the crankshaft to another sprocket mounted on the end of the camshaft.
The chain is a structure that develops large inertia, so a chain drive requires vibration damping.
Even a well-tensioned chain retains the property of “playing” in those places where there are no sprockets or tensioners.
The chain has virtually zero ability to stretch and compress, and fairly limited flexibility. Therefore, in order to provide it with constant tension while working in its place at any speed, it has to be literally shackled, using a system of tensioners and dampers.
This problem on the VAZ 2106/2107 is solved by a damper - an additional spring-loaded clamping bar. They have a steel frame covered with a layer of durable rubber. Tensioners and dampers dampen vibration and noise quite effectively. The chain is prevented from falling off by a stop pin that is screwed into the block or cylinder head. During normal operation the chain does not touch it.
The performance and durability of the timing chain drive depends on the material and quality of heat treatment of the chain and sprockets themselves. Manufacturing accuracy and cleanliness of working surfaces are of great importance. The main advantage of a timing chain drive is its long service life.
On engines of the VAZ family, the chain life is from 100 to 200 thousand kilometers. If high-quality materials were used in the manufacture of components, and proper tension and abundant lubrication of the drive were ensured during operation, then the chain will last no less than the engine itself. A broken circuit is a rare occurrence.
The deterioration of its condition can be monitored by increased noise when the engine is running.
For engines 2101 and 21011, where the block is lower, the number of chain links is 114, and for 2103/2106 the number of links is 116.
Replacing the timing chain on a VAZ is necessary when its critical wear has occurred, its service life has been exhausted, and tightening it with all sorts of “cunning” methods no longer gives results. These methods include:
- increasing the length of the working part of the tensioner by pressing on a piece of tube of a suitable diameter;
- “addition” of an additional bracket to the shoe and other “bullying” of the engine.
An extended timing chain no longer ensures accurate valve timing, which negatively affects engine performance.
In addition, she wears out the shoe and constantly “beats the head off” the pacifier. In addition, engine noise increases, fuel consumption increases and engine starting becomes worse.
It is also worth saying that the chain sometimes breaks with all that it entails.
- To remove the timing chain, you do not need to remove the crankshaft sprocket!
- For work we will need: keys “10”, “13”, “17”, a special wrench for the crankshaft pulley nut (or a “36” head), a screwdriver, a mounting blade, a hammer, and a bit.
- After removing the sprocket, do not turn the drive shaft, because this may disrupt the initial ignition setting!
- The original timing chain number is 2103-1006040, the average price is 380 rubles.
- Analogues:
- Fenox PC2103C3 — 519 rub.
- Kraft KT 017736 — 620 rub.
The original number of the timing chain tensioner is 2101-1006060, the average price is 364 rubles.
Analogues:
- TSN 671 — 254 rub.
- Riginal RG2101-1006060 — 230 rub.
- Trialli MT 151 — 407 rub.
Replacement frequency: every 200 thousand km.
First, remove the block head cover.
Now we turn the crankshaft until the mark on the camshaft sprocket aligns with the mark on the housing.
The mark on the crankshaft will also need to line up with the mark on the camshaft cover.
Next, bend the lock washer of the camshaft sprocket bolt. Then we engage fourth gear and put the car on the handbrake.
Then loosen the camshaft sprocket bolt.
Using a 10mm spanner, unscrew the two nuts of the studs connecting the parts of the casing. Using a 10mm socket with an extension, unscrew the bolt securing the upper casing to the bracket. We remove the casing. Using the “10” wrench, unscrew the “propeller”.
Using a 10mm wrench, unscrew the three nuts and six bolts securing the camshaft drive cover to the cylinder block.
Remove the camshaft drive cover.
Using a 17mm wrench, unscrew the bolt securing the tensioner shoe...
Using a chisel, bend the edge of the lock washer on the oil pump drive sprocket bolt.
Using a 17mm wrench, unscrew the bolt securing the oil pump drive sprocket.
We remove the star. We take out the camshaft drive chain. Then, lifting the chain, remove the camshaft sprocket.
Using a 10mm wrench, unscrew the chain limiting pin and remove it.
Before installing the chain, align the mark on the crankshaft sprocket with the mark on the cylinder block.
Using a 13mm socket, loosen the cap nut of the chain tensioner. Turn the crankshaft clockwise one and a half to two turns. In this case, the tensioner spring, acting on the tensioner shoe, will automatically adjust the chain tension. Tighten the tensioner cap nut.
Purpose of the timing chain on the VAZ 2106
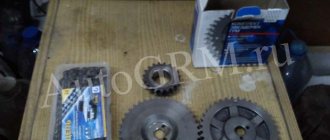
The timing chain in the engine of a VAZ 2106 car connects two shafts - the crankshaft and the timing shaft. Both shafts are equipped with toothed sprockets, on which the chain is put.
The timing chain is put on two sprockets, one of which is attached to the timing shaft, the other to the crankshaft
After starting the engine, the chain ensures synchronous rotation of the two above shafts. If the synchronization is disrupted for some reason, this leads to malfunctions in the operation of the entire gas distribution mechanism of the car. In addition, malfunctions in the operation of the cylinders occur, after which the car owner notes the appearance of dips in engine power, poor response of the car to pressing the gas pedal and increased fuel consumption.
Timing chain characteristics
Classic VAZ cars are equipped with timing chains, which differ only in the number of links. The length of the chains is the same:
- on VAZ 2101 and VAZ 2105 cars a 114-link chain is installed, the length of which varies from 495.4 to 495.9 mm, and the link length is 8.3 mm;
- On VAZ 2103 and VAZ 2106 cars, chains of the same length are installed, but they already have 116 links. The length of the link is 7.2 mm.
The timing chain pins on the VAZ 2106 are made of high-quality alloy steel, which has high strength and wear resistance.
Checking the timing chain for wear
A car owner who decides to find out the degree of wear on the timing chain on a VAZ 2106 will have to solve a very difficult problem. The fact is that a worn and stretched chain is not much different in appearance from a new one. An old chain, as a rule, does not have serious mechanical damage, and it is almost impossible to notice the wear of its pins with the naked eye.
But there is one simple wear test that every car enthusiast should know about. It is carried out as follows: a piece of old chain about 20 cm long is taken from one side, placed horizontally, and then turned in the hand so that the chain pins are perpendicular to the floor.
If the overhang angle of the timing chain does not exceed 10–20 degrees, the chain is considered new
After this, the overhang angle of the chain is assessed. If the hanging section of the chain deviates from the horizontal by 10–20 degrees, the chain is new. If the overhang angle is 45–50 degrees or more, the timing chain is severely worn and needs to be replaced.
There is a second, more accurate method for determining timing chain wear. But here the car owner will need a caliper. On an arbitrary section of the chain, you need to count eight links (or 16 pins), and use a caliper to measure the distance between the outer pins. It should be no more than 122.6 mm.
Measuring the chain with a caliper should be done in at least three places
Another random section of the 16-pin chain is then selected and the measurement is repeated. Then the third and last section of the chain is measured. If in at least one measured area the distance between the outer pins exceeds 122.6 mm, the chain is worn out and should be replaced.
Signs of a poorly adjusted chain
When they talk about a poorly adjusted chain, they usually mean a loose and sagging chain. Because a highly tensioned chain does not show any signs of breakage. She's just bursting. Here are the main signs that the timing chain has become loose:
- after starting the engine, a loud grinding and knocking noise is heard from under the hood, the frequency of which increases as the crankshaft speed increases. This occurs due to the fact that the slack chain continuously hits the damper and the tension shoe;
- the car reacts poorly to pressing the gas pedal: the engine begins to increase speed only one or two seconds after pressing. This is due to the fact that due to a sagging chain, the synchronism of rotation of the timing shaft and the crankshaft is disrupted;
- There are power failures in engine operation. Moreover, they can occur both when accelerating and when the engine is idling. Due to the desynchronization of the shafts, which was mentioned above, the operation of the cylinders in the engine is also disrupted. In this case, one cylinder either does not work at all, or works, but not at full strength;
- increase in fuel consumption. If the cylinder block is not working properly, this cannot but affect fuel consumption. It can increase by a third, and in especially severe cases - double.
Read about replacing the tensioner shoe: https://bumper.guru/klassicheskie-modeli-vaz/grm/natyazhitel-tsepi-vaz-2106.html
If the driver notices one or more of the above signs, this only means one thing: it’s time to remove the timing chain and check for wear. If it turns out to be very worn, it will have to be replaced. If the wear is minor, the chain can simply be tightened slightly.
Video “Chain Knocking on a Classic”
This video examines the cause of engine knocking and demonstrates chain drive tension.
A VAZ 2107 timing chain tensioner is installed on the front right side of the car engine. The main purpose of such a mechanism is to tension the chain, which in turn is extended during operation.
Replacement work is not difficult and is completed within a short period of time. To replace the tensioner you must:
- Open the hood of the car and in the engine compartment, use a ten-point socket wrench to unscrew the two bolts securing the tensioner to the cylinder block and carefully remove it. A sealing gasket will be installed between the tensioner and the block. Check its condition and, if necessary, replace it with a new one.
- Having removed the tensioner body, we clamp it in a vice and use a thirteen key to unscrew the central cap nut, thereby checking the serviceability of the collet lock. If a crack is detected, it is necessary to replace the cap or the tensioner itself.
After checking the tensioner and if it needed to be replaced, you can begin installation. Before installing it, the tensioner must be charged; to do this, push the plunger all the way in and, holding it in this state, tighten the cap nut.
I tighten the cap nut, install the tensioner in its place and tighten the bolts that secure it. Then we turn the crankshaft one turn, thereby tightening the camshaft drive chain, after which we release the cap nut, releasing the tensioner, and tighten it again. At this point, the repair work to replace the timing chain tensioner of the VAZ 2107 is completed.
Sometimes a car enthusiast encounters extraneous sounds that come from the area of the front engine cover and resemble a kind of tapping. This may be a sign that the chain guide needs to be replaced. The damper on the VAZ 2107 model is necessary to soften the vibrations of the chain during its rotation. If you can clearly hear a clattering or metallic tapping sound, this means that the damper is very worn and needs to be urgently replaced. Another possible cause of the problem is that the chain tension is too loose. In this car model, the damper is located on the left, in front of the cylinder block. Use the diagram supplied with the machine to determine the exact location of the part to be replaced.
Replacing a chain guide on a VAZ 2107 is not a complicated procedure. Each driver will be able to carry out such an operation independently if he takes into account several important points. When replacing a part yourself, you need to proceed like this.
The long fastening bolt is installed at the top, and the short one at the bottom. If the bolts have a significant degree of wear, they need to be replaced, otherwise even after replacing the damper, the characteristic tapping sound may remain.
If the damper simply breaks into pieces while moving, you need to remove all its components. Sometimes this is quite difficult to do and you have to invent various devices to get the debris out. In such a situation, a magnet attached to the end of a long wire can help out. Place all the removed parts together to determine if there is anything left inside.
Replacing the tensioner
This element is necessary for tensioning the VAZ-2106 chain. Replacing it is very simple, just follow these steps:
- Remove the old tensioner; to do this, unscrew the two nuts that secure it.
- Unscrew the cap-type nut - this can be done conveniently using a vice.
- Clamp the tensioner in a vice and unscrew the nut. Inspect the collet located inside the nut.
- If this clamp has no defects, you can assemble the mechanism and “charge” it. To do this, you need to push the plunger inside the body, and then tighten the nut.
Required tools:
- keys from the standard set;
- universal pulley clamp;
- special key for “36”;
- empty, clean container for draining antifreeze.
Replacing the timing chain on a VAZ 2106 as well as a damper, tensioner shoe, and sprockets
- Remove the air filter housing from the carburetor.
How to replace the timing chain on a VAZ 2106 with your own hands
Unscrew 3 nuts with a 10 wrench, 4 nuts with an 8 wrench
All actions must be performed carefully so that nothing falls on the carburetor. If this is neglected, you will need to remove this unit, possibly the intake manifold
Do-it-yourself replacement of the timing chain on a VAZ 2106
- Remove the distributor cap and remove the pipe used to supply fuel.
- Using a “10” wrench, remove the 8 nuts securing the valve cover and remove the washers with plates.
- Disconnect the choke cable and throttle valve drive.
- Remove the valve cover with gasket (ideally it is better to replace it).
- Remove the protection from below, drain the antifreeze into the container that was prepared initially.
- Using a wrench set to “19”, loosen the generator mounting nut.
- Loosen the clamp of the lower water pump pipe and remove it.
How to replace the timing chain on a VAZ 2106, stabilizer, tensioner shoe, and sprockets on your own
- Turn off the power to the fan, as well as the power to the temperature sensor on the radiator.
- Remove the radiator with pipes and thermostat.
- Loosen the generator chain tensioner nut. Use a pry bar to move it forward.
Read more: Where is the cabin filter of the VAZ 2110 and how to change it: step-by-step instructions Replacing the timing chain on a VAZ 2106 with your own hands
- Disconnect the VAZ 2106 alternator belt.
- Using the “36” key, turn the crankshaft by the pulley until the marks of the cover and pulley, the sprocket and the casting in the camshaft bed coincide.
Timing chain VAZ 2106
Also check out
- Unscrew the “36” nut securing the crankshaft pulley. Use a special key to lock the pulley and unscrew it. If there is no special key, you need to engage fifth gear, depress the brake pedal, and unscrew it using the key.
Replacing the timing chain on a VAZ 2106, as well as a damper, tensioner shoe, and sprockets
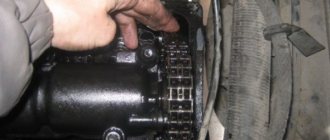
- Remove the pulley. Unscrew 6 bolts and 3 nuts with a “10” wrench, then 3 more bolts of the camshaft drive cover, remove the cover.
We change the timing chain on a VAZ 2106 damper, tensioner shoe, and sprockets with our own hands
- Unscrew the 2 nuts securing the chain tensioner and remove it.
The photos show an automatic tensioner.
- Loosen the bolt that secures the camshaft sprocket, after which you can remove it. The position for centering is worth remembering, or better yet, marking.
In the photo you can see the result.
- A fuse to prevent the circuit from jumping.
- Fastening the timing chain tensioner shoe.
- Crankshaft sprocket.
- Using a “10” key, disconnect the fuse, the tensioner mount, and the bolt that secures the auxiliary drive sprocket.
- Remove the sprockets and old timing chain. The crankshaft key and the casting on the cylinder block must match.
- Install new sprockets, crankshaft and auxiliary units to the drive. Install a carefully lubricated new chain.
- To prevent the chain from falling down, you need to place some kind of tool under it. Changing the timing chain of a VAZ 2106 at home
- The sprocket is installed in the chain so that the descending branch of the chain is tensioned and all its marks coincide. Next you need to turn the camshaft from right to left and go back behind the crankshaft. Thanks to these actions, the chain is tensioned, and you can check the correct installation of the marks. If the marks do not match, you need to throw the chain over the tooth and then repeat the procedure.
- Return the tensioner to its place and activate it. Tighten all mounting bolts and secure them. Turn the crankshaft 2 turns, make sure that the marks match and that the valves and pistons do not collide.
- Lubricate the crankshaft cover gasket with sealant and install it in place.
- Place the pulley, make sure that the marks match, and tighten it.
- Unscrew the distributor nut to “13”, remove the distributor itself, turn the slider to the contact of the 4th cylinder.
- Return the distributor to its place.
- To complete the procedure for installing a new VAZ 2106 timing chain, be sure to turn on the ignition.
- Reassemble in reverse order and add antifreeze.
- At this point, the replacement of the timing chain on the VAZ 2106 can be considered complete.
Replacing the chain
In order to replace the timing chain yourself, you will need to perform a number of these steps:
- Remove the cover from the block head. To do this, unscrew all the nuts that secure it. Be careful not to lose the washers and remove any attachments that will get in the way.
- Using a ratchet wrench, rotate the crankshaft until the mark on the camshaft sprocket aligns with the mark.
- The locking plate must be straightened using a thin chisel and a hammer.
- Unscrew the bolt that secures the camshaft sprocket. To make unscrewing easier, you need to turn on the fifth speed (or fourth) and squeeze the handbrake. There is no need to completely unscrew the bolt.
- Remove the damper and tensioner shoe, then unscrew the stop pin.
- Do not let the sprocket and chain fall down. Carefully remove the sprocket from the camshaft, then from the crankshaft and carefully pull it out.
- The new chain must be lubricated with fresh oil, then put it on the crankshaft sprocket, and then on the auxiliary mechanism drive.
- Make a small hook out of steel wire and use it to hook the chain and lift it up.
After these manipulations, you can install the sprocket on the camshaft, tighten the bolt and secure it with a plate. Before tensioning the chain on the VAZ-2106, you need to make sure that the timing marks match. To do this, rotate the crankshaft (with the gear off) and make sure that all marks match.
Chain mechanism fault detection
The timing drive, equipped with a chain, is structurally located inside the engine. To determine the condition of the parts of this mechanism, it is necessary to partially disassemble the motor. The fact that there are problems with the chain or drive elements is indicated by characteristic signs.
The chain is noisy
A circuit can have different types of noise:
- noise under load;
- knocking on a warm engine;
- extraneous sounds when cold;
- constant noise with a metallic character.
If the motor begins to make sounds that are uncharacteristic of its normal operation, it is necessary to find out as soon as possible what problems have arisen with the chain drive and eliminate them. If this is not done, wear on the timing drive elements will increase, which can lead to costly repairs.
Video: chain knocking in a VAZ “classic” engine
Timing drive components may fail prematurely for the following reasons:
- the use of oil not specified by the car factory, or its untimely replacement;
- use of low-quality parts;
- low lubricant pressure in the engine;
- failure to comply with engine maintenance regulations;
- low quality of repairs.
Often the chain is noisy due to stretching or problems with the tensioner. Attempts to tighten it turn out to be useless, and the engine sounds like a diesel engine. The sound most often appears on a cold engine when idling.
The timing chain stretches over time, so it needs to be periodically tightened or replaced
With high mileage of the vehicle, the timing chain stretches. As a result, it can simply jump to other teeth of the camshaft or crankshaft gears. This problem may occur when the timing drive parts are damaged. If the chain jumps by at least one tooth, the ignition is greatly shifted and engine operation becomes unstable (sneezes, shoots, etc.). To fix the problem, you will need to check the integrity of the parts, and if damage is detected, make repairs.
Installing the chain by marks
The need to install marks on the timing mechanism may arise during the repair process or when the chain is severely stretched. If the marks do not match, the stable operation of the motor is disrupted due to a phase shift. In this case, an adjustment is required. The work is carried out with the following tools:
- Screwdriver Set;
- key for rotating the crankshaft;
- a set of keys.
We carry out the procedure according to the following instructions:
- We dismantle the air filter box and the valve cover with the seal by unscrewing the fasteners.
- Loosen the tensioner clamp, press the screwdriver against the shoe and tighten the nut.
- Using a 38 mm wrench or a crank, turn the crankshaft until the marks on its pulley and the timing cover match, and the mark on the camshaft sprocket should be located opposite the protrusion cast on the body.
- If any of the marks do not coincide, turn on the fourth speed and unbend the lock washer on the camshaft sprocket.
- We unscrew the bolt and remove the gear.
- Remove the chain from the sprocket and set the desired position (step 3). After installing the marks, we perform reverse assembly.
Video: how to set timing marks on classic Zhiguli cars
Nature of tensioner mechanism breakdowns
Since the tensioning mechanism consists of a damper, a shoe and a shoe fitting, any failure will be associated with the failure of one of these elements:
- The fitting may break due to corrosion processes or mechanical wear. The result is that the shoe no longer extends and puts pressure on the chain, which becomes unstable and too loose. In extreme cases, it can even break completely. Replacing the fitting is the only possible measure to eliminate the problem in question. Since the body of the part is non-separable, repair is impossible.
- The damper can fail as a result of metal fatigue failure or a weak chain that hits the bolts, weakens them and breaks the damper. Replacing the element in question is also the only option in this situation. The new part must be original, but not from a Chinese manufacturer.
- The tension shoe wears out, causing vibrations and impacts. The element should be replaced, since its polymer coating cannot be restored under domestic conditions.
- If the chain cannot be tensioned, the cap nut is not loosened enough or the fitting has not been discharged as a result of failure. Check the condition of the parts in question and correct any problems.
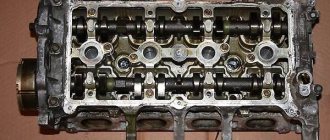
Design and purpose of the camshaft
With all the variety of elements and associated systems of a car engine, the power plant is a rationally coordinated single mechanism. The engine of the “six” is represented by a four-stroke type “engine”, and the alternation of strokes is strictly regulated. This determines the purpose of the VAZ 2106 camshaft, the price of which is relatively high and amounts to 1000-1200 rubles, depending on the manufacturer. The classic camshaft of the VAZ 2106 is responsible for the sequence (established order) of the operation of the valve elements to open and close the product for the removal of gas products of combustion of the air-gasoline mixture and the operation of the intake fuel line.
The main working body of the camshaft is the cams, which, through the influence of other elements of the product, including the camshaft chain, “open” the valves at a given frequency. The camshaft chain itself interacts between the gear and the camshaft sprocket of the “six” by means of a chain transmission.
Each valve corresponds to a separate cam, which, when operated by the action of a pusher on the protruding segment, presses on the valve element, which causes it to rise, which is why, depending on the position of the element, either a fuel-air mixture enters the cylinder or exhaust gases are discharged. When the pusher is released from contact with the protruding element, the spring “slams” the valve element with its tensile force.
The VAZ 2106 camshaft support neck is used for mounting the product in a retracted position. The mating parts are hardened using high-frequency current and are lubricated during operation.
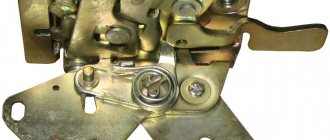
Purpose of timing chain guide on VAZ 2106
The purpose of the timing chain damper is easy to guess from its name. The purpose of this device is to prevent the timing chain from oscillating too much, since strong vibrations can cause the timing chain to fly off the guide sprockets. The second option is also possible: the chain, having become thoroughly loose without a damper, will simply break.
If the damper does not control the vibrations of the timing chain, the chain will inevitably break.
As a rule, a timing chain break occurs when the crankshaft rotation speed reaches maximum values. In such a situation, the driver simply does not have time to react to the broken circuit and turn off the engine in time. Everything happens instantly. As a result, the valves and pistons of the engine are damaged, and it is not always possible to eliminate such damage.
When the timing chain breaks, the valves are the first to suffer. It is not always possible to restore them
Sometimes things get so bad that it’s easier to buy a new car than to bother with restoring an old one. It is for this reason that the condition of the timing chain damper must be carefully monitored.
Timing chain damper device
The timing chain guide is a metal plate made of high-strength steel. The plate has a pair of mounting eyes with holes for bolts.
The chain guides on the “classic” are always made of high-strength steel and can last for years
Next to the damper is the second part of this system - the tensioner shoe. This is a curved plate that is in direct contact with the timing chain. To prevent premature wear, the surface of the shoe is coated with a wear-resistant polymer material.
The second part of the timing chain calming system is the tensioner shoe. Without it, the chain guide will not work
The chain guide is located on the right side of the engine, under the timing cover, between the crankshaft and timing shaft sprockets. Therefore, to replace the damper, the car owner will have to remove the timing cover and slightly loosen the chain.
Operating principle of the timing chain damper
As soon as the owner of a VAZ 2106 starts the engine of his car, the crankshaft and timing shaft begin to rotate. However, these shafts do not always start rotating at the same time. The shaft sprockets are connected by a timing chain, which over time begins to sag slightly due to natural wear. In addition, the teeth on the shaft sprockets also wear out over time, which only increases sagging.
Due to wear on the teeth on the timing sprocket, the chain sags more and may eventually break.
As a result, a situation arises when the crankshaft has already turned a quarter of a turn, and the timing shaft has just begun to rotate. In such a situation, the timing chain slack increases sharply, and to eliminate this slack, a hydraulic tensioner is activated.
On one side there is a tensioner shoe, and on the other there is a damper, which is the second part of the damping system
Its shoe is screwed to the oil fitting, which, in turn, is connected to the oil line with an oil pressure sensor. As soon as the chain sags, the sensor detects a sharp decrease in oil pressure in the line, after which an additional portion of lubricant is supplied to the line. Under its pressure, the tension shoe extends and presses on the timing chain, thereby compensating for the resulting sagging.
All this happens very abruptly, and as a result, the timing chain begins to vibrate strongly, and not on the side of the tension shoe (where the chain is securely pressed), but on the opposite side. To dampen these vibrations, another device is used - a timing chain damper. Unlike the tensioner shoe, the damper has no moving parts. Essentially, this is a high-strength steel plate against which the timing chain hits after it is pressed down by the tension shoe. But if there is no damper in this system, the shaft teeth and timing chain will wear out much faster, which will inevitably lead to complete engine failure.
Drive chain tension
When installing the tensioner, you need to slightly loosen the nut and turn the crankshaft clockwise - this will tighten the chain. The nut is then tightened. If there are defects inside the clamp, a new mechanism must be installed. Before tensioning the chain on the VAZ-2106, make sure that all mechanisms in the gas distribution system are in good working order.
After loosening the nut, you need to carefully rotate the crankshaft. In this case, the shoe should move on the tensioner. If this does not happen, you need to apply a light blow directly to the tensioner - the plunger should move. The crankshaft must be turned until resistance is felt. But we must not allow kickback to occur.
If under the hood of a VAZ 2106 something suddenly begins to ring and grind, then this does not bode well. Neither the engine nor the driver. Most likely, the timing chain under the cylinder block cover became so loose and loose that it began to hit the tensioner shoe and damper. Is it possible to tighten a slack chain yourself? Yes. Let's figure out how this is done.
Characteristics of the VAZ 2106 chain drive
The function of the timing chain is based on the connection between the timing shaft and the crankshaft in the engine of the car. They are both equipped with sprockets with special teeth, due to which the chain is fixed. As soon as the engine starts, the above-mentioned shafts begin to rotate synchronously thanks to the presence of this chain. A violation of synchronicity against the background of any kind of circumstances provokes a malfunction in the functioning of the timing belt.
Malfunctions in the functioning of the cylinders are also possible, dips in engine power invariably form, fuel consumption increases significantly, and the vehicle itself does not respond well enough to activation of the gas pedal.
Classic VAZ cars are equipped with timing chains of the same length, the only difference is the number of links. As for model 2106, we are talking about a chain with 116 links with a length of 7.2 mm each. High quality alloy steel is used to make pins, which, thanks to this material, demonstrate increased wear resistance and strength.
Pros of the drive
Timing chain drive has been used for a very long time, but this does not mean that such a system is a relic of the past. Even today, due to its advantages, it is actively used by modern leaders in the automotive industry.
Among the advantages are:
- high resistance to any type of load;
- the ability to operate under conditions of noticeable temperature changes, as well as at extremely low or high temperatures;
- The operating life of the drive can reach 200 thousand km with proper operation.
Disadvantages of the drive
Along with the advantages, it is worth considering the disadvantages:
- the weight is significant, so the auxiliary elements of the mechanism must correspond to it in terms of quality;
- the noise during operation is quite noticeable, higher than that of other types of gears;
- replacing and tensioning a VAZ 2106 chain requires performing related procedures that inexperienced drivers may not be aware of;
- the forced use of compensating elements in the system significantly complicates the drive;
- the design is quite complex, which causes increased production costs; therefore, consumables and parts are relatively expensive.
The mentioned disadvantages cannot be called critical, since because of them there was no global refusal to use this mechanism. The classic VAZ auto industry to this day focuses on precisely this technology.
Is it possible to shorten a stretched chain?
Theoretically, such an operation is quite possible - it is enough to knock out the cotter pin of one or several links and reconnect the chain. Why such repairs are very rarely practiced:
- It is difficult to estimate the degree of elongation of the element and the number of links removed.
- There is a high probability that after the operation the marks will no longer align by 5-10 mm.
- A worn chain will definitely continue to stretch and will soon begin to rattle again.
- Worn gear teeth will allow the links to skip easily when the chain is pulled back out.
Economic feasibility plays an important role. A set of spare parts is not so expensive that you waste time and effort trying to repair the part by shortening it.
Replacing the timing chain drive will take an experienced technician approximately 2-3 hours. An ordinary car enthusiast will need twice as much time without taking into account unforeseen breakdowns. Set aside part of the weekend for repairs and do the work without rushing. Before starting the engine, do not forget to compare the marks and make sure that the mechanism is assembled correctly.
Symptoms of mechanism malfunction
The first signs that the engine chain tensioner or the chain itself is faulty are:
- A sudden stop in the vehicle's movement while the engine is running, and a significant increase in the speed of rotation of the crankshaft, with the same throttle position.
- Instant engine blocking (wedge), accompanied by a characteristic sound.
The causes of such breakdowns can also be factory defects, such as:
- A weak collet-type clamp that cannot lock the rod in one position, preventing the tensioner from working correctly.
- Deformed shape of one of the planes of the product.
- Damper spring faulty.
- Defective threaded connections of installation fasteners.
Typical chain tensioner defects
Such malfunctions include:
- A collet-type clamp is not able to fix the product rod, which interferes with adjustment work on the correct tension of the chain drive.
- Wear of the main spring element (looks like this: the spring element is deformed in one plane, which becomes noticeable after dismantling the chain tensioner, which shines on one side).
- Damper spring failure.
- Limit wear of the product rod at the point where the collet-type clamp is attached.
- Defects in threaded connections on the installation fasteners (studs) of the product.
CHAIN DRIVE VAZ 2107
The chain drive on VAZ cars is designed to transmit movement from the crankshaft to the camshaft. The rotating camshaft opens and closes the valves with cams, through which the cylinders are filled with the fuel mixture, and the working cycle occurs in them. Malfunctions in the gas distribution system lead to malfunctions or to a complete stop of the internal combustion engine. Therefore, the chain drive must be maintained in good condition and adjusted if necessary.
DEVICE
The timing device of the VAZ 2107 is quite simple; there is nothing superfluous in the mechanism. The gas distribution mechanism of VAZ classic engines with a chain drive contains the following parts:
- Intake and exhaust valves on the cylinder head;
- Rocker;
- Camshaft;
- Intermediate shaft gear (sprocket);
- Intermediate shaft;
- Metal gear (sprocket) of the camshaft;
- Valve train chain;
- Tensioner;
- Tranquilizer;
- Tensioner “shoe” (lower damper);
- Crankshaft gear.
The crankshaft and camshaft are installed relative to each other in a certain position. For precise installation, there are special marks on the crankshaft pulley and camshaft sprocket. Incorrect installation, at best, leads to unstable operation of the internal combustion engine, in the worst case, the valves in the cylinder head bend, and serious repairs are already inevitable.
Adjusting chain tension
The need to tighten the chain may be necessary in different situations:
- engine repair;
- replacing the chain drive;
- chain stretching.
To work you will need the following tools:
- 13 and 38 mm keys;
- flat screwdriver;
- pliers.
Tensioning the chain consists of several steps:
- We place the car on a flat surface, turn on neutral, placing stops under the wheels.
- We unscrew the chain tensioner clamp, and a characteristic click will be heard.
- Use a 38 mm wrench to rotate the crankshaft, making several revolutions.
- Stop rotation at maximum force and tighten the tensioner nut.
If the valve cover is removed, you can determine the tension of the chain by pressing it with a screwdriver . If the chain is tensioned normally, it will be stiff.
Briefly about the drive design
To change the chain and related elements yourself, you need to know the structure of this part of the power unit. The mechanism that drives the camshaft of the VAZ 2106 engine includes the following parts:
- a small drive sprocket is mounted on the crankshaft;
- large idler gear;
- the upper large gear is bolted to the end of the camshaft;
- double-row timing chain;
- tensioner shoe supported by a plunger rod;
- damper - a metal plate with a wear-resistant lining;
- pin - the chain runout limiter is installed next to the lower sprocket.
When rotating, the chain is held on both sides by the guide and tensioner pads
While the engine is running, the timing chain must be kept in tension, otherwise there will be beating, accelerated wear and the links jumping over the gear teeth. A semicircular shoe supporting the part on the left side is responsible for the tension.
After the camshaft sprocket (in the direction of rotation), a damper plate is installed, pressed against the chain drive. To prevent the element from jumping off the lower gear as a result of strong stretching, a limiter is installed nearby - a metal rod screwed into the cylinder block.
In the updated versions of the “six”, automatic tensioning devices were installed, powered by oil pressure
The drive mechanism is located at the front end of the engine and is covered by an aluminum cover in which the front crankshaft oil seal is installed. The lower plane of the cover is adjacent to the oil pan - this feature must be taken into account when disassembling the unit.