The Starline B9 manual includes installation recommendations, as well as diagrams necessary for properly connecting the alarm. This manual will be useful both for car service workers and for self-installation of the system in a garage.
Basic requirements for implementing StarLine autorun
Before remote starting, make sure that:
- the hood is closed, the parking brake is on;
- for cars with a manual transmission - the “program neutral” procedure has been performed (preliminary preparation for starting the engine);
- for cars with automatic transmission - the control lever is in the “PARK” position.
Remote engine starting cannot be performed in the following cases:
- ignition on;
- the hood is open;
- the parking brake is turned off or the brake pedal is pressed;
- preparation for starting the engine on vehicles with manual transmission (“program neutral”) has not been completed.
During one starting cycle, the system can make 3-4 attempts to start the engine. If after the 3-4th attempt the engine does not start, the “OST” or “” icon will be displayed on the display of the remote control with feedback (provided that it is in the reception area) and the remote control will emit 4 beeps.
For more information about StarLine errors during autostart, please follow the link.
Owner reviews
I drive a VAZ 2107. I chose the alarm based on price, as well as the presence of additional qualities. I don’t think that VAZs are being stolen from anyone now, so the main emphasis was on the convenience of the alarm. The choice fell on Starline B9, which, in addition to security functions (very good, by the way), can also boast additional autostart options and a decent price. The alarm has been on the car for a year now – no glitches and working properly, so I’m happy.
I’ll say right away - I bought it at the price of Starline B9. As for me, 4 thousand for a budget alarm system, but with good options, is quite good. It was recommended by a neighbor in the garage who uses it all the time, and especially praised the turbo timer, so I took it. It won't hurt me on diesel either. So far, the system has been working properly for six months, although I was a little afraid that I had screwed it up, because I installed it myself, and for me this was my first experience. But no complaints. The only drawback is poor sensitivity to the signal from the key fob. Already from the balcony of the 9th floor the car is not reachable, which is inconvenient. But the rest is all good.
The Starline alarm system is a modern security system that meets all vehicle protection requirements. Also, the Starline alarm system, subject to proper installation and configuration, allows you to remotely start the car engine (manually or automatically starts based on temperature).
At the same time, vehicle owners, without going into details or without fully studying the installation instructions, do not always know how to set up the Starline alarm, enable Starline autostart, etc. Next, we will look at how to set up auto start on the Starline alarm system, taking into account its technical and design features.
Read in this article
The procedure for preparing for autostart on mechanics
Depending on the ignition support option (programmable function), to turn on the “soft neutral”, perform the following steps:
- set the parking brake;
- turn off the ignition;
- the display will show r99, if the turbo timer mode is programmed, r06 will be displayed (the LED indicator will be constantly on and the engine will continue to run);
- remove the key from the ignition switch;
- get out of the car and close all doors;
- turn on security mode.
The engine is prepared for autostart.
Functions
Functions of a security system with auto start:
- giving alarms when triggered;
- informing the owner about an attempt to break into the vehicle;
- turbo timer support;
- additional immobilizer mode;
- 2-stage engine start circuit blocking;
- a secret code is provided to disable the complex without a key fob;
- built-in component diagnostic unit with automatic exclusion of damaged components from security zones;
- protection of a car with a running engine is ensured;
- search for a car in a parking lot is supported;
- remote starting and warming up of the engine;
- protection against over-torque of the crankshaft by the starter is provided;
- display of motor operating time on the display.
Advantages and disadvantages
The advantages of the Starline Twage B9 complex, according to owner reviews, include:
- reliability of design;
- convenient use;
- support for automatic start of the power unit;
- using dialog code to encrypt commands;
- use of a key fob with an information display.
The feedback about the alarm left by users allows us to highlight its shortcomings:
- The kit does not include a siren;
- problems with recognizing feedback signals in parking lots (due to interference);
- damage to the protective glass of the control panel screen;
- There are many low quality fakes on the market (along with other early Starline models, for example, A6 or A9).
StarLine Twage A8 A9 A4 A6
StarLine A4 and A6 systems do not have the ability to start the engine.
Option 1 By pressing button 3 of the key fob, move the cursor to the “Start” icon and briefly press button 2 of the key fob.
Option 2 Press button 1 of the key fob for 3 seconds and release. If button 1 is unprogrammed or faulty, use the first option or program the first button.
StarLine E90 E91 E93 E60 E61 E63
Alarms E60 E61 E63 do not have the ability to start the engine.
For StarLine E90 E91 E93 systems, two options can be used depending on the firmware (if the firmware is newer, then most likely the first launch option is used).
Option 1 Press button 1 on the key fob for about 3 seconds (until two melodic signals appear), then release the button, the engine will start.
Option 2 Remote engine start is carried out by sequentially pressing buttons 1 and 3 of the key fob. press button 1 long for about 3 seconds (until a beep sounds), and then button 3 briefly.
Systems A96, B96, E96, X96
Sixth generation security and telematics systems, which is what all of the listed models are called, are distinguished by an innovative method of identifying the owner compared to other types of alarms.
To do this, use a smartphone or smart watch and a Bluetooth Smart channel. This combination guarantees minimal energy consumption, which means the service life of the batteries in the key fob is increased.
On the key fob of any of the listed security systems you will find four keys. To start the power unit, you must press button “1” for a long time, and to stop, press button “2” for the same long time.
In this case, each time you will hear a loud, thin sound, which will indicate that the command has reached the car's head unit.
The remaining keys are used when it is necessary to put the machine into service mode. Their combination is specified in the operating instructions. We do not recommend changing the settings yourself without knowing what it will lead to.
Important to note: If your car has a manual transmission, before using the Starline alarm with remote start, make sure to put the gear in neutral and apply the handbrake.
StarLine D94 B94 D64 B64
The D64 and B64 systems do not have the ability to start the engine.
For StarLine D94 and B94 systems, two options can be used depending on the firmware (if the firmware is newer, then most likely the first launch option is used).
Option 1 Press button 1 on the key fob for about 3 seconds (until two melodic signals appear), then release the button, the engine will start.
Option 2 Remote engine start is carried out by sequentially pressing buttons 1 and 3 of the key fob. press button 1 long for about 3 seconds (until a beep sounds), and then button 3 briefly.
Buttons and icons
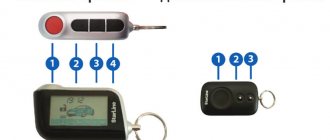
In accordance with the information given in the instructions for the signaling, the communicators have the same button assignments. All of them are used to control alarm functions.
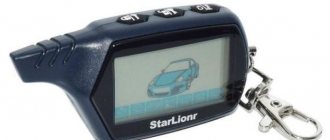
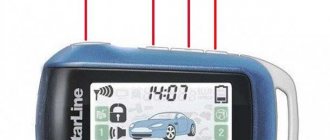
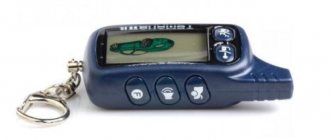
The photo shows the location of the buttons on the Starline 9 key fob
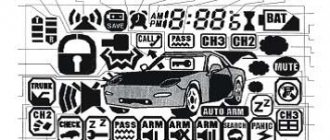
A detailed description of the indicators and icons on the device screen is given below.
Description of indicators
Decoding symbols
StarLine A92 A94 A62 A64
StarLine A62 and A64 systems do not have the ability to start the engine.
Option 1 Remote engine start is carried out by sequentially pressing buttons 1 and 3 of the key fob. press button 1 long for about 3 seconds (until a beep sounds), and then button 3 briefly.
Option 2 To remotely start the engine, place the cursor on the “Fan” icon; to do this, briefly press button 4 two or more times to move the cursor and briefly press button 3.
Common key fob malfunctions and their solutions
Problems that the consumer will encounter:
- Power supply discharge. If this happens, you need to buy a new battery and install it in the device. When replacing, consider the battery standard.
- Negative effects of moisture and dust on the device. If the key fob “sinks” or becomes clogged (often occurs during prolonged use), its body must be disassembled and cleaned of dirt. And then dry it from moisture. The device should not be dried in close proximity to sources of high temperatures, as exposure to them will lead to failure of the board. If there is dirt inside the case, it can be removed with a soft brush.
- Mechanical damage. If the case or screen is cracked, these components must be replaced.
- Software faults. This can be solved by reflashing the device. It is better to entrust this procedure to professionals.
StarLine A93 A93v2 A63 A63v2 A36 A39
For StarLine A93, A93v2, A63, A63v2, A36 and A39 systems, autostart can be enabled in two ways depending on the firmware (if the firmware is newer, then most likely the first startup option is used).
Option 1 Press and hold button 1 on the key fob (until two melodic signals appear), then release the button.
Option 2 Remote engine start is carried out by sequentially pressing buttons 1 and 3 of the key fob. Press button 1 long for about 3 seconds (until a beep sounds), and then press button 3 briefly.
Setting up autorun
To configure autostart on the Starline B9 car alarm, you will have to enter a special programming mode. To do this, you will need the Valet service button. This key is mounted in a place hidden from view, but at the same time convenient and easily accessible for the car owner. The installers definitely know the location of the button, but if it is unknown, it is worth checking:
- space under the front panel near the fuse box. You will need to remove the decorative covers;
- internal pockets of compartments for small items in door cards;
- space in the center tunnel between the front seats;
- place under the steering column or near the pedal assembly.
You will also need to have a main or spare key fob linked to this alarm. After this, you can make settings.
Other StarLine models
StarLine A65 A66 A67 A95 A96 A97 StarLine B95 B96 B97 B66 StarLine D95 D96 D97 StarLine E63, E65, E95, E66, E66v2, E93, E96
For these systems, two options can be used depending on the firmware (if the firmware is newer, then most likely the first launch option is used).
Option 1 Press button 1 on the key fob for about 3 seconds (until two melodic signals appear), then release the button, the engine will start.
Option 2 Remote engine start is carried out by sequentially pressing buttons 1 and 3 of the key fob. press button 1 long for about 3 seconds (until a beep sounds), and then button 3 briefly.
Factory reset
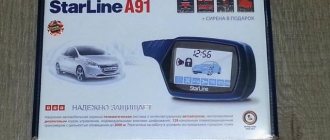
To reset the Starline A91 alarm settings, use the following algorithm:
- turn on the ignition and press the service button located in the car 10 times in a row;
- turn off the ignition, and the siren will emit 10 short signals, notifying the user that he has switched the alarm to reset mode;
- press the service button once, after which one siren signal sounds;
- press button No. 1 (lock) on the key fob, after which the system notifies with a short single signal that the factory settings have been reset;
- To exit the reset mode, turn on the ignition or wait until the system automatically exits this mode. As confirmation, the side lights flash five times and the key fob emits a melodic signal.
All. The alarm has been reset to factory settings.
Thus, the Starline A91 alarm system can perform automatic functions, or it can perform mechanical functions, configured by pressing buttons. A significant part of its functions are changed by programming. Therefore, by customizing the system, you can create a convenient and reliable anti-theft system that will serve you for a long time and without failure.
The dialogue encryption method, reliably protected from the reading devices of vehicle thieves, is the main feature and advantage of the Starline alarm system. However, the alarm system, which is popular among domestic motorists, has a number of additional functions. In particular, auto start, all the delights of which can be fully appreciated in the harsh winter. Let's figure out how to enable autostart on the Starline alarm system from a key fob - remote control (RC), as well as using a special application for smartphones. Let's find out why autorun doesn't work. Let us shed light on other issues directly related to this topic.
Fact. All models of the Starline security system are equipped with a self-diagnosis function. If any element of the system fails, the car owner will receive a corresponding notification on the key fob.
How else can you enable Starline autorun?
- By triple pressing the security button of the standard ignition key with a pressing interval of no more than 5 seconds (the availability of this function depends on the car model.
- From a mobile application if the system has a GSM or BT module.
- From an additional keychain.
- It is also possible to configure autostart based on engine temperature, time and battery discharge.
If any option does not suit your alarm model, then you can always find out which button to turn on autostart in the instructions.
How to install it yourself?
To install the alarm yourself, you must first disconnect the battery by opening the hood and resetting the terminal. This will prevent possible short circuits during installation.
Recommendations for placement and installation
When installing, you need to consider the following nuances:
- The microprocessor module is located inside the car, in the most hidden place. It is recommended to install the device under the instrument cluster to ensure minimum wiring length. The unit should be placed with the connector down to prevent possible moisture from flowing down the wires into the device. Self-tapping screws or plastic ties are used to secure the module.
- The antenna adapter is fixed on the inside of the windshield or rear window, which must first be cleaned and degreased. When installing, take into account that the distance between the transceiver and metal products and body parts should be no more than 5 cm. The device should not be placed near heat sources, since there is a temperature controller inside, and this will affect the readings for starting the engine.
- The siren is placed in the engine compartment; it cannot be placed in places with high humidity and temperature changes. To prevent the accumulation of moisture inside the device, it is installed with the horn facing down. After installation, you need to make sure that there is no access to the siren and the wires through which it is connected from under the bottom of the car.
- The sensitivity controller is located in the central part of the car body, in the cabin. You can choose any location for installation, as long as the sensor is firmly fixed. When choosing an installation area, it must be taken into account that the consumer must have free access to the controller adjustments.
- The remote temperature sensor must be fixed directly to the body of the power unit or to other metal parts adjacent to it. The correctness of reading information about the temperature level of the motor depends on the location of the device.
- The alarm status LED lamp is fixed on the center console, in the most visible place. It may be necessary to drill holes in the instrument panel to install the indicator. It is necessary to act carefully so as not to disturb the aesthetics of the salon.
- The “Valet” service key is installed in a hidden place inaccessible to prying eyes. The consumer must have easy access to the button when seated in the driver's seat.
- A limit switch is installed on the hood.
User Artemiy told how to install the Starline B9 anti-theft system using the example of a Lada car, describing the nuances of connecting the alarm.
Recommendations for laying and connecting wires
Cables should be laid away from sources of electrical noise. This refers to ignition coils, high-voltage spark plug cables, etc. The wires must not be allowed to come into contact with moving parts of the vehicle, such as pedals, steering rods. All components are connected after installation.
Connection Features:
- The antenna adapter must be connected to the five-pin block. For this, the appropriate wire is used.
- The diode lamp must be connected to a two-pin plug.
- To connect the “Valet” service key, a block with two contacts is also used.
- The sensitivity controller is connected to the microprocessor module via four-wire cables, which are included in the kit. After making the connection, the device is programmed and its parameters are adjusted.
- A two-wire cable is used to connect the engine temperature controller. One of the contacts is connected to a gray-orange conductor. The second cable must be connected to the black element of the 18-pin block, the polarity is not important.
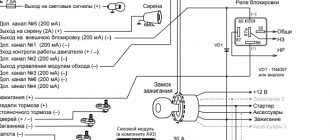
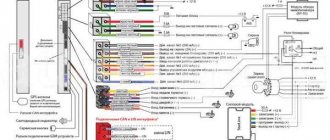
Connection diagrams
After installing all components, the alarm system is connected. When extending cables, it is necessary to use the soldering method; twisting is not allowed. It is recommended to additionally wrap the wire with electrical tape or install heat-shrink tubing on it.
Connection diagram for 18-pin connector
If the controllers are connected incorrectly, this will result in false alarms.
Connecting the 4-pin connectors of the shock sensor and additional sensor
To implement the automatic start of the internal combustion engine (internal combustion engine), it is necessary to correctly connect the relay. The identification of all cables on the connector is shown on the map.
Connection diagram for 6-pin autostart connector
