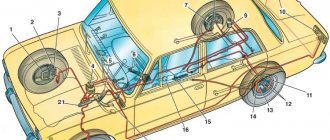
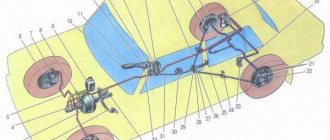
A fully operational brake system of a VAZ 2107 car is a key element in ensuring safe movement in a car for both passengers and the driver. Therefore, you should pay special attention to it, and if minor signs of malfunction appear, begin repairs immediately.
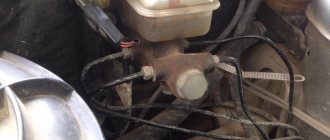
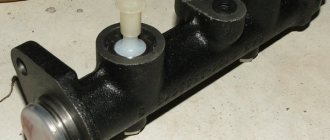
The brake master cylinder is one of the main elements of the car's braking system. Basically it can have two faults. The first is the appearance of a fluid leak from the main brake, the second is a decrease in the effectiveness of the brakes, which can be determined by the failure of the pedal or its “softness”. Both of these faults can be eliminated by a not very complicated repair of the main brake; this repair consists of replacing the o-rings and boot, but in some cases the problem can only be solved by replacing the cylinder.
↑ Removing and installing the main brake cylinder
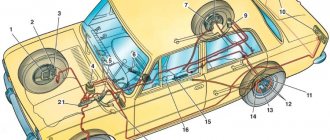
- Disconnect the flexible hoses from the master cylinder and cover the hose openings and fittings on the cylinder to prevent fluid from leaking from the reservoir and preventing dust and dirt from entering the cylinder.
- Disconnect the steel pipes from the master cylinder that drain fluid to the wheel cylinders of the front and rear brakes, first unscrewing the pipe nuts.
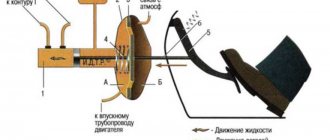
- Remove the cylinder by unscrewing the nuts securing it to the vacuum booster.
Install the master cylinder in the reverse order of removal. After installing the cylinder, bleed the brake system to remove air from it.
Replacement
Replacing the part yourself is not difficult. To do this, you need to arm yourself with the following set of tools:
- screwdriver;
- keys 10, 13;
- 5 – with a cubic syringe or bulb;
- brake fluid;
- clamps.
If during disassembly you find that the old rubber hoses have become hard, it is recommended to replace them with new ones.
- Remove the belt from the expansion tank and put it aside.
- Using a ten key, unscrew the fastenings of the brake fluid reservoir and open the lid.
- Drain the brake fluid into a container.
- To prevent brake fluid from entering the engine compartment, it is necessary to place a piece of dense material under the cylinder.
- Loosen the clamps on the hoses extending from the tank and remove them.
- Disconnect the three brake pipes and move them a little.
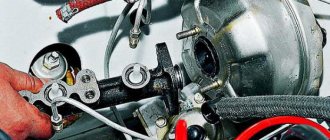
- We unscrew the two nuts securing the cylinder to the amplifier, using a 13mm wrench.
- Remove the brake master cylinder.
- We clean the seat of the spare part from dirt and brake fluid residues.
- Let's move on to a new element. We remove the protective seal and install the oil seal there.
- We insert the new cylinder into place and tighten the nuts.
- We remove the plugs and use a syringe to inject brake fluid into the cylinder cavity until it is completely filled.
- We assemble the remaining elements.
The final stage of repair work will be bleeding the car's brake system.
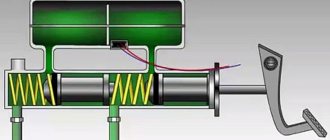
↑ Design of the main cylinder of the hydraulic brake drive
1 - plug; 2 — cylinder body; 3 — rear brake drive piston; 4 — washer; 5 — front brake drive piston; 6 - sealing ring; 7 — locking screws; 8 — piston return springs; 9 — spring plate; 10 — pressure spring of the sealing ring; 11 — spacer ring; 12 — inlet; A - compensation hole (gaps between sealing ring 6, spacer ring 11 and piston 5)
Why is the cylinder leaking?
In general, everything is not so rosy with security systems in cars designed in the 60s. In addition to the fact that among the full-fledged safety systems in Tolyatti cars there were only brakes with two brake circuits, the quality of the components very often led to the failure of system elements. If we talk about the main brake cylinder, then its durability and performance can be affected by several points at once:
- compliance of the brake fluid with the level of resistance of rubber seals and cuffs to
- chemical exposure;
- the quality of Neva brake fluid or its analogues, which is even worse;
- the quality of anthers, protective seals and the cuffs themselves;
- class of processing of the mirror of the main brake cylinder and its pistons;
- timely replacement of the working brake fluid.
↑ Parts of the brake master cylinder
1 - cylinder body; 2 — lock washer; 3 - fitting; 4 - sealing gasket; 5 - sealing washer; 6 — piston lock screw; 7 — piston return springs; 8 - cup; 9 — pressure spring of the sealing ring; 10 - sealing ring; 11 — spacer ring; 12 — rear brake drive piston; 13 — washer; 14 — front brake drive piston.
Unscrew the locking screws 7 and remove all the parts in the order shown in Fig.
Symptoms of a problem
Failures that result in the need to replace the VAZ 2107 master brake cylinder can be divided into two categories: piston jamming, damage to rubber seals. Typically, a malfunction is determined by a sharp decrease in the brake fluid level. The fact that its quantity has become critically low is indicated by a red lamp on the dashboard. If the main brake cylinder of a VAZ 2107 is leaking, it will be clearly visible during a visual inspection - leaks can be seen on the vacuum booster and inside the cabin. Another indicator of a malfunction is a change in the force of pressing the pedal. It stops springing and seems to collapse under your foot.
There are several ways to diagnose a GTZ malfunction:
- visual inspection of the interior for fluid leakage through the boot;
- inspection of brake circuit outlet areas and joints;
- checking the pressure level in the system.
Replacing the main brake cylinder on a VAZ-2107
Now we take an assistant and bleed the brakes. The procedure is very standard, so there is nothing to describe here.
Thanks to the user of our forum Randall for the material. You can discuss the article on the forum: https://www.semerka.info/forum/viewtopic.php?p=69277#69277
- Login to leave comments
Comments
The GTZ will need to be replaced. Thank you.
- Login to leave comments
Well written. At
Well written. With a certain amount of skill, if you are clever and quickly “close” the fittings of the main pipes when removing, you can do without pumping, or do the bleeding “by gravity.” Caps from GTZ are excellent for closing fittings.
From personal experience, I will say that the VAZ GTZ is complete nonsense at a cost of 80-100 UAH (10-15 $) and a service life of 1-1.5 years. Two main disadvantages: 1. Low-pressure nylon fittings are held in place by crown-springs (bad metal), and with a little effort they pull out of the socket - they were adjusting the valves and accidentally touched the repair belt. I used the kit as a temporary measure. 2. after 20 thousand-30 thousand km the piston in the cylinder begins to bypass. It manifests itself - the pedal is either soft or hard, there is a dependence on the ambient temperature and the intensity of the impact on the pedal, pumping the brakes does not help.
After replacing two VAZ stock units every year, I installed an Italian one (I don’t remember the name) and forgot about the existence of such a part as a GTZ in my car. The main difference from the VAZ one is the metal low-pressure fittings. issue price 25-30$
- Login to leave comments
ATTENTION EVERYONE.
Author I'll kill you))) joke. Because of the author, I postponed everything since the repair was on the street. I am writing to EVERYONE who will do this procedure on the street, instead of having a key for 13 > with a knob. Otherwise, you won’t be able to unscrew the bolt that holds the GTZ to the vacuum seal; there’s very little room for the wrench to fit through.
How to remove air from the brake system
When the driver changes the drive cylinder, air enters the brake system. It's almost inevitable. Air bubbles accumulate in the brake hoses, making normal braking difficult. So the driver will have to remove air from the system using the recommendations outlined below. It should be noted here that to perform this operation you will need the help of a partner.
- The front wheel of the car is jacked up and removed. Access to the brake fitting is provided. A piece of plastic tube is put on it. Its second end is directed into an empty bottle. Then the nut on the fitting is carefully unscrewed.
Basic faults
Despite the simplicity of the design and the small number of moving elements, the GTZ often ceases to perform its functions normally due to malfunctions.
It is not difficult to detect a breakdown of the GTZ. The first signals of a malfunction will be given by the brake pedal. Any change in its behavior when pressed (lightness, increase in force, etc.) indicates a breakdown. But it will signal the emergence of problems throughout the system. Checking the system on the highway allows you to more accurately identify the malfunction (the car accelerates, and then emergency braking is performed). And then the traces determine how the system works. Afterwards, all that remains is to visually inspect all the components of the drive for leaks.
The main malfunctions of the master brake cylinder are:
The master cylinder loses its seal, usually due to severe wear or damage to the sealing collars. In this case, liquid can flow between the chambers and also come out of the housing. This allows air to enter the system. As a result, the pressure decreases significantly and the effectiveness of the braking system deteriorates.
Malfunctions
There are two types of brake master cylinder failure:
- Damage or swelling of rubber seals;
- Piston jamming.
Signs that it is time to repair or replace an element are:
- leakage of liquid;
- changes in the pressure of the brake pedal: it became softer or began to fail.
To eliminate breakdowns, it is necessary to dismantle the master brake cylinder and then install a new element, or to repair it, namely, change the boot, rubber seals, clean parts from dirt, corrosion, etc.
If the GTZ breaks down, the entire braking system of the vehicle is susceptible to malfunctions. At the right moment, when you press the brake pedal, the car may stop much more slowly than usual, or may not respond to the signal at all. And this can cause a traffic accident.
If, when squeezing the pedal, you feel that it has become softer or the car is braking more slowly, you should check the brake system in general and the brake master cylinder in particular. With a little time, you can improve the safety of your vehicle.
Required Tools
So what tools do we need for the job? In order for the replacement of the master brake cylinder (VAZ-2107) to be successful, we will need:
- Key "8" and "10". A tool is needed specifically for brake pipes, since carob pipes often lick off the edges.
- Head “10” and “13”.
- Screwdriver. This is necessary if you have clamps installed on the rubber tubes and cuffs.
- Medical syringe (it is enough to use a five- or ten-cc one).
- New clamps 10-16 millimeters.
- An empty bottle or any other container.
- Brake fluid (on domestic “classics” a product of the RosDOT brand of the fourth class is used, as shown in the photo below).
How to disassemble the GTZ?
An exact answer to whether repairs can be made can only be given after you disassemble the master brake cylinder of the VAZ-2107. To do this, you just need to perform simple manipulations:
- Unscrew the first locking screw and remove the piston and spring.
- Unscrew the second locking screw; you need to cover the hole with your finger, as the piston may jump out.
If the piston suddenly jams, you need to knock it out - to do this, tap on the master cylinder body with a small wooden block. Be sure to inspect:
- There should be no scratches, holes or other damage on the mirror inner surface.
- The threads in the holes for the locking screws must be intact.
- The cylinder must not have an elliptical hole.
If there is no damage, repairs can be made. To do this, use a special brake cylinder kit. Its price is much lower than the assembled mechanism - about 80-100 rubles, depending on the manufacturer. The cost of a new GTZ is at least 700 rubles.
Determination of breakdowns of the GTZ VAZ-2110
You can determine the faulty part yourself; to do this, you just need to know what to look for:
- Brake fluid leaks on the vacuum booster at the junction with the master brake cylinder indicates that the cuff in the cylinder is worn out.
Leaks on the vacuum booster indicate wear on the seal in the cylinder.
- If the brake pedal has become too soft , this may also indirectly indicate wear on the turbocharger. In this case, both the cylinder bore and the piston cuffs may be worn out. Although often a soft brake pedal indicates that the brake system is not pumped.
- The brake pedal may stick , which indicates a blockage in the brake cylinder body.
- If the return springs are broken , the brake pedal will not return to its original position.
In any case, you need to determine for yourself whether it’s worth bothering with disassembling the GTZ and repairing it or immediately installing a new part.
Is it worth buying a repair kit and is it profitable?
Buying a repair kit can save the money spent several times, but it will increase the time costs.
Based on the cost of the GTZ at 1,000 rubles, you need to think carefully about whether it is worth disassembling the brake cylinder for such a sum. Repair kits can be incomplete or complete . In any case, you need to purchase a complete one, since no one will measure the forces on the return springs.
You can also repair the brake master cylinder yourself.
An attempt to save money will result in a long procedure of disassembling, washing and drying all parts. When washing, you need to make sure that no gasoline or oil gets on the rubber parts, as this can damage them.
Therefore, the use of a repair kit can only be justified in the following cases:
- The assembled part is not available for sale.
- Inability to allocate 1,000 rubles for a purchase.
- The desire to understand the brake system with your own hands from beginning to end.
In other cases, it is better to immediately install the assembled part.
