Symptoms of problems
The general technical condition of the car (including the brake system) can be checked using a personal diagnostic adapter - a car scanner. These types of devices are widespread and have a wide price range. We would like to draw your attention to the budget model of Korean production Scan Tool Pro Black Edition.
At a cost of about 2 thousand rubles. This scanner is capable of fully diagnosing your car (engine, gearbox, transmission, abs, srs and much more), which will pay for itself in 1-2 trips to the service station. The adapter is quite easy to use, has Russian-language software and is compatible with most cars produced in 1993. The device will also be useful when buying a used car, as it can show its real mileage and VIN.
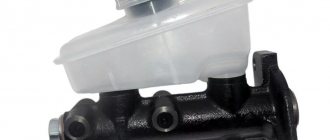
The fluid brake system consists of many parts that can become unusable: pipes, wheel cylinders, calipers, drums and pads. Typical signs of a faulty master cylinder:
- After pressing the pedal, the car stops slowly. The reason is that the cuffs of one or two pistons have lost their tightness - they have cracked or “floated”.
- To slow down, you need to press the brake pedal hard. The phenomenon occurs due to swelling of the rubber of the piston seals.
- The brake pedal travel is too short. The fluid inside the cylinder has nowhere to go because the compensation hole is clogged. Another option is that the passage is blocked by a swollen rubber seal.
- A common symptom is pedal failure, the brakes coming on at the end of the stroke. This indicates complete wear of the cuffs; as a result, liquid penetrates behind the piston and rushes into the expansion tank - the cylinder “bypasses.”
- The pads do not release the brake discs and drums and get very hot when driving. Options: one of the pistons is jammed or the bypass hole is clogged.
The listed symptoms of a GTZ malfunction are similar to malfunctions of other elements. Pedal failure also occurs when a large amount of air enters the tubes or loss of fluid in one of the working cylinders. Sluggish deceleration and increased force on the pedal are often caused by a breakdown of the vacuum booster - a cracked membrane or a lack of tightness at the joints of the hose that takes off engine vacuum.
There are signs that clearly indicate the performance of the main hydraulic cylinder and the malfunction of other elements:
- during braking, the car pulls to the side - the problem lies in a certain circuit or wheel;
- jamming of the brake mechanisms of one wheel;
- creaking and squeaking when braking;
- heating the discs and pads on one wheel.
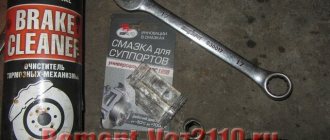
Tools that will be needed during the replacement process
To replace the brake cylinder you will need a tool.
Before starting any repair work, you should prepare thoroughly. Replacing the brake master cylinder is no exception. To replace this part you will need:
- Set of keys. Having a variety of sockets and socket wrenches will be a huge advantage.
- Screwdriver Set.
- Round nose pliers will help when changing cuffs.
- Special “brake” wrench for 10.
In addition, during the replacement process, brake fluid will spill out, which is generally advisable to replace with new one. DOT-4 brake fluid is suitable for the VAZ-2110.
The process of removing the old part
In order to remove the brake master cylinder, you need to open the hood and do the following:
- To get to the part, you will first have to remove the sound insulation. You should not try to tear it off, as it is secured with bolts. Therefore, you should arm yourself with a screwdriver and unscrew all the fasteners. If the sound insulation is not removed after this, it means that not all fasteners have been unscrewed. If you pull the element, it can be damaged. After this, you can start replacing.
We unscrew several screws using a Phillips screwdriver to remove the sound insulation.
Disconnect the terminal with wires.
We disconnect the tubes and put rubber caps on them.
Unscrew the fastening bolts.
Remove the brake cylinder.
At this point, the dismantling process can be considered complete.
Installing a new part
Getting started with installation depends on what part you purchased. If it was assembled with the tank, then this will save the car owner from unnecessary work.
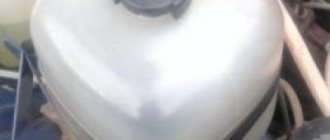
If the new gas turbine engine does not have a tank, you need to install the old tank. Before installation, it must be carefully inspected for cracks, chips and damage. If the tank is in poor condition, you will have to buy a new one. It is for this reason that it is recommended to immediately buy and assemble it.
Further work should proceed according to this algorithm:
- The new part is installed in its place under the hood of the car.
We install the new brake cylinder in its original place.
Fill the brake fluid and bleed the system.
After all the air has come out, clamp the pipes.
Next you need to carefully tighten the fasteners . At this point, the procedure for replacing the GTZ can be considered complete. You will need to add brake fluid to the reservoir, connect the sensor in the plug and install the sound insulation in the old place.
Video about replacing the master brake cylinder of a VAZ-2110
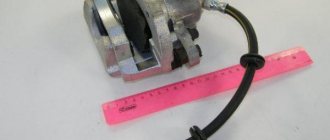
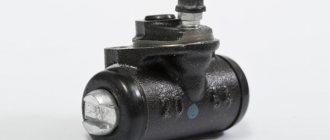
A high-quality rear brake cylinder (RBC) will serve for a long time, but a defective one can manifest itself immediately after installation. An example would be when the pistons only extend a few millimeters out of the cylinders, not spreading the brake pads far enough.
To determine the condition of the brake drum, you will need to remove the brake drum. If the cylinder leaks, then its service life has come to an end.
Replacing the rear
There is nothing complicated in this procedure, and to perform it you will need the following tools:
Head 10 with ratchet and wrench Special wrench for loosening brake pipes (so-called split wrench)
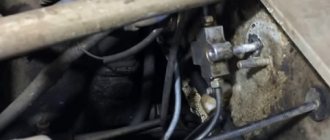
First you need to remove the brake drum and rear pads, since there is no other way to access the cylinder.
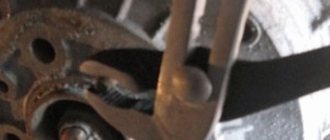
After this, from the reverse side we unscrew the tube that fits the cylinder using a split wrench:
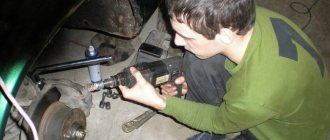
To prevent brake fluid from leaking, you can plug the end of it temporarily. Then we take the head with a knob and unscrew the two fastening bolts, again from the back, as is more clearly demonstrated in the photo below:
Some tips
- If you start having problems with the brakes, first of all you need to carry out an external inspection of the vehicle: check the fluid level in the reservoir, make sure that the front/rear cylinders are not leaking. There should not even be stains of brake fluid in the brake hydraulics.
- “Brake fluid” must be filled with the same brand; it is recommended to completely replace the brake fluid at least once every two years.
- If faults are identified in the gas turbine engine, and it has already served for at least a year, it is more advisable to replace it completely than to repair it. The same can be said about the rear working cylinders.
- Before changing the turbocharger, the brake fluid should be removed from it; this operation is usually done using a syringe.
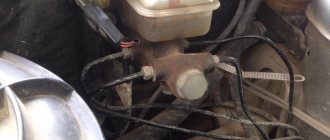
- Usually a leak in the master cylinder is not visible, but if there is any suspicion that this part is faulty, you should remove the main cylinder - there will be traces of leaks at the rear, and this indicates its faulty condition.
- If, during an external inspection, cracks were found on the brake hoses, it is better not to take risks and immediately replace the defective parts.
Didn't find the information you are looking for? on our forum.
We recommend reading:
Which gasoline is better for VAZ 2114
Air leakage through injectors symptoms of VAZ 2114. Possible malfunctions, cleaning and adjustment
Vibration in the cabin when idling VAZ 2114 injector causes
Repair of the underbody of a VAZ 2107
VAZ 2114 injector boils, reasons
Error p1602 vaz 2114 how to fix
What is an ESD for a VAZ or an ECU for a VAZ 2114
Master cylinder, slave and clutch VAZ 2101. Replacement and repair, fluid pumping
Required Tools
If you plan to do the repair yourself, then you need to check the availability of the following tools and materials:
- Screwdriver Set.
- Brake fluid.
- Special wrench for disassembling brakes “10”.
- Socket wrench “17”.
- Plug fittings.
- Pliers.
- Rubber caps.
- A set of keys.
- Socket wrench "13".
Advice! If in the VAZ 2110 mechanism, in addition to the sealing rings, other parts are damaged, then only replacing the GTZ will help. If the remaining elements are fully operational, you need to buy new rings and install them in place of the damaged parts.
Improvement of the braking system
Many VAZ 2110 owners agree that the factory brake system is far from perfect. Therefore, they decide to modernize and improve the unit using technical tuning.
A popular solution to the issue of brake efficiency is to replace drum mechanisms with disc ones. Of course, in the case of the “ten” we are talking about the rear wheels. When replacing brakes, be sure to take into account the fact that the rear wheels must brake more softly and somewhat later than the front wheels. This way the car won't skid and you won't fly off the road.
Another option is to remove the factory brake master cylinder and vacuum booster. Instead, units from Priora are excellent. Such tuning will eliminate vibrations and also allow you to use the brake pedal effectively and without excessive effort.
How to remove an old VAZ-2110 cylinder
Replacing the master brake cylinder of a VAZ-2110 involves first removing the old model. The subsequent installation of the new model depends on how well this process goes. To avoid mistakes and miscalculations, follow these instructions:
- Disconnect the brake fluid indicator related to the GTZ from the expansion tank located in the VAZ-2110.
- Unscrew the closing valve of the expansion tank.
- Using a syringe, pump out the liquid, and then unscrew the pipeline from the general brake system.
- If you have a 10 key, disconnect 4 tubes, 2 on each side.
- Gently push the tubes to the side so that they do not interfere with the removal of the cylinder.
- Next, your task is to get to the bolts that secure the part to the vacuum brake booster. To do this, unscrew the screws using a Phillips head screwdriver. These screws are responsible for holding and securing the engine compartment upholstery.
- Bend the upholstery material and 2 nuts will become available to you.
- Remove the GTZ by removing it from the studs directly with the tank.
- If the tank also needs to be replaced, then the old sample is slightly pryed with a screwdriver and removed, and a new one is put in its place.
Why is the rear brake mechanism acting up?
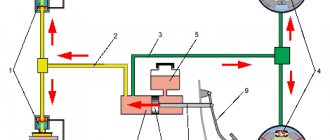
The hydraulic drive built into the VAZ-2110 combines in its internal design a booster and a dual-circuit pressure controller designed to control the rear brakes. If the rear cylinder is not working correctly, problems can provoke and create an emergency situation at any time when the vehicle is moving along the roadway. To prevent this from happening, the part should be repaired in a timely manner.
There is nothing surprising in replacing an old type of rear brake cylinder (RBC) with a new one; nothing lasts forever. Auto parts stores offer car enthusiasts the opportunity to purchase parts from the best manufacturers that will last a long time and guarantee safety on the road.
Replacing the master cylinder
And now we proceed directly to replacing the main brake cylinder on a VAZ 2110.
Removing the cylinder
VAZ 2110 replacement of the main brake cylinder
- The first step is to disconnect the brake fluid level sensor from the expansion tank of the master cylinder.
- Next you need to unscrew the cap of the expansion tank.
- Using a syringe, pump out the brake fluid from the expansion tank.
- The next step is to disconnect the brake system pipe.
- Using a 10mm wrench, disconnect all 4 tubes in series, 2 on one side of the cylinder and 2 on the other.
- Now the tubes should be bent slightly so that they do not interfere when removing the master cylinder.
- To get to the bolts securing the master cylinder to the vacuum brake booster, you need to unscrew several screws using a Phillips screwdriver.
Partial removal of the engine compartment trim
- These screws hold the engine compartment trim in place. Bend back the upholstery and give yourself good access to the two nuts.
- Using a 17mm wrench, unscrew these two nuts.
- Then simply remove the master cylinder from its studs along with the reservoir.
- If you have to remove the brake reservoir in order to install it on a new one (if the reservoir on the new cylinder breaks), then you should simply pry it off with a screwdriver and remove it.
Attaching the expansion tank to the brake master cylinder
- If it is necessary to replace the tank, do so before starting installation.
- Installation of the brake master cylinder occurs in the reverse order.
- First, you should hit the pusher rod into the hole in the master cylinder.
- Then put it on two studs and tightly tighten the fastening nuts with a 17mm wrench.
- Connect all brake system pipes.
Advice! Do not tighten the pipes too tightly - they will still have to be released in order to bleed the main brake.
- Unscrew the reservoir cap and fill it with brake fluid.
- Reinstall the engine compartment trim and secure it with self-tapping screws.
And so, on the VAZ 2110 the main brake cylinder has been changed!
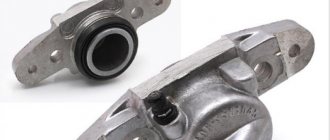
Main causes of malfunction
The VAZ 2110 caliper is structurally an element that holds the brake pads and is responsible for the degree of their pressure on the brake discs. It is also responsible for uniform wear of the brake pads and guarantees the driver reliable braking in extreme situations.
Thus, the importance of the caliper in the operation of the car is difficult to overestimate.
If by this time you have a completely reasonable question, what can happen to the caliper on a VAZ 2110 (2112), we will be happy to answer you. The main cause of malfunctions is “acidification” of the moving elements, coating them with an oxide film, clogging due to the destruction of protective boots or the use of improper lubricant, namely:
- acidification of the main piston mechanism;
- acidification of guides.
A clear sign of problems that the caliper can cause on VAZ cars is uneven wear of the brake pads and an increased braking distance. In this case, the VAZ pads must be changed, and the caliper mechanism itself must be subjected to comprehensive diagnostics:
- check the condition of the piston, its degree of freedom, the presence of moisture, metal oxide, oxide formations and build-ups, the condition of the protective boots;
- Similarly, check the condition of the guides, make sure that there are no uncharacteristic scuffs, abrasions or deformations of the rod on the surface.
We must also not forget about regularly replacing the brake fluid in the system. This should be done approximately every 40 thousand km. mileage of VAZ-2110.
Since brake fluid is hygroscopic, it easily absorbs moisture, thereby oxidizing the piston mechanism and causing it to fail. The piston stroke becomes difficult and uneven wear of the brake pads and wheel wedge occurs.