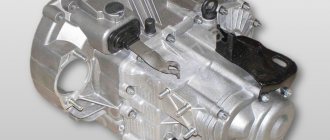
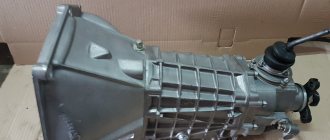
Main technical characteristics of the VAZ 2107 box
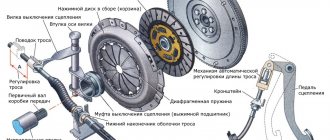
The “seven” gearbox works in conjunction with the clutch.
The VAZ 2107 is equipped with a single-plate dry clutch, which has only one (central) pressure spring. This is quite enough for convenient control of vehicle speeds. The device weighs quite a lot - 26.9 kg without oil.
What kind of gearbox can be put on the “seven”
The VAZ 2107 will willingly work with both a four-speed and a five-speed gearbox, so only the driver decides which model to choose.
If we talk about domestic “VAZ” gearboxes, then initially the “seven” was equipped with a four-speed unit, so you can always buy and install this particular unit. The main advantage of such a box is its increased performance - the driver drives 200 - 300 thousand kilometers without ever investing in repairing the device. In addition, the four-speed gearbox is more suitable for low-power 1.3-liter engines or for drivers who often transport heavy loads by car, since the gearbox is initially designed for high traction.
Five-speed gearboxes allow you to reach higher speeds. Younger drivers like this, since at the start and when overtaking you can squeeze maximum power out of the car. However, over time, such boxes began to be made from low-quality materials, so switching is not always clear.
Foreign gearboxes can also be installed on the VAZ 2107. Boxes from Fiat are most suitable, since it was this car that became the prototype of domestic models. Some car enthusiasts install boxes from older versions of BMW, but the installation procedure can take a lot of time, since the car’s original design does not provide for non-standard units.
Installing/removing the VAZ 2106 gearbox
To repair or replace the gearbox, it must be removed. Today we will tell you how to remove or install the gearbox on a VAZ 2106 yourself.
Installation and removal of the VAZ 2106 gearbox
1. Work must be carried out on an inspection ditch or lift.
2. Disconnect the negative cable from the battery.
3. Disconnect the cardan drive from the gearbox and remove it from the car.
4. Remove the exhaust pipe from the mufflers.
5. Disconnect the terminals from the reverse light switch.
6. In the salon, carefully remove the decorative cover from the ring.
7. Use a screwdriver to pry off the rings holding the mat.
8. Moving and lifting the mat, unscrew the four screws securing the cover.
9. Take out the cover with the foam rubber seal from under the mat and lift them up.
10. Pressing down on the gear shift knob, use a thin screwdriver to remove the locking sleeve from the groove of the lever rod...
11. ...and remove the handle.
12. By striking the mounting blade inserted between the engine and the engine compartment partition, we bend the eye washer of the upper clutch housing mounting bolt.
13. Using a 19mm wrench, unscrew the bolt.
14. It is more convenient to use a special curved wrench with a head for this purpose.
15. Using a wrench or a 13mm socket with a cardan joint, unscrew the two upper bolts securing the starter to the clutch housing.
16. Using a 13mm socket with an extension, unscrew the lower starter mounting bolt.
17. Using a 10mm wrench, unscrew the four bolts securing the clutch housing cover.
18. Using your hand or sliding pliers, unscrew the nut securing the flexible speedometer drive shaft to the drive housing.
19. Install a stop under the lower part of the gearbox housing. Using a 19mm socket with a universal joint on the wrench extension, unscrew the remaining three bolts securing the clutch housing.
20. Using a 13mm wrench, unscrew the two nuts securing the cross member.
21. Remove the gearbox by sliding it back.
22. To replace the gearbox, disconnect the clutch housing. We install the gearbox in the reverse order of removal. Before installation, apply a thin layer of CV joint-4 lubricant to the splined end of the input shaft.
Let us remind you that the previous article was about removing and installing the instrument panel on a VAZ 2106 with your own hands.
Removal and installation of the Gearbox (Gearbox) VAZ 2101, 2104, 2105, 2106, 2107
We carry out the work on a car lift.
Lower the parking brake lever to the down position. Remove the gear shift rod.
Align the two screws securing the parking brake lever boot and remove the boot from the lever.
Remove the front carpet.
Remove the floor tunnel cover.
Disconnect the battery.
Remove the warm air wire hose from the air filter housing.
Remove the two upper starter mounting bolts.
Unscrew the nuts securing the exhaust pipe to the exhaust manifold and remove the locking plates. (If you have difficulty removing the nuts, complete the operation from underneath the vehicle.)
Unscrew the lower starter mounting bolt and...
...move the starter forward.
Drain the oil from the gearbox housing. Close the drain plug.
Disconnect the parts securing the main muffler to the body.
Disconnect the additional mufflers from the exhaust pipe without disconnecting them from the main one.
Remove the exhaust pipe from the car downwards.
Remove the driveline safety bracket.
Unscrew the three nuts from the bolts securing the flexible coupling to the gearbox flange.
Remove the bolts from the flange and coupling one by one by turning the driveshaft.
Using a screwdriver, pry the coupling away from the flange and lower it down.
Disconnect the wires from the reverse light switch (located on the right rear of the transmission).
Unscrew the nut and disconnect the cable from the speedometer drive gearbox (located in the left rear part of the gearbox).
Remove the slave cylinder from the clutch housing without disconnecting the hose from the cylinder.
Unscrew the four bolts securing the clutch housing cover and remove the spring washers.
Place a support under the crossbar.
Unscrew the two nuts (the second one is not shown) securing the cross member to the body and remove the washers.
Remove the stop and smoothly lower the gearbox down.
Place a stop under the front of the engine to secure it in position.
Using extensions and universal joints, remove the left and right upper bolts securing the clutch housing to the engine. Remove the spring washers and eyelets.
Unscrew the left and right lower bolts securing the clutch housing to the engine. Remove the spring washers.
(An assistant must support the rear of the transmission.)
Remove the gearbox by first moving it backwards until the input shaft leaves the clutch, and then downwards.
Install the gearbox on the vehicle in the reverse order of removal. Fill in the required amount of oil.
Before installing the gearbox, apply a thin layer of LSC-15 or Litol-24 lubricant to the splined part of the input shaft and engage 1st or 3rd gear
Step-by-step instruction
So, when all the preparatory steps have been made, you can proceed directly to the removal itself. To do this, unscrew the brake fluid supply pipe to the gearbox, as shown in the photo below:
Then remove the fixing plate and release the hose:
When the cardan is disconnected, unscrew all the bolts securing the gearbox to the engine, including the small bolts of the tin protection. Then you can unscrew the hanging bar, which actually holds the gearbox.
Be careful not to let anything fall on your head. Use insurance while performing this work. You can place a special stop under the box to secure it.
How to do without repairs?
The search allows you to get an idea of the prices offered by specialists and the conditions for performing work. Any repair requires a certain amount of time.
If you are severely limited in this, we recommend that you pay attention to alternative solutions to the problem.
You can buy a new gearbox VAZ 2106, gearbox 2107 without much effort. There is no shortage of parts on the market. But a new box won't be cheap. Want to save money? Buying a used VAZ 2107 gearbox is an excellent option. But there are risks to consider here. Buying spare parts secondhand is not always successful.
Do you need parts quality guarantees? Replacing a VAZ 2107 box or another model directly in the workshop is an excellent solution. You receive a guaranteed working transmission unit and save time on repairs.
In our workshop, transmission replacement for VAZ 2104, 2107 and other models is carried out by highly qualified specialists. We also carry out the reassembly of units and their preparation for exchange ourselves. This allows us to guarantee the quality of the result. Gearboxes with a large safety margin are offered for exchange. Car locksmith work is carried out as quickly as possible. Reasonable prices for boxes and expert services make repairs profitable.
Why change the gearbox?
There are quite a few reasons to replace the transmission on a car, but usually they are a significant argument when repairing the car’s power plant. First of all, the gearbox is replaced in the event of serious malfunctions that are associated with widespread disruption of its performance.
Another reason to replace a transmission is to improve its performance. All Zhiguli fans know that the VAZ 2106 was produced in several modifications, which were equipped with 4 and 5-speed gearboxes. Those drivers who got a “six” with a 4-speed gearbox have already clearly noticed its significant shortcomings when driving on the highway, so they change this element to a more advanced analogue - a transmission with 5 speeds.
One way or another, the procedure for replacing a gearbox is performed the same way, regardless of the reason for the replacement. Below you will find detailed instructions for replacing the gearbox.
The installation of the VAZ 2106 box must be carried out taking into account the requirements and recommendations of the concern. It is permissible to use two types of boxes:
- manual, 4-speed transmission;
- manual, 5-speed transmission.
Both types of VAZ 2106 gearboxes are interchangeable, but the 5-speed version is more expensive, and this gearbox is more demanding to maintain. For example, the original “Etalon” is preferable to its Fiat Polonaise counterpart.
Four-speed and five-speed manual transmissions
So, the so-called “four-step” was quickly replaced by a “five-step”. Let us immediately note that the five-speed manual gearbox is not very different from the 4-speed gearbox in design (the shape of the rear cover and other elements are similar). The main distinguishing feature is the placement of the fifth stage (speed, gear), which is located at the end of the secondary shaft.
The five-speed gearbox has the same ratios as the four-speed gearbox. Most of the parts are also the same, since the five-speed gearbox is based on the four-speed one. The 5MT gearbox has a primary, secondary and intermediate shaft. Structurally, the input shaft is the same as the four-speed gearbox, but the output shaft has a slightly different rear end where the fifth gear components are installed.
More precisely, at the rear end of the intermediate shaft there is a threaded hole into which a bolt is screwed in to secure the fifth gear gear block, as well as the reverse gear. The fifth gear itself and the reverse gear are located in the cavity of the rear cover; the hub of the fifth gear synchronizer clutch is installed together with the reverse driven gear on the secondary shaft. Next, behind the hub, a thrust washer and a bushing are installed where the fifth gear gear is located.
This additional fifth gear was used to allow the engine to operate at lower speeds when driving at high speeds. On the one hand, this solution increases the service life of the internal combustion engine and gearbox, and on the other hand, it saves fuel.
In simple words, owners of cars with a 4-speed manual transmission are very familiar with the situation when, when driving on the highway at a speed of 100-120 km/h and above in fourth gear, the engine speed is high, the engine and gearbox are very noisy under load, and fuel consumption is increased. To increase comfort, all that remains is to reduce the speed.
It was to solve this problem that the designers introduced 5th gear to reduce the load on the engine and gearbox, reduce noise and increase fuel efficiency.
As a rule, fifth gear is an overdrive (overdrive), it is recommended to engage it at a speed of 80-100 km/h on a flat road. At the same time, a further increase in the number of stages is possible and practiced (for example, MT6), but often most manual transmissions have 5 gears. The reason is the need for the driver to constantly change gears, which makes it difficult to control the vehicle.
Speaking of disadvantages, a 5-speed gearbox is more demanding on the oil level in the gearbox than a four-speed gearbox. If there is not enough oil in the box, it often happens that it is the 5th gear that fails first, and the gearbox begins to howl and make a lot of noise under load.
How to replace the gearbox on a VAZ?
The gearbox is the most important element of any car. It is she who converts the torque to obtain the most efficient engine operation and the desired travel speed under various road conditions. In this article we will learn how to replace the gearbox on a VAZ 2106. We will also look at in what cases it is replaced and how it is removed.
Why change the gearbox?
There are quite a few reasons to replace the transmission on a car, but usually they are a significant argument when repairing the car’s power plant. First of all, the gearbox is replaced in the event of serious malfunctions that are associated with widespread disruption of its performance.
Another reason to replace a transmission is to improve its performance. All Zhiguli fans know that the VAZ 2106 was produced in several modifications, which were equipped with 4 and 5-speed gearboxes.
Those drivers who got a “six” with a 4-speed gearbox have already clearly noticed its significant shortcomings when driving on the highway, so they change this element to a more advanced analogue - a transmission with 5 speeds.
One way or another, the procedure for replacing a gearbox is performed the same way, regardless of the reason for the replacement. Below you will find detailed instructions for replacing the gearbox.
How to remove the gearbox on a VAZ 2106?
To begin, place the car on the inspection hole, engage neutral gear and install wheel chocks under the wheels. Don't forget to take care of lighting, you will need it. To do this, it is recommended to use a portable lighting lamp. Also prepare a standard set of tools.
Before removing the gearbox, it is necessary to dismantle everything that interferes with its removal. To do this, disconnect the negative terminal of the battery and pull out the switch for turning on the reverse lights on the gearbox.
Don't forget to drain the gearbox oil. This has nothing to do with the work, but will significantly lighten the weight of the box. And this will be useful to you when removing it.
Next in line is the gear shift lever. It is located inside the car.
To remove it, you need to remove the decorative trim, unscrew the four screws securing the special metal plate, pull out the protective cover and loosen the special fastening clips.
After this, the lever is removed from there and removed along with the plate. Next, unscrew the speedometer drive cable and hang it so that it is not in the way.
After this, drain the brake fluid from the clutch drive. To do this, unscrew the tube from the fitting and place an empty bottle. Unscrew the clutch fork and disengage it from the gearbox.
Next, go down into the pit again and unscrew the exhaust pipe. The fact is that it will interfere with dismantling and then the likelihood of damage during work will increase.
That is why it is recommended to simply dismantle it.
Lastly, the driveshaft is removed from the gearbox side. Raise one of the rear wheels and place the body on a rigid support, such as a tree stump or a double stack of bricks. Using a screwdriver, bend the locking tabs located on the front propeller shaft seal.
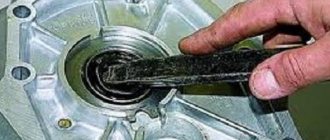
Using the same screwdriver, push this oil seal back. Next, using a wrench or socket wrench, unscrew the nuts securing the cross member and remove it. Surely parts of the exhaust system will interfere with you. If you cannot remove the cross member, then remove all interfering elements.
After this, remove it from the spline joint, which is secured using an elastic coupling.
Now you will need the help of a partner. First of all, unscrew the fastening of the gearbox cross member, then your partner should hold it from falling, while you, at this time, unscrew the bolts securing the gearbox to the engine. Once all the bolts are removed, move the box back and remove its input shaft from the connection with the crankshaft bearing.
How to install a new gearbox?
As soon as the old one is removed. Clean the junction between the engine and the gearbox. Be sure to check the clutch. If it needs replacing, it is better to do it now to avoid these difficulties in the future.
With the help of a partner, install the new transmission and drive it into the engine. It is worth noting that one of the most difficult procedures is inserting the transmission input shaft into the rear crankshaft bearing, so you will need a lot of physical strength and a little patience. After the box is attached, tighten the nuts securing the gearbox to the engine.
Install the crossbar and tighten it. Now the front box is securely fixed. At this time, you can already hang individual elements. These include: the speedometer drive, contacts for turning on the reversing lights and the clutch drive.
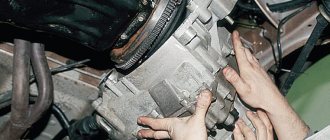
After all this “trifle” has been installed, you can put the driveshaft in place. To do this, insert it into the slot of the elastic coupling and put on the fixing seal.
Next, using a screwdriver and pliers, bend the metal antennae to the oil seal.
How to remove the gearbox on a VAZ 2106
Gearboxes and related products for VAZ cars
- home
- Products
- Remove/install gearbox
- About company
- Contacts
- Shipping and payment
- To come in
PRODUCTS
- VAZ gearbox
- Spare parts for gearbox
- Related products
Andrey, Mr. Ulyanovsk 04/09/2020
Now the gearbox is grinding in, light noises disappear before our eyes. But one thing is for sure - the shifts are clear, everything works as it should. So I recommend it! This is such a boring review :) Gearbox VAZ 21083
New opportunities for residents of Novosibirsk 10.29.2018
All residents of Novosibirsk now have the opportunity to purchase a VAZ gearbox in retail auto stores.
st. Rassvetnaya 17/2
All residents of St. Petersburg have the opportunity to purchase and install a VAZ gearbox from our partners.
Request a call back
Enter your Name and Phone Number and we will definitely call you back!
- Home >
- How to remove and install a gearbox >
- Removal and installation of the Gearbox (Gearbox) VAZ 2101, 2104, 2105, 2106, 2107
Removal and installation of the Gearbox (Gearbox) VAZ 2101, 2104, 2105, 2106, 2107
We carry out the work on a car lift.
Lower the parking brake lever to the down position. Remove the gear shift rod.
Align the two screws securing the parking brake lever boot and remove the boot from the lever.
Remove the front carpet.
Remove the floor tunnel cover.
Disconnect the battery.
Remove the warm air wire hose from the air filter housing.
Remove the two upper starter mounting bolts.
Unscrew the nuts securing the exhaust pipe to the exhaust manifold and remove the locking plates. (If you have difficulty removing the nuts, complete the operation from underneath the vehicle.)
Unscrew the lower starter mounting bolt and...
...move the starter forward.
Drain the oil from the gearbox housing. Close the drain plug.
Disconnect the parts securing the main muffler to the body.
Disconnect the additional mufflers from the exhaust pipe without disconnecting them from the main one.
Remove the exhaust pipe from the car downwards.
Remove the driveline safety bracket.
Unscrew the three nuts from the bolts securing the flexible coupling to the gearbox flange.
Remove the bolts from the flange and coupling one by one by turning the driveshaft.
Using a screwdriver, pry the coupling away from the flange and lower it down.
Disconnect the wires from the reverse light switch (located on the right rear of the transmission).
Unscrew the nut and disconnect the cable from the speedometer drive gearbox (located in the left rear part of the gearbox).
Remove the slave cylinder from the clutch housing without disconnecting the hose from the cylinder.
Unscrew the four bolts securing the clutch housing cover and remove the spring washers.
Place a support under the crossbar.
Unscrew the two nuts (the second one is not shown) securing the cross member to the body and remove the washers.
Remove the stop and smoothly lower the gearbox down.
Place a stop under the front of the engine to secure it in position.
Using extensions and universal joints, remove the left and right upper bolts securing the clutch housing to the engine. Remove the spring washers and eyelets.
Unscrew the left and right lower bolts securing the clutch housing to the engine. Remove the spring washers.
(An assistant must support the rear of the transmission.)
Remove the gearbox by first moving it backwards until the input shaft leaves the clutch, and then downwards.
Install the gearbox on the vehicle in the reverse order of removal. Fill in the required amount of oil.
Before installing the gearbox, apply a thin layer of LSC-15 or Litol-24 lubricant to the splined part of the input shaft and engage 1st or 3rd gear
How to remove the gearbox of a VAZ 2106
Before we start removing the VAZ 2106 gearbox, let's take a rough look and determine the main faults that result in its removal. The box should be removed if:
- There is increased noise in the box.
- If while driving you feel that it is difficult to change gears, then this is another sign for subsequent repair of the gearbox.
- Speed slippage or unclear gear shifting.
In addition to the above faults of the VAZ 2106 gearbox, which require removal, the box is also removed when replacing the clutch, when replacing the rear crankshaft oil seal, when replacing the clutch release bearing.
The work of removing and then installing the gearbox itself is very labor-intensive and requires a sufficient investment of physical effort and time on your part, so before you repair the VAZ 2106 gearbox, make sure that the real reason for the breakdown of your car lies precisely in the gearbox , and not in anything else.
To remove the gearbox from a VAZ 2106 car, you will need the help of an assistant, wrenches for “10”, “13”, “19”, a head with an extension or universal joint, prepare yourself a key for the oil drain plug from the gearbox, and of course screwdriver and pliers. If everything you need is present in your combat arsenal, then let's start repairing.
- The first step is to disconnect the ground wire from the battery.
- The handbrake lever must be lowered to the lower position.
- You will also need to remove the radio panel.
- We turn on the neutral position and remove all the decorative body kits and so on from the gearshift knob. It is also necessary to remove the gear shift lever rod; to do this, use a screwdriver to press out the locking sleeve.
After you have removed the lever rod, the remote, elastic and locking bushings will still remain on the lever itself, which also need to be removed. And we will remove them using two screwdrivers, with which we will open the petals of the spacer bushing and then remove all the others.
Now we get rid of the decorative trim of the interior that will interfere with us, namely, look at the fastenings of the floor mat and, if necessary, unscrew it and move it to the side, remove the decorative cover of the parking brake lever, remove the front sill trim, wrap the mat so that the clip of the decorative cover is moved through gear shift lever.
Now let's get to work outside the car, namely you need:
- Unscrew the mounting bolts and remove the exhaust pipe.
- Unscrew the lower starter mounting bolt and move it to the side.
- Take an empty container and, using a special wrench, unscrew the oil drain plug from the gearbox housing, drain the oil and screw the plug back on.
- Disconnect the parts securing the main muffler to the body and disconnect all additional mufflers; there is no need to disconnect them from the main muffler, after which we remove the exhaust pipe from the car.
- Next, you need to remove the driveshaft safety bracket from the car. Then unscrew the nuts securing the elastic coupling to the gearbox flange and, turning the driveshaft, remove the bolts from the coupling one by one. Remove the coupling from the flange by using a screwdriver to move it away and lower it down.
Gearbox servicing
The service life of even the most reliable mechanisms depends on their correct operation and the quality of the oil used. Therefore, do not forget that high-quality oil is the key to long-term operation of the gearbox. During improper operation, rotating metal elements in contact with each other wear out. As a result of this, metal shavings get into the oil and, accordingly, are distributed throughout all elements of the box, further increasing the wear of gears and other parts. However, the gearbox has methods of passive protection against such harmful effects. For example, the drain plug in the bottom cap has a magnet that catches metal shavings. The primary and secondary shafts are sealed at the ends with rubber cuffs. The volume of oil that needs to be poured into the box is 1.35 liters. Long-term operation of the gearbox is possible with regular visual inspection to timely eliminate oil leaks, if any. In addition, it is necessary to measure the oil level in the box. It is advisable to carry out this procedure once a year or after every fifteen thousand kilometers. The oil must be changed every five years or after every fifty thousand kilometers. If it is necessary to repair the gearbox of a VAZ 2106 car, it is necessary to completely drain the oil, after which this device can begin to be disassembled.
Design Features
The five-speed gearbox of the VAZ 2106 is based on a four-speed gearbox, which ensures the interchangeability of parts. The unit is three-shaft and consists of the main components:
- Carter;
- Back cover;
- Bottom cover;
- Intermediate, primary and secondary shafts;
- Gears, couplings.
The VAZ 2106 car has good dynamic and speed characteristics thanks to a high-quality and simple gearbox. All gears, except the reverse mechanism, are helical and have constant mesh. This device allows the gears to transmit large torques with their small design. The reverse gears are spur gears, which prevents the car from developing high speed when moving backwards. This is explained by the weight and size of the gears and the maximum possible transmitted torque.
Drive gear
The forward gears are engaged thanks to clutches with inertial synchronizers. The direct switching mechanism consists of forks with rods. After the gear is engaged, fixation occurs thanks to spring-loaded balls that fit into the holes of the rods. VAZ designers also provided for the use of locking blocks as protection against engaging two gears at the same time. To reverse, engage reverse gear. In this case, the gear in the gearbox will move along its axis into engagement with the teeth of the gears of the intermediate and secondary shafts. Structurally, the gears of this transmission are located inside the rear crankcase cover. In the 5-speed gearbox, the elements of the last gear are also located there.
To replace the lubricant in the box (oil), there are special plugs in the housing that have a self-sealing conical thread
Please note that all characteristics of metal elements are selected taking into account the fact that the driver pours high-quality oil into the gearbox
Backstage at the checkpoint - what is it for?
In the language of service station specialists, the rocker is called “gearbox control drive rod.” The shift lever itself is mistakenly taken for the backstage when the backstage is a multi-component element:
As part of the gearbox, the link plays the role of a connecting link between the lever and the driveshaft. Being a mechanical device, it can wear out, so the driver will immediately begin to notice problems in driving the vehicle. Current breakdowns are usually associated with the exhaustion of the life of the link, and less often with a drop in the oil level in the gearbox.
Self-adjustment of the scenes
If you have the first problems with shifting gears, you can first try adjusting the rocker. It is quite possible that some connections have become loose and a little intervention can fix this problem:
Usually these actions are quite enough to return the car to its original controllability.
Video: instructions for adjusting work
How to remove and install the rocker on a VAZ 2107
In fact, the process of dismantling the old stage and installing a new one is quite simple. Car enthusiasts themselves explain in accessible language on forums exactly how to carry out the work.
Magadan
https://vaz-2106.ru/forum/index.php?showtopic=7549&st=40
Thus, it is not for nothing that the gearbox on the VAZ 2107 is considered one of the most complex design elements of the model. The owner can do some of the operation, inspection and repair work with his own hands, but do not overestimate your strength in the event of serious large-scale problems with the gearbox - it is better to pay for the services of specialists.
Malfunctions
The main breakdowns of the gearbox mechanism of the VAZ 2106 model primarily include: random switching off of the lever, characteristic noise, and oil leaks. Let's start in order. Spontaneous gear disengagement can occur when there is severe wear on the teeth of the spline ring, gear clutch, retaining rings, spring, or fork rod teeth.
Also, the cause of this malfunction may be loosening of the mounting nuts on the engine mount, or on the box itself. Or, an equally common reason may be dirty clutch levers.
If the noise is not constant and appears only when one of the gears is in operation, then the reason can only be one: wear of the synchronizers or gears. If the noise does not go away when any gear is engaged, the cause may be a loose connection between the crankcase and the gearbox, or wear of the locking ring.
Well, liquid leakage can only happen in two cases: weak fastening of the filler or drain plug, as well as defects in their design that affect the tightness of the system.
9.4. Gearbox replacement
We work on an inspection ditch or a lift. Disconnect the negative cable from the battery. We disconnect the cardan drive from the gearbox (see Replacing the cardan drive) and remove it from the car. Remove the exhaust pipe of the muffler (see Replacement of exhaust system parts). Disconnect the terminals from the reverse light switch (see Replacing the reverse light switch).
In the cabin, carefully remove the decorative cover from the ring.
Using a screwdriver, we disconnect the rings holding the mat.
Moving and lifting the mat, we unscrew the four screws securing the cover.
We take out the cover with the foam rubber seal from under the mat and lift them up.
By pressing down on the gear shift knob, use a thin screwdriver to remove the locking sleeve from the groove of the lever rod.
. and remove the handle.
By striking the mounting blade inserted between the engine and the engine compartment partition, we bend the eye washer of the upper clutch housing mounting bolt.
Use a 19mm wrench to unscrew the bolt.
It is more convenient to use a special curved wrench with a head for this purpose.
Gearbox oil for VAZ 2106
The coordinated operation of the gearbox elements depends on the quality of the lubricant that washes them, as well as on its volume. The oil in the VAZ 2106 gearbox must be changed every 50 thousand kilometers. At least, these are the requirements of the manufacturer. But you need to check the lubricant level at least once a quarter.
What kind of oil to pour into the VAZ 2106 gearbox
In accordance with the requirements of the plant, only gear oil from groups GL-4 or GL-5 according to the API classification must be filled into the VAZ 2106 gearbox. As for the viscosity class, the following SAE classes are suitable:
The required oil volume for a four-speed gearbox is 1.35 liters, for a five-speed gearbox - 1.6 liters.
Checking the oil level in the gearbox
To find out what level of lubrication is in the box, the car must be driven onto a horizontal overpass or inspection hole. The engine must be cold. The oil level in the gearbox is determined by unscrewing the oil filler plug. It is unscrewed using a 17 key. If oil pours out of the hole, everything is in order with the level. Otherwise, it needs to be topped up. But there is one nuance here. You can only add oil of the class and type that is already in the box. If you do not know what kind of lubricant is in the gearbox, it must be drained completely, and only then a new one must be filled in.
Draining oil from the VAZ 2106 gearbox
To drain the lubricant from the “six” gearbox, the machine must be installed on an overpass or pit. The engine must be hot. This way the oil will drain faster and in full.
The oil drain plug is located in the lower crankcase cover. It is unscrewed with a 17 key. Before unscrewing it, you need to place a container under the hole to collect the oil. When the lubricant drains, the plug is screwed back on.
How and with what to fill the gearbox of a VAZ 2106
To fill the six gearbox with oil, you will need a special syringe or a thin hose (must fit into the oil filler hole) with a funnel. In the first case, lubricant is drawn from a container into a syringe, and then squeezed out of it into the filling hole. The process continues until the lubricant flows out of it. After this, the oil filler hole is screwed in.
When using a hose and funnel, you need to insert one end into the hole and raise the other end at least half a meter above it. The lubricant is poured into a funnel inserted into the other end of the hose. When oil begins to flow out of the box, stop pouring, remove the hose and tighten the plug.
We carry out the work on a car lift.
Lower the parking brake lever to the down position. Remove the gear shift rod.
Align the two screws securing the parking brake lever boot and remove the boot from the lever.
Remove the front carpet.
Remove the floor tunnel cover.
Disconnect the battery.
Remove the warm air wire hose from the air filter housing.
Remove the two upper starter mounting bolts.
Unscrew the nuts securing the exhaust pipe to the exhaust manifold and remove the locking plates. (If you have difficulty removing the nuts, complete the operation from underneath the vehicle.)
Unscrew the lower starter mounting bolt and...
...move the starter forward.
Drain the oil from the gearbox housing. Close the drain plug.
Disconnect the parts securing the main muffler to the body.
Disconnect the additional mufflers from the exhaust pipe without disconnecting them from the main one.
Remove the exhaust pipe from the car downwards.
Remove the driveline safety bracket.
Unscrew the three nuts from the bolts securing the flexible coupling to the gearbox flange.
Remove the bolts from the flange and coupling one by one by turning the driveshaft.
Using a screwdriver, pry the coupling away from the flange and lower it down.
Disconnect the wires from the reverse light switch (located on the right rear of the transmission).
Unscrew the nut and disconnect the cable from the speedometer drive gearbox (located in the left rear part of the gearbox).
Remove the slave cylinder from the clutch housing without disconnecting the hose from the cylinder.
Unscrew the four bolts securing the clutch housing cover and remove the spring washers.
Place a support under the crossbar.
Unscrew the two nuts (the second one is not shown) securing the cross member to the body and remove the washers.
Remove the stop and smoothly lower the gearbox down.
Place a stop under the front of the engine to secure it in position.
Using extensions and universal joints, remove the left and right upper bolts securing the clutch housing to the engine. Remove the spring washers and eyelets.
Unscrew the left and right lower bolts securing the clutch housing to the engine. Remove the spring washers.
(An assistant must support the rear of the transmission.)
Remove the gearbox by first moving it backwards until the input shaft leaves the clutch, and then downwards.
Install the gearbox on the vehicle in the reverse order of removal. Fill in the required amount of oil.
Helpful advice
Before installing the gearbox, apply a thin layer of LSC-15 or Litol-24 lubricant to the splined part of the input shaft and engage 1st or 3rd gear
All material on the site and instructions for removing and installing the gearbox are protected by copyright! Copying and distribution is permitted only with the written permission of the administration of the Korobka.pro site and or by indicating the authorship and a link to the Korobka.pro site!
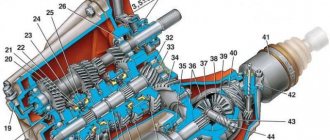
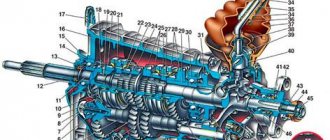
VAZ 2106 gearbox diagram
The VAZ 2106 transmission has a specific design diagram - you can see it in the picture. Speed shifting occurs as a result of the interaction of the clutch with synchronizers. Automatic shift levers and working mechanisms are represented by forks with rods. As the speed changes are completed, they are fixed with springs and balls - they are needed to hold the rod. Additionally, engineers use protection against accidentally turning on a couple of speeds at once.
The operational parameters of gearbox parts are selected taking into account the characteristics of the transmission oil. Poor quality fluid negatively affects the operation of the gearbox.
Speed box diagnostics
The gearbox on the VAZ 2106 should be systematically serviced. This procedure includes changing the oil. The choice of fuel for a VAZ should be approached as responsibly as possible. 80W90 oil is in demand, for example, from the domestic TNK brand, Lukoil. As a rule, about 1.5 liters are required for replacement. The need for replacement arises after 30,000 km of VAZ operation.
In order to save money, many car owners carry out the replacement themselves. Tools required: wrench, hexagon. In this case, vehicles must stand on a level surface. New fluid can be added to the car system using a special filling syringe.
During diagnostic procedures, service center technicians must pay attention to the condition of the coupling spline connections, synchronizer springs, and shaft seals. As a rule, complete disassembly of the box is required if any of its component parts are deformed
It is better to entrust the replacement of a VAZ 2106 gearbox to professionals.
How to remove a VAZ 2101 gearbox with your own hands
VAZ-2101 cars are equipped with a 4-speed manual transmission, the main part of the gearbox is located under the bottom of the car.
Basic faults
The gearbox used on the Kopeyka is structurally a fairly reliable unit, capable of handling a significant resource without any special intervention. But still there are problems with the gearbox.
The main problems with this unit are:
Of course, there are other types of malfunctions, for example, jamming of the gearbox while driving, inability to engage or disable any gear, destruction of gears or shafts, breakdown of the gearbox housing.
But such problems arise much less frequently and are mainly due to improper operation of the gearbox, as well as design defects in the component elements of the box. Elimination of any of the malfunctions is carried out on the removed box. Therefore, in order to restore the functionality of the gearbox, you must first know how to remove the gearbox on a VAZ-2101.
Moreover, it doesn’t matter whether the VAZ-2101 gearbox is being repaired or replaced, it will still have to be removed.
What you need
This operation is not particularly complicated, but it requires certain skills and knowledge of the sequence of work. The complexity of the operation lies in the fact that many elements have to be unscrewed and disconnected, and access to them is not always convenient.
To remove the box you will need the following tools and accessories:
All work is carried out in three places - the interior, the engine compartment, and under the car. Therefore >a viewing hole will definitely be required.
Sequence of work
Having prepared everything you need, you can begin work.
The removal sequence is as follows:
If the gearbox is to be repaired, then the VAZ-2101 gearbox is then disassembled, followed by replacement of worn elements, and then the unit is assembled and installed in place.
Reinstalling the box is carried out in the reverse order. In this case, you should check the installation of all removed elements in place, as well as the reliability of tightening the fasteners.
Article on the topic - VAZ-2101 gearbox design
Video - how to remove a gearbox without a hole
← We tried, your assessment is interesting. Loading…
Gearbox servicing
The service life of even the most reliable mechanisms depends on their correct operation and the quality of the oil used. Therefore, do not forget that high-quality oil is the key to long-term operation of the gearbox. During improper operation, rotating metal elements in contact with each other wear out. As a result of this, metal shavings get into the oil and, accordingly, are distributed throughout all elements of the box, further increasing the wear of gears and other parts. However, the gearbox has methods of passive protection against such harmful effects. For example, the drain plug in the bottom cap has a magnet that catches metal shavings. The primary and secondary shafts are sealed at the ends with rubber cuffs. The volume of oil that needs to be poured into the box is 1.35 liters. Long-term operation of the gearbox is possible with regular visual inspection to timely eliminate oil leaks, if any. In addition, it is necessary to measure the oil level in the box. It is advisable to carry out this procedure once a year or after every fifteen thousand kilometers. The oil must be changed every five years or after every fifty thousand kilometers. If it is necessary to repair the gearbox of a VAZ 2106 car, it is necessary to completely drain the oil, after which this device can begin to be disassembled.
https://youtube.com/watch?v=YW2EsAU8i7c%2520
