Short-throw rocker for VAZ 2114, do-it-yourself adjustment
Over time, free movement begins to appear virtually everywhere, wherever it can be, on cars produced by AvtoVAZ. The gearbox is no exception. It’s not mind-blowing that replacing the scenes on a VAZ 2114 has become an ordinary function, common to all owners of this model.
Kit
Finding the problem is quite simple:
- Gears are switched with inconsistencies, it’s unclear;
- The gearbox is loose.
Some experts say that completely changing it is not always appropriate. It is more profitable from a monetary point of view to purchase a repair kit. But in fact, such a repair does not give the desired result, and after a while the link will still have to be changed.
What gearbox is installed on the VAZ-2114?
Since the VAZ-2114 is equipped with a mechanical gearbox, the driver personally selects which gear to engage at what point in time (by changing the position of the driven gear relative to the driving gear - approx.), thereby ensuring the correct position of the lever in the cabin. However, during operation it happens that the handle begins to rattle, causing only discomfort to the car owner.
Below, in our article, we will look at the main causes of this problem, as well as ways to fix them.
Gearbox device
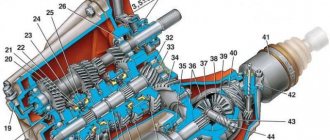
Diagram of the gear selection mechanism with decoding
First of all, before we undertake the repair or alteration of the gearshift knob, we need to learn more about its design (to figure out where the vibration comes from and how dangerous it is for the operation of the car as a whole - approx.), and also become familiar with its main elements.
It’s no secret that the VAZ-2114 is a front-wheel drive car, with front drive wheels; accordingly, the gearbox itself is perpendicular to the direction of movement of the car (this means that the “box” lever does not enter the cabin directly from its body, but through the rocker – approx.) . The same cannot be said about representatives of the “classic” AvtoVAZ family, where the rattling of the gearbox lever may indicate problems with the transmission itself.
The handle on the VAZ-2114 works somewhat differently, using special rods that help the car enthusiast change gears with the greatest comfort. However, among this lie small shortcomings of the creators, which over time lead to the rattling of the handle.
Causes of gearbox bouncing
- The connection bushing is the wrong size.
- The handle gasket is missing.
- Inconsistency of parts that border each other.
All of the above problems can be caused by one small metal bushing that connects the rods under the lever. Therefore, the rattling of the handle may appear due to the appearance of a gap in it, or poor contact between two connections. All this leads to impacts of the bushing against the metal of the body, which contributes to the appearance of noise and rattling of the handle.
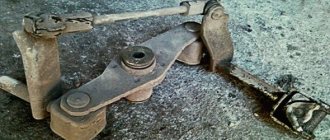
This is what the old bushing looks like.
On some VAZ-2114 models, such connections were wrapped with a rubber gasket to avoid such malfunctions.
Sports
We noted that for the VAZ 2114 you can install a sports short-throw rocker. Outwardly they are quite similar, but the difference in work is felt immediately. On a sports unit, gears shift faster and smoother. It's all about the design of the backstage itself. Unfortunately, it is precisely because of this that the process of independent replacement becomes almost impossible.
If you decide to install a short-throw rocker on your VAZ 2114, contact trusted car services, or even better, a studio that specializes in tuning. Such events are classified as technical improvement, which is why no one understands this better than tuning specialists. Even official AvtoVAZ car services.
- Electrical equipment
- Engine
- Brake system
- Other
- Steering
- Transmission
- Suspension
- Tuning
- VAZ 2110 Other
- Engine
- Steering
- Electrical equipment
- Transmission
- Brake system
- Suspension
- Tuning
- Electrical equipment
- Steering
- Video publications
- VAZ tuning photo stream
- Operation and repair manuals
Price issue
Short walker
Actions on your own, you only have to purchase the necessary parts and ordinary consumables. If you contact a car service, the minimum cost of the service will be 800-1000 rubles. That is, the savings are obvious.
The curtain itself costs about 400 rubles. From here it becomes clear why we did not advise buying a repair kit, but rather completely replacing the part. There will be no savings as such, but the difference as a result of the repair will be significant.
How to replace the universal joint on a VAZ 2110-VAZ 2112?
Note! It is possible to remove this hinge only on an overpass, inspection hole, or if you raise the car, because this hinge is located under the bottom and you will need to crawl under it to unscrew both bolts that secure it!
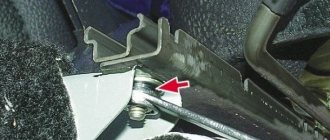
Removal: 1) At the beginning, as you already understood, you will need to crawl under the car, after that, look for the boot (Indicated by the arrow) and the hinge itself, which is located under this boot, so after that, take two keys in your hands and hold the bolt with one to prevent it from turning , loosen the nut of this bolt a little as shown in the figure, and after the clamp nut is loosened, grab the rod with your hand and remove it from the hinge as shown in the small figure.
Note! Before you start unscrewing the nut of the tie rod bolt, drag the boot towards the box so that it does not interfere, and after you disconnect the link, drag the boot towards it and thereby completely remove it from the car!
2) Now you will need to unscrew another bolt that secures the hinge in the front part to the gear selector rod, so after this bolt is unscrewed, you can pull the hinge and calmly remove it from the place where it is installed.
Note! When you install the new joint, you will need to get these bolts into the hole in the gear selector rod, so remember approximately where this bolt is located after installing the new joint in the same place and screw it in so that it fits into the hole in the gear selector rod!
Installation: Installation of a new hinge is carried out in the reverse order of removal, but only when you install the hinge, the link will definitely need to be adjusted, otherwise the gears will not engage clearly and instead of, for example, first gear as mentioned earlier, the reverse gear may easily engage. (For information on how to adjust the rocker, see the article entitled: “Replacing the rocker on a VAZ”)
Additional video: If you want to learn in more detail how the hinge is removed and installed, then watch the video below that clearly shows everything:
- Electrical equipment
- Engine
- Brake system
- Other
- Steering
- Transmission
- Suspension
- Tuning
- VAZ 2110 Other
- Engine
- Steering
- Electrical equipment
- Transmission
- Brake system
- Suspension
- Tuning
- Electrical equipment
- Steering
- Video publications
- VAZ tuning photo stream
- Operation and repair manuals
Modernization of standard to short-stroke
If you are not afraid of the minus associated with reducing the time before repairing another unit, but it is too easy to buy a ready-made copy, know that the standard rocker on a VAZ 2114 can be converted into a short-stroke one with due effort.
To carry out this operation you will need:
- standard rocker 2114;
- backstage repair kit 2114 (the bushings and axle from it will be useful);
- ball nut;
- metal tube with a diameter of 15 mm;
- steering cardan.
When all the necessary spare parts have been found, you must perform the steps in the following order:
- We cut the ball from the wings.
- We grind the lower edge of the cut so that it fits the tube.
- We put on the pipe and scald.
- We weld a ball nut to the lower edge of the structure.
- We attach the cardan to the gearshift lever.
- Then we proceed as when replacing the rocker seal and put everything back together.
Replacing the backstage with a short-stroke one
CLARIFICATION! The essence of this procedure is that reducing the stroke is achieved by changing the length of the pressure lever. The action we performed is aimed at reducing the shift lever on our side, by increasing it on the side of the box.
If you carry out the modernization using this “makeshift” method, you will not have to remove the standard rocker.
Lada 2115 “inconspicuous” › Logbook › #14. Kalino cardan.
The topic is not new, but maybe someone hasn’t come across it, maybe it will be useful for someone. There are legends about the benefits of the Kalinovsky cardan. This is a popular modification, which consists of installing a backlash-free cardan from Kalina on the VAZ 2113/14/15, which is installed on the gearbox linkage. Since the cardan is a hinge without play, it helps to reduce the lateral travel of the lever, and the clarity of gear engagement also increases.
For a long time I was tormented by the rattling of the gearshift knob. File off a few millimeters on the handle sleeve
eliminated the problem literally for a month. It was decided to install this “magic” Kalinovsky cardan.
I didn’t install it myself ( not because I’m a quitter, but because it’s already cold in the garage, and there’s no hole, and I don’t want to do it outside on an overpass
), but I took it to a friend at a service station, but I literally helped =) I only bought the driveshaft, since the boot turned out to be absolutely intact.
The correct name for the cardan shaft from Lada Kalina is: Gearbox control drive rod joint (without backlash). Catalog number 1118-1703160.
In common parlance - a glass.
So that the post is not empty, I am posting information from the Internet about its replacement. We purchase the driveshaft from the viburnum itself.
Next, we saw off 10 mm from it (if you don’t saw off and leave it as is, the gearshift lever will move closer to the rear passengers).
In fact, everything fit perfectly for me and without shortening.
Next, we jump into the hole, or simply climb under the car, taking with us the keys for 10 and 13. We see this thing - this is the universal joint, which we will change to a Kalinovsky one
Move the rubber boot to the box
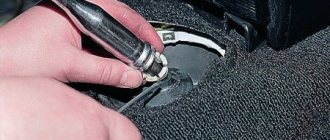
We loosen the coupling bolt of the clamp by 13, slightly unclench the clamp and pull the link off the cardan. Then unscrew the 10mm bolt that secures the cardan on the gear selector rod and remove the cardan.
Everything is ready to install the Kalinovsky cardan
We put a new cardan on the gear selector rod and secure it there with a 10-point bolt. It is advisable to coat this bolt with thread locker so that it does not turn away from vibration.
After that, we pull the boot into place, put on the drawstring and adjust it. We tighten the clamp and make a test drive. If everything is satisfactory, tighten the clamp thoroughly.
And now personal feelings:
The speeds are switched on very softly, as on foreign cars, the rattling has not completely gone away, but has dropped to almost 0 (we will look for other reasons). In general, only positive emotions.
In general, if you thought about it, but didn’t dare, definitely give it a go – it’s worth it!
Replacing a short-stroke rocker on a VAZ 2114
VAZ models received one unpleasant feature: with age, backlashes appear in some parts of the car. We are talking about the transmission, engine, and gearbox. There is no need to wait until all the parts of the unit wear out, since a complete replacement will cost more than modernization. In this article we will talk about tuning the gearbox, or more precisely, about installing a short-stroke shifter (SC) instead of the standard one. Here, VAZ 2114 owners have three options: installing a freelance rocker, making the part with their own hands, and also adjusting the standard unit.
Important! Defects in the operation of the gearbox may appear due to the oil seal, the “symptoms” of which are similar to the rocker. A visual inspection is enough to determine whether the seal is working or not. The analysis can be performed according to the scheme from this article
The analysis can be performed according to the scheme from this article.
The short-throw rocker reduces gear shifting time, which is why this part was originally only found in sports cars. Subsequently, almost all automakers included a short-throw rocker in the design of their cars. AvtoVAZ lagged behind foreign cars a little, so the first model of the company with this part was the Lada Kalina, so if you install a freelance element, then it’s from the Kalina.
In conclusion
Now you know how to replace the short-stroke linkage and understand that it is within your power. The main thing is to be patient and the convenience of a short gearbox will appear in your car.
Published April 11, 2018
Over time, almost everywhere possible, backlash begins to appear on cars produced by AvtoVAZ. The gearbox is no exception. It is not surprising that replacing the rocker on a VAZ 2114 has become a routine procedure familiar to all owners of this model.
Set
Determining the malfunction is quite easy:
- Gear shifts with problems, indistinctly;
- The gearbox is loose.
If such a malfunction occurs, a complete replacement of the element may be required. Moreover, many are switching to a short-throw rocker, which gives the car a more sporty character. This technology was borrowed from motorsports. By the way, a simple adjustment can turn it into a short-stroke one.
Some masters argue that it is not always wise to completely change. It is more profitable from a financial point of view to purchase a repair kit. But in fact, such repairs do not give the desired result, and after a while the link will still have to be changed.
Replacing the rocker rod oil seal
The normal condition of the oil seal determines whether the oil “disappears” from the gearbox, so if you notice oil stains on the asphalt after parking, you should think about whether it is the oil seal or the oil filter.
Therefore, after checking the filter, it’s the seal’s turn. A malfunction of the VAZ 2110 oil seal can also be suspected if a crunching sound is heard when changing gears.
The oil seal can only be replaced in a hole, overpass or other device that allows you to get under the car:
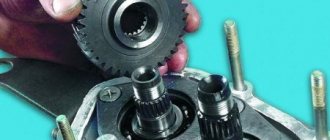
First of all, we pay attention to the rubber boot. If oil escapes from the VAZ 2110 gearbox through the oil seal, then the entire boot will be in its drops; We bend the boot and disconnect the cardan, gaining access to the cuff; We remove the cardan from the lever, and then from the rocker; Having removed the cardan, we get to the oil seal; Using an awl and a hook, remove the cuff on the gearbox; Now you need to press in the new oil seal. Traditional craftsmen usually install it using a plastic bottle cap; If the replacement was successful, we return everything to its place, install the boot, and we can consider this minor repair complete.
Traditional craftsmen usually install it using a plastic bottle cap; If the replacement was successful, we return everything to its place, install the boot, and we can consider this minor repair complete.
Remember that any rocker repair will not be successful if it is not adjusted correctly. It is best if the setup is done with an assistant, since it is problematic to do this on a VAZ 2110 yourself.
Do-it-yourself short-throw scaffold
A similar device can be installed on any VAZ car (both classic and front-wheel drive) with your own hands; below are examples of how this is implemented.
Short-stroke link for classics
For production in this case you will need:
- a piece of pipe with a diameter of fifteen millimeters;
- nut from a classic ball nut;
- RPP from 2108;
- backstage repair kit 2108 (axle and two bushings);
- cardan from the steering mechanism 2104, 2105 or 2107.
The work is performed as follows:
- The ball from the bottom is cut off from the RPP;
- The lower part is sawed off so that a pipe can be inserted into it and scalded;
- The nut is welded to the pipe from below;
- The ball is placed in a convenient place;
- The cardan is attached to the gearshift lever.
The described process is illustrated by the following photographs:
Short-stroke rocker VAZ 2109
One of the main parts will be a cardan from Kalina, which will help avoid play in the lever.
Next you need to complete the modification, as shown in the photographs:
Then two pieces of metal are welded
After finishing the work, you need to clean all the seams and paint them in the desired color.
The short-throw shifter, which you install yourself on many VAZ car models, has its pros and cons, but it allows you to reduce gear shifting time and makes it easier to control the car. Whether to do it or not is everyone’s personal choice, but it cannot be denied that such a modification is perceived by many as necessary and useful.
Rate the usefulness of the article!
- Why do brake pads squeak when braking and what to do about it
- Replacing engine mounts on VAZ and other cars
- Car rental: what you need to know when choosing
- What does the braking distance depend on and what formula can it be calculated by?
- How well do you understand car emblems?
- How to remove the outer CV joint and replace a torn boot
- How to independently replace the internal grenade on VAZ cars
- Wheels for rotating the car in place 360 degrees
- In 3 years, diesel engines will become a luxury
- Review of the most expensive Hyundai Solaris ever
- Test drive Lamborghini Huracan from Mikhail Petrovsky
- Electrical equipment
- Engine
- Brake system
- Other
- Steering
- Transmission
- Suspension
- Tuning
VAZ 2110
- Other
- Engine
- Steering
- Electrical equipment
- Transmission
- Brake system
- Suspension
- Tuning
How to replace the universal joint
In most cases, it is not the rocker itself that fails, but the cardan. Due to its displacement, even a small one, a failure occurs in the gear shift mechanism.
Standard VAZ-2109,2114 scenes are rarely installed during repairs; similar parts from Lada Kalina are used. The replacement looks like this:
- Using two keys set to “13”, unscrew the clamp securing the cardan to the rod.
- Using a screwdriver, pull the boot towards the box housing. If desired, you can remove it completely, and if it has cuts or other damage, replace it with a new one.
- Unscrew the fixing bolt with a “10” key.
- Knock down the cardan with a hammer, strike carefully so as not to damage anything.
- The Kalinovsky universal joint is much more durable and reliable, so install it instead of the standard one.
- Reassemble the entire structure in reverse order. But do not rush to tighten the bolt on the clamp - adjustment is necessary.
Replacement instructions
Before work, we recommend not only purchasing the latest spare part, but also watching training videos on replacing the slide. The procedure is not very difficult, but a pleasant guide will never be superfluous. Especially if you do not have extensive experience in repairing a car and gearbox, namely.
Substitution procedure
The process contains several successive steps.
- Remove the cover from your gear shift knob.
- Raise the car using a jack. In some cases, an inspection hole is suitable, if you have one in your garage.
- Now you should dismantle the console, which will give you access to the backstage.
- The element is held in place by 6 bolts, which can be removed using a regular 13 mm wrench.
- But it's not that simple. You cannot unscrew the top two bolts with a wrench, so don’t even try. They are specially planted very tightly, so to dismantle them you just need to cut them down with a grinder.
- Now you can relax and remove the remaining two bolts in the lower fastening of the rocker, for which your effort and a 13mm wrench will definitely be enough.
- The next step is to remove the clamp and move the boot. You will need to remove the hinge. Immediately with the replacement of the scenes, we recommend changing the hinge. It would not be superfluous to replace the oil seal and cardan. These elements have a limited service life, and since you decide to change the backstage itself, there are specific prerequisites for doing everything very well.
- Then install the new unit in place of the old one. Act carefully so that the rubber bands of the slides get on the welded bolts that you sawed off earlier using a grinder.
- Now the assembly is assembled back, acting in reverse disassembly sequence. It is not necessary to seat the upper mounting bolts tightly, but try to tighten them with force.
What is a short-stroke link?
Let's dive a little into the history of the creation of the node in question. It all started with auto racing. If you study the history of the origin of many working units that today are attributes of a modern car, you will notice that all of them, or almost all of them, came to us from motorsport. This is where the constant search for new products, upgrades, improvements, and driving comfort takes place. The same thing happened with the backstage.
Racing drivers once came to the conclusion that when they have to save every second, they waste time changing gears. It’s distracting, disruptive, inconvenient, and ill-conceived. Auto mechanics took care of the problem, and as a result, a short-stroke rocker was created.
At first, KK was used exclusively on sports cars and was their calling card, as it significantly reduced the time for changing gears. It became an excellent novelty, which was quickly adopted by all the world's manufacturers of sports models. Over time, the device migrated to ordinary cars.
An undeniable advantage of the system is the reduction of strokes during gearbox shifting. The short-stroke rocker ensures that the gearbox operates without backlash. Thanks to the CC, gear fixation becomes clearer and easier. And now about the minuses, or rather about the minus, in this case there is only one. This is a possibility of synchronizer failure. This happens due to increased load during gear shifting.
Installation of CC and cardan from Lada Kalina
The best solution would be to buy parts from Kalina, but some drivers prefer to take KK from a VAZ 2114, that is, a “native” part. In addition to the standard set of tools, you will also need a grinder. Replacement is carried out as follows:
- Inside the car, it is necessary to remove the platform, which blocks access to the transmission and gearbox parts. The platform is held in place by 5 bolts;
- From the bottom of the car, loosen the clamp that presses the cardan and the rocker;
- You need to remove the boot from the gearbox hinge and remove the mount;
- Further, the installation depends on which rocker was chosen as a replacement - the standard one from the VAZ 2109-2114 or from Kalina. After installing the standard CC and cardan from the Kulisa, the part may not fit into the seat. This can be corrected with the help of an angle grinder;
- The size of the cardan is best determined by the standard element. After the adjustment, you need to check whether the short-stroke linkage is hitting the body. If everything is installed correctly, then you need to tighten the clamp;
- The next step is to adjust the new part, which is done in reverse speed. It is necessary to switch the gearbox to reverse gear and set the lever to the R gear position. It is best to place the lever closer to the driver's seat. Done, the replacement is complete, now the tuning can be checked on the road.
Price issue
Short walker
Actions on your own, you only have to purchase the necessary parts and ordinary consumables. If you contact a car service, the minimum cost of the service will be 800-1000 rubles. That is, the savings are obvious.
The curtain itself costs about 400 rubles. From here it becomes clear why we did not advise buying a repair kit, but rather completely replacing the part. There will be no savings as such, but the difference as a result of the repair will be significant.
How to adjust the rocker on a VAZ 2110 with your own hands
Before adjusting the gearbox linkage, it is necessary to perform a number of preparatory work:
- Drive the car into the pit.
- Tighten the handbrake and install the wheel chocks.
Method No. 1 - adjusting the rocker according to the rear speed.
- Loosen the clamp.
- Engage reverse gear and position the lever as you would like it to be in this position.
- Then tighten the clamp and check how the rocker works, whether you are satisfied with the current position of the lever and the operation of the rocker.
Method No. 2 - adjusting the rocker at first speed.
This method is used, as a rule, when the first method did not produce results.
- Turn on first speed.
- Loosen the rocker clamp.
- Turn the rocker drive counterclockwise until the gearshift lever begins to rest against the plastic reverse speed stop.
- Tighten the clamp and check how everything works.
Method No. 3 - adjusting the scenes in neutral.
If you do not have a plastic stopper, the adjustment is made in neutral gear.
To adjust the neutral position of the gearshift lever, you need to accurately calculate the depth of the shift of your gearbox to the driveshaft of the VAZ 2110. Sometimes such manipulations result in the appearance of annoying rattling of the lever.
If adjusting the rocker does not lead to anything and there is still a problem with switching, replace the rocker completely or ask for help from specialists.
Sometimes cases arise when fifth suddenly disappears, reverse gear does not engage, or reverse gear is engaged instead of first. Don’t rush to remove the box, just try to adjust the bushing on the heel of the gearbox. Adjusting the rocker of a VAZ 2110 (or VAZ 2112) is quite a difficult task, as it might seem at first glance. But this is only at first glance. Somehow the reverse gear disappeared at ten, and I thought that now I would have to change the box. I decided to look on the Internet with the hope that maybe not everything was so bad, I went to a couple of auto forums, and decided to check the gearbox mount and the bushing on the heel. I started with the less difficult one. To check the pillow, I took a jack and lifted the box, I tried it - everything worked. I bought a new pillow, changed it, but the speed does not turn on again. And here it began... from the pit to the car showroom, from the car showroom to the pit, trying to re-adjust the bushing on the heel and so on for an hour, when I wasn’t tired of everything, I sat down to rest and think carefully about how to adjust the rocker on a VAZ 2110 (or VAZ 2112). During a smoke break, one bright thought came to me, which ultimately helped me tame this unit.
Adjusting QC
If you manage to replace the unit yourself, then it makes no sense to contact a specialist to adjust it. True, it will be very difficult to do this yourself; it is better to ask someone you know.
There are two methods for setting up a freshly installed rocker:
- In reverse gear, we put a friend behind the wheel and ask him to engage reverse gear. We install the lever in the most convenient position, in your opinion, and climb under the car, where we put the lever in place of the reverse gear and tighten the clamp.
- In first gear - if you can’t get the rear one in, put in the first one. We loosen the clamp as in the first case, but this time we must turn the drive, this must be done so that it reaches counterclockwise until the stop of the plastic clamp, after which we fix the clamp.
