Step-by-step installation of ignition VAZ-2109 carburetor
As practice shows, VAZ-2109 owners sometimes encounter improper operation of the power unit, caused precisely by problems with the ignition being set incorrectly.
The most common symptom here is the engine starting easily when it is not functioning correctly at idle.
According to experts, in 9 out of 10 cases, repairs, replacements and adjustments can be made directly on site. That is, having dealt with the nuances, any car owner will save a lot of money by refusing to visit a car service center.
Preparatory activities and necessary tools
Installing the ignition of a VAZ 2109 carburetor begins with preparatory activities. In particular, you need:
- Warm up the car engine;
- Set the parking brake and install wheel chocks under the rear wheels.
Remember that you cannot ignore safety rules, because a car is a highly dangerous vehicle, and failure to comply with safety rules when driving, servicing and repairing it can cost you dearly.
An important point: before you start work, you should make sure that the carburetor is correctly configured on the car. It would not be superfluous to carry out a visual inspection of all elements of the system. If we are talking about a carburetor car, special attention should be paid to inspecting the condition of the distributor.
If you have a car with an injection engine, it is worth checking the ignition module for serviceability. The thing is that, as practice shows, it is this module that fails most often and is the reason for the inoperability of the entire system.
To complete the work we need:
How does an ignition malfunction manifest itself?
If the unit in question is adjusted incorrectly, the following alarming symptoms are almost always observed:
Meanwhile, the vast majority of car owners spend energy on carburetor prevention, mistakenly believing that this is where the cause lies.
Naturally, their work is wasted.
If the angle adjustment was made incorrectly, then the following are observed:
All this leads to rapid wear of the engine as a whole.
Signs of incorrect ignition operation 21099
The VAZ 21099 engine, like the engine of any car, is a closed system in which everything is interconnected. Sometimes it is very difficult to distinguish between malfunctions of the power supply system and the ignition system if they do not manifest themselves in external signs. Incorrect operation of the ignition system can lead not only to deterioration in vehicle dynamics. Here are just a few basic examples of what an incorrect installation or failure of settings in the ignition system of the VAZ 21099 can do:
- increased fuel consumption;
- failures in transient speed regimes;
- unstable idle speed;
- Difficulty starting the engine, regardless of the engine and air temperature.
Popping noises in the carburetor or muffler may indicate early or late ignition. It is almost impossible not to notice them. In addition to external manifestations, a failure in the ignition installation often leads to burnout of the exhaust system, breakdown of gaskets, burnout of valves and pistons, breakdown of the cylinder head gasket; in general, you need to have a very rich imagination to list all the troubles that an incorrect ignition installation angle brings.
Before you set the ignition on the VAZ 21099, you should make sure that it is the ignition system that is to blame, since similar symptoms can occur with:
- incorrectly set fuel level in the carburetor float chamber;
- clogged air or fuel jets;
- incorrectly set thermal clearances of valves in the timing belt;
- broken valve timing;
- malfunctions of ignition system elements - coils, distributors, breakdowns of high-voltage wires, etc.
Preparation
As previously noted, you can do without such a device as a strobe light, but if you want to set up the ignition yourself, then there is still a reason to purchase it.
Before you start setting the angle, do the following:
There is a special scale with which the set angle is determined. This should be discussed in more detail, since you need to set the ignition according to the marks. For this:
If everything is done correctly, then cylinders 1 and 4 move to the TDC position.
When the scale is poorly visible and you are not sure that you have found the necessary feature, then you can verify the correctness of the position in another way.
There are pulleys on the camshaft gears. They must coincide with the mark on the wall of the timing belt protective housing.
How to adjust the ignition timing of a VAZ 21099
We turn off the engine and remove the protective plug located on the clutch housing. It will give access to the flywheel with marks that should match the mark on the crankcase. Let's clean this place thoroughly if it's dirty, otherwise we won't see the marks. Now we connect the strobe. It couldn't be easier to do this. Using the clamps on the strobe wires, we connect to the corresponding battery terminals. We only observe the polarity. After this, we remove the central wire from the distributor, install a tee from the strobe light in its place, and insert the central high-voltage wire into the hole of the tee. We check the contacts thoroughly.
Everything is ready for testing, and now you can start the engine and shine a strobe light on the hatch. Ideally, the marks on the crankshaft flywheel and on the crankcase housing should coincide at idle speed, but you need to take into account the brand of gasoline that is poured into the tank. The center of the triangular mark on the crankcase corresponds to the zero advance angle, and the following notches add or subtract 1 degree each. So, when filled with 98 and 92 gasoline, the advance angles should, in theory, be different. But if we go down to earth and really evaluate the quality of gasoline, then in order not to get upset again, we will set the ignition optimally for both gasolines - at 4-5 degrees. If necessary, we will adjust it later.
Having loosened the distributor fastening, we rotate it so that the +5 degree marks coincide, taking into account the gradation of one division on the distributor scale - 8 degrees. We turn off the engine, put everything back in place and turn off the strobe light.
Settings
The strobe is used like this:
After this, the actual adjustment begins.
The work is carried out in the following order:
The angle is adjusted by rotating to the right - this increases the angle, respectively, movement in the opposite direction decreases it.
It is not difficult to find out the exact direction - it is indicated by the scale marked on the distributor (there is an o and a “plus” there). Each division corresponds to 8 degrees. For this reason, adjustment is slow. After finding the desired position, the distributor is secured.
Checking the advance angle setting
To check how correctly we have set the ignition timing and how well the brand of gasoline corresponds to the inscription on the gas station, we drive out onto a flat section of the road, accelerate to 40 km/h in fourth gear and sharply press the gas pedal. In this case, a short-term (3-4 seconds) detonation should occur in the engine. That is, a knocking, ringing, clattering sound of the piston pins should be heard. If the ringing does not stop after 4 seconds, the ignition is too early. If the knock does not appear at all, then the ignition is late. If necessary, we adjust the ignition angle by eye.
Operating principle of the ignition system
It takes some time for the mixture to burn in the cylinder. If the mixture ignites while the piston is at TDC, then it will burn after the piston passes TDC, catching up with it, that is, during the expansion stroke of the combustion chamber and exhaust gases. This will create insufficient pressure on the piston, as a result of which efficiency will be noticeably reduced and fuel consumption will increase (ignition is delayed).
When the mixture is ignited long before the piston passes TDC, a significant part of the energy will be spent on overcoming the pressure by the piston during the process of explosive combustion of the mixture. In this case, detonation occurs (early ignition). In addition, if the VAZ ignition is set incorrectly, the engine will overheat due to the increased absorption by the cylinder walls of the heat released during combustion of the mixture.
That is why the optimal ignition timing is considered to be one at which the mixture ignites shortly before the piston passes TDC, so that the combustion of the mixture coincides as much as possible in time with the piston passing TDC. In this case, the VAZ ignition timing provides the best operating mode.
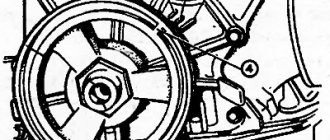
In order to control the ignition of the VAZ 2109, divisions are applied in the clutch housing hatch shaft, and a mark is installed on the flywheel. When the point on the flywheel coincides with the central mark in the hatch, the pistons in the first and fourth cylinders are set to top dead center (TDC).
The way to control the VAZ ignition installation “on the move” is as follows: moving at a speed of 40-50 km/h on a flat section of the road with fourth gear engaged, you need to press the gas pedal to the floor. If, while accelerating, a slight detonation is heard, which disappears almost immediately, the ignition is set correctly. The absence of detonation manifestations indicates late ignition. Excessive detonation is a sign of early ignition of the combustible mixture.
Ignition check
How to check the correctness of the procedure?
There is no point in doing this in the garage - you should drive out onto a flat road to check.
- To check the correctness, you need to accelerate to 50 km/h.
- Then, to check, the fourth speed is activated, while the gas pedal is pressed all the way.
If, after changing gear, you hear the engine begin to knock quietly, while the sounds are short, then this means that you did everything correctly. If the ignition is set too late, this will be indicated by the absence of sounds when accelerating. If the ignition is too early, the sounds will be quite loud.
Installing the ignition on a VAZ ninth model
When adjusting the ignition of a VAZ 2108-09-099 with a contactless ignition system, a strobe light is used. The sequence of actions is as follows:
After finding it, you need to secure the locking plate without changing the position of the ignition distributor. If after adjusting the ignition the engine speed increases, it should be reduced to 800-900 rpm. Having completed the described steps, you need to make sure how the ignition on the VAZ is set when the car is moving using the method described above.
Source
Incandescent lamp instead of strobe light
Many car owners will ask a completely fair question: how to adjust the ignition of a VAZ 2109 in the absence of a strobe light. Of course, it is more correct to work with a strobe, especially since in this case it is possible to carry out adjustment and adjustment work as accurately as possible. However, there is another method that is useful for those who, for one reason or another, do not want to purchase a strobe.
To work, we need an ordinary incandescent lamp designed for an operating voltage of 12V. The entire algorithm of actions is as follows:
- Disconnect the wire from the distributor that goes to the ignition coil
- We connect one terminal of an incandescent light bulb to the wire. We connect the second wire from the lamp to ground.
- As in the case when setting the ignition of a VAZ 2109 using a strobe light, use a spanner to loosen the distributor fastening nuts.
- Turn on the ignition. The incandescent lamp should light up.
- Gradually turn the distributor until the lamp stops glowing. After this, turn the distributor slightly in the other direction. As soon as the lamp starts to glow again, you can tighten the fastening nuts.
Of course, the method described above cannot provide the highest possible adjustment accuracy. However, with its help it is quite possible to achieve more or less correct and stable operation of the power unit.
Setting the ignition timing (ignition timing) on cars 2108, 2109, 21099
Setting the ignition timing is one of the main settings of a car engine. Incorrectly set ignition (both in the direction of increasing the advance angle and in the direction of decreasing) immediately affects its operation for the worse. Therefore, you should pay special attention to this procedure, especially on front-wheel drive VAZ 2108, 2109, 21099 vehicles.
Signs of incorrectly set ignition timing
overheating, detonation, shots into the muffler or carburetor - this is not a complete list of such malfunctions.
It should be borne in mind that similar symptoms occur with an incorrectly adjusted or faulty carburetor, faulty valve mechanism, etc.
Purpose of setting ignition timing
Set the required ignition timing at which the main characteristics of the car engine - power, throttle response, idle speed, fuel consumption - will be normal.
Tools for work
— Stroboscope (the simplest one, without a built-in tachometer, can be bought in a store for 200-300 rubles). A more advanced one, with a built-in tachometer, costs a little more.
— Tachometer (you can use the one built into the instrument panel, you can connect an external one (for example, an auto tester, a multimeter in tachometer mode), you can use your ear, if you have experience).
Strobe and autotester
— Socket wrench or open-end wrench. Either a matching ratchet socket or an L-shaped wrench. Size 10.
Preparatory work
— Warm up the car engine to operating temperature (85-90 0 )
— Set the minimum idle speed (750-800 rpm)
To do this, turn the “amount” screw of the fuel mixture on the carburetor. You can set the minimum speed using the tachometer or by ear. If they correspond to the norm, then we skip this point.
Location of the adjusting screw for the “amount” of the fuel mixture on the carburetor 2108, 21081, 21083 Solex
— We remove from the fitting on the housing of the vacuum ignition timing regulator, on the distributor, the silicone vacuum supply tube coming from the carburetor
— We check by placing a finger on its hole whether there is a vacuum in it
It shouldn’t be there, since in theory it should start working at speeds above 800. If it is, slightly reduce the idle speed (by rotating the “amount” screw of the fuel mixture on the carburetor) until it disappears.
— We plug the hole in the silicone tube with a small bolt or simply bend it in half (tie it in a knot)
— Use a 10mm wrench to loosen the three nuts securing the distributor body
— We are looking for a hatch on the gearbox housing with a scale and a visible part of the flywheel. It is usually closed with a rubber stopper
Location of the inspection hatch in the clutch housing on VAZ 2108, 2109, 21099 cars
— We wipe the scale in the hatch with a rag so that the installation marks are clearly visible on it
— Use a slotted screwdriver to turn the flywheel by the splines of its crown and find a long transverse alignment mark on it
Ignition timing setting mark on the flywheel and scale with degrees
— We check whether this is a risk (what if your flywheel is installed incorrectly)
We check using the following marks - the long mark on the flywheel should be opposite the triangular cutout on the scale, the mark on the camshaft pulley should be opposite the protrusion on the rear timing belt cover (to see them, remove the plastic timing belt cover).
We carry out the connection according to the instructions for your strobe, since their models are different and the methods of connecting them may differ in detail. Basically, connecting a strobe looks like this - a red wire to terminal “B” (+) of the ignition coil, a black wire to the “minus” of the battery, or any part of the housing, a metal clamp to the high-voltage wire of the fourth cylinder (closest to the distributor).
Option for connecting a strobe light to a carburetor engine of VAZ 2108, 2109, 21099 cars
Setting the ignition timing (ignition timing) VAZ 2108, 2109, 21099
— We start the engine, once again make sure with the tachometer that the idle speed is minimal
— We direct the flashing beam of the strobe into the hatch with the scale
In the light of the strobe light, the long, highlighted mark on the flywheel should be opposite the desired division on the scale.
Each division on it corresponds to one degree of ignition timing.
The bottom of her middle triangular cutout is zero degrees.
Angles for 92nd gasoline
Angles for 92nd gasoline
On engine 2108, ignition timing (-1 0; +-1 0), 21081 (1 0; +-1 0), 21083 (1 0; +-1 0).
Angles for 95 gasoline
Angles for 95 gasoline
For engine 2108, the advance will be 1 degree - one mark on the scale towards the windshield from the bottom of the triangular cutout in its center, 21081 - 5 degrees (5 divisions), 21083 - 4 degrees (divisions). An error of one degree is permissible both in the direction of decreasing the angle and increasing it.
— We adjust the ignition timing by rotating the ignition distributor housing (distributor)
Adjusting the ignition timing using a distributor
— Having achieved the desired ignition timing, turn off the engine, disconnect the strobe light, and secure the distributor
— Checking the correct setting of the ignition timing
— When you press the gas pedal, on a warm engine, at idle speed, there should be no “failures” in operation.
— When you sharply press the gas pedal, when driving at a speed of 45-50 km/h, on a flat section of the road, in fourth gear, a short-term detonation should be felt (3-5 seconds). “Tap of fingers” in other words. If it is not present, the ignition is late; if it is present and does not go away, the ignition is too early. We correct the situation by slightly rotating the distributor in one direction or another. Then we check again.
Notes and additions
— If the long installation mark on the flywheel does not stay in place opposite the scale in the hatch, but constantly jerks and moves, then you may have problems with the distributor (ignition distributor), voltage regulator in the generator, ignition coil, high-voltage wires. A minor breakdown of the wiring is also possible.
— If the car drives stupidly after this adjustment, then we experiment with setting the advance angle. Most often, it is usually necessary to do the ignition earlier (increase the ignition timing). On the Internet there are descriptions of adjustments with increasing angles of up to 10, 12 and even 25 degrees. In any case, an indicator of correctly set ignition timing will be a slight detonation when you press the gas at a speed of 45-50 km/h, good throttle response and the absence of failures.
More articles on the site on the ignition system of VAZ 218, 2109, 21099 cars
Adjusting the ignition timing
Ignition timing is the moment a spark occurs at the spark plug electrodes. It is determined by the angle of rotation of the crankshaft journal relative to the top dead center (TDC) of the piston. The ignition angle has a noticeable effect on engine performance. If its value is too high, ignition of the fuel in the combustion chamber will begin much earlier than the piston reaches TDC (pre-ignition), which can lead to detonation of the fuel-air mixture. If sparking is delayed, this will lead to a decrease in power, engine overheating and increased fuel consumption (delayed ignition).
The ignition timing on the VAZ 2106 is usually set using a car strobe light. If there is no such device, you can use a test lamp.
Setting the ignition timing using a strobe light
To adjust the ignition timing you will need:
- car strobe light;
- key to 13;
- a piece of chalk or a correction pencil for printed text.
The installation process itself is carried out in the following order:
- We start the car engine and warm it up to operating temperature.
- Disconnect the hose from the vacuum corrector located on the distributor body.
- We find three marks (low tide) on the right engine cover. We are looking for the middle mark. To make it better visible in the strobe beam, mark it with chalk or a correction pencil.
Video: adjusting the ignition using a strobe light
Setting the ignition timing using a warning light
To adjust the ignition using a lamp you will need:
- the warning lamp itself;
- 36 head with handle;
- key to 13;
- 16mm spark plug wrench with wrench.
The work order is as follows:
- Using a 36mm socket, placed on the crankshaft pulley ratchet, we rotate the shaft until the mark on the pulley aligns with the casting on the cover. When using gasoline with an octane rating of 92 and higher, the mark on the pulley should be aligned with the middle ebb. If the octane number is less than 92, the mark is placed opposite the last (long) ebb.
- We check whether the distributor is installed correctly in this position. Unfasten the latches and remove the distributor cover. The outer contact of the distributor slider should be directed towards the spark plug of the first cylinder.
Video: adjusting the ignition using a light bulb
Installing the ignition by ear
If the valve timing is set correctly, you can try to set the ignition by ear. This is done as follows.
- Warm up the engine.
- We drive out onto a flat section of the highway and accelerate to 50–60 km/h.
- We switch to fourth gear.
- We sharply press the accelerator pedal all the way and listen.
- With the ignition set correctly, when the pedal is pressed, a short-term (up to 3 s) detonation should occur, accompanied by the ringing of the piston pins.
If detonation lasts more than three seconds, ignition is early. In this case, the distributor body is rotated several degrees counterclockwise, and the verification procedure is repeated. If there is no detonation at all, the ignition is late, and the distributor body must be turned clockwise before repeating the test.
Setting the ignition timing (ignition timing) on cars 2108, 2109, 21099:
Hello! This pin is made of ordinary steel. You can choose the size and install it yourself (as you write). For a HO sensor, a simple metal rod is enough to stir up its magnetic field and send a pulse to the controller.
Hello. I have a VAZ 21083 with MPSZ (controller MC2713-02). When replacing the clutch, it was discovered that the flywheel plane was slightly “worked together” by the clutch disc. Not critical, but still. The flywheel has a pin for the NO sensor. I have not found such flywheels for sale. Is this pin made of some kind of “special” metal? Or is it possible to copy the location in a regular flywheel, drill a hole and press in a regular pin of the required diameter and to the required height?
It is better to fill in the 92nd. 95 is rich in various additives, which is bad for spark plugs. You can set the ignition with a distributor according to the article “Adjusting the ignition by rotating the distributor.” There is no article about the bottom. there is only about thresholds. Soon I think there will be something about the bottom.
And also for the plastic on the upper bearing of the tumbler where the hall sensor is located, pieces with worn-out protrusions were breaking off from it and there seemed to be excess play in my opinion. That it is available for sale as a replacement or only assembled with a bearing and a hall sensor. Can it be restored with epoxy glue (does it harden like resin?), or just glue it completely? There seems to be a millimeter of wear on the magnet, but the impeller is without wear, the powder was like black on the impeller. There was a drop of oil and some pieces of something stuck behind the protective plastic, I disassembled it, replaced the oil seal, reassembled it, the gap was larger, but I couldn’t find adjusting washers on sale. And there are illustrations of the catalog for the distributor; I only find it assembled.
Hello. What advantage does 95 gasoline give? Also, for the lead to the minus side, move the scale on the distributor 21083, is it counterclockwise to turn if you stand on the left? I tried something clockwise and it also doesn’t pull in jerks, with a delay of 50 it just accelerates and I don’t hear any other sounds? Sometimes at idle I add gas and it stalls, like an air leak or a low level in the carburetor? There is a problem with the gas pump with the outlet valve, the sealing ring has worn off, and the valve in the carburetor may stick. I tried another one, but I haven’t tried it yet at 50. I put a round notch on it, I think the top one is even further from the risk. And what about the article about the bottom of the 9, I looked and didn’t find it?
1. Check whether the throttle valve opens when you press the gas pedal (the hummock in the drive may be frayed). 2. Check how the diffusers are installed (if it’s the other way around, then gasoline will not flow into the engine). 3. Check whether the fuel pump is pumping (article “The fuel pump is not pumping”). 4. Check the spark on the plugs (“Checking the spark on the plugs”). 5. Check whether the timing belt (and at the same time the timing marks) have broken.
Hello everyone, tell me what to do, the Solex carb does not supply fuel to the engine, there is gasoline in the chamber, I press the throttle, but there is no supply, I blew out the jets, zero emotions, I’ve already broken my head
Align the relative position of the crankshaft and camshaft using two marks - on the camshaft pulley and on the crankshaft pulley. Then, in the clutch hatch, independently apply a mark on the flywheel opposite the middle of the triangular cutout of the scale (paint or scratch). We set the ignition with a strobe light. We check in motion. We correct by rotating the distributor.
Hi all! guys please tell me!! I bought a VAZ 21093 carburetor. I changed the timing belt. When it was time for you to install the ignition, that’s where the problem is... I have a carburetor, but some Kulibins installed an electronic ignition there and also coils from a gazelle. how to set the ignition. Plus the flywheel is also upside down. what to do.
good time of day!
Try removing the timing cover, aligning the marks on the camshaft pulley with the protrusion mark on the rear timing cover. At this moment, the mark on the flywheel should be visible in the hatch. The mark is very thin and may become clogged and therefore not noticeable. During inspection, it is better to wipe the flywheel with a rag or brush. There is no information on the cylinder mark. Perhaps these are some flywheel manufacturer's own variations.
On my VAZ-21083 I can’t find the mark on the flywheel, despite the fact that I turned it slowly and carefully examined every millimeter when illuminated with a lamp. But in one place on the surface of the flywheel, where there should be a mark, I found a cylinder with a diameter of 2 mm and a height of 3 mm, the axis of which is perpendicular to the surface of the flywheel (the surface on which there should be a mark). Maybe on some episodes the mark was made this way?
Through a long process of trial and error, I determined that for my car, for 95 gasoline, the appropriate angle is 3-3.5 degrees, for 92, 0-1 degree. The car is VAZ 21099, produced in 2000, with a 1.5 liter engine. I can’t hear detonation on my car when the angle is too high, so it was difficult to find the right angle, I had to rely on my own feelings. Now I drive with the “OCTAN4” octane corrector to adjust the angle from the passenger compartment.
Hello dear mechanic! )
Interesting article about UOZ again! Thank you. Will I also need to check at what degree the crankshaft flywheel mark is located?
I have a VAZ 21081, it looks like the flywheel is also not positioned correctly, I’m constantly experimenting, but on a liter engine it’s difficult to decide—and anyway, it doesn’t go very well, especially uphill
Align the camshaft and crankshaft to the marks on the pulleys. Loosen the distributor fastening. Start the engine. Rotate the distributor to set stable idle speed. Check for correct installation while driving. The engine should readily respond to pressing the gas pedal in all modes. Correct, if something is wrong, with a distributor.
YOU'RE RIGHT I'VE BEEN DOING THIS FOR 17 YEARS, I'VE BEEN DOING THIS FOR CARB AND IGNITION SYSTEM DON'T LISTEN TO ANYONE T 0973333979
TURKEY.. I agree with you.. Each engine seems to require its own approach. It would be good if those who are approached by the owners of old VAZs take this into account.. And so.. today repairs mainly consist of replacing still “living” parts with.. new ones.. and so on ad infinitum.. Good luck on the roads! ! And reliable brakes!!
Igor, thank you for your detailed comment. There would be more of these on this site. Indeed, the repair manual for VAZ 2108, 2109, 21099 vehicles indicates a negative angle, which is why it appears in this article. I believe that when carrying out such work on his car, the car owner needs to know both what is written in the repair manual and have information about actual repair and adjustment methods. This is the only way to achieve a positive result. I have a VAZ 21083 1998. The ignition timing is 3-4 degrees (as in the article). Acceleration, dynamics, idle speed are normal. I tried 10 degrees. Everything is very bad. A friend’s VAZ 21093 doesn’t pull 3-4 degrees at all, but the lead is 10 degrees and that’s all very well.
The advance angle CANNOT BE “NEGATIVE” according to its original purpose... IT MUST ADVANCE. the moment the shaft passes through TDC... Since 1989 I have been the owner of a VAZ-2108 (1.3l)... I still have this car!! at full speed!! From the very first kilometers I serviced the car myself.. For a very long time I set the OZ exactly according to the instructions +1* (by strobe light).. the engine thrust seemed to be fine.. but the engine always consumed about 7-8 liters of fuel... In the USSR, in Kazakhstan, where I lived..the quality of the fuel was always questionable.. Perhaps this OZ (+1*) was close to optimal..(and that’s a stretch).. I’ll decide on the angle.. chance helped.. My friend and I drove in two cars to Tashkent..750km. He also has a 1.3L VAZ-2108.. With almost the same mileage.. His car turned out to be much more economical and faster than mine.. this despite the fact that the load, tires, fuel, speed, even the oil and spark plugs in our engines were absolutely the same .. The difference in fuel consumption was almost 2.2 liters.. Right there, in Tashkent.. I looked with a strobe light at how the OZ was set on a friend’s car.. and was surprised that the mark was barely visible at the very top of the window on the flywheel.. those are VERY EARLY IGNITION . (
I saw the same negative ignition timing in the VAZ 2108, 2109, 21099 “Behind the Wheel” operating manual. Maybe this is for a perfectly tuned engine with normal gasoline. And so, in reality, most likely the car will not actually pull at such an angle. Our gasoline needs corners early. I'll have to try it.
And in the photo... the position of the marks is not at all clear on what basis. For the first time I see..that the OZ can have a “MINUS” sign..(photo for VAZ 2108!!) If you set the marks like this.. the car will move with difficulty.. and will consume 10-12 liters of fuel per 100 km..
Listen, smart guys, if you find a mistake, then point it out, don’t be unfounded
Source
Adjustment with strobe light
How to configure and adjust the OZ on a VAZ 2109 or 21099 using a strobe? Anyone can cope with this task, but you need to take into account that if there are malfunctions in the operation of the module, then most likely the adjustment will not solve the problem. When adjusting, engine speed should be in the region of 820-900 rpm. The method of adjusting the SOP using a strobe is considered one of the most accurate.
How to perform this procedure:
- First you need to start the power unit and set the appropriate number of revolutions for its operation. If this value on a carburetor engine is outside the limits, then you need to adjust the air-fuel ratio to form a combustible mixture.
- Next, you need to disconnect the vacuum line from the fitting. Having done this, the car engine should be turned off, after which the gap in the vacuum hose will need to be removed. If there is no clearance, you will need to unscrew the three nuts that secure the distributor or switchgear housing.
- Once these steps are completed, you will need to remove the rubberized plug from the transmission housing; directly behind it is the flywheel inspection hole. In addition, you will need to disconnect the high-voltage wire from cylinder number 1 from the distribution unit cover.
- After this, you should activate the strobe itself. This device is connected instead of the disconnected wire, as well as to the battery. After starting the power unit, the device will transmit impulses in time with the flywheel. In this case, the distributor body will rotate until the mark on it coincides with the one marked on the flywheel itself. Once the marking is complete, you will need to secure it in place. For diagnostics, make sure that the marks on the flywheel and crankshaft match; if this is the case, then the installation of the OZ was carried out correctly (the author of the video is Nail Poroshin).
How to set the ignition on a VAZ 2109
The question of how to set the ignition on a VAZ 2109 worries many car enthusiasts. Indeed, owners of these car brands from time to time encounter problems associated with unstable operation of the power unit.
A common symptom is normal engine starting and incorrect idle speed.
What is the reason for this phenomenon? Are there ways to solve it?
According to experienced craftsmen, you need to pay attention to the ignition system - it is the main cause of such a malfunction.
Moreover, in 90% of cases the problem can be solved independently.
System design
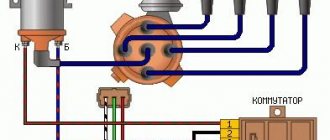
Before we begin to consider the adjustment process, we consider it necessary to understand the diagram and principle of operation of the system. Vehicles of the VAZ 2109 model range are equipped with a non-contact ignition system. The connection diagram of all elements is as follows:
The operating principle of the system is not complicated. In order for a spark to begin to be produced, the motor shaft must turn. Simultaneously with its rotation, the camshaft will also turn. As a result of this, the sensor generates a signal that will be sent to the switch. The “K” terminal of the coil will connect to the common wire (to “ground”), as a result of which a spark will occur on the main wire. At the moment when the working distributor slider connects the main wire with one or another high-voltage wire on the corresponding spark plug, a spark will appear and the car engine will start.
If the setting is made incorrectly, the candles work in the wrong time modes. Consequently, such a violation becomes the cause of unstable operation of the entire power unit.
Theoretical basis
The ignition system, not only of the VAZ 2109, but also of other cars, is a chain of interconnected devices and components that ensure the appearance of a spark on the spark plugs and the subsequent ignition of the air-fuel mixture in the internal combustion engine.
The system includes:
All these elements are switched using low and high voltage wires.
One of the main components is the ignition distributor, which performs two main functions - it sets the moment of spark supply (depending on the speed of the power unit) and supplies the spark to the cylinders.
The correct operation of the devices mentioned above determines the ignition timing, that is, the time when a spark is supplied to the spark plugs to ignite the air-fuel mixture.
Incorrect setting of the torque can cause malfunctions in the engine, problems with starting it and “floating” rotation of the crankshaft at idle speed.
To fix this, you need to know several nuances, which will be discussed in the article.
Adjusting the ignition by light bulb
There are ways to adjust without a strobe. To make adjustments using a light bulb, you will need a key to rotate the crankshaft and a standard 12-volt light bulb.
Setting the ignition timing by loosening the spark timing sensor.
The procedure for adjusting the ignition by light bulb
- Use a special wrench to turn the crankshaft until the marks match. If you do not have a crankshaft key, engage 4th gear and push the car until the marks match.
- Connect a 12-volt light bulb to the wire connecting the distributor and the ignition coil.
- Connect the light bulb to ground using the second wire.
- Connect the central wire to ground Lada 2109.
- Loosen the bolts on the distributor body and turn on the ignition - the light should light up.
- Rotate the body to the right until the light goes out.
- After the light goes out, smoothly turn the distributor to the left.
- Stop when the light comes on.
- Tighten the housing bolts.
The ignition control circuit based on the light bulb is ideal for carrying out the operation at home without additional costs for the device.
What do ignition malfunctions promise?
Difficulties in starting the power unit, strange color of exhaust gases, incorrect operation of the engine at idle speed - all this can be the cause of incorrectly adjusted ignition timing.
At the same time, many car enthusiasts blame the carburetor and spend a lot of time cleaning or repairing it. As a result, money and time are wasted, but there is no result.
On the other hand, if the ignition system does not produce a spark, and the spark plugs are regularly filled, then the problem may lie elsewhere.
An incorrectly set angle manifests itself as follows:
1. Powerful detonation appears during operation of the power unit.
It is not difficult to recognize the problem. The main symptom is an uncharacteristic ringing sound that is heard when you press the accelerator pedal.
This malfunction is a common occurrence among motorists who do not properly monitor the condition of their vehicle.
The cause of detonation is early ignition timing, which not only reduces the comfort of driving a car, but can also lead to deformation of the pistons.
Alternatively, the rings may be defective, which in this case will inevitably have to be replaced.
2. The appearance of smoke from the exhaust pipe.
— after starting the power unit, black smoke comes out of the exhaust pipe. This problem is a clear indication of pre-ignition.
3. Motor power decreases.
This is especially noticeable when the vehicle picks up speed.
There may be a delay of several seconds between pressing the gas pedal and the car starting to accelerate. If the car starts to accelerate, it happens jerkily.
4. Fuel consumption increases.
One of the main consequences of incorrect system configuration. This and the problem described above are evidence of late ignition.
This is explained by the fact that when the piston reaches the top point, the fuel mixture does not burn completely and continues to burn even when the piston moves back.
5. Uneven idle.
An incorrectly set ignition immediately manifests itself as engine malfunctions at idle.
In such a situation, experts recommend setting up the system first, and only then starting to check other systems.
Verifying that the settings are correct
After we have dealt with the question of how to install the ignition on a VAZ 2109, we will consider the process of checking whether the adjustment work has been carried out correctly.
So, if configured correctly:
- during the process of rapid acceleration of the power plant (when the car is warm), there is no violation of the stability of its operation;
- When the car is moving at a speed of about 50 km/h in fourth speed and during sharp acceleration, there should be a short detonation of the engine. If there is no detonation, ignition is later; if it is present, but does not go through, it is earlier. We make the adjustment by turning the distributor in one direction or another.
Remember that it is often impossible to achieve stable operation of the power unit due to improper operation of the fuel system or even due to low quality gasoline. In this kind of situation, the best way out of it would be to set the carburetor to the most optimal operating mode and then adjust the ignition timing.
Incorrectly set ignition does not have the best effect on the operation of the engine, worsening its performance characteristics. Many car owners, as soon as the first problems with the engine appear, due to lack of experience, decide that the cause of everything is a carburetor failure. In reality, the problem often lies in incorrectly adjusted ignition timing and can be eliminated if you know how to set the ignition on a VAZ-2109 (carburetor) using a simple set of tools.
- Difficulty starting the engine;
- unstable idling and uneven operation of the power unit as a whole;
- a noticeable decrease in engine power, as well as its throttle response;
- increased fuel consumption;
- the appearance of dips in speed when accelerating the car;
- the presence of thick black smoke in the exhaust gases when starting the engine and while driving (indicates that the timing is too early and, as a result, poor fuel combustion).
Each of these signs is the reason that the engine begins to work less efficiently, and this, in turn, affects the operating comfort of the car as a whole. Therefore, we recommend that you read the guide on how to set the ignition on a VAZ-2109 car with a carburetor engine in order to apply this knowledge in practice, if necessary.
In garage conditions, even a driver who has no experience in car repairs can adjust the advance angle. To do this, you will need a 10" wrench and a strobe light or light bulb. Naturally, with the help of a strobe, setting the ignition of the VAZ-2109 (carburetor) will be more convenient and accurate, but with the help of a light bulb you can also achieve a satisfactory result. Next, we will look at how adjustment work is carried out using both options.
Do-it-yourself methods for adjusting the ignition on a VAZ-2109 (for carburetor engines)
Ignition problems are increasingly appearing in older versions of cars equipped with a carburetor engine.
If you have just such a VAZ-2109, then work on adjusting the torque requires the following equipment and tools:
As practice shows, when setting the moment you can do without a strobe.
But if you plan to service the car yourself, then having such a device in the garage is only a plus.
Before starting work on setting the ignition angle, perform the following preparatory work:
Installation by marks:
- take a slotted screwdriver and turn the flywheel until you reach a long stripe on the scale. When setting the ignition, make sure that the long strip is opposite the triangular cutout on the product scale. This position corresponds to the zero position of the angle. When setting this parameter, the 1st and 4th cylinders of the VAZ-2109 engine are located in the TDC position;
- if the scale is difficult to see or you are not sure that the required strip is really long, then make sure that its position on the camshaft pulley is correct. To do this job, remove the timing belt cover. In this case, the desired mark should coincide with the line on the back of the belt casing.
The strobe test is performed as follows:
Once the preparations are confirmed, you can begin to accurately set the ignition timing.
This is done according to the following algorithm:
The angle should be adjusted by starting from the “zero” of the long line, that is, from the central part of the triangle.
To eliminate errors, rotate the distributor housing to the right.
With this action the angle will increase. If you turn the cap counterclockwise, the ignition angle, on the contrary, will decrease.
You can determine the exact direction using the scale marked on the car distributor, where o and “minus”.
One division on the product is equal to 8 degrees. Therefore, adjustments should be made without haste. Once the desired position is found, fix the distributor.
The test can be carried out with a strobe light using a 12 Volt light bulb.
Adjusting the ignition timing
For subsequent actions, use a 13 key to loosen the fastening nut of the distributor (ignition distributor). Connect one wire from the light bulb (it will act as a voltmeter, that is, indicate the presence of voltage) to the low-voltage terminal that the coil has, the second to ground.
Now turn on the ignition
Slowly and carefully rotate the distributor body clockwise, stopping immediately when the light goes out. The sparks that appear will indicate the moment of ignition
Move the distributor counterclockwise until the contacts are disconnected and the lamp lights up again. Everything is in order, you can safely tighten the distributor, the setup is complete.
Do-it-yourself methods for adjusting the ignition on a VAZ-2109 (for injection engines)
To check the ignition module of a car with an injector and an 8-valve motor, stock up on the following tool:
What does the ignition module look like?
Do not rush to diagnose the module before checking the functionality of the system as a whole.
First, make sure that the battery terminals are connected, and then turn on the ignition (at the moment, fuel pumping through the system begins).
If the red fault light comes on, check the system for a breakdown.
After completing the steps above, make sure the throttle valve is operating correctly.
To do this, turn the key in the ignition and use a multimeter to take basic measurements. The voltage in the car network must be from 12 Volts
or more, sensor - about
0.5 Volts
.
The damper opening level is up to 1%
.
Now depress the accelerator pedal and watch the readings - they should change in the range of about 4.5 Volts
.
To make operation more efficient, adjust the throttle opening to 100%.
Next, turn off the regulator that controls the air flow and achieve an opening of 50%.
At the final stage, adjust the throttle valve until it is completely closed.
Adjusting the ignition using the tachometer
To carry out this type of economical ignition adjustment of the Zhiguli 2109, two people will be needed. One should be in the interior of the Nine, the second should rotate the distributor.
Step-by-step adjustment using the tachometer
- Turn on the ignition and watch the tachometer needle.
- A second person must loosen the bolts securing the distributor and turn it.
- When you turn the key in the ignition, the tachometer needle sharply deviates and returns to zero.
- The distributor should remain in the position when the tachometer needle deviates.
- This method of adjusting the ignition timing requires patience, as it is very difficult to adjust the first time.
Results
As can be seen from the article, measuring the ignition timing of a VAZ 2109 and setting it up yourself is possible, although for the first time everything looks quite complicated.
There are masters who specialize only in such work, you can contact them.
Well, if not, then all you have to do is set aside a little time, find a suitable tool and do the work described above yourself.
If you are the owner of a “nine” or are well acquainted with a person who has owned a similar car for a long time, then you have probably heard about problems with the engine. As a rule, the symptoms of problems, as described by VAZ 2109 owners, are approximately the same - they turn the key, the car starts, but the engine idle leaves much to be desired.
Well, let's find the cause of this phenomenon and ways to eliminate it. Looking ahead, we note that most often this problem appears due to an incorrectly set ignition.
Setting the ignition on a carburetor VAZ 21099
Ignition adjustment with strobe light
In order to set the lead angle, observe the following conditions:
- the engine must be warmed up;
- Carry out the adjustment at minimum stable idle speed;
- Disconnect the vacuum hose from the distributor and plug it to prevent air from leaking into the carburetor.
Connect the strobe according to the instructions to one of the high-voltage wires, the ignition coil (terminal “K”) and ground.
There is an inspection window on the top of the gearbox housing, closed with a rubber plug. Having taken it out, start the engine and direct the strobe beam into the window. The cylinder block has a triangular cutout and marks (marks), each of which corresponds to a rotation of the flywheel by one degree. There is also a risk on the flywheel. When you direct the strobe light, the flywheel will appear motionless.
Having loosened the three screws securing the distributor, turn it until you achieve alignment of the marks corresponding to the advance of the ignition angle by one degree (for 92nd gasoline):
For 95 gasoline, the advance angle is greater:
Ignition adjustment without strobe
It often happens that the results of adjusting the ignition on a carburetor VAZ 21099 with a strobe light disappoint the owner. The main reason for the owner's dissatisfaction is the poor dynamics of the car or the appearance of detonation knocks.
The main reason for such problems can safely be called the disgusting quality of gasoline - there are many videos on the Internet that demonstrate the results of testing gasoline to ensure that the real octane number corresponds to what is stated by the seller.
By adjusting to the fuel that is poured into the tank of your car, it is quite possible to set the ignition with your own hands without special equipment, almost by ear.
To do this, you need to make test rides after each turn of the distributor body through a small angle. Signs of late ignition in this case will be:
- sluggish car dynamics (the car becomes “dumb”);
- shots in the silencer are possible;
- motor tendency to overheat;
- black soot on spark plugs.
Too large an advance angle manifests itself in jerking of the car when driving at low speeds and severe detonation during acceleration.
A sign of a correctly installed ignition is short-term detonation knocks in the engine during a sharp increase in speed.
Adjusting the electronic ignition on the injector
What to do if there is no spark at the spark plugs, what is the switch connection diagram, what to do if the ignition does not turn on and what are the signs of too early OZ? We offer you to learn in more detail how to configure and how to check the module on an engine with an injector or carburetor. In the case of injection power units, the procedure for setting up the SPD is carried out by reprogramming the control unit; this requires special software. Accordingly, it is better to perform such a procedure under the supervision of specialists at a service station.
How to check the ignition module of an injector with 8 valves?
Before setting up the ignition of an injection engine, you will need to prepare:
- laptop with ID diagnostic program;
- tester;
- keys, screwdriver.
Before checking the VAZ 21099 ignition module, it is necessary to monitor the components of the control system. Everything must be connected and working properly; if necessary, the required parameters must be adjusted. Turn on the ground and ignition, while gasoline is pumped. When a red light appears, diagnose problems on the car’s on-board computer and the PC connected to it.
Check the throttle device: turn on the ignition, use a tester to check the voltage values for the on-board network and the sensor. Reference diagram of indications: BS voltage - more than 12 volts, sensor voltage - approximately 0.5 volts, opening degree - up to 1%.
Before removing the module, monitor all system components
When the gas pedal is pressed, the sensor voltage readings and the throttle opening degree will change: approximately 4.5 volts and at least 90%, respectively. It is best to achieve 100% throttle opening.
Next, you should turn off the additional air flow regulator, achieve 50% opening of the throttle for air flow when starting the engine easily in a warm state. Then adjust the throttle so that it is completely closed.
Checking with a light bulb
It will simplify your work when using a strobe. The lamp requires a 12-volt lamp.
- one contact from the light bulb is connected to the wire running from the coil to the distributor;
- the second is applied to the mass;
- the central (high-voltage) short-circuit cable is installed there;
- start the engine and loosen the bolts on the distributor;
- the housing must be rotated to the right until the lamp goes out;
- then it is turned slowly to the left - when the light flashes, the distributor is fixed.
To better understand how torque is set, we suggest watching this video:
Setting with a light bulb
If you do not have a strobe, then the torque can be adjusted using a conventional control lamp; in particular, you will need a 12-volt lighting source.
How to set the SOP torque using a control light:
- To correctly adjust the torque of the RCD in the Nine with a carburetor engine, you will need to crank the crankshaft until the marks coincide. To turn the crankshaft you will need a special wrench. If the key is missing, you can set the lever on the gearbox to fourth speed, and then manually turn the shaft until the marks match.
- To make the adjustment, you will need to connect the test light to the wire and switchgear with the coil. The second contact from the light source is connected to ground, that is, the vehicle body.
- Next, on the switchgear housing you will need to slightly loosen the bolts that secure it. Then you will need to turn the key in the ignition. If everything is working correctly, the light should light up.
- After completing these steps, you will need to turn the housing of the distribution mechanism; it turns until the light stops burning. After this happens, the distributor housing will need to be turned in the opposite direction. The adjustment procedure stops the moment the lamp starts to light again. When this happens, the distributor no longer needs to be touched; it will be necessary to tighten the bolts that secure it (the author of the video about the implementation of this method is Nail Poroshin).
What needs to be done before adjustment?
Tuning is required for “nines” that have a carburetor installed. For those who have an injector, good news - the car has an automatic device that independently regulates the ignition. To make the adjustment, you will need 2 devices - a strobe and a tachometer. How to properly prepare everything for adjustment? In the following way:
- Warm up the engine to its normal operating temperature, which is approximately 85°C.
- You need to set the minimum value for engine idle speed to 750-790 rpm. Turn the adjusting screw for the amount of combustible mixture on the carburetor with a wrench to change the indicators. If the speed meets the requirement, there is no need to change them.
Next you need to get to the marks on the flywheel. The algorithm of actions is as follows:
- Disconnect the silicone pipe from the fitting located on the vacuum regulator from the carburetor. It is worth checking for vacuum.
- After this, turn off the engine.
- The silicone tube can be wrapped in a knot or closed.
- Take a 10mm wrench and remove the 3 nuts on the distributor body.
- We inspect the crankcase. You need to find a hatch with marks. This may take some time as it is often covered with a rubber plug.
- When you have found the fixture, wipe the scale inside it so that each mark is clearly visible.
- We take a slotted screwdriver and turn the flywheel with it until we reach the installation mark. The strip should be opposite the triangle on the hatch scale (triangular notch). In this position, the ignition timing is 0°, and the pistons of engine cylinder 1 and 4 should be at TDC. This position is the starting position for further manipulations.
- Connect the strobe contacts in accordance with the instructions for the device. Usually they are connected to the battery in accordance with the polarity.
Source

