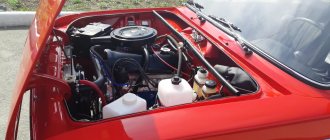
The design and principle of operation of the ignition on a VAZ
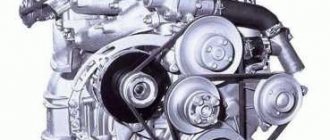
The engines produced for these VAZ models differ only in volume, but have no structural differences. They are equipped with both contact and non-contact ignition systems.
The first case is when the contacts are opened mechanically, and in the second case a Hall sensor is used, with the help of which the moment a spark is supplied to the combustion chamber is determined.
Correction of the angle in the closed state of the contacts.
So, if our car has a transistor or classic ignition system, we can start setting it up.
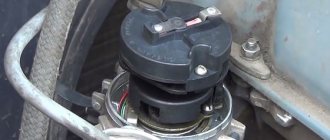
- First of all, remove the distributor cover and clean the distributor contacts with a file to ensure a tighter fit between them (important for a classic ignition system).
- After which we need to set the maximum distance between the contacts, a special crankshaft wrench will help us with this; we turn the crankshaft with it until there is the greatest distance between them. If there is no key, you need to enable
4th gear and push the car to the desired position.
- Unscrew the screw that secures the contact group to the plate.
- Using a 0.4mm probe, we adjust the contact group so that it fits flush with the contacts. Then tighten the screw and fix the position of the contacts.
- Now we check the position of the contacts using two probes 0.35mm and 0.45mm. If we did everything correctly, the smaller diameter probe should pass freely while the larger probe should not pass at all.
This operation helped us set the required gap of the distributor contacts. Critical condition when contacts are closed. New distributors have a precise angle. Many people advise checking the angle after adjustment; it should be in the range of 52o-58o degrees. If we succeeded, we proceed to the next stage.
Contact ignition
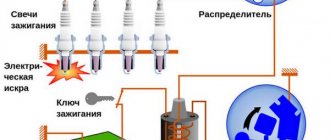
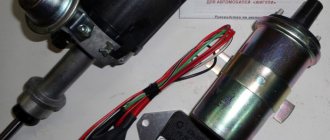
The system consists of: high voltage coil, contact group, distributor, distributor cover, vacuum and centrifugal regulators, resistance, spark plugs and wires.
- The system works as follows. When the piston is at TDC, the coil windings open.
- At this time, high voltage is directed from the distributor cover through the wires to the spark plugs, with the help of which a spark appears in the combustion chamber and, accordingly, the working mixture ignites.
As the engine speed increases, the advance angle undergoes changes, and the centrifugal regulator changes it to the required level.
In turn, the vacuum regulator changes the angle in proportion to the vacuum in the intake manifold. Thanks to this, the engine operates with the required power at any crankshaft speed.
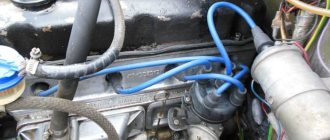
BB wires
High-voltage wires, or, as they are also called, spark plug wires, are different from all others installed in the car. The purpose of these wires is to transmit and carry voltage passing through them to the spark plugs and protect other elements of the vehicle from electrical charge.
Spark plug wires provide connection to the ignition coil, distributor and spark plugs
Malfunctions
The appearance of problems with explosive wires is accompanied by the following characteristic signs:
- problematic engine starting due to insufficient voltage on the spark plugs;
- shots at start-up and vibrations during further operation of the engine;
- unstable operation at idle speed;
- periodic engine tripping;
- the appearance of interference during the operation of the radio, which changes when the engine speed changes;
- smell of ozone in the engine compartment.
The main reasons that lead to problems with wires are wear and aging of the insulation. The location of the wires near the engine leads to temperature changes, especially in winter, as a result of which the insulation gradually cracks, moisture, oil, dust, etc. get inside. When cracks reach the conductor, the explosive wire can be pierced to ground, and a spark to the spark plug simply it won't arrive. In addition, wires often fail at the junction of the central conductor and the contact connectors on the spark plugs or ignition coil. To avoid mechanical damage, the wires must be correctly laid and secured with special clamps.
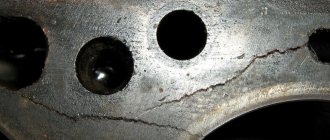
One of the malfunctions of high-voltage wires is a break
How to check
First, you should visually inspect the cables for damage to the insulating layer (cracks, chips, melting)
Attention should also be paid to the contact elements: there should be no traces of oxidation or soot on them. Checking the central core of explosive wires can be done using a conventional digital multimeter
During diagnostics, a broken conductor is identified and the resistance is measured. The procedure consists of the following steps:
- Remove the spark plug wires.
Pull off the rubber caps with wires from the spark plugs - We set the resistance measurement limit on the multimeter to 3–10 kOhm and connect the wires in series.
If the current-carrying wire breaks, there will be no resistance. A working cable should show about 5 kOhm. Serviceable spark plug wires should have a resistance of about 5 kOhm
I check the wires for damage and spark breakdown as follows: in the dark, I start the engine and open the hood. If a spark strikes ground, it will be clearly visible, especially in wet weather - a spark will jump. After this, the damaged wire can be easily identified. In addition, one day I was faced with a situation where the engine began to misfire. I started checking with the spark plugs, since the wires had been replaced recently, but further diagnostics led to a malfunction in the cable - on one of them there was no contact with the terminal itself connecting the conductor to the spark plug. After contact was restored, the engine started running smoothly.
Video: checking explosive wires
Which ones to put
When choosing and purchasing high-voltage wires, you should pay attention to their markings. There are many manufacturers of the elements in question, but it is better to give preference to the following:
- BERU;
- NGK;
- PARTS-MALL;
- AMD;
- Bremi;
- Tesla Technics.
Today a large selection of spark plug wires is offered, but it is better to give preference to well-known manufacturers
Signs of incorrect ignition on VAZ cars
Setting the ignition timing on a vehicle is necessary if the internal combustion engine is being repaired or the distributor is being dismantled. Also, during operation, it undergoes wear and tear, like any other engine systems, and accordingly the following signs of malfunction may appear:
- The motor does not start or has interruptions in operation. Provided that the combustible mixture is supplied correctly, the malfunction may be an incorrect setting of the advance angle, slipping or stretching of the timing chain.
- Poor acceleration and inelasticity of the engine. This means that the combustible mixture is not ignited at the required piston stroke position, which leads to a deterioration in the efficiency of the internal combustion engine.
- High gas consumption. This effect occurs under conditions of late ignition. Part of the combustible mixture does not have time to burn and flies out into the exhaust manifold. In such cases, you can hear characteristic popping noises in the exhaust while the engine is running.
Hard work of the internal combustion engine. This occurs under conditions of early ignition, when the working mixture ignites when the piston position has not reached top dead center.
In such cases, you can hear a characteristic ringing sound in the engine. Such symptoms can lead to burnt out exhaust valves.
Third stage: analyze the results
At the end of adjusting the ignition timing of the VAZ 2106, you should check the performance of the vehicle. We warm up the engine, then pick up speed at 50 km/h on a flat road section. We engage 4th gear, and then sharply accelerate. We listen to the operation of the system - within one or two seconds you should hear a characteristic clicking sound, and the car should pick up speed strongly. If there is no detonation, it is necessary to turn the distributor counterclockwise by one degree. If detonation lasts longer than necessary, turn the body clockwise. We repeat until we reach the optimal indicator.
It is worth noting that if you had to significantly change the position of the device, this indicates certain malfunctions.
Moreover, this fact may indicate that you are using a poor quality fuel mixture, as well as breakdowns of elements such as the regulator, shaft play or distributor bearing.
It is worth noting that to correctly set the ignition angle of the 2106 engine and any other cars, you should make a small diode probe.
It won’t take up much space in your glove compartment, but its benefits will be undeniable.
Instructions
There are several popular methods for setting the ignition angle on VAZ cars.
Installation with strobe
In this option, you do not need to remove the distributor and valve cover, and the installation time will not exceed five minutes.
- Loosen the distributor nut, noting its initial placement in advance.
- We connect the negative wire of the strobe to the ground of the car, and the “plus” wire to the coil and a special clamp to the wire of the first cylinder.
- The light beam, strictly directed at the pulley, will accurately show the optimal location of the distributor.
By gradually turning the distributor, it is necessary to correctly align the marks on the crankshaft pulley and the marks on the front timing cover. We fix the distributor nut.
Installation by marks
The mark on the pulley number 4 is combined with the mark on the front cover. The values of the marks are as follows: 1-100 degrees, 2-50, 3-00. When installing the ignition. when the engine is running on 92 gasoline, the mark for 0 degrees is selected.
We set the ignition to the light bulb
Before starting the installation, you need to take a 12-volt light bulb and solder two wires to it. Then, using a wrench, turn the crankshaft to the TDC position of the piston of the 1st cylinder.
- We place the marks opposite each other on the crankshaft pulley and the front cover.
- Remove the distributor cover so that the distributor is in the position of the first cylinder.
- We attach one of the wires from the light bulb to the ground of the car, and the second to the low-voltage wire inside the distributor.
- Turn on the ignition. If the ignition is installed correctly, the light will not light up.
- Otherwise, we install the distributor in such a position that the light does not light (i.e., the contacts are open).
When using this installation method, the light bulb can be replaced with a multimeter.
Installation by ear
Warm up the engine to operating temperature. Then loosen the nut securing the distributor. Slowly turn the distributor to the right and left until the engine operates optimally at idle without unnecessary knocking or detonation. Tighten the distributor fastening nut.
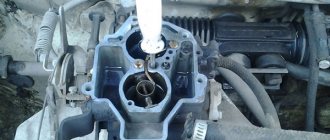
How to prepare a VAZ-2107 car for setting the ignition with a carburetor engine
Before starting work, read the instructions and open the carburetor engine kit. It consists of 4 spark plugs, a switch, an ignition coil, wires and a distributor.
Warm up the engine to normal temperature of 90 degrees. Set the idle speed to approximately 800 rpm. To do this, turn the screw on the carburetor, which is responsible for fuel consumption. Remove the ignition from the fitting and the silicone tube that connects to the carburetor and distributor. If you feel that there is a vacuum, then reduce the idle speed. Now turn off the engine and close the silicone tube with a bolt or bend it in half. Take the 10th wrench and loosen the nuts that secure the distributor body. Next, remove the plug that covers the flywheel in the gearbox. Use a screwdriver to turn the flywheel until you see the alignment mark. If it is located near the triangular cutout, then the lead angle is 0 degrees. Then connect the strobe according to the instructions.
Let's consider the procedure for setting contactless ignition on a VAZ-2107.
Many motorists choose electronic ignition. To debug it, you need to have skills in working with car electrical systems. If you don’t have such experience, it’s better to entrust the process to specialists.
Tools you will need:
- keys for 8, 10 and 13;
- crosshead screwdriver;
- several screws;
- drill.
How to set the ignition on the carburetor in a static position:
- Connect a strobe light to hear sounds clearly.
- Unscrew the nut that holds the ignition coil.
- Warm up the engine.
- Rotate the distributor in both directions alternately.
- Ask an assistant to watch how many revolutions there will be, they should be 2000 rpm.
- Listen to the engine. There should be characteristic sounds, like a failure.
- Wait for the engine to run smoothly and gain momentum. The sounds must be rhythmic.
- Tighten the distributor nut.
Contactless ignition system for VAZ
When installing such an ignition, the engine starts better when cold, there is no need to adjust the gap on the contacts, the spark will be more powerful, the service life of the spark plugs will increase and, moreover, it is more reliable in contrast to the contact one.
- As in the case of contact ignition, we align the marks and the piston of the first cylinder to the TDC position.
- We remove the old contact distributor, having first removed the negative terminal of the battery. We install contactless.
- Next, using a strobe light, we set the required ignition timing.