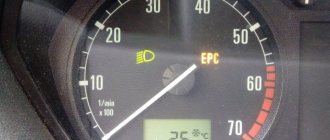
One of the main elements of the Volkswagen Polo gasoline engine control system is the ignition coil. If a part fails, ignition does not occur in the cylinders.
The coil converts electrical impulses with an amplitude of 12 volts into high-voltage impulses (15 thousand volts). Such a high voltage ensures breakdown of the working area of the spark plug.
Possible problems of poor engine starting
If the starter does not activate at all and the traction relay does not operate, then two types of malfunction are likely: in fact, the starter itself has “died” or there is a violation in the electronic circuit. A rare occurrence is a fuse installed on the power circuit. Fortunately, Volkswagen Polo does not own such a device, so we exclude the possibility of a fuse failure.
The reason for the lack of power is a dead battery or poorly tightened wires at the terminals. With the wires, everything is very simple: we tighten them, and the power is restored. If the battery is at “zero”, then we cannot do without outside help: we are looking for a good Samaritan who will give us a “light”.
Sluggish starter operation is also not good. This is a sign of a weak battery charge. Therefore, we either charge the battery or replace it with a fresh one.
The vigorous operation of the starter eliminates the preconditions associated with the battery. The depressed motorist faces two other difficulties. The first is located in a plane called the ignition system. The second lies in the fuel supply system.
In most cases, there is one problem. The engine will not start because there is no spark. There is only one question: in what specific part of the system did the problem occur?
The low-voltage part consists of a sensor and a special box stuffed with electronics. The desired spark appears in it. The second component is a transformer, or in common parlance, coil to which the spark plugs are connected. Thanks to distributors, high-voltage wires feed the spark plugs with high voltage current. The final step is the spark plugs, which provide the spark needed to start the engine.
The check must be carried out in a special manner. We start with the high-voltage part: remove the wire from the distributor and fasten its end next to the car body. We make sure that the wire does not touch the surface, otherwise all the electronics on the car will fail. We start the engine and look at the tip of the wire. A charge of electricity should jump between it and the body. If this does not happen, remove the cover from the distributor, clean its contacts, and inspect the “slider” and wires. If there are any flaws, we replace the parts. You also need to dry candles filled with gasoline.
The serviceability of the spark plugs is a new step of verification. We take them out of the coil, connect high-voltage wires to them, collect them into a bundle and start the starter. Small sparks flash on the electrodes of the spark plugs. If there is still no spark, then it means the problem is deeper than expected.
In the next step, we check the coil, or more precisely, the voltage supplied to the element. This can be done using a tester or an engine compartment lamp. If there is no voltage, then the problem with the engine not starting is the coil. The defective part must be replaced. But it may be that the current is not flowing as a result of a disgusting connection of wires or obvious contamination.
The last limit is the low voltage part of the system. The only thing that can be done here is to “poke” the contacts of the distributor connector. Voltage leakage may be due to them. But if there is still no voltage, then it means you should take the car for computer diagnostics of electrical systems. Using special equipment, technicians will identify the cause of the malfunction.
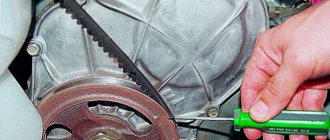
The most unique reason why the engine does not start is a breakdown of the camshaft drive belt. Basically, it is associated with the worn-out serrated surface of the tape. It is better to entrust the repair of the mechanism to experts.
Malfunction in the ignition system of the Polo Sedan
The Polo Sedan is equipped with a high-energy microprocessor ignition system (MPI). A voltage of approximately 40,000 V is supplied to the spark plugs, and although at low current it is not life-threatening, a possible electric shock when checking the ignition system can lead to serious consequences. Therefore, if you handle the tip of the spark plug while the ignition is on, use a thick rubber glove or, as a last resort, pliers with insulated handles.
Before checking the ignition system, place the gear shift lever in neutral and leave the parking brake on.
Squeeze the clips and remove the decorative cover of the cylinder head.
Check the fit of the ignition coil on the spark plug
Check the serviceability of the low voltage ignition coil circuit
If the ignition coil low voltage circuit is normal, check for spark at the spark plugs. Remove the ignition coil and reconnect the wiring harness block to it.
Insert a spare spark plug into the tip of the coil and connect its body to the vehicle ground in any convenient way. Have an assistant turn the engine crankshaft with the starter. Check the other ignition coils in the same way.
Reliable contact of the spark plug body with ground is mandatory, since if a larger additional spark gap appears than the gap between the spark plug electrodes, damage to the engine control system unit or the high-voltage circuit of the ignition coil is possible.
Carry out this check for no more than five seconds so as not to damage the exhaust gas converter as a result of gasoline that has not burned in the engine cylinders entering it.
If there is no spark at any of the ignition coils, check for blown coil fuses in the mounting block located in the instrument panel fuse mounting block. If the fuses are blown, replace them and start the engine.
Do not install fuses with a higher current rating, as this may cause damage to the electrical equipment and even cause a fire.
If there is no spark. replace the ignition coil with a new one. If there is a spark, but the engine does not start, replace the spark plugs with new ones. You can also first try to install not new, but proven ones, from a “working” machine.
If after this the engine does not start, check the serviceability of the engine management system.
Replacing a failed oil pump
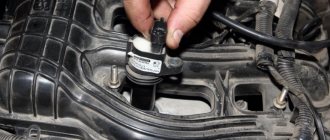
A completely different source of the problem in a Volkswagen Polo car is a malfunction of the oil pump. The device serves to supply oil to the system and lubricate the moving parts of the engine. If the pressure constantly drops as a result of a decrease in the injection rate or leaks in the cylinder body or the pump itself, then the element should be replaced with a new one as soon as possible.
For the procedure you will need a Torx T45 wrench, a “5” hexagon and thin pliers:
- We dismantle the oil sump. To do this, remove the engine splash guard and drain the oil from the lubrication system. We remove the flywheel shield and unscrew the twenty fasteners of the crankcase itself. Gently tap the edges of the crankcase with a rubber hammer and disconnect the part.
- Then we dismantle the pump sprocket protection and the tensioner spring in its drive.
- Unscrew the bolt securing the tensioner to the cylinder block and remove the component.
- Then remove the pump sprocket by carefully unscrewing the bolt.
- Finally, we unscrew three more screws holding the pump housing and remove the part.
- We put a new oil pump in place of the old one and assemble everything in the reverse order.
- We fill the reservoir with oil and check if the car starts.
A fresh oil pump for the Polo sedan, just imported from a German factory, costs about 12,000 rubles. A used copy can be purchased at a price several times cheaper. It all depends on the mileage of the car.
Possible reasons why the Volkswagen Polo sedan does not start
The main advantage of a new car is that it is new. There is no need to change “consumables” before the first maintenance, the body is perfectly “clean” without a single scratch, the chassis fits tightly at all levels, the engine runs like a clock.
How to check and repair the ignition coil of a Polo sedan, Jet
But the moment comes when everything goes wrong. Cars also age, and their old age is a snowball: small “problems” over time turn into full-fledged problems that require real resuscitation of the “iron horse”.
Each car has its own medical history. Some suffer from rapid wear of the chassis, others experience difficulties with electronics, and still others complain of problems with the engine and transmission.
The worst thing is when malfunctions occur in the power plant components. The engine is the most valuable “organ” of a car. Accordingly, the cost of repairing it is one of the highest.
Engine performance directly depends on the ignition system. Thanks to it, the power plant can be started. Failure of starting system elements is a real nightmare for any motorist, especially for a beginner.
Imagine: getting into your car early in the morning to go to work, turning the key in the ignition, trying to start the engine, but it won’t start! You repeat the procedure again and again, but all in vain. Just burn the candles with gasoline. You have to walk to the stop and go to work by public transport. The whole day is ruined.
Many car enthusiasts face this situation. There can be many reasons for its occurrence. The first thought that should creep into a motorist’s head is whether the starter works? And also how quickly it “spins”.
Symptoms of malfunction
More often than not, the bobbin does not suddenly fail. This is usually preceded by a number of warning symptoms.
The main symptoms of a faulty ignition coil:
- misfires in one or more cylinders, they can be determined using a scanner by the presence of the “triple” effect of the engine;
- the appearance of “breakdown tracks” on the housing can be determined visually when starting the engine in the dark;
- the occurrence of cracks and chips in the dielectric zone;
- overheating of the structure;
- burning of rubber tips of high-voltage wires;
- oiling, contamination.
If the above symptoms appear, you should consider purchasing a replacement device. You can't stand by and watch an ignition coil die. In the event of a sudden coil failure, further independent movement will be impossible (unless you have individual coils installed).
Ignition coils
Replacing a failed fuel pump
Replacing the fuel pump on a Polo sedan will also cost a pretty penny. A malfunction in this unit is one of the common reasons why a car will not start.
READ Check the car for a ban on registration actions
An electric fuel pump, through the injection system, pumps a certain amount of fuel to the engine injectors, which is necessary to start the power plant and move the machine. The service life of the device depends on many criteria. Among them, an important role is played by the quality of the fuel received at the gas station, as well as the amount of dirt penetrating the system. The main signs of a clogged pump, in addition to the fact that the engine will not start, are unpleasant sounds in the engine, which begins to stall from time to time.
The operating principle of the fuel pump is simple. The device uses a special float, which lowers as the fuel level in the tank decreases. The potentiometer, which responds to float maneuvers, increases the resistance of the sensor and at the same time lowers the voltage on the arrow indicating the amount of fuel on board. The more the voltage drops, the closer the o on the dashboard becomes.
When dismantling a faulty fuel pump, you should be aware that gasoline vapors contain toxic substances that are harmful to the human body. Therefore, it is recommended to carry out work outdoors.
Sequence of actions for replacing the fuel pump on the Polo sedan:
- We dismantle the battery.
- Remove the cover at the bottom of the trunk.
- To separate the pump from the sensor, you need to unscrew the fasteners located on the sides of the device with a small screwdriver.
- We loosen the pipeline clamps and remove both types: supply and return.
- Close the tube holes.
- Unscrew the union nut 3217 with a special wrench. The device costs quite a bit (about 2000 rubles!), so you can use a wooden peg and a hammer instead: we place the end of the “piece of wood” against the edges of the nut and hit it lightly with the hammer.
- From the neck of the tank we take out the gasket and metal flange.
- Disconnect the fuel pump from the bayonet lock and remove it.
- When reassembling, the following points should be taken into account: before installing a new fuel pump, the O-ring must be moistened in engine oil; The fuel sensor should not be damaged, and it should “look” towards the pipelines.
An original VAG fuel pump for the Polo costs from 11,000 rubles. Its code number is 6rf 919 051 d. The pleasure is expensive, but it’s not like changing the filter!
By the way, the fuel filter should also be replaced. This is where problems with the pump often begin, smoothly flowing into the engine starting system. As a rule, it is recommended to change the fuel filter on a German sedan every 30,000 km. But the figure may vary depending on the degree of blockage of the element.
If an uneven hum appears in the engine, accompanied by a loss of power and an increase in fuel consumption, then there are clear signs of wear on the fuel filter. This thing is inexpensive. The original will cost the sedan owner 1,500 rubles. A similar sample of the popular Filtron brand costs about 1000 rubles. Agree, there is a difference: either buy a whole gas pump for more than 10,000 rubles, or purchase it for 1,000 rubles. a fuel filter that will not only save the resource of the unit, but also increase its service life.
At the end of the “fuel” topic, it is worth noting another culprit of the problem, why the engine does not start. It is the fuel pressure regulator.
The main idea of the device is to maintain the required pressure in the injectors, which changes depending on the operating mode of the power plant.
Checking the pressure is not difficult: we connect a pressure gauge between the fuel hose and the fitting, while simultaneously disconnecting the vacuum wire. When operating properly, the pressure in the system should increase. If this does not happen, then change the vacuum hose and check the value again with a pressure gauge. If there are no changes, then now we know where the dog is buried - we are replacing the regulator.
Thus, the main problem areas that cause failure are the ignition, fuel injection and oil pressure regulation systems.
How to test an ignition coil with a multimeter
The easiest way to check the ignition coil remains - with a multimeter. This device is already in almost every home, so it is the most affordable way to check.
The essence of the test is to measure the resistance of the primary and secondary windings. The algorithm of actions is the same for all types of coils. There are differences in the resistance of the primary winding of the new coils in relation to the old-style coils. New coils have lower resistance of the primary winding and due to this it is possible to obtain higher energy. In old ones - about 3-4 ohms, and in new ones - about 1-2 ohms.
First of all, we check the secondary winding. To do this, you need to set the multimeter to resistance measurement mode up to 20 kOhm and connect the probes to the high-voltage terminals of the ignition coil.
We switch the multimeter to resistance measurement mode up to 200 Ohms and connect the probes to the low-voltage terminals of the coil. The resistance should be about 1-2 Ohms at an ambient temperature of 21 degrees Celsius.
The check can be completed here, but it is better, of course, to remove the ignition coils, clean them and visually inspect them for signs of breakdown or cracks.
I recently read here when I was looking for what the problem was, I swapped my DAC coil for a super original from Korea - a GM coil - some people haven’t even seen these, but they exist - they were installed only on Korean Lanos...
according to the results of measurements on all DAC coils - that I held in my hands I saw a resistance from 4.6 to 5 tina coil that I set 5.2 kOhm on both secondary coils
and most importantly, if you check your coil and you have, say, 4.8 kOhm - on 1-4 and also on 2-3 - similar without a big difference in the readings, then I don’t see the point in changing anything ... but if you have one pair contacts 4.8 kOhm on the second, let’s say 4.4 kOhm, then you need to think about it. To be honest, I don’t know what this difference will lead to, but definitely not to smooth ignition work...
Where I got it, I don’t even know where I got it - they screwed it up
coil is one of the main elements of the ignition system. It is designed to convert the low-voltage voltage of the vehicle's on-board network into high-voltage. Its main task is to generate an electrical impulse on the spark plug.
About the coils
The ignition coil is a step-up transformer with a primary and secondary winding. The primary winding consists of a small number of turns of thick wire, which is supplied with low voltage voltage (6 or 12 volts usually). The secondary winding, on the contrary, consists of a large number of turns of thin wire. That is why a high pulse voltage of about 30,000 Volts is created on the secondary winding.
Several internal combustion engine ignition systems are common in the automotive space. The Chevrolet Lacetti uses the DIS (Double ignition system) system or a system with an “idle” spark. It is called so because the formation of a spark occurs in pairs in two cylinders. This leads to one main drawback of this system: if one part of the ignition coil fails, then you are left without two cylinders. On the other hand, you will immediately discover the culprit of the problem.
The Chevrolet Lacetti with a 1.8 engine uses a different ignition coil circuit without the use of high-voltage wires.
The ignition coil rubber band broke: causes and consequences
Decent reels, provided that the right spark plugs are used, last a long time. As a rule, the ideal pair is selected at the factory and subsequently it is enough to update the spark plugs on time, giving preference to factory instructions.
However, the manufacturer can save on high-voltage generators. In the case of Lada, to replace the original Bosch, analogues from Russian manufacturers Itelma, Sever, Soate were launched into series from time to time. It is quite expected that the alternative did not survive for a long time, and forward-thinking owners switched to Bosch, applauding the unprecedented throttle response and unwavering idle speed.
If the coils are decent, but the engine is barely noticeable at idle, take a look at the rubber tips. Rubber tends to age, which means that with age, cracks can appear on high-voltage parts of any engine, regardless of the make of the car. The problem of cracking rubber bands is common to all configurations with “individuals” - from VAZs to VWs and Toyotas.
Let's take a look at other reasons for tip damage:
- Hasty and incorrect installation of the ignition coil. Before recessing the product deep into the well, it is necessary to center the rubber tip with the axis of the spark plug, otherwise the coil will go to the side and the spark plug will break the rubber.
- Sticking to the spark plug. When peeling off a stuck tip, the formation of cracks is inevitable. If this problem occurs on your motor, then you need to use high-temperature dielectric grease.
Description of ignition and problems
In our world, there are currently three main types of ignition systems in use:
Classic system with a spark distributor (distributor). This system is obsolete and has not been installed on new cars for a long time. But it still occurs often on older cars.
READ How to check the air flow sensor on a Granta 8 valve
Double ignition system (DIS) - this system does not have a spark carrier and due to this it has become widespread. It is popularly known as the idle spark system. The thing is that two spark plugs are connected to one coil and, accordingly, spark breakdown occurs simultaneously in two cylinders at once - in one on the compression stroke, and in the second on the exhaust stroke (idle spark). This particular system is installed on the Chevrolet Lacetti.
Coil On Plug (COP) - literal translation - “ coil on a spark plug”. The name speaks for itself. That is, each candle has its own coil . This is the most modern ignition system at the moment.
Ignition systems are constantly being modernized and improved, but one thing remains unchanged - the use of the principle of inductance to convert low voltage to high voltage. In other words, all these systems are united by the use of ignition coils. They may differ in type, power, voltage, and so on, but the principle of operation is unchanged. This means that the verification methods are almost the same.
Symptoms of a problem
When the ignition coil fails, misfires appear in the cylinder for which this particular ignition coil is responsible. It happens that the coil does not fail immediately, but gradually, its insulation breaks through and the spark begins to leak onto the housing under heavy loads.
If the IKZ does not work correctly on the car, the following symptoms of a malfunction appear:
- The “CheckEngine” light starts flashing;
- The traction and dynamics of the car disappear;
- The car starts to move jerkily;
- Popping sounds are heard from the exhaust pipe;
- The exhaust at idle is not uniform;
It should be noted that such symptoms can be associated not only with ICD, but also with injectors, compression, spark plugs, etc. To be sure that the IKZ is faulty, it must be checked.
The principle of operation of the ignition coil
In simple terms, the ignition coil can be called a conventional voltage-increasing transformer. Its task is to convert low voltage (6-15V) into high voltage (20-30kV). It, like a transformer, consists of two windings - primary and secondary. The primary low-voltage coil consists of a small number of turns, and the secondary one has a larger number.
But there is one more nuance. The turns in the coil are arranged in a certain way, which allows the coil, in addition to inductance, to also have a capacitance. That is, a kind of oscillatory circuit.
When current is applied to the primary winding, a magnetic field is generated in the coil. The induced voltage is generated in the coil by self-induction. At the moment of ignition, the current in the coil is interrupted by the output stage (in older systems, by the breaker contacts). The instantaneously collapsing magnetic field generates a high induction voltage in the primary winding. It is transformed on the secondary winding of the coil and is converted in the ratio - the number of turns of the secondary winding divided by the number of turns of the primary winding. A high-voltage discharge occurs in the spark plug with ionization of the spark gap and the passage of current. This continues until the accumulated energy is spent.
All these physical phenomena are probably of little interest to anyone, so let’s digress and count, in my opinion, interesting facts. How many times does a spark plug “produce” a spark during its service life?
Number of sparks = “rpm” multiplied by “number of cylinders” and divide all this by 2. Let’s take a regular 4-cylinder 4-stroke engine. Let's say the engine speed is 3000 rpm. This means the number of sparks = 3000×4/2 = 6000 sparks / min!
Therefore, the ignition coil may well deservedly someday get tired and silently fail.
Purpose
The ignition coil is necessary to form a spark in the combustion chamber of a car engine. The output coil produces a voltage of 15,000 Volts, such a high voltage is necessary for a high-quality spark and good ignition of the fuel in the combustion chamber.
A voltage of 12V comes to the coil from the vehicle’s on-board network, then electromagnetic processes occur in it and the voltage rises to enormous values.
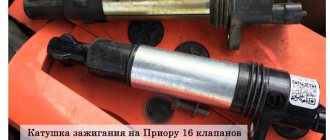
The Polo Sedan uses individual ignition coils, that is, each coil is responsible for a specific cylinder, in total there are 4 of them.
Individual ignition coils on the Polo Sedan made it possible to increase engine power and efficiency, while maintaining the same fuel consumption. Therefore, many cars use the IKZ system.
How to check the ignition coil
The ignition coil can be checked in several ways:
- replacing with a known good one - this is the most accurate method of checking
- motor tester oscilloscope
- ohmmeter
- "to the spark"
Let’s say we are ordinary car enthusiasts and we don’t have working coils in stock and, even more so, a motor tester. There are two last options left. But the “spark” option also requires some equipment, namely a high-voltage arrester.
Simply unscrewing the spark plug and checking the spark will not reveal anything. There will be a spark both with a working coil and with a tired one. But when installing the spark plug back into the cylinder, in the second case there will be no spark. Why?
Because the breakdown voltage is influenced by several factors and the most important of them is pressure! The higher the pressure, the higher the breakdown voltage required at the same spark gap.
That is, to break a 1mm gap in a spark plug at atmospheric pressure (screwed-out spark plug) requires much less voltage than at higher pressure (screw-in spark plug), since the pressure in the cylinders when the engine is running is much greater than atmospheric pressure.
And the spark gap makes it possible to change the distance between its electrodes within a wide range. This allows you to set a gap of several millimeters for testing. But these few millimeters require the same breakdown voltage as 1mm on a spark plug screwed into the cylinder while the engine is running.
Removal and inspection
- Disconnect the high-voltage wires from the ignition coil
- Use a 10 mm socket wrench or socket. unscrew the 3 nuts securing the coil (2 under the coils, 1 between them)
Ignition coils can be checked in the three most common ways: with a multimeter (tester), “for spark” and by connecting a working coil.
“To spark” is a rather dubious method because it does not make it clear that the coil is in its dying state. You may see a spark that is quite bright, but when the spark plug is installed in the cylinder there may not be a spark at all. This happens due to the difference in atmospheric pressure and what occurs in the cylinders during compression (in other words, compression).
- Turn the spark plug out of the cylinder
- Put a high voltage wire on it
- Invite a partner who will start the engine or watch the spark on a candle
- Simulate starting the engine: press the gas pedal to the floor (so that fuel does not enter the cylinders), and turn on the starter for 2-3 seconds
- If the spark is bluish-blue, then most likely everything is in order with the ignition system. If the spark is red or orange, it means there is a malfunction and it does not mean that the fault is in the ignition coil. The culprits may also be fresh ignition, high-voltage wires, ignition coil control wiring harness block
Checking wires
15. Remove the cover on the left in the engine compartment and connect the VAG 1598/31 tester to the wiring harness of the engine control unit (Fig. 4.32). Check the wires between the tester and the connector for open circuit: pin 1 + socket 102, pin 2 + socket 103. Wire resistance: max. 1.5 Ohm.
16. Additionally, check if the wires are shorted to one another.
Specification resistance: ∞ Ohm.
17. If no faults are found in the wiring and there is voltage between pins 2 and 4, replace the engine control unit.
How to check a Chevrolet ignition coil
to check a car’s ignition coil, but let’s look at the simplest ones that even novice car enthusiasts can do.
Checking with a multimeter
We use it to check the resistance of the coil windings. There is no need to remove the coil.
- Check the secondary winding first. Set the tester to resistance testing mode up to 20 kOhm and connect its probes to the coil terminals where the high-voltage wires are connected. The value we need is in the range of 12-14 kOhm. All values that go beyond these limits indicate a coil malfunction. We do the same process with the second coil.
- Now let's check the primary winding. Disconnect the wiring harness block from the coil connector by pressing the special tab. Set the tester to measurement mode up to 200 Ohms and connect to the low voltage terminals of the ignition coil. The required value is 1-2 ohms. Do the same with the second coil.
ignition coils Volkswagen Polo sedan
Activation check
9. Remove the engine cover (Fig. 4.44).
10. Disconnect the wiring connectors (arrows) from the injectors (Fig. 4.50).
10. Connect the VAG 1527 diode tester using wires from VAG 1594 to pins 1 and 4 (output 1) and to pins 2 and 3 (output 1) of the disconnected connector (Fig. 4.48).
11. Start the engine with the starter and check the ignition signal from the engine control unit. The tester light should blink.
13. If the tester light is blinking and there is voltage between pins 2 and 3. replace the ignition coil.
14. If the tester light does not blink. check the wiring.
How to change spark plugs on a Volkswagen Polo sedan?
Replacing spark plugs in a Volkswagen Polo sedan
- Remove the spark plug cover. 2276-4-10-03.
- Using a screwdriver, lift the ignition coil. 2276-4-10-04.
- Press the lock on the bottom of the wire block. ...
- Disconnect the block from the ignition coil. ...
- Remove the ignition coil from the spark plug well. ...
- Using a high 16" spark plug head with an extension, unscrew the spark plug.
READ Where is the engine number for KIA RIO 3
Step-by-step instruction
Before you start changing the spark plugs on a Volkswagen Polo 1.6 car, you should first get to them. To do this, you will need to unfasten two fasteners on the plastic cover of the cylinder block and move it to the side so that it does not interfere with you in the future.
Next, to get to the spark plug, you will need to remove the coil with contacts. And this is quite easy to do, using a special hook, or, at least, using an ordinary nail bent at an angle of 90 degrees.
Lower the hook into the hole with the coil, guide it into a special hole (on the sides of each coil on the Polo Sedan there are special plastic ears with which the device can be removed from the groove), and pull the hook towards you.
But, you should keep in mind that a block with wires is attached to the top of the coil, which will need to be disconnected by pressing the latch. Therefore, it is not recommended to stretch the coil very quickly, so as not to damage the integrity of the wires.
So we have opened access to one of the 4 candles. Now all that remains is to throw the key prepared in advance on it and unscrew it from the socket (previously, when considering how to change the spark plugs on a Volkswagen Polo sedan 1.6, we mentioned that the key must be marked 16. And this is a very important nuance. After all, if you choose a different size of the key head , the spark plug will not stay tightly in it during dismantling, which will cause severe difficulties in removing it from the engine).
The above function should be repeated for the 3 remaining candles. Well, after you have all four consumables in your hands, you can start replacing them with new elements. There are usually no problems with this either. After all, if you understand how to remove the spark plugs, then the installation diagram is also known to you, because it repeats the above-mentioned function, only in reverse order. And for a better perception of the picture, we advise you to watch the short video annotation attached below.
Remove the ignition coil from the spark plug well.
Using a tall spark plug head “16” with an extension, unscrew the spark plug.
Remove the spark plug from the spark plug well.
Install the new spark plug in reverse order.
When screwing in a spark plug, you need to twist the spark plug wrench or extension with the head by hand, and not with a wrench or ratchet, to avoid damaging the threads of the spark plug hole in the cylinder head.
If the spark plug does not follow the thread, strong resistance to rotation will be felt. In this case, you need to unscrew the spark plug and, after cleaning the thread, re-tighten it. Completely tighten the spark plug to 25 Nm.
Attention! Over-tightening the spark plugs can damage the threads in the spark plug holes in the cylinder head.
The process of dismantling and replacing SZ
To change the SZ for a Volkswagen Polo, you must complete the following steps:
- First, remove the protective plastic cover with the VW marking. To do this, you need to unfasten the fastenings from the sides by pressing on them.
- Under the cover there are 4 ignition coils with low voltage wires. They must be removed to gain access to the NW. remove the coils using a flat-head screwdriver. The tool is inserted under the spool and with a upward movement the part is carefully dropped.
- When the coils are reset, you need to disconnect the wires from them. To do this, you need to press the latch and remove the plug with wires.
- When removing the coils, you should clean the places where they are installed from dirt and oxidation, which may be a prerequisite for the failure of the coils.
- Next, the old candles are unscrewed. With all this, attention should be paid to their condition. If there are traces of oil, fuel, or dark carbon deposits on them, you should find out the reason and remove it.
- We screw in a new set in place of the old products. It is better to screw in the spark plugs manually until they click, so that you can feel if the part is not going along the threads. The tightening torque should be 25 Nm.
- After installing the spark plug kit, all wires are connected and the assembly is completed.
READ Changing the oil in the Skoda Octavia a5 gearbox
After replacing the SZ, you need to start the car and check the operation of the engine.
Turning out the NW with a key
Replacing the SZ yourself makes it possible to save money on a car service and maintain the technical condition of the car at an appropriate level.
How to remove the ignition coil for VW Polo Sedan, Jetta, Skoda Rapid
Timely replacement of spark plugs will extend the life of the engine.
How many spark plugs are there in a Volkswagen Polo?
On the Volkswagen Polo Sedan 1.6, depending on the engine installed on it (CFNA, CFNB, CWVA, CWVB), two different spark plugs are installed. In CWVA and CWVB engines with VAG part number 04C905616. They are nickel, have one side electrode, and are screwed in with a tightening torque of 23 Nm.
Setting the ignition of a VW Passat B3 with an ABS engine using the VAG-COM program and a strobe light
The ignition of a VW Passat B3 with an ABS engine is set as follows.
- Warm up the car and turn off the engine.
- Open the timing cover. The mark on the plastic cover should match the groove on the pulley. Otherwise, remove the car from the handbrake, set second gear and push the car (the pulley will rotate) until the marks match. The mark on the timing cover must coincide with the groove on the pulley
- Open the distributor cover - the slider should be turned towards the first cylinder. The distributor slider should be turned towards the first cylinder
- Open the inspection window plug and see if the marks match. The coincidence of the marks is checked through the inspection window
- Connect the strobe wire and battery power to the first cylinder. Unscrew the nut under the distributor. The strobe cord is connected through the diagnostic connectors
- Press the key on the strobe gun and bring it to the viewing window. The mark should be opposite the top tab. If this is not the case, twist the distributor. When installing the ignition, the strobe light is brought to the viewing window
- Connect the adapter.
- Launch the VAG-COM program. Remove the car from second gear and start the engine. To adjust the ignition, the VAG-COM program is used
- In the VAG-COM program, go to the “Engine Block” section. After starting the VAG-COM program, you need to go to the “Engine Block” section
- Select the “Measurement Mode” tab and click the “Basic Settings” button on the left. Using the VAG-COM program you can quickly and accurately set the ignition
- Tighten the distributor bolt.
- In the VAG-COM program, return to the “Measurement Mode” tab.
- Disconnect the strobe and diagnostic cords.
- Close the inspection window plug.
Spark plug diagnostics
Faulty spark plugs can be determined visually by the following signs:
- deposits on the spark plug;
- melted electrodes;
- a layer of soot on the tip of the spark plug;
- traces of oil on the tip of the spark plug.
You can diagnose a faulty spark plug using a number of external signs.
There are several reasons why spark plugs fail:
- wear and exceeding the service life;
- frequent regular driving over short distances;
- high engine oil level;
- unbalanced air-fuel mixture.
In what cases is it necessary to replace spark plugs?
A high voltage is applied to the SZ, due to which a spark appears between the electrodes, igniting the combustible mixture. The quality of spark plugs affects the efficiency of the internal combustion engine and fuel economy. Therefore, it is necessary to monitor their condition.
Replacing the SZ on any car is done for two reasons:
- according to the technical maintenance regulations;
- in case of wear or malfunction of the SZ, which causes incorrect operation of the engine.
According to the regulations on Volkswagen Polo cars, replacement of the SZ must be carried out after 30 thousand kilometers.
But you need to change the spark plugs when the following signs appear:
- the car jerks while driving;
- the starter does not fire immediately; several idle revolutions are required to start the engine;
- increased fuel consumption;
- Motor power drops.
In addition, it is recommended to perform a technical inspection of the car after 15 thousand kilometers. During inspection, the condition of the SZ should be checked. Spark plugs require replacement if a visual inspection reveals cracks in the body or peeling of the insulator. It is better to change the entire set of SZ.
Press the two spark plug cap latches.
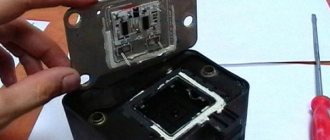
How to fix a locked lock?
Quite often the problem of blocking the ignition switch arises. This usually occurs due to the use of an anti-theft system integrated into the steering column.
It works as follows: if there is no key in the lock, then it is impossible to turn the steering wheel.
To unlock the steering wheel, you need to insert the key into the lock and try to find a position in which the key can be turned.
If the lock cylinder is not blocked by a spring, then local repair of the lock well is possible. In case of blocking, a new lock is needed - jewelry repair of the spring will cost much more.
Selection of spark plugs for Volkswagen cars
There are a number of important things to consider when purchasing new spark plugs. Candles differ in design and material from which they are made. Spark plugs can be:
- two-electrode (with one side and one central electrode);
- multi-electrode (with one central and several side electrodes).
Multi-electrode spark plugs have multiple side electrodes
For the manufacture of electrodes the following are used:
- yttrium and copper (available, but not very resistant to fading);
- platinum (very reliable, corrosion resistant, but expensive).
When choosing candles, you need to pay attention to the heat rating. Failure to meet the manufacturer's requirements will result in a number of problems. If it is greater than the regulated values, the load on the engine will increase and lead to its forced operation. If the heat rating is low, problems will arise when starting the engine due to an insufficiently powerful spark.
It is advisable to purchase original Volkswagen spark plugs, which:
- have high wear resistance;
- ignite the mixture efficiently;
- function reliably throughout the entire service life.
The highest quality spark plugs are produced by Bosch, Denso, Champion, NGK. Their price varies from 100 to 1000 rubles.
Step-by-step analysis of the lock and repair
- Clear access to the steering column should be ensured;
- Unscrew the two screws on the plastic steering column housing;
- We disconnect the steering cardan using a key set to “13” - unscrew the nut and remove the restraining spring;
- Carefully release the latches and disconnect the circuit boards from the steering wheel column;
- Remove the column casing using a hexagon size “6”;
- We take out the shaft with the switches.
Now you need to understand what to do: does it make sense to repair the core or a complete replacement with a new one would be a rational option.
You can repair the lock by replacing contact groups 357905865, 6N0905865 with new ones, which, of course, is much cheaper than buying a new ignition switch.
Basic knowledge of ignition systems
One of the main conditions for starting the engine is a properly functioning ignition system. This system delivers an electrical discharge at a certain moment when the engine is started, after which the gasoline engine starts.
Typically, the ignition system includes:
- Distributor;
- Coils;
- Candles;
- Control block.
Sometimes a machine can be equipped with a transistor-type non-contact starting system, consisting of a similar list of components as a conventional system, but its fuel distribution system does not have a Hall detector and an air-fuel mixture condenser. Instead, an ignition system of this type uses a special non-contact type sensor, the functionality of which, however, is based on the same physical principles.
Diesel engines differ slightly in their starting system: ignition in this case should be called fuel injection during the compression stroke, with a mixture of diesel fuel and air being injected into the engine separately. Initially, air is supplied to the system, which is very hot in the combustion chamber. After this, the chamber is filled with a fuel mixture through nozzles and immediately ignites.
Sources:
https://motyk.ru/info/kak-proverit-katushku-zazhiganija-shevrole/ https://555-shop.ru/zapchasti/kak-snyat-katushku-Polo-sedan.html https://Nissan-modus .ru/prochee/katushka-zazhiganiya-na-folksvagen-Polo-sedan-zamena.html
»How to maintain spark plugs
Spark plugs are a very important part of a gasoline engine and must be kept in good condition to ensure the best performance. The spark plug electrodes must be clean and sharp to produce the powerful spark needed for ignition.
A warped or dirty spark plug can cause erratic ignition, which can lead to misfiring or poor performance. It can also waste fuel and lead to deposits on the cylinder head.
The great thing is that spark plugs are easy to repair, maintain and replace as needed. We'll walk you through the steps to checking and maintaining your spark plugs. With this information you can decide whether you want to change your spark plugs.
Removal
- Raise and support the front of the vehicle.
- Delete:
- Top motor cover.
- Golf / Estate / Plus / Passat / Touran: Windshield washer reservoir filler neck.
- Disconnect the connector from the diesel particulate filter (DPF) pressure sensor.
- Remove the diesel particulate filter (DPF) pressure sensor bracket.
- Disable:
- Jetta/ Polo : Fuel supply and return pipes.
- Polo: Fuel preheater valve.
- Delete:
- Golf / Estate / Plus / Passat / Touran: Fuel filter housing. DO NOT disconnect hoses.
- Jetta/Polo: Fuel filter housing.
- Coolant expansion tank. DO NOT disconnect hoses.
- Disconnect the coolant level sensor connector.
- Disconnect the coolant temperature (ECT) sensor connector.
- Jetta / Golf / Estate / Plus / Passat / Touran: Disconnect the coolant pipe support bracket from the engine mounting bracket. DO NOT disconnect hoses.
- Remove the upper timing belt cover [1].
- Engine support.
- Delete:
- Right engine mount.
- Right fender liner.
- Engine protective glass.
- Auxiliary drive belt. Use Tool No. T10060A.
- Crankshaft pulley bolts [2].
- Crankshaft pulley [3].
- Lower timing belt cover [4].
- Rotate the crankshaft clockwise to TDC of the cylinder
- Make sure the arrow on the camshaft sprocket is at approximately the 12 o'clock position [5].
- Otherwise: Rotate the crankshaft one revolution clockwise.
- Lock the crankshaft sprocket [6]. Use tool No. T10050.
- Make sure the alignment marks are aligned [7].
- Make sure the crankshaft sprocket retainer tab is seated in the oil seal housing [8].
- Lock the camshaft [9]. Use tool 359.
- Loosen the camshaft sprocket bolts [10]. Make sure the sprocket can be easily turned by hand.
- Loosen the high pressure fuel pump sprocket bolts [11]. Make sure the sprocket can be easily turned by hand. Use tool no. T10385. NOTE. There are two types of timing belt tensioner pulleys.
- Tensioner roller type A:
- Loosen the tensioner pulley nut [12].
- Turn the tensioner pulley counterclockwise until the locking pin [13] can be inserted. Use Tool No. T10264 [14].
- Insert the clamp into the tensioner pulley [15]. Tool No. T10265.
- Turn the tensioner pulley fully clockwise until it stops [16]. Use Tool No. T10264 [14].
- Hand tighten the tensioner pulley nut [12].
- Tensioner roller type B:
- Loosen the tensioner pulley nut [17].
- Turn the tensioner pulley clockwise to loosen the belt tension. Use Tool No. T10409 [18].
- Hand tighten the tensioner pulley nut [17].
- Remove the timing belt starting from the guide pulley (G2). NOTE: Mark the direction of rotation on the belt with chalk if the belt is to be reused.
Sources:
https://razborov.net/Volkswagen/kak-pomenyat-svechi-na-fol-ksvagen-polo-sedan.html https://dentauto.ru/raznoe/kak-snyat-svechi-zazhiganiya-na-folksvagen-polo -sedan.html