What is this?
Re-welding the bottom means updating the floor of the car using welding equipment and a number of tools. The bottom of the car is the most vulnerable place. It takes on mechanical damage, the negative effects of active chemicals, and dirt. Most often you have to deal with the corrosion process.
Overcooking the bottom of a VAZ-2112 may be required in the following cases:
- The bottom is covered with rust.
- There are holes.
- There are big cracks.
- The bottom has become thinner.
In these cases, auto technicians recommend overcooking. This work is labor-intensive and expensive. To repair a car, you need to do a number of these steps:
- Find a service station that restores VAZ-2112 cars.
- Contact the administrator and ask him about the terms of cooperation and approximate prices for services.
- Agree on a time to come to the master or call a specialist.
- Provide your vehicle to the mechanic.
- After a professional inspection, negotiate the exact cost of the work and the time frame for its completion.
- Give consent for repairs.
- Accept the job.
- Pay the specialist the previously agreed amount of money.
- Receive a warranty card for the work done.
The wizard performs a number of such actions:
- Inspects the bottom of the car.
- Makes a decision about the need to digest it.
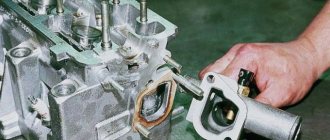
- Cuts out the damaged part.
- A patch is welded to this place.
- Treats the area with an anti-corrosion compound, sealant and mastic to increase resistance to external negative influences.
- Provides the restored car to its owner.
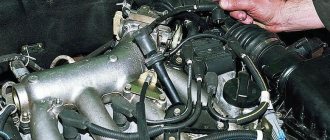
For work, the specialist uses a semi-automatic welding machine, gas welding.
Replacing the underbody of a car
- Disassembly and dismantling
- Installation and welding
Is it possible to replace it yourself in a garage?
To take on this amount of work in your garage, you either need to be too frugal or have a lot of faith in your experience as a bodybuilder. In a normal situation, no one will do the replacement of the bottom, even partially. It's just a waste of time and nerves due to sheer inconvenience. Absolutely everything gets in the way - from the seats to the fuel and brake system pipes.
But this is not the main problem; most often you have to deal with the following situations:
- The need to completely disassemble the interior and dismantle the wiring, since it is not always possible to install it conveniently.
- A large amount of preparatory work, since such damage usually spreads to side members, thresholds, and floor reinforcements. That is, it’s unlikely to get rid of it by replacing one trough.
- The need to perform work both inside and outside. Doing this without a pit, placing the car on jacks, would not be recommended to anyone. Whole arms, legs, and even the head are much more important and expensive.
- Often the work involves the manufacture of repair inserts; the problem cannot be solved using conventional methods. Such a replacement is mainly associated with the need to come up with non-standard solutions. It is impossible to do this without relevant experience.
- If you change the bottom completely, you will need to decide how to install it in the interior. The dimensions of the doorways do not allow this to be done; sometimes it was even necessary to cut off the windshield.
- If you miss the primer and high-quality anti-corrosion agent, then you shouldn’t hope for the durability of the new bottom; rust won’t take long to appear.
We can safely say that replacing the bottom and accompanying repairs of other body parts is still a pleasure. And if errors are also made with dimensions and geometry, then subsequent problems will begin to appear in geometric progression. Don't tempt fate, it usually deceives. The problem can be solved easier and faster only in a service center that has a lift and the necessary welding equipment.
Where to find a new or used bottom
For domestically assembled cars, finding new components to replace the bottom is not difficult. On sale you can find both the original and slightly different analogues. It will have to be cut and adjusted to size in any case. Let us pay attention to just one point - you should not buy obvious foil that bends with your fingers. With such a thickness of metal, the result will be short-lived even with normal anti-corrosion treatment. Even for homemade repair inserts, it is advisable to use iron with a thickness of at least 1.5–2 mm.
The situation with components for foreign cars is more complicated. For Europeans and Americans, it is difficult to find new body parts from the factory. Yes, the problem is being solved, but not as quickly as we would like. And in terms of cost, this option will be far from cheap. It is advisable to look for a new bottom only when repairing (restoring) an expensive car after an accident; finding one for any old woman is already problematic. The main option is to search for contract body parts. Such a solution is cheaper, and the quality is rarely inferior to new hardware; serious companies working in this area are monitoring this point.
Looking for the bottom in our showdowns is an equally thankless task. In most cases, they offer options with varying degrees of rust damage; you can only find something worthwhile with great luck. In this case, it is better to give preference to inexpensive analogues; they last longer with high-quality treatment with anti-corrosion compounds.
So that you don’t have to search for components yourself, we are ready to take on the solution to this problem ourselves. We work with trusted suppliers who ensure delivery of body parts for the most common car models in the capital in just 2–6 days. It will obviously be more convenient and calmer for you.
Features of partial replacement
The bottom of the car rots not only from the outside, but also from the interior. Therefore, anti-corrosion treatment performed immediately after purchase is not a reason to calm down. The risk group traditionally includes those who bring snow with them, forgetting to clean their shoes when landing. Even the presence of rubber mats or a full-fledged carpet does not guarantee that a puddle of melt water will not accumulate under them.
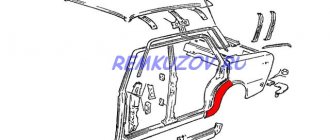
In most cases, the front quarter of the body on the driver's or passenger's side is damaged. The rear seat area rusts a little less often, however, this depends more on operating conditions and regular maintenance of the interior and body.
Replacing the bottom in separate troughs-baths (quarters) is more preferable. In this case, the amount of work is significantly reduced and the cost of the service is reduced. That is, if you want to save money, pay attention to the condition of the metal in the cabin, because sometimes it’s not difficult to remove the carpet and check for moisture under the carpet.
Required volume of reinforcement work
The amount of disassembly of the interior is also correspondingly reduced; if we are not talking about concomitant damage to the side members, sills, panels of the engine compartment or trunk, then it is quite possible to complete the replacement in 1-2 days. As an example, we will give the volume of reinforcement work when replacing one of the front quarters, since this is the request most often made to the service (in this area):
- We start with the rugs; they will definitely get in the way.
- We remove the front seats, and even when replacing one quarter it is better to dismantle both, they create additional inconvenience.
- We remove the internal lining of the sills, pillars, and disassemble the central tunnel.
- In some cases, it is necessary to remove the doors; in extreme cases, we unscrew the opening limiter.
- Pipes of the brake and fuel systems and exhaust elements are laid under the bottom, which are also subject to dismantling. Sometimes you even have to dismantle the gearbox.
The main condition is to provide access to all the welds along which the removed quarter of the bottom is joined to other body elements.
Dismantling damaged areas
The correct way is to drill out all weld points along all edges. It will take longer to cut out metal; we use this technology only when access to points is difficult due to cramped conditions. It is not advisable to cut with a plasma or an angle grinder; the danger of sparks and drops of molten metal should not be underestimated.
We drill with a special cutter or drills with a diameter of 5-6 mm, and we drill only the top layer of metal, otherwise welding a new element will be problematic. In addition, care is also needed in order not to damage the wiring and tubes running under the bottom. The main areas where this work is carried out:
- Connection to the panel (shield) of the engine compartment.
- Joining points with the threshold of the doorway, the central tunnel.
- Connection to floor reinforcement.
- Areas in which the removed quarter of the bottom is welded to the spar.
But before drilling, we remove the sound insulation layer, the internal anti-corrosion coating, and strip the paint down to the metal. Otherwise, it will not be possible to find all the weld points. When assembling cars, all such joints must be sealed with sealant, which will have to be cut or the bottom part must be pulled out by force.
Preparation of the body and repair inserts
New underbody parts do not require special preparation; they are usually supplied in a ready-to-paint condition. But there is one nuance that concerns inexpensive analogues. The manufacturer simply saves money and uses transport primer, which cannot be painted over; the coating will peel off in entire sections. Therefore, if dirty stains remain from a napkin (rag) with a solvent, we clean such soil down to the metal.
The main part of the work involves preparing the body itself; we have never had to change the bottom when there are no problems with the other elements. In the simplest case, there are traces of rust, not through or deep damage, but simple red spots. We fight this problem with the help of a rust converter or acid etching primer.
If more serious damage appears in other adjacent areas of the metal, we solve the problem radically - we cut out all the damaged iron without pity, and can only weld it to living metal. For such areas, we prepare repair inserts from steel 1.5–2 mm thick, trim them, and give them the required shape. We usually overlap welding using resistance welding.
After all the surrounding areas are cleaned, digested, the surfaces are degreased, including the new quarter, and coated with epoxy primer, it has greater strength. Only for the edges along which welding seams will pass, we use conductive primer with zinc. It burns less and provides better quality of the weld point.
Welding work and anti-corrosion treatment
First of all, we try on the new quarter of the bottom in place; in rare cases, it is possible without additional adjustment or even trimming. We make sure to ensure a tight fit of the metal along all edges; sometimes we have to bend it. For all future welded joints, we drill holes with a diameter of 4-5 mm in increments of 3-4 cm. There is a rule - the number of connection points should not be less than for the factory assembly of the car, this is the only way to ensure the design strength and rigidity of the joint.
After this, we install the new element in place and fix it in 3-4 places with welding pliers to prevent spontaneous displacement. We start cooking at the points with the best fit of the metal. We do not weld in a row, but through 5–10 prepared holes, this allows us to avoid local overheating and deformation of the metal. If necessary, press the welded segment against the body to ensure maximum tight contact.
Upon completion of welding work, we carefully clean the metal from scale and cut off excess beads. A prerequisite for protection against corrosion is the treatment of all resulting joints with polyurethane sealant, which can then be painted. It prevents water from penetrating between layers of metal and reduces the risk of rust.
On the interior side, we degrease the new insert and all adjacent areas, restore the damaged primer and paint. Usually painting is done without careful color selection; it is enough to check compliance with the code. And some car owners, in order to reduce the cost of replacement, insist only on priming without further painting. We also carry out anti-corrosion treatment of the bottom from the outside only by prior arrangement. But we do not recommend abandoning this method of protecting metal, especially since we have a fairly good selection of various materials for this purpose.
Features of a complete replacement of the bottom of the car
This replacement is practiced mainly in the most unfortunate situations, when both the side members and the sills are damaged. And this entails a violation of the geometry of the body. Therefore, you should not experiment on your own; without a slipway, precise control of dimensions at the main points will not be possible.
There is a rule - a new bottom should be adjusted and welded only after the damage to the sills and side members, floor reinforcements and jacks has been completely eliminated. Yes, in some cases you have to cook it this way, but only when it comes to a partial replacement, and then only as a temporary solution. For a complete replacement, this method is categorically unacceptable.
All such defects are already visible during preliminary diagnostics, so we discuss the issue of purchasing all components immediately. Otherwise, there is no point in taking on work. It is for this reason that the replacement time can be increased to 3-4 days without taking into account the search and delivery of components.
The main difficulty is associated with the increased size of the trough-bath. And you will have to cook more, process the seams, and it’s not easy to just turn around in the car with such a large part. In some cases, you even have to install them in separate segments.
Disassembly and dismantling
The interior, and not only it, will have to be completely disassembled. We especially have to work on rear-wheel drive cars, in which we also need to remove transmission elements. Filming:
- Seats and doors.
- The lower part of the interior trim.
- Lining of the central tunnel.
- Interfering tubes and wiring sections.
- Cardan and, if necessary, other transmission elements.
- In some cases, we also cut out the windshield.
The bottom itself is dismantled using proven technology - we drill out all the welded points in places adjacent to other body elements. To do this, we first remove all the coatings in the interior, clean the paint, and remove the noise. In order not to waste time, we cut the entire bottom into several separate segments, so it will be much easier to remove it. When the interior is completely disassembled, there is no longer any danger from cutting.
Installation and welding
Further actions are also standard. We carry out work to prepare the body for installation of a new bottom:
- We thoroughly clean or treat corroded areas with a rust converter.
- If necessary, we install repair inserts or change elements that cannot be used in the future.
- Before we start replacing the bottom itself, we change or restore the sills and other power parts with a mandatory check of the body geometry.
- We prime all the junction points along which the welds will pass.
- We clean the bottom itself down to the metal, drill holes for welding, and prime it.
- If replacement is planned in separate segments, we arrange them so that the joints fall on the floor reinforcements. Be sure to overcook.
- After cleaning the deposits of metal and removing scale, thoroughly blow with compressed air, degrease and seal all welding seams.
We recommend not to refuse additional painting of the bottom from the interior side. This will not take much time, since we use infrared drying equipment. This coating will provide additional protection and will delay the reappearance of rust for another couple of years.
What additional things do we recommend doing when replacing the underbody of a car?
Before you begin reassembling the interior, we recommend taking advantage of some of the car's upgrade options. Thus, upon approval, we are ready to perform the following work:
- We will replace the electrical wiring, the condition of which is unlikely to be normal. Additionally, we will lay lines for connecting parking sensors, heated glass, amplifiers, subwoofers and other acoustic devices.
- Improve noise and vibration insulation by gluing several layers of STP or Shumoff materials. We will select options with different soundproofing capabilities that will minimally weigh down the body. This complete treatment will make the car interior more comfortable.
- And most importantly, do not give up anti-corrosion treatment on the outside of the bottom. We use only proven compositions of bitumen and polymer mastics. Coatings of this class extend the service life of the metal by 3-4 years. It would also be a good idea to check the condition of the anti-corrosion protection on the wheel arches, trunk floor, and rear side members. These areas are just as susceptible to rust as the bottom itself.
Upon completion of all agreed upon work, we begin reassembling the machine. All equipment that has been dismantled will be connected with a mandatory performance check. By the way, if you have a desire, we are ready to make changes to the interior of the cabin; styling provides ample opportunities for this.
To buy and replace the bottom of the car completely or partially, leave a request on the website or call us. If it is impossible to get to the service center on your own, we will provide a tow truck.
Types of service
Overcooking the bottom of a VAZ-2112 car can be:
- Using semi-automatic welding equipment:
- Using gas welding.
Depending on the location of the repair, the service is:
- In the garage of a private master.
- On the territory of the car service center.
- At the location of the client's car.
Depending on the time that the client allocates for work, overcooking occurs:
- Urgent.
- Not urgent.
According to the performer, overcooking is classified into:
- Professional.
- Independent.
Causes of rust and preventive measures
The first versions of the VAZ 2110 were characterized by the fact that their paintwork began to peel off in the area of the windshield frame. The problem began to develop from the seal and gradually spread to the entire body element.
Soon the manufacturer changed the painting and installation technology, but still the problem of a body that was not resistant to corrosion could not be completely overcome.
We will look at the main reasons for the probable appearance of rust on the sills, bottom, arches, and side members. We will also give some tips on how to deal with them.
| Causes | Prevention measures |
| Age | After 5-7 years, traces of corrosion may appear on the body and bottom. There are no remedies against age, so listen to the following protective measures |
| Accidents and accidents | It is easy to advise avoiding accidents. In this case this is the only recommendation |
| Poor quality repairs | Do not try to save money on body repairs, since an unqualified specialist will not really do anything, but will only waste your time and money. Choose experienced, proven craftsmen and service stations |
| Weather | The worst thing is snow and rain. Try to knock down and wash away the snow stuck under the bottom. Especially if you often drive on roads sprinkled with salt or snow and ice melters. |
| Humidity in the garage | Think about the issues of moisture protection of the room; in winter, periodically turn on the heater or heat fan in the garage in order to at least partially combat the high level of rust |
| Driving on gravel | Small stones destroy the anti-gravel coating within a year, after which corrosion begins to appear. Avoid such roads, carry out periodic preventive maintenance |
| Moisture in the cabin | It gets through wet shoes and snow brought into the cabin. As a result, the bottom begins to rot from the inside. Be sure to lay down rubber mats with sides in winter; be careful that water does not get inside the cabin during rain or car wash. |
To increase the service life of the underbody of your own car, periodically perform anti-corrosion treatment. Pay special attention to the hidden cavities of the side members and sills.
Rusted thresholds
Problem Definition
It is not difficult to determine the presence of rust on the bottom. Although if you bought the car second-hand, these problems can be carefully disguised.
- Be sure to inspect the body from below. Traces of corrosion may be hidden behind a layer of anti-gravel coating or putty. Use a hammer or awl to hit these areas lightly. If rust is present, you will see it.
- Check the condition of the body along the thresholds, in the cabin at the feet of the driver and front passenger. It is these places that are quite weak in the case of the VAZ 2110.
- If the bottom is rotten, you can notice this by the sagging of the floor under your feet under load.
- When the driver's seat comes off or cannot be moved, a rotten body may also be the cause.
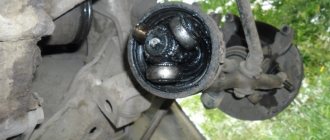
- One of the most unpleasant situations is rotten thrust pads designed for lifting a car on a jack. But this way you will immediately determine that there are problems and they need to be solved.
Approximate price
On average in Russia, it costs 8,500-29,000 rubles to digest the bottom of a VAZ-2112 car. Price of works included in this amount:
- Purchase of electrodes (about 3 kg per car) - from 550 rubles per 3 kg .
- Two cutting wheels for an angle grinder, two spare ones - about 270 .
- A pair of metal brushes for a drill - from 200 .
- Degreaser and Solvent – 150-160.
- Paint - from 700 rubles .
- Epoxy glue - about 200 rubles .
- Rubber-bitumen mastic – 150.
- Polymer-bitumen mastic – from 350 .
- Rust converter - about 85 .
- Large Movil cylinder – 345.
- Paint brushes – approx. 160.
- Two amplifiers under the seat - 400.
- A pair of corners - 300 rubles .
- Floor panel – 4500.
- Jacks - 160 rubles for two pieces .
- The work of a car mechanic costs about 20,000 rubles .
If you independently overcook the bottom of a VAZ-2112 car, using the cheapest spare parts, the costs will be limited to 8,500 rubles . When purchasing consumables and equipment in a specialized store, repairs will cost 11,500 rubles . Restoring the bottom of a car in a car service costs about 29,000 rubles .
Protective polishing of the body
Protective body polishingfrom 3,000 2. Slipworks.installing a car on a slipwayfrom 3,000elimination of a simple misalignment of a car bodyfrom 3,000elimination of a misalignment of a medium-complex car bodyfrom 6,000elimination of a complex misalignment of a car body of a foreign car from 8,000removing the front bumper of a car assembly from 500installing a front bumper of a car as an assembly from 500removing the rear bumper of a car as an assembly from 500installation of a rear bumper of a car assy from 500 rear bumper dismantling from 500 car rear bumper - assemble from 500 front bumper disassembly from 500 car front bumper - assemble from 500 car front door - disassemble, assemble for painting from 1,000 rear car door - disassemble, assemble for painting from 1,000 foreign car door front, rear - replacement with reinforcement overhaul from 1,500 car front, rear door assembled - replacement with adjustment according to the opening from 1,500 side mirror of foreign cars without electric drive - replacement from 500 side mirror of foreign cars with electric drive - replacement from 500 replacement of front headlight from 500 replacement of tail light from 500 Replacement of car hood from 1,000 Replacement of car trunk lid from 1,000 Replacement of front removable fender from 1 000Replacing the roof of a car without a sunroof in assembly 6,000Replacement of a car roof with a sunroof assemblyfrom 7,000Replacement of a front side member with a mudguardfrom 3,500Replacement of a car's rear panel from 3,500Replacement of a car's front panel from 2,000Replacement of a car's side sill assembly from 3,000Replacement of the center pillar with a part of the sill from 6,000Repair No. 1 of the side of a car - sedan7,000Repair No.2 of the car side - sedan8,000Repair No.3 of the car side - sedan9,000Repair No.4 of the car side - sedannegotiableRepair of the car side - station wagon No.17,000Repair of the car side - station wagon No.28,000Repair the car side - station wagon No.39,000Repair the side of the car - station wagon No.4negotiablerepair of the mudguard front car No. 11 000repair of front car mudguard No. 22 000repair of front car mudguard No. 32 500repair of front car mudguard No. 4 negotiablerepair of front car door No. 19 00repair of rear car door No. 19 00repair of rear car door No. 21 5 00repair of front car door No. 21 5 00repair of front door car No. 32 500repair of the rear door of car No. 32 500repair of the front door of car No. 4 negotiablerepair of the rear door of car No. 4 negotiablerepair of the hood of car No. 19 00repair of the hood of car No. 21 5 00repair of the hood of car No. 32 500repair of the hood of car No. 4 negotiablerepair of the front fender of car No. 15 00repair of the front fender of car No. 21,000repair of the front fender of car No. 31,500repair of the front fender of car No. 4 negotiablerepair of the roof panel of the car No. 11 0 00repair of the roof panel of the car No. 22,000repair of the roof panel of the car No. 33,000repair of the roof panel of the car No. 4 negotiablerepair No. 1 of the trunk lid of the car, 5th door 9 00repair No. 2 car trunk lid, 5th door1 5,00repair No. 3 of a car trunk lid, 5th door2,500repair No. 4 of a car trunk lid, 5th door negotiablerepair of the rear panel of a car No.11,500repair of the rear panel of a car No.22,000repair of the rear panel of a car No.33,500repair of the rear car panels No. 4 negotiablerepair of sidewall threshold of foreign cars cost 1,000 Restoration of cloudy plastic headlights of foreign cars cost 1,000 Abrasive polishing of the car body from 4,000 Protective polishing of the car body 5,000 - 10,000Complete wheel arch repair
One of the next days we took on the complete repair of the wheel arch, which was also noticeably rotten. I had to remove the stand to make it easier to work with. There is nothing special to tell here, the scheme of work is the same:
- we remove everything that gets in the way, both in the arch itself and under the hood;
- cut out rotten areas;
- cover them with a steel sheet;
- and cover with mastic.
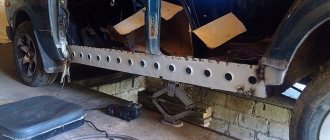
We welded the extensive rotten area behind the counter with a 3-mm steel sheet, because... it is subject to stress. The remaining patches are cut from the same millimeter sheet.
On the same day, inside the threshold, for its durability, I poured about 100 ml of waste through the drilled hole and plugged it with a plastic plug. It is clear that the entire car body will rot sooner than a pipe with a 2 mm wall, but it’s still safer.
Then we finally assemble everything, install the wing, fender liner, plastic trims, seats and you’re done. By the way, under the plastic sill trim the pipe is completely invisible. You need to look underneath to notice that the sills and areas of the bottom have changed.
That’s all for this part, now I’ll briefly talk about door hinges and let’s summarize.