The condition of the car largely depends on the body. The suspension can be “rebuilt” by replacing worn and faulty parts. The engine's attachments are also repaired or replaced; in severe cases, major repairs or complete replacement are performed. Body work determines the appearance of the car and, in many ways, its service life.
New VAZ 2110 from the showroom with an ideal body
What is this?
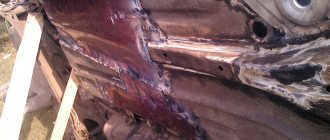
Re-welding the bottom means updating the floor of the car using welding equipment and a number of tools. The bottom of the car is the most vulnerable place. It takes on mechanical damage, the negative effects of active chemicals, and dirt. Most often you have to deal with the corrosion process.
Overcooking the bottom of a VAZ-2112 may be required in the following cases:
- The bottom is covered with rust.
- There are holes.
- There are big cracks.
- The bottom has become thinner.
In these cases, auto technicians recommend overcooking. This work is labor-intensive and expensive. To repair a car, you need to do a number of these steps:
- Find a service station that restores VAZ-2112 cars.
- Contact the administrator and ask him about the terms of cooperation and approximate prices for services.
- Agree on a time to come to the master or call a specialist.
- Provide your vehicle to the mechanic.
- After a professional inspection, negotiate the exact cost of the work and the time frame for its completion.
- Give consent for repairs.
- Accept the job.
- Pay the specialist the previously agreed amount of money.
- Receive a warranty card for the work done.
The wizard performs a number of such actions:
- Inspects the bottom of the car.
- Makes a decision about the need to digest it.
- Cuts out the damaged part.
- A patch is welded to this place.
- Treats the area with an anti-corrosion compound, sealant and mastic to increase resistance to external negative influences.
- Provides the restored car to its owner.
For work, the specialist uses a semi-automatic welding machine, gas welding.
When is repair required?
The first copies of the tenth family had a characteristic feature - the paintwork on the windshield frame peeled off at the top, starting from under the seal. Then this disease was overcome by changing technology, but the weaknesses remained.
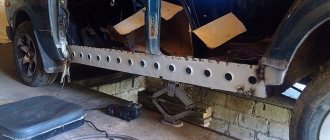
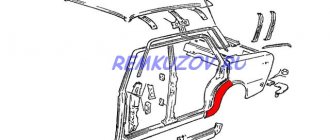
Already on five- to seven-year-old cars, corrosion on the sills is very likely, and ten-year-old cars necessarily require monitoring of the bottom, arches, and side members.
Rotten thresholds
They accelerate the appearance of rust and through corrosion, damage in road accidents followed by incomplete or unqualified repairs, difficult operating conditions on bad roads in winter and in bad weather, storage in conditions of high humidity.
Regular anti-corrosion treatment done at a service center or with your own hands will help extend the life of body parts; it is especially necessary for the hidden cavities of the sills and side members, this power “skeleton” of the car.
The bottom is corroded on both sides. From below he is attacked by dirt and water from the road. If the anti-gravel coating is damaged, the first spots appear literally within a year; after 2–3 years, with intensive use, corrosion becomes through.
Through corrosion of the bottom
In the cabin there is a carpet on the floor, under which there are layers of vibration-insulating and noise-absorbing materials. If water or snow gets into the bottom trough, for example from shoes, the coating gets wet and does not dry well. Increased constant humidity leads to corrosion of the bottom from the inside of the cabin and the need for repairs. To prevent this, use rubber mats with sides, and make sure that no water gets into the interior during rain or when washing.
Corrosion due to moisture under soundproofing material
A rotten bottom is revealed when viewed from below; under a layer of putty or anti-gravel, the holes may not be visually noticeable, but light blows with a hammer or pricks with an awl will immediately reveal the defect. Corrosion most often appears along the sills and in the driver's and front passenger's feet.
In the cabin, poor condition of the bottom will be indicated by sagging of the floor under your feet under load, in extreme cases, the breakdown or impossibility of fixing the driver's seat. And, of course, there is a frequently encountered situation when, when lifting a car on a jack, the special thrust pads for the jack break due to corrosion.
Types of service
Overcooking the bottom of a VAZ-2112 car can be:
- Using semi-automatic welding equipment:
- Using gas welding.
Depending on the location of the repair, the service is:
- In the garage of a private master.
- On the territory of the car service center.
- At the location of the client's car.
Depending on the time that the client allocates for work, overcooking occurs:
- Urgent.
- Not urgent.
According to the performer, overcooking is classified into:
- Professional.
- Independent.
Let's get to work. Preparation
So first we need to prepare the car. We drive it into the garage and dismantle the interior. It is advisable that the room has an inspection hole. Depending on the scale of the work, we will need to remove one or more seats, as well as part of the carpeting, which comes standard from the factory.
At the next stage, we cut out the rotten sections of the floor with a grinder. We also cut out the metal whose thickness is less than the factory thickness - after repair it can rust again.
Please note that fuel and brake pipes, as well as the exhaust system, run under the bottom.
And the tank is hidden under the rear sofa. If a major overhaul is being carried out, all these elements should be dismantled.
Next, carefully clean all the seams with sandpaper. You can use a special drill attachment. The remaining traces of rust are treated with a zinc converter. Be careful: he is very aggressive. Therefore, we work exclusively in protective gloves.
If the scale of the work is very large and almost the entire element had to be cut off to restore the bottom of the VAZ-2110, it is important to ensure the rigidity of the body. We install wood spacers in the doorways.
Approximate price
On average in Russia, it costs 8,500-29,000 rubles to digest the bottom of a VAZ-2112 car. Price of works included in this amount:
- Purchase of electrodes (about 3 kg per car) - from 550 rubles per 3 kg .
- Two cutting wheels for an angle grinder, two spare ones - about 270 .
- A pair of metal brushes for a drill - from 200 .
- Degreaser and Solvent – 150-160.
- Paint - from 700 rubles .
- Epoxy glue - about 200 rubles .
- Rubber-bitumen mastic – 150.
- Polymer-bitumen mastic – from 350 .
- Rust converter - about 85 .
- Large Movil cylinder – 345.
- Paint brushes – approx. 160.
- Two amplifiers under the seat - 400.
- A pair of corners - 300 rubles .
- Floor panel – 4500.
- Jacks - 160 rubles for two pieces .
- The work of a car mechanic costs about 20,000 rubles .
If you independently overcook the bottom of a VAZ-2112 car, using the cheapest spare parts, the costs will be limited to 8,500 rubles . When purchasing consumables and equipment in a specialized store, repairs will cost 11,500 rubles . Restoring the bottom of a car in a car service costs about 29,000 rubles .
How to extend the life of the bottom?
These tips are suitable for those who have already repaired the floor on the “ten”, and those who still have a living copy. So, the first rule is frequent washing. Typically, car owners pay attention to the upper part of the body. But you also need to wash its hidden cavities. This is especially true for those who live in large cities and operate their cars in winter. The stuck salt will not go away until it is removed with a powerful stream of water.
The next rule is regular treatment of the bottom. Over time, the old anticorrosive agent is washed out and peels off. Once a year you need to check its condition and, if necessary, renew the layer. If pockets of corrosion have already appeared on the surface (but not through), we treat them with a converter, and then with a thick layer of mastic. As for the thresholds, they have drainage holes. There is no point in treating them externally with anti-corrosion agent - the water is inside. Therefore, in dry and warm weather, we take a can of Movil and pour it through a thin tube (it usually comes included) inside. After a year, this procedure should be repeated. This is the only way to ensure complete protection against rust for the bottom and sills. If the problem occurs in winter, you can apply a temporary measure - clean the rusty surface and apply anti-corrosive agent locally to the area. And with warming, treat the entire perimeter.
Anti-corrosion treatment
We start processing the car from the bottom. The bottom is processed by applying mastic that does not dry out. Anticorrosive coating can be applied with a brush or under pressure. After application, the composition strengthens over time and does not give corrosion a chance to eat away at the metal.
The bottom of the “ten” after treatment with mastic
Next comes the processing of thresholds. On the outside, the thresholds are also treated with mastic, and on the inside with a liquid composition for hidden cavities, in order to protect the thresholds from rust as much as possible.
When carrying out work to protect the bottom, it is also necessary to treat the gas tank, which is also covered with rubber-bitumen mastic.
There are two ways to process wheel arches:
- Apply rubber bitumen mastic and install wheel arch liners.
- Apply liquid fender liners.
Liquid fender liners are very convenient to apply, but the mastic has noise-insulating properties. Therefore, after applying it, the cabin becomes quieter. Rubber fender liners do not have this property, but they perfectly protect the metal of the arches from rust.
The doors and hidden cavities of the body are processed last. A liquid composition is applied, namely Movil. It is produced in the form of an aerosol, which allows you to easily reach hard-to-reach places.
Before applying the anticorrosive agent, carefully study the instructions for use, since each protective composition is individual and can be applied in different ways and under different conditions.
↑ Front suspension design of VAZ 2110
1 – ball joint, 2 – hub, 3 – brake disc, 4 – protective cover, 5 – swing arm, 6 – lower support cup, 7 – suspension spring, 8 – telescopic strut protective cover, 9 – compression buffer, 10 – upper support cup, 11 – upper support bearing, 12 – upper strut support, 13 – rod nut, 14 – rod, 15 – compression buffer support, 16 – telescopic strut, 17 – nut, 18 – eccentric bolt, 9 – steering knuckle, 20 – front wheel drive shaft, 21 – joint protective cover, 22 – outer shaft joint, 23 – lower arm
VAZ 21099 Engine and its systems
1.Unscrew the fastening bolts and remove the crankcase protection.
2. Remove the muffler exhaust pipe (see subsection 11.6.1.). 3. Remove the air filter (see subsection 11.2.).
4. Loosen the clamp and disconnect the brake booster vacuum hose from the engine inlet pipe. 5. Unscrew the bolt and disconnect the ground wire from the clutch housing. 6. Loosen the clamps and disconnect the hoses from the thermostat.
7. Disconnect the high-voltage wire from the central terminal of the ignition distributor cover. 8. Use a screwdriver to press out the spring clip and disconnect the block with low-voltage wires from the ignition distributor terminal.
9. Loosen the clamp and disconnect the fuel supply hose from the fuel pump.
10. Loosen the nuts on the end of the clutch release cable. 11. Remove the cable end from the clutch release lever. 12. Disconnect the block with the wire from the starter traction relay terminal.
13. Unscrew the fastening nut and disconnect the wire from the contact bolt of the starter traction relay. 14. Disconnect the block with the wire from the generator terminal. 15. Unscrew the nut and disconnect the wires from the generator terminal.
16. Disconnect the connector with the wire from the carburetor shut-off solenoid valve terminal. 17. Loosen the clamp and disconnect the fuel return hose from the carburetor. Remove the hose from the plastic clamp. 18. Loosen the bolt securing the choke rod to the choke control lever.
19. Loosen the bolt securing the air damper drive rod shell to the bracket and disconnect the cable. 20. Remove the spring clamp of the accelerator drive cable from the throttle valve drive sector. 21. Remove the throttle actuator return spring.
22. Remove the accelerator drive cable from the throttle valve drive sector. 23. Unscrew the fastening nut and remove the accelerator cable bracket from the valve cover. 24. Disconnect the block with the wire from the limit switch of the forced idle economizer (EFH).
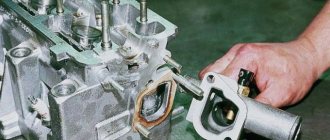
25. Disconnect the wire from the coolant temperature sensor. 26. Disconnect the wire from the oil pressure sensor. 27. Loosen the clamp and disconnect the heater supply hose.
28. Loosen the clamp and disconnect the heater outlet hose. 29. Loosen the clamp and disconnect the gear shift rod from the joint tip. 30. Unscrew the fastening nut and disconnect the cable from the speedometer drive.
31. Disconnect the block with the wire from the reverse light switch on the gearbox. 32. Loosen the nuts securing the left and right braces to the suspension arms. 33. Unscrew the three bolts securing the brace bracket to the body and move the left and right braces to a position so that they do not interfere with the removal of the power unit.
34. Remove the cotter pin from the tie rod ball joint nut to the swing arm. 35. Unscrew the nut securing the steering rod ball joint. 36. Press the steering rod ball joint pin out of the strut swing arm using a special puller.
37. Remove the two bolts and disconnect the ball joint of the suspension arm from the steering knuckle. 38. Using a pry bar, press the shank of one of the inner CV joints of the drive shafts out of the gearbox and move it to the side. 39. Insert a technological mandrel (for example, an old internal CV joint) instead of the hinge so that the side gear does not turn. After this, disconnect the second CV joint in the same way as the first.
40. Unscrew the three mounting bolts and remove the clutch housing shield. The operations specified in paragraphs 40 and 41 are performed to facilitate work on the removed engine with the gearbox. 41. Loosen the three bolts and nuts securing the clutch housing to the cylinder block. 42. Hook the engine onto the eyelets and tighten the hoist cables.
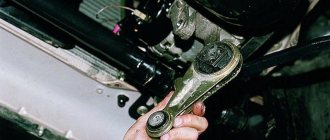
43. Unscrew the two nuts securing the rear support of the power unit to the body. 44. Unscrew the nut, slightly lift the engine and remove the bolt of the right front power unit support. 45. Unscrew the nut and remove the bolt of the left front support of the power unit.
46. Lower the engine onto stands, lift the car and remove the engine from under it.
Before lowering the engine, check that all wires and hoses are disconnected from the engine.
↑ Design description
Front suspension
– independent with telescopic hydraulic shock absorbers, helical coil springs, lower wishbones with braces and a stabilizer bar. The basis of the suspension is a telescopic hydraulic shock absorber strut 16. Its lower part is connected to the steering knuckle 19 with two bolts. The upper bolt 18, passing through the hole in the rack bracket, has an eccentric collar and an eccentric washer. By turning this bolt, the camber of the front wheel is adjusted. The telescopic strut is equipped with: a coil spring 7, a polyurethane foam compression stroke buffer 9, as well as an upper strut support 12 assembled with a bearing 11.
Prevention measures
As you know, why repair a very rotten bottom if something like this can be postponed. To do this, it is necessary to follow preventive measures. Of course, if the cause of corrosion is age, then no amount of prevention will help. However, there are factors that should be taken into account in order to minimize the risk of damage to the bottom:
- avoid accidents and drive a car following all traffic rules;
- give your car for repair only to a trusted specialist who is able to do the job efficiently;
- wash away accumulated snow in winter;
- avoid rooms with high levels of humidity in the air;
- try to drive on good roads;
- Eliminate the possibility of moisture getting into the interior, because otherwise it will not be possible to avoid rotting of the bottom right from the inside of the cabin.
It is equally important to treat the bottom with special anti-corrosion agents - they will also help your body serve for several more years without repair. When preventive measures have not been taken and rust has already appeared on the bottom, it’s time to start repairs.
