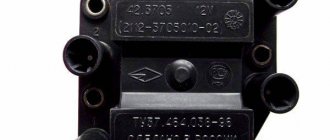
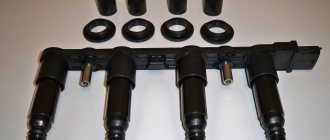
One of the important elements of the ignition system necessary for igniting the working combustible mixture in the internal combustion engine of a car is the ignition module (ignition coil). The VAZ 2110 ignition coil converts low-voltage voltage into high-voltage, which creates a spark on the spark plugs.
It is quite obvious that if a malfunction occurs in the ignition, first of all the spark plugs, wires, caps, and then the ignition coil itself are checked for functionality.
In other words, you need to know how to test module 2110 (ignition coil). Next, we will look in more detail at what it is and how to check the ignition module, what malfunctions occur and how to fix them.
Description and purpose of the car part
The ignition module for the VAZ 2114 is an important spare part of the ignition system. Without it, it is impossible to start the engine. It is responsible for creating a spark on the candles. The composition includes 2 coils with a closed magnetic circuit and a channel switch . Installation of defective or damaged parts or inappropriate components into this system may result in no or weak spark discharge on one or all spark plugs. The cause of unit failure is its natural wear and tear.
The following signs indicate the need to look for a working ignition module on the Lada 2114:
- Engine tripping.
- Power drop.
- Difficulty starting a cold engine.
SOATE ignition module - price 2690 rub.
How to disassemble the ignition module of a VAZ 2110
Many car owners are faced with the problem of their car not starting. If it suddenly turns out that high voltage has disappeared on the cylinders (either only on one, or on several at once), or the warning lamp does not light up, there is no spark, then the engine will not work. The ignition module may have failed. It's not always worth rushing to stores to look for something new.
Those who own a VAZ-2110 car are offered an alternative - repairing the ignition module themselves. The main thing is to have basic knowledge of auto electricians and the ability to understand circuits and contacts. It’s also a good idea to know how to use a digital multimeter in your work.
In order to disassemble the ignition module, you will also need knowledge of its components. This is a pair of ignition coils designed to excite high-voltage pulses, and a two-channel switch. Basically, high-frequency pulses can disappear in the 2nd and 3rd cylinders. You will have to start by removing the ignition module. The high-voltage wires are disconnected, then the VAZ-2110 ignition module itself is removed.
Unscrew the bolts
We get the board
Reassembling the sensor in reverse order
The essence of the repair is as follows:
- To open the aluminum plate you will need a straight screwdriver.
- Looking at the inside of the module, it may seem that everything is very complicated. Attention should be paid to the printed circuit board, which is coated with transparent silicone. The sealant is removed. To make the wires with which the board is connected to the contacts of the connectors and coils, too soft aluminum is used, so they become unusable. Such wires are torn off and thrown away. What should I put in place?
- You will need a computer mouse, which will have to be disassembled. It only requires stranded wires.
- The ignition module circuit includes two L497D1 switches, which are also manufactured by two fairly powerful transistors. The contacts are aluminum, so for soldering you will need a special flux for aluminum.
- First, the wires are soldered to the board itself. During manufacturing, the collectors are coated on top with a special metal that cannot be soldered. Therefore, before soldering the wires, the coating is removed from the metal.
- Then the plate is placed on the stove and heated to one hundred and eighty degrees, the heat will be distributed throughout the plate. This is important so that when the soldering iron comes into contact with the plate, the heat does not dissipate from it.
- Now you can proceed directly to soldering the wires to the module contacts. Try to make the wires as short as possible. Next, take a varnish (the varnish you use to paint your nails will also work), and use it to insulate the joints.
- Next, you need to check the ignition module. It must be functional. And the final touch: the inner surface is coated with autosealant, after which the assembly is completed. The wires should be positioned freely and not be pinched.
The work is not that difficult, and can be done by anyone who can work with a soldering iron and have basic knowledge of electronics.
If after repair it turns out that the cause of the malfunction was different, then this reason needs to be found, or go to the store for a new module.
What affects the cost of a car part?
An ignition module for a Lada 2114 can cost varying amounts of money. The cost of a part depends on its technical characteristics:
- Design features.
- State.
- Quality.
- Variety.
Other factors influencing the purchase price include the following:
- Place of purchase.
- Manufacturer of spare parts.
- Seller's pricing policy.
- Delivery required.
Ignition module ATE-2 - price 2090 rub.
Installation Guide
How to install BSZ with your own hands on the “seven”? How to properly set and adjust the device? First you need to prepare everything you might need.
Tools and materials
To complete this task you will need:
- a set of keys;
- self-tapping screws;
- screwdriver set;
- construction drill.
Stages
Installation of electronic ignition must be carried out on a de-energized on-board network, otherwise a short circuit may occur in the system.
So disconnect the battery and then follow these steps:
- Disconnect all high-voltage wires from the spark plugs.
- Dismantle the distributor cover.
- After this, by rotating the crankshaft, it is necessary to set the slider to a position perpendicular to the axis of the power unit. Also mark the location on the middle mark of the distribution element scale, this will allow you to make adjustments without any problems in the future.
- The distributor fixing nut must be unscrewed, after which the device is dismantled.
- A non-contact regulator is installed instead of the dismantled distributor, while the slider and housing must be placed in the desired position in accordance with the previously established marks.
- The device cover is installed.
- Then you need to connect the high-voltage cables with the spark plugs.
- After completing these steps, you can replace the coil. In general, this task is quite simple, but when performing it, you should take into account the position of contacts B and K. If they are different on the new short circuit, then the element should be rotated relative to the fastener so that the contacts are located similar to the one that was installed previously.
- At the final stage of installation, the switch is installed; the best option would be to place it between the washer expansion tank and the headlight. The mechanism is fixed using self-tapping screws, and the so-called zero wiring should be brought out under one of them. As for the radiator, it should be leaned against the body.
Types of spare parts
Depending on the design features, the following ignition modules are distinguished:
- Standard.
- With dual coils.
- Selective (consist of several coils for better system operation).
You can purchase a car part:
- New sample.
- Old style.
It is possible to purchase spare parts for this motor:
- Sixteen-valve.
- Eight-valve.
You can install such a device on a VAZ 2114, taking into account its manufacturer:
- Original.
- Unoriginal.
Depending on the country of manufacture, a spare part can be:
- Domestic.
- Foreign.
You can buy and install an ignition module on a VAZ 2114 for the following purposes:
- Restore machine functionality.
- Improve engine starting.
Depending on the technical condition, the following parts are distinguished:
- New.
- Used.
You can buy spare parts from this brand:
- AutoTrade.
- SOATE.
- Auto Technologies Group.
- ATE-2.
- Bosh.
- Auto electronics.
- Lucas.
- MZATE.
- Omega.
At the place of purchase, the part is:
- Purchased at a car market.
- Taken directly from the manufacturer's warehouse.
- Ordered from the online store.
- Purchased at a car dismantling station.
- Taken from a private person.
- Purchased from a local auto parts store.
Bosch ignition module - price 3640 rubles
Diagnostic procedure
The diagnostic procedure can be as follows:
Disconnect the connector with signal wires from the module.
Remove the connector from the module by moving the lock slightly and pulling the wire.
Turn on the ignition and check the voltage at terminal 15 (central) of the control wire block. The rated voltage is 12 V. A drop or absence of voltage when the battery is charged indicates that the engine control unit does not supply power to the module. This means the reason lies in the ECU.
We check the voltage between pin 15 and the block ground.
We remove the high-voltage wires, unscrew the module mounting bots and remove it.
Using a 13mm wrench, unscrew the bolts attaching to the cylinder block.
Unscrew the bolts securing the clutch housing.
Remove the module along with the bracket.
We check the resistance of the primary windings of the coils - put the multimeter in resistance measurement mode and take readings from the rightmost and central terminals, then from the leftmost and central terminals. The nominal resistance of the primary windings is approximately 0.5 Ohm.
Scheme for checking the primary windings.
We measure the resistance of the secondary windings between terminals 1-4 and 2-3 high-voltage wires. Nominal value: 5.4 kOhm. If the readings do not correspond to the nominal value, the coil is not working correctly.
Scheme for checking secondary windings.
Check the module for a short circuit. To do this, install one tester probe on the central pin 15, the second on the metal body. The device should show the absence of a short circuit (one or infinity). Otherwise, one of the coils has shorted to the housing.
Scheme for checking the module for short circuit.
Approximate prices
In domestic stores, a new ignition module for Lada 2114 is sold for 1250-3640 rubles . Approximate prices for parts from different companies are shown in the table below.
| Brand | Country of issue | Cost in rubles |
| Omega | Russia | 2190 |
| SOATE | Russia | 2690 |
| Auto Technologies Group | Czech | 3000 |
| ATE-2 | Russia | 2090 |
| Pramo | Russia | 2000 |
| Bosch | Germany | 3640 |
| MZATE | Russia | 1930 |
| Autoelectronics | Russia | 1250 |
Ignition module MZATE - price 1930 rub.
A used ignition module can be purchased for 400-1700 rubles , depending on the condition of the part, its manufacturer and technical characteristics.
You will have to pay additionally for delivery. The cost of such a service depends on the tariff policy of the transport company and the distance from the seller to the buyer. On average, delivery throughout Russia costs 200-500 rubles .
Signs of coil malfunction 2109
In this scheme, the role of the coil cannot be overestimated. As soon as it loses its performance, at least partially, this is fraught with a complete stop of the engine. The meanness of the device lies in the fact that it happens completely unexpectedly, without any prior warnings or moral preparation of the driver. Although an attentive driver may still notice some deviations in the operation of the engine, which can be expressed in the following:
- 400-500 km before failure, the coil works properly on a cold engine only after 1-2 minutes of warming up. Before this, the engine starts, but convulses, which is most often attributed to debris in the idle system. At the same time, malfunctions may appear in transient operating modes of the engine at low speeds, up to approximately 1000 rpm. They are also difficult to calculate, since the motor fails for no more than 30 seconds, after which everything falls into place.
- Another short-term symptom is that when the engine is cold started and the accelerator pedal is pressed, the engine begins to actively rev up, but this also only happens for a few seconds; engine operation returns to normal after the pedal is released and pressed again.
- During acceleration and when changing gears, temporary disruptions may occur in the form of jerking, vibration, and deterioration in dynamics, but the symptoms disappear as suddenly as they appeared. This can also last a few seconds, but repeats itself more and more often.
- Stop car. The engine refuses to start, there is no spark at all.
