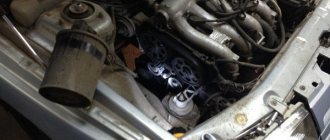
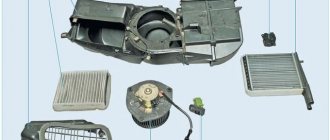
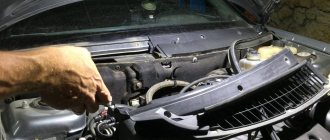
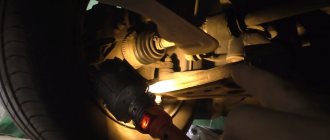
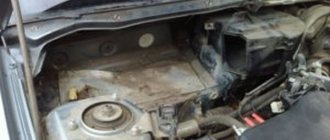
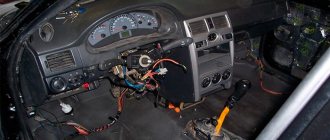
A month ago I bought an air conditioning compressor bearing (NSK 32BD45A1T12DDUCG21) for 370 rubles. But everyone couldn’t get around to changing it. And then yesterday, returning from nature, I felt a vibration when moving. I arrived, opened the hood, climbed around and realized that the vibration was coming from the generator-compressor area. Well, I think it's time to change the bearing. I arrived at the garage and began to remove the compressor according to the instructions found on lkforum.
1. Loosen the tensioner and remove the generator belt from the pulleys. 2. Remove the crankcase protection and the lever extension (saber) - it will interfere (I just unscrewed the crab - that's enough). 3. Using a 10mm wrench, loosen the coupling mounting bolt (insert a screwdriver between the two protrusions so that the pulley does not rotate when unscrewing the bolt.) 4. Unscrew the 4 compressor mounting bolts from the bracket. You will need a 12-mm socket bent wrench - the top bolts are in a hard-to-reach place (if you don’t have such a wrench, then removing the generator is inevitable). 5. Lower the compressor down, leaving it hanging on the hoses. They are durable, and the compressor is lightweight (in my case it lay on a saber, it is very convenient to disassemble it later). 6. Using a 10″ wrench, unscrew the bolt securing the coupling and remove it. Important! don't lose the spacer (I didn't have one). 7. Remove the locking ring using expanding pliers. 8. Next, take a small three-jaw puller and hook the paws onto the pulley. The bearing is in the pulley. 9. Removed, now for pressing. The bearing is simply sealed, there are no more retaining rings. Important! We place the supports clearly along the outer edge (on the flat part of the pulley), which is the limiter for the landing of the bearing. 10. Press the new one through the old bearing. You can hammer it with a blunt chisel - the metal is soft. 11. Install the pulley back, striking the inner race of the bearing through a suitable mandrel. The head fits 30. Doesn't fit 27! 12. Reinstall the coupling, protection, etc.
How to detect a faulty air conditioner bearing?
This trouble manifests itself in the form of a whistle coming from under the hood, as well as in the form of play, which can be felt with effort. Some inexperienced craftsmen may well give the wrong verdict; for example, they may suspect other bearings, for example, a water pump or a generator, to be causing the “whistle”. However, an experienced specialist will immediately determine what’s what with one simple manipulation. We remove the belt that drives the Condera pulley and start the engine; if there is no whistle, then we can say with certainty that the reason is in the Condera clutch bearing.
To work we need to have:
- Tool set + jack + TORX screwdrivers;
- Chisel for making notches on the pulley;
- Bearing (air conditioning compressor bearing code - 305222).
How to replace an air conditioning compressor bearing on a Priora at home
- We place a jack under the front right wheel, remove the bolts on the wheel and jack up the wheel. Next, completely unscrew the bolts and remove the wheel.
- Using an “8” key and a TORX, unscrew the fasteners of the mudguards and anthers, then remove them.
- Using the “8” socket, you need to unscrew the coupling mounting bolt, and then carefully remove the top cover of the coupling. Be careful not to lose the puck.
- We remove the retaining ring that secures the coupling pulley to the compressor shaft, then we remove all this equipment and knock the bearing out of the seat. If your bearing is cored, that is, seated, and then fixing notches are applied around the circumference, then it will be more difficult to get the bearing out. It is best if pressing and pressing is done using a press; without it, everything can be ruined.
- We take a new prepared bearing and press it into place; if you do not have a press or device for this, you can go to the nearest service station, they will help you without any problems.
- Now we take a chisel or similar device and use a punch to make notches in a circle, thereby fixing the bearing inside the pulley.
That's all the pain, all that remains is to put everything back together in the reverse order, put on the belt and check if the whistle is gone. That's all for me, the work is done, I hope you are happy with the result!? Goodbye everyone and see you again at VAZ Repair.
How to remove the Priora air conditioning compressor pulley
Why did you decide that it was a compressor? Your compressor electric coupling bearing has become damaged; it is located inside the compressor pulley, but it has become damaged due to the overtightened belt. Change it urgently before I screw up the rest
If you have the right hands, remember: In the pit, unscrew the compressor mounting bolts and place it on a board carefully so as not to damage the hoses, bend them, etc. 1 you unscrew the bolt in the middle of the pulley 2 you carefully remove the pressure plate with a screwdriver, bending it away from the pulley, without deforming the pulley (the pulley is bendable!) 3 you lose the spacer washers in the hole, cursing. 4 use a magnet to look for and collect the washers 5 use a three-legged puller to remove the pulley, inside the double-row bearing is stuck by spot welding, squeeze it out using a press, if the pulley bursts, consider it a lost cause, the pulley is powder-coated, you can’t restore it by welding, you can’t buy a new one separately from the compressor 6 instead of a double-row, you put two single-row ones I don’t remember the size, but in Bearing stores they always have them, they know your problem - 250 rubles, 7 you assemble in reverse order. in services they do this, only there they will also charge you money for draining - filling in the refrigerant - they are fooling suckers - I did all the operations myself - the amount of work is 2 hours with smoke breaks and squeezing out the bearing. Double row Japanese bearing for 1000 - 1500 - g@$but. 2 single-row Russians for 125x2 rule Good luck!
if the pulley bursts, consider it a lost cause, the pulley is powder-coated and cannot be repaired by welding; you cannot buy a new one separately from the compressor
As I understand it, if the clutch were to be turned off, it would make noise? It doesn’t make any noise when it’s off, yesterday we tormented the car for an hour at the service station, it made a noise a couple of times with the kanduk off, but this has never happened on the road
with the air conditioner on it should hum under load (dying bearing), when turned off it should be quiet/or lightly rustling. The pressure disk could also have been bent when the bearing was changed last time.
Take off the belt and turn the clutch/pulley by hand. Everything will become clear immediately. If the clutch with the compressor shaft rotates tightly with jamming and grinding noise from the inside of the compressor, replace the compressor. Everything else is a clutch/pulley/bearing.
Panasonic Priora air conditioner clutch bearing
Article tags: bearing replacement, bearing noise, bearing selection
A procedure such as replacing a bearing in a car air conditioning compressor is performed quite often, and there are completely objective reasons for this. The fact is that this part experiences increased loads, since it is forced to function whenever the engine is running, even regardless of whether the driver turns on the air conditioning or leaves it alone.
The fact that replacing the air conditioner compressor pulley bearing is really necessary and cannot be delayed in any way is evidenced by an unpleasant extraneous hum that occurs every time the car’s power unit starts. It is noteworthy that it manifests itself in different ways and under different conditions: sometimes only after the engine has warmed up, and sometimes only, as they say, “when the engine is cold.”
If noise occurs from the engine compartment, it is urgent to identify the source of the noise. Most often it is created by the drive belt rollers. But, if you clearly understand that the sound is coming specifically from the air conditioning compressor, then the reason for this, with a high degree of probability, is the air conditioner clutch bearing.
Why are air conditioners needed?
Today people spend a significant part of their lives in their cars. A car has long become a necessity for many citizens. Many cannot imagine life without him. And comfortable conditions in this four-wheeled friend play a big role. Driving in a car should be enjoyable and reduce fatigue, which significantly increases driving safety. First of all, it is necessary to ensure the flow of fresh air into the car interior, especially in winter, when the windows cannot be opened for ventilation in the cold. Almost all new cars are now equipped with so-called climate control units or air conditioners. This setting allows you to maintain the selected air temperature and reduce humidity in the car. In addition, it eliminates external noise, which also leads to fatigue, and various unpleasant odors. The rhythm of life forces people to stay in the car most of the time, and, accordingly, to get more done. A good climate, fresh air and normal temperature in the car affect the driver’s well-being, and this helps with driving and reduces accidents. Therefore, almost all new cars are equipped with air conditioning. Window blowing also improves visibility when fogging up.
The car has equipment such as the car air conditioning system. The center of this system is the compressor, which separates the high and low pressure sides. This system in a car works on the same principle as a home refrigerator, although the internal device is a little different, more “technical”.
REPLACING THE AIR CONDITIONER PULLEY BEARING ON PRIOR!
HAVE QUESTIONS? ASK! I WILL ANSWER. Video Rating: 5 / 5
Related posts:
19 Comments Already
Did you even remove the pulley with the viscous coupling? what condition is the bearing in? Is the retaining ring coming off? and also check how the electromagnet coil is holding! Pay attention on my video where exactly this washer is located!
AND THE WASH SHOULD BE IN LOVE WITH THE BASK.
Someday I’ll climb in and have a look again about the washer, it seemed to me that it looked like a washer on the shaft, but no matter how much I tried to unfasten it I couldn’t, I still decided that it wasn’t a washer. Now I'm racking my brain, if there is no washer, how to reduce the gap
I'll do this in the near future. I'll write what and how.
The control unit is similar to HALLA
firstly... try the engine without a drive belt and a generator! make sure the timing belt has nothing to do with it! and secondly on. ......the exact dimensions for you—NSK A32 30BD5222DUM6! And the VIN has nothing to do with it! just by bearing brand! but also check that the bearings in the generator are normal... I just changed them there soon too! sizes 6302 - front and 6202 - rear!
WHAT A CONDITION. CHALLAH? OR PANASONIC. LIKE PANASONIC……. YES?
not with a chisel, but through a brass insert along the inner ring of the bearing. The main thing is to choose a stop slightly larger than the outer diameter of the bearing itself. otherwise you can split the pulley itself!
Handsome! I was already thinking about stopping at the service station, I had already asked how much to fill the air conditioner... and here is this video)) nothing complicated. I just have a question: on the inside of the pulley - how did you wrap it along the outer diameter of the bearing?
By the way... I ordered a bearing in the “foreign cars” department just according to the dimensions.
Yes, just remove the pulley (about an hour) and check the markings! There are no mistakes in mine! because I have already ordered the bearing 3 times within a year! If you find out, unsubscribe!
Hello MsGekar. I have a problem, but it's a little different. The clutch gap is large. I've been looking around in the compressor and can't find the washer. As a result, I don’t know how to reduce the gap. The gap is kind of strange. At first it is about 2mm, so the clutch does not turn on, when I hit it with a hammer the clutch turns on. When disconnected, the coupling is disconnected to the required distance of less than 1mm, but somehow later the gap becomes larger again Video on Youtube. “Lada Priora: the air conditioning compressor clutch does not work”
Thank you very much! I've already removed the alternator belt and the noise goes away immediately. The generator is good, but the air conditioner is noisy, especially when turned on. The sound is as if something is growling or touching the timing belt area. I drove around and called stations, they don’t know of such a problem anywhere. They offer to come and disassemble and look at the bearing - which I can do myself. The only problem is that I can’t find a bearing of the same brand as yours. Everywhere they say: you are mistaken, the air conditioner requires 35BD5222 and everyone has it. (300-1000 rub.)
BY THE WAY …. I CHANGED THE BEARINGS ON THE GENERATOR...(WITH CONDITION) WITHOUT DRAINING THE COOLER... 4 HOURS OF WORK.
thank you... as I understand it, you knocked out the outer race of the bearing itself with a chisel from the inside? or some kind of puller?
Hello. I have the following problem: A rumble appeared in the timing belt area on a cold engine, now it growls at any temperature. I am sure that the sound is coming from the air conditioner drive bearing (Holla). Based on the data from your video, I visited all the stores in Saratov, but could not find a bearing with these dimensions. In stores for foreign cars they require a VIN code. Please tell me more specifically which foreign car, with what VIN code and dimensions the bearing for HOLLA is needed. I will be very grateful, thank you.
Clutch bearings - air conditioner pulley by numbers and article.
In the table below you can see the most common types of original bearings by size - numbers and article, intended for all brands and models of cars of the European, American, Korean or Japanese automobile industry, which we always have in stock.
| Air conditioner bearing dimensions internal - external diameter and width | Air conditioner bearing catalog numbers original and analogues from Koyo, FKC, Alpha HQ, DYZV, NSK, NACHI, MCB, MBS, JB, BWT | Car brands |
| 30x47x12 | DAC 30470012 | Toyota |
| 30x47x18 | 336-2001 / 30BD219T12DDULXCG02 / 30BD219T12DDWAXCG01 30BD4718T12DDUM1G01 / 30BG04S8G-2DS / 83A693 | Suzuki, Mercedes, Isuzu, Mazda, Daihatsu, Toyota, Ford |
| 30x47x21 | 83A693A | |
| 30x47x22 | 30BG4S13-2DST2 | Suzuki, Daihatsu, Toyota, Ford |
| 30x52x20 | 30BGS10G-2DST(101.007) | Nissan, Toyota |
| 30x52x22 | 30BD5222DU / 30BGS10G-2DST2 / DAC3052-32RD / 30BD5222DUUM6 / 30BD5222T1XDDUM6CG02 30BD5222T1XDDUM6CG02 | Toyota, Suzuki, Daihatsu, Ford |
| 30x55x23 | 30BD219V 5006-2NSL / 30 55 23 30BD40-A-T12DDF2CG01 / 30BG05S5G-2DS DAC3055.2RKCS4B / 30BD40-A-T12DDF2CG01 / 30BG5222-2DSECS20 DAC3052 / 30BD40DU 3 0BG05S5G-2DS / 30BD40T12DDUCG21 / 30BD40T12VVCG21 / 30BG05S2DS | Ford Transit, Volkswagen, Fiat, Mercedes-Benz, Lancia, Seat, Audi, Renault, BMW, Chrysler, Opel, Toyota, Nissan, Honda, Volvo, GM, Hyundai |
| 30x55x26 | DAC3055CRK/30BGS1-2NSL | |
| 30x62x27 | W5206/30BG05S1-2NSL | |
| 32x47x18 | 32BD4718DUK 32BG04S3G / 32BD4718T12DDUKCG26 / 32BD4718T12DDUMCG26 / 32BD4718T12DDUMCG26 | Mazda 3, Isuzu, Suzuki, Daihatsu, Toyota, Ford |
| 32x52x20 | 320-2001/2TS2-DF0676LH | Mazda, Suzuki, Daihatsu, Toyota, Ford |
| 32x55x20 | 320-2001/2TS2-DF0676LH | Mazda, Suzuki, Daihatsu, Toyota, Ford |
| 32x55x23 | 32BD45-A-1T12DDFCG21 / 32BD45-A-1T12DDUCG21 / 32BD45-A-1T12DDUCG21 / 32BD45DU 32BG05S1 -2DSL | Mazda, Suzuki, Daihatsu, Toyota, Ford |
| 35x48x20 | EP35BD4820T1XDDUM-01 | Honda SRV K24A Civic |
| 35x50x20 | 35BD5020AT1XDDUKCG01 30BGS5S0710G-2DST2 DAC35500020 / ACB / 35BD5020DU 35BG05S7G-2NST DAC35500020 / 35BD5020T12DDUCG21 / 35BD5020T12DDUCG33 / 35BD5020 T12DDUKCG33 | Volkswagen, Mercedes, Dodge, Honda Civic, Suzuki, Daihatsu, Toyota, Ford, Mitsubishi Space Star, Lancer |
| 35x52x20 | 35BD5220AT1XDDUM3C01 / 35BG5220-2DL / ACB / 35BD5220DF (101.011) | Suzuki, Daihatsu, Toyota, Ford, Hyundai Sonata |
| 35x52x22 | 35BD5222T1XDDUM2CG01 / DAC35520022 / ACB35x52x22 / 35BD5222T1XDDUM2CG01 / 35BD522DFX7 / 35BD5222DFX7 (101.006) / DAC35520022 | Audi A6, Volkswagen Passat, Suzuki, Daihatsu, Toyota, Ford |
| 35x52x23 | 35BG05S6G | |
| 35x55x20 | 5BD219-A-T12DDUCG01 / DAC3555RD3H / ACB / 35BD219-A-T12DDUCG01 / 35BD219-A-T12DDUCG21 / 35BD219DUK 35BG05S10G-2DST2 / DAC35550020 / 35BD219T12DDUCG21 / 3 5BD219T12DDUCG33 / 35BD219T12DDUKCG2 / 35BD219T12VVCG21 / 35BD219T12VVCG33 / 35BD219T1XDDUKGCG33 | Nissan Almera, Mazda 3, Volkswagen Passat B, Golf, Jetta, Citroën Fukang, Mitsubishi Pajero, Peugeot 307 |
| 35x62x21 | 35BG06G-2DS | Audi A6 |
| 35x62x24 | 5BD6224-A-T12DDUC01 / 35BD6224DV DF0789(101.008) / 35BD6224T12DDUKCG21 | Audi A6 |
| 35x62x27.7 | 35BD210DDU | |
| 35x62x28 | 5BD210-A-T12DDUCG21 / 35BD210T12DDUCG21 | |
| 38x54x17 | 38BG05S2G-2DS | Suzuki, Daihatsu, Toyota, Ford |
| 38x62x24 | 101.008 | |
| 40x55x24 | 40BGS40G | |
| 40x57x24 | 40BD45T12DDU / 40BG05S1DS / 40BD45T12DDUCG21 / 40BD45T12VVCG21 / 40BD45T12VVCG47 / 907257A 40BG05S2G-2DS / 40BG05S1G-2DS | Mitsubishi, Hyundai Santana, Volkswagen, Mazda |
| 40x62x20.625 | 40BD49T12DDUCG33 / 40BD49T12DDUCG40 / 40BD49T12DDUKCG48S01 / 40BD49T12DDUKNCG01 / 40BD49T12VVCG40 / 40BD49V/90527 712019 83A5518 / 40BD49WT12DDUCG27 / 65S7684 / 6559496 | Honda, Delco, Opel, Chevrolet Lacetti, Toyota Hiace, Audi, Mercedes |
| 40x62x24 | 40BD219T12DDU / 40BGS11G-2DS / 83A551B4 / 40BD219T12DDUBCG401 / 40BD219T12DDUCG21 / 40BGS11G-2DS / 83A551B4 / ACB40x62x24 / 40BD219T12DDUKCG401 / 40BD2 19T12VVCG21 / 40BD219T12VVCG47 / 40BD49AWT12DDU / 40BGS12G-2DS / 40BGS35G-2DST | Jeep Grand Cherokee, Honda, Peugeot, Mitsubishi, Mazda |
| 40x66x24 | 2TS2-DF08A06 40BGS39G | Mitsubishi, Volkswagen Jetta, Audi, Renault, Toyota |
| 40x68x30 | 40BD6830DUK | |
| 45x64x20 | DF0957 | |
| 45x68x20 | DF0954 | |
| 45x75x32 | 45BG07S5G-2DST | MERCEDES M113 CLS55 E55 CL55 S55 SL55 G55 AMG |
How to replace a compressor pulley bearing
Let us briefly describe the technology for replacing a compressor bearing. To begin, the air conditioning compressor is removed from the engine. In this case, all freon is removed from the system. Then, using a puller, the pulley is removed from the compressor, and the worn bearing is pressed out of it using a press (sometimes on older machines the pressing force exceeds 3 tons). Now a new bearing is put in its place using the same press and everything is assembled in the reverse order. Upon completion, the system is diagnosed for leaks and refilled.
In general, this scheme should always be used, but in order to save money, some repairmen try to change the compressor pulley bearing directly on the car, without removing the compressor. This is, in principle, possible in some cases, but it is impossible to guess whether the compressor pulley will be removed with normal force, or whether additional equipment will be required to dismantle the compressor pulley. This is why we prefer not to take risks and change the air conditioner bearing only by removing the compressor.
Replacement of the air conditioning compressor clutch bearing for Lada VAZ of all sizes.
- First, the compressor is removed from the machine (if there is no access, there is space under the hood for a puller).
- The central nut fixing the pressing disk with the shaft is unscrewed, the puller is clamped and the locking ring is removed.
- Using a special puller, the pulley-coupling assembly is removed from the splines or key (depending on the modification).
- Using a press and a mandrel, the damaged bearing is re-pressured with a new one and the components are assembled in the reverse order.
- Fixing the locking ring to prevent it from falling out of its place or from causing misalignment - free play when the shaft rotates.
After the replacement work, the devices should be installed in their standard space in the car.
- In stock, for replacement, there are always more common types of unique bearings of all sizes according to the article Newsun made in usa, Nsk, Fkc, Koyo and Nachi made in Japan, as well as their analogues from recognizable manufacturers for Lada Vaz Largus, Priora, Vesta, Kalina , 2110/11/12/13/14/15, 2120 Nadezhda, 2121 4X4, 2123, 2131 4X4, 2329, XRAY and other models, at the most reasonable prices.
In conclusion, we will one hundred percent check the operation of all components of the structure for tightness and no freon leakage and fill the Lada VAZ car air conditioning system with the required amount of refrigerant according to the standard table to the full volume, taking into account the model of your car.
Fundamentally! , if it is not time to replace the pulley ball bearing, this will entail the most serious difficulties due to its misalignment and free movement;
- The insulating varnish layer to protect the electromagnetic coil will overheat and burn out.
- The overload on the components of the pump, pistons and valves will increase, which will lead to their complete destruction!
As a result, you will have to not only change the burnt coupling, go through all the components, with internal flushing of the system with partial or complete disassembly using special equipment, carry out repairs - replacing the broken pump with a new one, but also change the receiver - filter drier and radiator - condenser, and These events are very expensive.
- It is necessary to change a crumbled, jammed or humming bearing in the compressor pulley of the air conditioning system of your car Lada Largus, Priora, Vesta, Kalina, 2110/11/12/13/14/15, 2120 Nadezhda, 2121 4X4, 2123, 2131 4X4, 2329, XRAY For the newest unique one, with a clear selection of h-w-d sizes, and a guarantee for work at the lowest prices, call our contact phone number.
Source: www.avto-aircon.ru
When to change a bearing
The core of the problem lies in the fact that the compressor pulley bearing is engaged all the time when the engine is on, regardless of whether the air conditioning is on or not. Even in winter, when you hardly turn on the air conditioner, the pulley bearing performs its function. Failure can occur naturally due to aging. The bearing lubricant thickens and during operation it becomes very hot. Excessive tension on the drive belt also contributes to failure.
The consequences of its failure can be the most unpleasant. When an air conditioning compressor bearing becomes wedged, its seat may be “eaten up,” which will ultimately lead to the need to replace the entire air conditioning compressor or its front half, which is very unpleasant financially. The next step in a possible series of troubles may be a rupture of the air conditioning compressor pulley drive belt and the infliction of severe “injury” by this belt on the electrical wiring and other engine components located in the engine compartment.
How does a compressor work?
As can be seen from the figure, the compressor operates from a drive belt, which rotates a pulley. The pulley itself spins constantly while the engine is running, but the compressor only runs when you turn on the air conditioning. This happens due to the fact that an electromagnetic clutch is built into the pulley. When you turn on the air conditioner, this clutch secures the compressor shaft and pulley. The shaft begins to rotate and the compressor begins to pump refrigerant through the air conditioning system. It follows that the pulley bearing works constantly, wear and tear always occurs, even in winter, when no one remembers about the air conditioner. As a result, the bearing is one of the weakest points in the air conditioning system. I recommend turning on the air conditioner for 10-15 minutes once a week. Especially in winter, when the lubricant in the bearing thickens, as a result of which the balls rotate with difficulty, the bearing begins to overheat, its separator is destroyed and therefore the balls are already unevenly located in the bearing, and extraneous noise begins to appear in the engine compartment.
When is it necessary to change the bearing?
The problem is that this part of the compressor pulley is constantly engaged when the engine is running . This does not depend on whether you turned on the air conditioner itself. Even in winter, when the unit is turned off, the pulley bearing continues to work.
Therefore, it can simply fail as a result of natural aging. During operation, heating occurs and the lubricant thickens. The cause of the breakdown may also be excessive tension on the drive belt.
The unpleasant consequences of failure of an air conditioner compressor bearing are obvious. Wedging of a part “eats” its seat; this may require replacement of the front half of the compressor or a complete new installation of it, which will be financially significant.
The next bad news may be a broken air conditioner compressor pulley drive belt. As a result, heavy “blows” from the belt occur on electrical wiring and engine parts under the hood. It is not uncommon for the hood to bulge due to belt impacts. If the windings of the electromagnetic clutch are damaged by high temperatures, replacement is inevitable. The negative impact of temperature on the oil seal can also lead to the need to install a new part. As we can see, you can expect a lot of troubles just because of one bearing.
Why and how is Renault Logan air conditioner repaired?
So, what can go wrong in this system:
- Depressurization of the circuit through which freon circulates leads to the fact that the air conditioner begins to idle. This is not a particular problem for the unit itself - it does not increase the rate of its wear, but only turns the element into a useless structure. Repairing this malfunction consists of replacing the tubes and seals of the working circuit and adding freon to the required level.
- Looseness or complete rupture of the air conditioner belt drive. This breakdown can be classified as simple - to restore the system’s functionality, you just need to replace the torn belt or tighten it if it is simply weak.
- Contamination of freon, due to which it gradually loses its properties. Despite the fact that the coolant circulates through a circuit closed from the external environment, in practice it is not ideally sealed. Therefore, experts recommend changing the air conditioning fluid from time to time. When asked how often this should be done, most car service technicians agree that at least once a year, for example, in the spring when preparing the car for the summer operating season.
- Compressor bearing wear. Because of this, play appears in it and the efficiency of the unit decreases. Moreover, an old element can cause mechanical breakdowns of other parts of the device. Therefore, the sooner you pay attention to its wear, the sooner the Renault Logan air conditioner bearing is replaced, the longer the air conditioner itself will last.
Important! The air conditioner bearing is not a universal component. Therefore, it will be possible to determine what dimensions a spare part should have only after the failed element is in the hands of a specialist. And only after the necessary part has been selected, the Logan air conditioner bearing is replaced.
Step by step replacement
Let's consider the replacement sequence. The first step is to remove the compressor from the car. There may be slight differences on different models and brands of cars, but the general sequence is approximately the same everywhere. For this purpose, we place the car in the “pit”, and if this is not possible, we jack up the front of the car from the compressor side and remove the wheel.
Don’t forget, to avoid the car falling off the jack, place something suitable under the body in the suspension area. I do not recommend placing stops under the thresholds; they wrinkle very easily. Then unscrew the bolts securing the compressor. Usually there are four of them, but on some car models there may be three. It is possible that the generator will interfere with this procedure. Then it is better to remove it first for ease of work.
The next step is to unscrew the fastening nut of the electromagnetic clutch pressure disk and remove it. Having removed the pressure disk, we will see a retaining ring holding the pulley with the bearing. It can be removed quite easily, after which you can remove the pulley itself, and then proceed to replace the pulley bearing.
As you noticed, we did not remove freon from the air conditioning system. This is possible in cases where the pulley can be removed without disconnecting the compressor from the system. However, the engine compartment of modern cars is so tightly packed that this is not always possible. Therefore, be prepared for the fact that the next step after unscrewing the compressor mounting bolts will be the removal of freon.
To do this, you need to slightly loosen the clamps on the rubber pipe of the air conditioning compressor. I advise you to loosen the clamps gradually and not too much, otherwise a sudden release of freon may occur, which may not be very pleasant. It is better to wait a while after loosening the clamps until all the freon comes out.
So, the pulley is removed, all that remains is to remove the bearing. It can be attached using a regular retaining ring, which can be easily removed, or it can be flared. In the latter case, you will have to pick up a chisel and a hammer. After this, using a special puller, or using old bearing races, we press out the unusable bearing. I would like to draw your attention to the fact that when removing the bearing, you should not apply force to the outer part of the pulley, as it is quite fragile and can become deformed.
After removing the failed bearing, install a new one. To do this, we use a suitable press, for example, a screw press. At the final stage, you can use the old bearing and hammer. Then install the retaining ring or use a core. The main operations are now complete. All that remains is to reassemble in reverse order.
Now I want to talk about the details that you should pay attention to. When installing the compressor in its place, be careful and follow the tightening order of the mounting bolts, if it is indicated in the technical documentation. Otherwise, the housing may break, for example, a crack may form. If freon has been bled from the air conditioning system, then refilling should be done only with the type of freon indicated on the compressor housing.
After removing the compressor from the machine, plug all inlet and outlet openings to prevent moisture from entering it. Also, try not to turn it over to avoid compressor oil leakage.
Recommendations for replacing and operating the clutch bearing
Tips for performing operations on the compressor rolling unit:
- Before changing a part, it is necessary to thoroughly clean the surface of dirt. The soured part exhibits noticeable resistance when pressed out. There is no need to hit the pulley with a hammer or heat it until red - this will lead to its deformation and cracking.
- When manipulating the pulley, it is important not to lose the spacer. It has a special size. A new washer may lead to incomplete activation of the magnetic clutch, which means that it will be difficult to turn on the compressor.
- To tighten threaded connections more accurately, use a torque wrench.
- It is better to save a failed unit. This will help you find a replacement faster.
- Clean all surfaces during the renovation process. This is the key to the operation of the node.
- The main advice is to always listen to the operation of the units under the hood. Excessive noise is a signal of a problem.
Causes of failure of compressor pulley bearings
Compressor pulley bearings are usually double-row, closed type, that is, maintenance-free. They “die” for several reasons. Either from a belt that is too tight, or from old age. Over time, the lubricant in the bearing thickens and stops lubricating the balls, which, in turn, heat up, destroy the separator, and finally bunch up, after which the bearing simply jams.
If the bearing becomes noisy, it inevitably begins to heat up. Often bearings removed from a compressor are blue from overheating. When the bearing heats up, it can render the compressor seal unusable; the insulating varnish in the winding of the electromagnetic clutch often burns out, which leads to a short circuit and failure of the clutch. And there’s no need to talk about plastic pulleys, they’re simply torn in half!
The most unpleasant thing is if the bearing jams. In this case, it rotates in its seat and grinds it down; the wear sometimes reaches several millimeters. As a result, you have to replace the entire compressor or its front half.
When the pulley bearing is jammed and “gobbled up” the front part of the compressor, it’s the belt’s turn. The belt breaks, causing various “injuries” to the car. I had to see broken impellers, torn wiring, and “humps” on the hood. Sometimes scraps from the drive belt fly under the timing belt cover and break it, then you have to repair the engine. It happens that the same belt drives the pump, generator, and all engine attachments. God forbid, this happens far from the city.
If you care about your car, we advise you to change noisy bearings, as they say, without waiting for peritonitis.
Video “How to replace a car air conditioning compressor bearing”
This video shows how professionals replace a car air conditioning compressor bearing.
Lots and lots of modern details already fill the precious Priora. But the most important thing is the irreplaceable Panasonic Priora air conditioner. But many have little budget and cannot afford the Priora equipment above the basic one. And the basic one, alas, is not equipped with air conditioning. And in this case, an excellent solution was found. You can buy a basic Priora and simply install the air conditioner yourself later.
Read about what kind of air conditioner is installed on a Priora, how it is installed, and where it can be installed.
Installation of Panasonic air conditioner on Priora
Installing a Panasonic air conditioner on a Priora raises many questions even for the most experienced car drivers. The most popular of them:
- install it yourself or contact a special service;
- where to buy air conditioner;
- how to install it;
And it’s not so difficult to figure it out, of course, if you’re not confident in your abilities, then it’s probably better not to try and pay money to professionals. And let them do their thing. Any hundred will not refuse such a trifle; they will quickly and easily install the required air conditioner.
Where can I buy a Panasonic air conditioner for a Priora? The shelves of shops, markets, and online stores are simply overflowing with this type of product. And, most likely, there is no difference where to buy completely identical things.
If you are afraid of fakes, try to find an official supplier in your region. This is probably the only guarantee that they will sell you an original air conditioner, because price has long ceased to be a marker of quality. A fake can also be sold at a high price. So take it at the price you like.
You should be very careful with the installation. There are a lot of different little things that you need to know in order to avoid disastrous results.
Installing a Panasonic air conditioner on a Priora yourself
To install an air conditioner on a Priora, it is necessary to disassemble the existing heating system.
First of all, the antifreeze is drained, then the air filter housing is removed. Be sure to remove the bumper and remove the filter and the air conditioner fan itself. After all the spare parts have been removed, we proceed to dismantling the generator.
Included with the purchased Panasonic climate system, the Priora already has its own generator, it is adapted for the operation of this model of air conditioner. We simply install a new unit in place of the old one.
Don’t forget to attach the supports on which the compressor from the air conditioner and, of course, the generator itself will be mounted. We fasten the tension roller bracket. This may require a small hole in the belt cover. Only after this we combine the housings of the stock furnace and the evaporator with each other.
Next, we connect all installed systems (compressor, radiator, fan, generator) to the contract wires.
Tips for choosing and purchasing parts
Before changing the bearing on the air conditioning compressor, you must first select a new analogue. This unit does not belong to catalog spare parts. For this reason, selecting it by VIN number will not be successful. The serial number will also not help - it has no data on the spare part.
A proven option is to select a part based on bearing markings or dimensions:
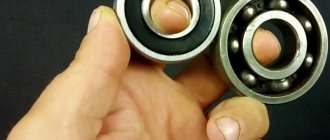
After removal, the original bearing can be conveniently measured in your hands with a caliper. In case of severe damage or scattering, you can resort to measuring the landing planes:
- the outer size of the shaft journal will correspond to the inner size;
- The fitting size on the sleeve is identical to the external size.
The seat height can be determined by the marks on the coupling or by the remaining cage.
Types of Air Conditioner Clutch Bearings Used
The air conditioning compressor clutch bearing is often installed in a double row with the following features:
- it is thin-walled;
- has 2 rows of rolling;
- angular contact design;
- seals to preserve the bearing lubricant inside the housing and protect against dirt and dust.
Such characteristics provide the parts with comfortable operation at high temperatures and rotation speeds. Under conditions of constant vibration load from the internal combustion engine, the device must reliably dampen the load forces.
