Signs of malfunction and replacement of the crankshaft position sensor on a VAZ 2114
First, let's look at what a crankshaft position sensor is. The crankshaft position sensor of the VAZ 2114, like many other VAZ models, is an electromagnetic device that transmits information about the position of the crankshaft to the electronic “brains” of engine control. This sensor is very important; the correct operation of the fuel injectors and the ignition system depends on it. It doesn't break down often. But if you are going on a long trip, it is advisable to have a spare one.
Crankshaft position sensor VAZ 2114
Sensor types
Sensors differ in operating principle and design features.
- inductive type. Inside there is a metal rod with a magnet at the outer end. It is designed to magnetize the rod. A winding of copper wire is wound around this rod, the ends of which are brought out in the form of connectors for connecting wires. The operating principle of the inductive type crankshaft position sensor: when a steel object is located next to the rod, a signal appears at the terminals.
- The operating principle of the next type of crankshaft sensor is slightly different. It has a hall sensor inside. When a metal object is brought close to it, its state changes (from logical zero to one and vice versa).
- frequency Let's look at how this type of crankshaft sensor works. The engine control unit generates pulses of a certain frequency. They are fed to the sensor and when a metal object is brought to the sensor, the generation frequency changes. By changing the frequency, the controller determines the presence of an object near the sensor. The sensor reacts to the metal of the crankshaft ring teeth (on some cars it is located on the flywheel).
Symptoms of a problem
Signs of a malfunction of the DPKV can be different. Often, dirt adheres to the end of the sensor itself, which can interfere with reading. Also, symptoms of a faulty crankshaft sensor may be as follows:
- The idle mode is unstable;
- Engine speed rises or falls spontaneously;
- Power drops;
- During acceleration, a “failure” is felt;
- The car doesn't start well.
In these cases, for the most part, the VAZ 2114 crankshaft position sensor is replaced.
In addition, the VAZ 2114 crankshaft sensor may well be in good working order. And on the “tidy” the DPKV error will appear (0335 or 0336). The reason for this may be a broken wire near the connector. This is easily determined visually; then it is enough to replace the connector without replacing the sensor itself.
If the owner notices signs of a malfunction of the crankshaft sensor on his car, then this is a “signal” about the need for diagnostics.
It is not difficult to guess where the crankshaft sensor is located on a VAZ 2114. Like many other VAZ models, it is attached to the engine, and more specifically to the oil pump, near the generator drive pulley, on its cover. The sensor is attached with one bolt, which is typical for many models of this family.
Here is the crankshaft sensor on the VAZ 2114
Typical causes of failure:
- Physical damage to the case;
- The interturn closure of the winding turns entails a change in the generation frequency transmitted to the control unit (frequency type sensors);
- Emergency wear or loss of pulley teeth.
Functionality check
If you decide to check the serviceability of the sensor yourself, treat this procedure responsibly and carry it out correctly. On a VAZ 2114 car, the crankshaft sensor is checked in several ways.
- Using a multimeter. The serviceability of the induction sensor can be assessed by the resistance of its coil. In a working product it is 500-700 Ohms.
- On the multimeter, set the measurement limit to 200 millivolts, connect the probes to the terminals (where the standard wires are connected). Pass a steel object several times in front of the core. The working sensor will “see” the metal and there will be voltage spikes on the multimeter display. If there are none, replace the part.
- But the most accurate results when checking are provided by an oscilloscope. When using this device, one hundred percent results can be guaranteed; it reads all the information from the sensor while the engine is running. It can be observed on the device screen. The engine, during tests, should operate at different speeds. They start with eight hundred revolutions, then two thousand, and raise it to six thousand. If the lines (on the device screen) are of different lengths, you need to look for the cause of the malfunction. Remove dirt, check the pulley for defects, and so on.
Remove from the engine
The malfunction has been identified. Let's start eliminating it. Let's look at this operation using the VAZ 2114 as an example.
Turn off the car ignition. We open the hood, fix it firmly, and visually determine where the VAZ 2114 crankshaft sensor is located. Before removal, it is advisable to remove all contaminants in the area where it is located. Next, carefully remove the block with wires from the connector.
Connector DPKV VAZ 2114
Using a “10” wrench, unscrew the fastening bolt.
Removing the crankshaft sensor on a VAZ 2114
Removing the DPKV VAZ 2114
After dismantling the sensor, it is advisable to check the generator drive toothed pulley for defects. Since its damage can introduce errors into the operation of the entire system.
After we are convinced that there are no defects of any kind, we proceed to assembly. The seat must be clean. We install the new part in place and fasten it with a bolt (the tightening torque should not exceed 8-12 Newton meters). In this case we use adjusting washers. They are sold complete with a new sensor. Thus, using a special probe, we ensure that the gap between the pulley and the sensor core is one millimeter. The permissible error is 0.41 millimeters in the larger direction.
The gap between the pulley and the crankshaft sensor core on a VAZ 2114
Method 2
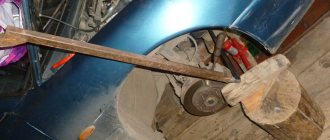
If you can’t remove the nut with a regular wrench, don’t torture yourself and use an additional lever. Often in spare parts stores you can find keys with a long lever. This kind of tool is just right for this kind of work. If you do not have such a device at hand, you can use a metal pipe.
The step-by-step process using the lever is similar to the previous instructions:
- Remove the alternator belt;
- Place the car on a jack;
- Remove the timing belt;
- Using a pipe of suitable diameter, place it on the ratchet or wrench, then press firmly on it;
- Due to the inconvenient location of the pulley, extension cords should be used during operation.
The nut breaks counterclockwise, so do not strip the thread when trying to unscrew it in the opposite direction.
Together with treatment with a chemical lubricant, this method allows you to quickly unscrew the fastener. Understanding how to unscrew the crankshaft pulley bolt greatly simplifies the process of replacing the timing belt or oil seal. Note that the above methods for removing the VAZ 2114 crankshaft pulley (8 valves) are used in professional services. The only thing that can additionally be used to remove a part in a service station is a pneumatic tool. Next, we will consider another effective method of dismantling a part.
We connect the block with wires into place.
After installation and checking the gap, we try to start the engine. With a confident start and stable operation of the engine, we can say that the repair was carried out successfully.
Despite the fact that the breakdown of the synchronizing sensor is not frequent, knowledge of its symptoms and consequences, as well as methods of elimination, will be useful to the car enthusiast.
New sensors are available in almost any auto parts store. The price of DPKV can vary between 200-400 rubles. How much a VAZ 2114 crankshaft sensor costs depends on your region, the location of large spare parts stores nearby (usually cheaper there) and the greed of the seller. Can be ordered in the online store. When purchasing, take the old one with you so as not to make a mistake in choosing a model. To avoid defects and repeated purchases, it is advisable to purchase from well-established sellers.
Recommendations
Comments 20
When cleaning the oil channels, did you remove the plugs from there?
Do you mean on the crankshaft after processing? I don’t know, it’s unlikely, they probably just blew it out with air. After I picked it up I didn’t do anything with it, I installed it right away
There, a transitional drilling from one neck to another is made through the cheek, and the inlet hole is clogged with a ball, which even has a number in the catalog. Apparently, this means picking it out when cleaning it and installing a new one.
No, these balls were not touched. I don’t think that a lot of “manure” has accumulated under them))) Well, what the heck, they’re pressed in there, you can’t get them out, and then the new ones, God forbid, don’t press in properly and pop out during operation
Above all praise! I give you a standing ovation!
Well done, a lot of work has been done. Congratulations! I didn’t remove the engine, but the floor of the engine was scattered and the gearbox had to be thrown off, this is also not easy. And lubricant for high-speed bearings on the splines is barbaric))) it could have been done with ordinary lithol))) And the question is that the nanogasket was made only on one half ring?
After all that has been done, I would probably still advise removing the engine))) Still, you need to work with the crankshaft when the engine is upside down. But it would not be easy to move it back and forth even if it was removed, especially if there is no tilter and there is no one to help. Yes, and how to remove it up? I don’t have a hook in the ceiling or anything else)))
Well done, a lot of work has been done. Congratulations! I didn’t remove the engine, but the floor of the engine was scattered and the gearbox had to be thrown off, this is also not easy. And lubricant for high-speed bearings on the splines is barbaric))) it could have been done with ordinary lithol))) And the question is that the nanogasket was made only on one half ring?
Yes, this Blue lubricant is, in principle, lithol, only more stable, so it definitely won’t be worse. I only placed a gasket under one half ring. And it would be more logical to put it under the half-ring where the layer of metal was removed on the crankshaft, but I was afraid to put it under the loaded half-ring
Replacing the crankshaft position sensor VAZ 2114
One of the most common problems of the VAZ-2114 car is the failure of the DPKV crankshaft position sensor. The fragility and unreliability of the sensor design forces motorists to either shell out considerable sums for repairs at a car service center, or learn the basics of repairs on their own, and, in our economically unstable life, the second option is best. Next, we will teach you how to replace the DPKV with your own hands. So, let's go!
Crankshaft position sensor: principle of operation, types
DPKV is a small electronic device located near the pulley under the hood, which performs a critical function: by transmitting an impulse of the crankshaft position to the engine, the sensor coordinates the movement of the injectors, which directly affects the fuel supply, which, in turn, determines the operation of the ignition system. You need to monitor the condition of the sensor regularly, especially if you have planned a long trip.
Sensors are divided into two types, each of which has its own operating principle:
- Inductive. It consists of a magnet and a metal rod wrapped with copper wire. The inductive sensor gives a signal by reacting to the approach of a steel object, that is, the crankshaft.
- Impulsive. The sensor consists of a hall, which changes its position when a metal object approaches it. Due to this, impulses arise, which are then sent to the power unit and determine the operation of the ignition system.
Signs of breakdown
You can determine that the sensor has failed by the following signs:
- Idling malfunctions, instability in engine operation is observed;
- The engine loses power;
- The engine accelerates chaotically or, conversely, slows down;
- Heavy plant;
- During high-speed movement and, especially during acceleration, dips are observed.
The main malfunctions may be the following:
- Mechanical deformation;
- Broken wires or shorted wires (this problem is especially common in used cars);
- Wear of the pulley and other parts.
Repairing the sensor is difficult and almost impossible at home. But replacement is not difficult, and it is not that expensive. Let's now find out how to replace the sensor on a VAZ-2014.
Step-by-step instructions for replacing the sensor
If you strictly follow the instructions, the replacement procedure usually does not take much time.
- First of all, to make further work safe, turn off the ignition and raise the hood.
- We find the device and, if it is covered with dust and dirt, which is observed quite often in the practice of motorists, be sure to use a rag to clean both the sensor and its installation location, so that when installing a new device, there is no short circuit in the wires.
- Now we have access to the device. A positive point is the ease of removing the sensor, which cannot be said about other parts. But here it is very important to observe the subordination of actions: first, by bending the fasteners, remove the block and wires, then, after unscrewing the bolt, carefully, slowly, remove the DPKV
- Just in case, it is worth diagnosing the condition of the pulley; toothed parts are often deformed, which also causes a disruption in the fuel supply system and leads to errors in the data transmitted by the sensor, which can already be dangerous.
- We check that the installation site of the new part is clean.
- We mount the sensor.
Installation is carried out in the reverse order of dismantling: tighten the bolt, fasten the block, start the engine, check the sensor data.
An important point during installation is to maintain the required gap, which should not exceed 1 mm. If the gap is too large, you should select a device of the appropriate size: do not try to fix the DPKV of the wrong type, as this connivance can lead to negative consequences.
How to check for sensor malfunction with the device?
Despite the fact that a sensor malfunction is usually determined by the above symptoms, this may not be enough for a correct diagnosis, since different types of breakdowns have the same symptoms. Dips during acceleration can also occur when other parts are deformed, such as the ignition system or braking system, and this also occurs when the engine itself malfunctions.
You can definitely check the sensor using the following method:
We buy a voltmeter (it’s easy to find in any car store) or a multimeter, which is even better. On the multimeter we turn on the voltmeter function, measuring 200 mV. Now we connect the probes to the sensor. And then the most interesting thing: take any screwdriver (necessarily with a metal rod) and hold the screwdriver close to the sensor. The data on the voltmeter will change, monitor its data: if the device shows 0.3 V, then the device is working properly; If the readings fluctuate, replace the sensor without a doubt.
Installation
1. Thoroughly clean the piston from carbon and deposits. We inspect the piston and connecting rod. Cracks on them are unacceptable.
2. We select new rings in accordance with the diameter of the piston - nominal or repair size. There are no markings on the nominal size rings; the repair rings are increased in diameter by 0.4 or 0.8 mm, and are marked “40” and “80”, respectively.
3. Before installing new rings, use a set of feeler gauges to measure the gap between the piston ring and the wall of the groove in which the ring will be installed.
If the gap exceeds the maximum allowable, the piston must be replaced.
Table 8.1.4. Permissible clearances between groove walls and piston rings
| Ring | Gap, mm |
| Upper compression ring | 0,04-0,07 |
| Bottom compression ring | 0,03-0,06 |
| Oil scraper ring | 0,02-0,05 |
Oil scraper ring.
. and install the upper compression ring with the words “VAZ” or “TOR” facing up.
We orient the lower compression ring so that its groove is directed downwards.
4. We put the rings on the piston as follows: having spread the ring lock (no more than is required to put the ring on the piston), we first place the lock on the piston, and then the back part of the ring.
We install new rings on the piston, starting with the oil ring expander. After installing the oil scraper ring, the expander lock should be rotated 180° relative to the ring lock.
After installing the rings on the piston, we rotate them with locks so that the lock of the upper compression ring is located at an angle of 45° to the piston pin axis, the lock of the lower compression ring is rotated 180°, and the lock of the oil ring is 90° relative to the lock of the upper compression ring.
Why do you need to twist the crankshaft pulley?
Removing the crankshaft pulley is performed for various reasons.
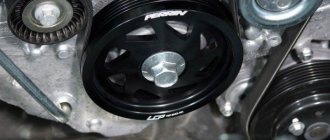
Crankshaft pulley
Most often it has to be removed when replacing the timing belt or replacing crankshaft seals. Usually the belt is changed either according to the regulations, or when defects are identified that require its replacement. Oil seals are replaced when oil leaks occur due to product wear.
On a VAZ 2114, the crankshaft pulley is secured with a bolt. During removal, a problem arises when unscrewing the mounting bolt. Firstly, it is inconvenient to get to. Secondly, at the factory they always tighten it very tightly so that it does not unscrew on the road. If a fastener comes loose while driving, it can result in costly repairs. During operation, thanks to the right-hand thread, the tightening is enhanced. In addition, coking and sticking of the part occurs. Thus, sometimes the bolt is very difficult to remove.
Tools
To successfully dismantle the VAZ 2114 crankshaft pulley and replace consumables, you should prepare the following tools:
- standard set of keys;
- jack;
- support or stump;
- socket head;
- extension;
- pulley puller;
- pry bar, screwdrivers.
It is more convenient to carry out work on a lift or ditch for inspection.
Stages of work
In order to remove the crankshaft pulley on a VAZ 2114, you need to dismantle some parts and components. The entire process of removing the crankshaft disc consists of the following steps:
- First, to dismantle the generator belt, you need to unscrew the locking bolt and loosen the tension bolt.
- Next, you need to lift the front of the car and remove the right front wheel.
- In the upper part of the engine compartment of the VAZ 2114, remove the air filter and the engine mud shield.
- Next, remove the alternator belt.
- To secure the flywheel from turning, you need to open the plug on the side of the VAZ 2114 clutch. Then insert a screwdriver or pry bar into the opened opening between the flywheel teeth.
Fix the flywheel and unscrew the bolt - Next we move on to unscrewing the fastener. To make it easier to unscrew, you need to apply special liquids to the threaded connection that corrode corrosion. For this purpose, special WD lubricant, brake fluid, and vinegar essence are suitable.
- Then the head of the key is put on and, using a lever, it is turned counterclockwise so as to tear the bolt from its original position.
We put the head on the bolt - If you are unable to unscrew the fastening element by hand, you can use the starter.
Unscrew the fastening bolt - Place the lever coming from the head against the spar or the floor in the direction of the shaft movement, and then turn the starter several times, giving the crankshaft a rotational impulse.
- After unscrewing the fastening element, you need to remove the crankshaft pulley. It is held in place by a key and is difficult to remove easily. You can use a special device with paws that cover the edges of the disk.
- If you don’t have a puller, you can use pry bars or screwdrivers by inserting them between the crankshaft and the pulley on each side, gradually moving the part to be removed away from the shaft. The touch point should be chosen closer to the crankshaft.
- Before removing the disk, it is advisable to tap it with a wooden hammer to avoid possible distortion. The part should be dismantled carefully so as not to damage the key and groove.
After completing the necessary replacement, when reinstalling the crankshaft pulley, the seats should be treated with grease so that the parts fit without effort. In this way, distortions can be avoided.
Necessary tool
When disassembling an engine or partially replacing its components, it is often necessary to unscrew this element. Rare dismantling of this unit leads to the fact that over time the fastening bolt turns sour. In such a situation, you can decide on one of the ways to unscrew the fastener. To carry out the work you will need a set of tools.
Quick removal of the VAZ 2114 crankshaft pulley is only possible if you have the following tools:
- Jack for raising the car;
- Wheel chocks (bricks, boards, etc.) for securely securing the vehicle;
- Mount as a lever;
- Set of keys and heads: 17, 19, 13 and 10.
It is better to carry out dismantling work on a lift or pit. If this is not possible, ensure that the vehicle is supported by one jack. In addition to the set of tools listed, a lubricant such as WD-40 will not be superfluous. When you start work, treat the fastening and after 10-15 minutes proceed with removal.
Dismantling may be necessary when replacing the timing belt or oil seal. Such work cannot be done without removing this part. Rarely does a pulley need to be replaced. Even though this part is made of metal, it also deforms over time, causing problems with the crankshaft position sensor.
There are quite a few options for unscrewing the pulley, but in this article we will look at three main methods of dismantling.
How to remove the crankshaft pulley of a VAZ 2114 yourself: instructions, photos and videos
The crankshaft gear is the gear through which the engine equipment rotates. Depending on engineering solutions, it has the shape of a gear with teeth for a chain or belt.
Crankshaft Gear for Chain
Crankshaft Gear for Belt
As a rule, timing gears (lower) and oil pump drives are installed on the crankshaft. The gears are mounted with a tight fit, fixed on the keyway, and pressed with threaded fasteners.
Crankshaft gear malfunctions
Common crankshaft gear problems include:
- Natural mechanical wear of the teeth. High speeds and vibrations affect the contact surfaces of gears. Over time, wear appears on the gears, and they are replaced with new ones. The wear on the timing gear can negatively affect the valve timing;
- Wear or damage to the keyway of the crankshaft gears. The fact is that even a slight gear play, which will not have a noticeable effect on the operation of the engine, will eventually develop into a problem. The crankshaft gear backlash will increase. If the problem is not addressed, the keyway may become severely damaged, requiring the crankshaft to be replaced.
Replacing the crankshaft gear
The easiest way to remove the gear from the crankshaft is if the shaft itself is removed from the engine. As a rule, gears are installed on the shaft with interference, so a puller will be required. The sequence is as follows:
- install the puller and by rotating its rod, gradually “press out” the gear;
- Remove the gear from the shaft, remove the key, and inspect the keyway on the shaft.
Replacing the crankshaft gear
To mount the gear, you will need a round attachment similar to a steel tube, which will easily fit onto the shaft. Necessary:
- install the key;
- lightly press the gear;
- placing the tube on the shaft, rest it against the gear;
- lightly tapping the tube with a hammer to “seat” the gear into place.
If you only need to replace the gear, this can be done without removing the engine and crankshaft. Removing the crankshaft gear must be done after the engine has completely cooled down and the car has been immobilized.
Let's consider the procedure for replacing the timing gear of a VAZ 2110 engine.
- The first step is to remove the timing case;
- Then install the timing mechanisms according to the marks on the crankshaft and camshaft pulley (this is necessary so as not to disrupt the engine’s timing);
- If you did everything correctly, the marks on the flywheel should match. To check this, remove the rubber plug on the gearbox;
- Then you need to fix the rotation of the engine. For this it is better to use special clamps. If this is not possible, you can insert a regular flat-head screwdriver into the transmission inspection window;
- Unscrew the pulley and remove it;
- Check the position of the mark on the timing sprocket;
- Loosen the timing belt tension roller and remove the belt;
- Remove the crankshaft gear and inspect the keyway;
- Reassemble components and mechanisms in the reverse order of disassembly, checking the timing marks.
Also interesting: TOP 10 best brake pads for VAZ and Lada (Front, rear)
You can change the crankshaft gear in a home workshop, but you should understand that an error in setting the gas distribution mechanism can lead to serious engine damage. If you do not have experience with such repairs, it is better to contact specialists.
see also
Comments 27
The procedure for replacing the crankshaft without removing the engine is 99% completely feasible when working by one person. Short-term help is only needed to remove and install the gearbox and carefully install the camshaft. You can easily remove the old distributor by yourself. I installed one, but then I need to lay clean material on the beam and make a hanger for the back of the stake. I installed all the main liners in the block, and prepared 1 and 4 main caps with liners. Then I lubricated everything with oil, first the crankshaft was placed on the beam with counterweights horizontally, it was intercepted, then the rear journal was in the suspension and the front journal was in the seat. Then for a few seconds you need to press the shaft weighing 14.5 kg upward onto the seats with one hand and install 1 main cover in place. Then, without letting go, grab and post the 4th lid. This is the hardest thing. If anyone can help for a minute, the installation will be no problem at all. The advantages of this procedure: - no need to invent a procedure for removing the engine - the cooling system, cylinder head, camshaft, piston, carburetor, distributor, attachments, electrical wiring are also not affected. Even the adjusted ignition will not go astray if you mark the location of the oil pump drive sprocket before loosening the chain.
Cons - oil drips for some time (as already mentioned here), but in insignificant quantities
It’s not the crankshaft that’s knocking... In general, it’s not clear what it is. Replaced: Crankshaft + liners Piston + rings + pins Camshaft with housing + rocker with adjusting bolts Chain, sprockets, shoe, damper Piglet + fungus Compression is a beast, the finger is sucked into the breather tube...
I tried it like in this video, I pump it sharply and there seems to be something knocking in the fourth cylinder. But you can't feel anything with a screwdriver through the spark plug hole.
So, friends, the end of the story with the crankshaft. Last time I wrote how I removed it and showed the wear on one surface under the thrust semi-ring. The crankshaft was taken for grinding of this surface. To get the groove out clean, I had to grind as much as 0.5 mm! Grinding + polishing + washing the crankshaft cost me 615 rubles and 3 days of waiting. I can recommend it to anyone from Voronezh, they have quite good machines and the staff seems competent)))
