01/26/2022 24,870 VAZ 2114
Author: Ivan Baranov
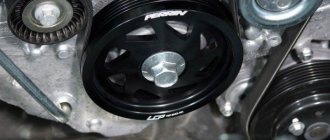
Often, when repairing a car, it is necessary to remove the crankshaft pulley of a VAZ 2114. An experienced motorist completes this operation in a quarter of an hour, but a beginner sometimes encounters many problems during removal. The article provides detailed instructions on how to remove the crankshaft pulley of a VAZ 2114, as well as a video in which you can see the removal process.
[Hide]
Why is it difficult to remove the pulley?
No. 1. Depending on the engine design, make and model of the car, the difficulty of removing the pulley varies. Some machines have a lot of space to comfortably carry out repair work, while others have very little free space. The pulley design elements cover the pulley.
The structure of pulleys is also different, there are 2 types:
- ordinary;
- damper
Damper pulleys have an additional outer ring with an elastic band in their design, which absorbs vibrations and micro-vibrations.
Before you start removing the pulley, you need to loosen the tension nuts and bolts, remove the generator and power steering belt.
No. 2. In the factory assembly, the pulley is seated on the engine crankshaft, pressed with a bolt or nut and tightened with high compression force. Thus, the factory assembly is very strong. Therefore, if you have never removed the pulley, it will be more difficult to dismantle it the first time.
In addition to tightening with the maximum permissible force with a special torque wrench, during operation, the engine becomes very hot, the threaded connection is tightened even more and sticks. And external factors influence the outside, due to which the threaded connection may be subject to corrosion.
Some engine models cannot be repaired; they are disposable. These are, for example: 1AZ-FSE, 3UZ-FSE. Each power unit was examined in detail.
No. 3. If you disengage the clutch, the engine crankshaft can be freely turned with a wrench. Therefore, in order to unscrew the crankshaft pulley nut, you need to stop the shaft from turning. If, when you press the clutch, the speeds do not change, then it is not working. Air may have entered the system. In this case, you need to bleed the clutch.
Why are special technological holes made in pulleys? In auto repair shops, there is a special device for fixing the shaft, which must be bolted to the pulley and the shaft locked.
If there is no special device for fixing the shaft, which is screwed to the pulley, then you need to install good anti-roll devices under the wheels of the car and put 4th gear on the gearbox.
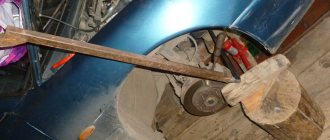
Or, the third option is to rest a pry bar against the flywheel teeth and fix the crankshaft from turning while unscrewing the pulley nut.
Another option is to insert a pin into the pulley hole, and install a pry bar around the pin and the second stop, as in this figure.
Method 1
The first step is to try to remove the pulley bolt using the standard method. The set of tools for this procedure is as follows: heads, wrenches, jacks. The step-by-step removal process looks like this:
- Remove the plastic protection (if any);
- Reach the pulley and lock it in one position;
- If the fastening does not work, treat the nut with WD-40 or hammer the pulley with a block of wood. Often this allows you to get rid of attachment.
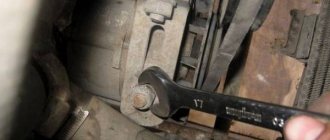
- Place a socket or a 19mm wrench on the pulley nut and try to tear it off;
- Unscrew the right wheel and jack up the car;
- Loosen the generator belt tension bolt and remove it;
- Remove the timing belt;
This disassembly method is considered the simplest, but it is only possible if the fixing nut is slightly acidified. Remember that applying a chemical lubricant before starting work will make the removal process much easier.
If this method doesn't work, try the second one.
How to unscrew the crankshaft pulley
Depending on the design of the crankshaft, the pulley is attached to it either with a nut or a bolt. On rear-wheel drive vehicles, the pulley is usually secured with a nut. The engines of some rear-wheel drive cars can be started with a special crank, for which special protrusions are made for engaging the crank. This handle is also called a “crooked wrench,” and the engagement for this wrench is called a ratchet.
The pulley fastening nut is installed with a size of 36 or 38 mm on a wrench. Use a socket wrench. The key is strengthened by welding a long handle or putting on a tube to increase the “shoulder”.
How to unscrew the pulley nut:
- Place the car on a pit or overpass.
- Apply the hand parking brake.
- Turn on 4th gear at the gearbox, put chocks under the wheels.
- Do not tap too hard on the edges of the nut.
- Throw on a socket wrench, extend it with a pipe and remove the stuck nut.
If the pulley nut does not come off:
- Move the gearbox handle to neutral.
- Remove the spark plug wires from the spark plugs to prevent the engine from starting.
- Place a socket wrench on the nut and extend it with a pipe. Place the wrench in such a way that the pipe rests against the ground or the machine spar on the right side to prevent the pulley from turning clockwise.
- We make a couple of short sharp turns of the ignition key to turn on the starter. The starter will begin to rotate the flywheel, the flywheel will rotate the crankshaft, and the pulley will be secured with a key. In this case, the stuck nut usually “comes off” quickly.
The crankshaft pulley on front-wheel drive vehicles is generally secured with a bolt. To remove the crankshaft pulley of a front-wheel drive car, you must proceed in this order:
- Raise the front right side of the car with a jack. Place a trestle, stump or a pair of wheels with rims.
- Remove the wheel.
- Dismantle and remove the air filter with housing.
- Remove the protective cover.
- Loosen the belt tensioner and remove the alternator belt.
- To fix the crankshaft, you need to remove the plug in the clutch housing, then insert a pry bar into the hole and rest it between the flywheel teeth.
- Now you need to put on the socket wrench, extend it with a pipe and sharply try to turn it counterclockwise. The main thing is to remove the stuck pulley bolt.
If it is not possible to remove the bolt from its place, then we use the method of unscrewing it with a starter. This method is shown above.
Helpful advice from locksmiths who have seen a lot: use solvent or WD-40, or a similar rust preventative. After spraying it on the thread (if the pulley is secured with a nut), you need to wait 15 minutes, then try to unscrew it. If it’s a bolt, then it’s not easy to apply this product to the threads, although if you spray it around the bolt, it’s possible that liquid will pass through the micro-cracks and decarbonize the joint.
How to change the alternator on a “ten” yourself, without resorting to the services of a car service.
- How to remove the generator from a car:
- Reinstallation procedure when replacing the generator on a VAZ-2110 and tensioning the drive belt:
- Alternator drive belt tension:
The generator is an important source of energy for a car. Technical malfunctions resulting from improper operation can damage electrical equipment elements and completely disable them. Insufficient battery charge will increase the load and lead to its rapid replacement. If there is a lack of charge, there will not be enough energy to power all the electrical equipment of the car. In addition, starting the engine in the cold will become very difficult.
In this article we will look at the features of replacing a generator on a VAZ 2110.
How to remove the generator from a car:
- unhook the fastening nuts;
- moving the generator towards the engine, loosen the belt tension;
- unscrew the lower fastening nut and, holding the generator with your hand, pull out the bolt and bushing;
- take out the generator;
- remove the engine crankcase protection (if any);
- loosen the screw on the tension bracket;
- remove the wire from terminal “D”;
- unscrew the nut securing the second wire “B +”, having first removed the rubber cap from it;
- be sure to disconnect the terminals from the battery;
- unscrew the tension screw;
- turn the car wheels to the right;
- unscrew the nut of the upper support of the generator and remove the tension bar;
- remove the drive belt from the generator;
Reinstallation procedure when replacing the generator on a VAZ-2110 and tensioning the drive belt:
- take a new generator, screw it to the lower support and insert a bolt with a spacer sleeve and tighten the nut;
- tighten the tension screw;
- install the wiring on the terminals corresponding to the markings;
- We attach the tension bar to the upper unit of the generator using a tension bracket;
Now let's move on to an equally important part of the work, when replacing the generator on a VAZ-2110, belt tension. Incorrect belt tension can lead to a number of undesirable consequences.
Insufficient drive belt tension will result in little or no battery charge. A loose belt can slip off the pulleys and cause damage to engine parts.
A belt that is too tight puts stress on the bearings, which leads to their rapid failure. A belt that is too tight wears out faster and eventually stretches and breaks. Therefore, be sure to ensure the correct tension of the generator drive belt.
Under ideal conditions, measured between the alternator pulley and the crankshaft, the drive belt should bend 10-15 mm with a force of 10 kg/cm.
Alternator drive belt tension:
- put the drive belt on the crankshaft and generator pulleys;
- tighten all fastening nuts;
- the belt should not give way, but excessive tension is also useless;
- tighten the tension screw until the belt is tight, checking it with your hand;
As you can see, the procedure for removing and installing the device is not that complicated. Any car enthusiast can do this. But to make the work easier, it is better to perform it in a pit or overpass (if it is necessary to remove the crankcase protection and facilitate access to the lower unit of the generator).
Proper operation of the generator ensures proper operation of the vehicle's electrical equipment. Monitor the operation of the device using indicator lamps. If the red battery charge indicator lights up, you must immediately eliminate the cause of the problem.
Timely detection of faults in the power system significantly extends the life of your car’s electrical equipment
And here is a video on this topic:
Pulley removal
Unscrewing a fastening bolt or nut is only half the battle. Next you need to pull the pulley out of the shaft. The pulley cannot be removed easily by hand unless its seat is broken. In addition, if the pulley fits tightly onto the shaft, it is also secured against turning by a key.
There are special pullers for removing the pulley from the shaft. There are mechanical and hydraulic pullers.
The design of a mechanical puller is simple. Usually it has three legs, with which you need to hook the pulley itself, and rest the central rod against the shaft. After which, you need to rotate the rod, the legs will straighten and pull the pulley towards you. There are even simpler pullers that you can make yourself. If there is no removable device for the pulley, then you can use pry bars. If one person is filming, then take turns, moving it a little on each side so that there is no distortion. If there are two, then at the same time, from different sides, the pulley is pressed out from the crankshaft with a sharp movement.
It also happens that when using a puller, the walls of the pulley grooves cannot withstand and break off. Therefore, when using pry bars, they must be engaged as close to the shaft as possible.
Folk tricks
Let's look at a few folk car tricks that have helped more than one driver.
- Each threaded connection, by the way, not only on the part of the car, can be unscrewed by first lubricating it with a special oil, for example: HP, sunflower oil, vinegar, brake fluid.
- In rare cases, lightly tapping the edges of the bolt and nut with a hammer or wrench helps.
- Removing a bolt or nut does not mean removing the pulley. How to unscrew the crankshaft pulley without a special key? The pulley sits very firmly on the shaft; it can be removed using a pry bar or a screwdriver and carefully pry it off in several places.
Video
This video contains useful tips on how to unscrew the nut securing the pulley to the crankshaft of a car engine.
An option for unscrewing the crankshaft pulley bolt using a poly V-belt.
How to remove the crankshaft pulley on a VAZ (2108, 2109, 21099, 2110, 2111, 2112, 2113, 2114, 2115).
How to remove the crankshaft pulley bolt. Bolted connection.
How to tighten a crankshaft pulley very quickly.
Removes the crankshaft pulley on a Honda car without a special key.
If you are faced with the problem of how to unscrew the crankshaft pulley bolt, this article is for you. We will describe this process in detail so that you can quickly and easily remove the crankshaft pulley and then begin repairing it.
Replacing the oil seal
When moving on to dismantling and replacing oil seals, proceed as follows:
- Using a #10 wrench, unscrew all the bolts and nuts that secure the drive cover to the pan.
- Now, together with the gasket, remove the drive cover.
- Remove any remaining gasket.
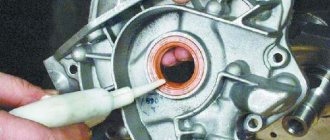
- Using a screwdriver and a punch, knock out the oil seal from the inside of the drive cover.
- The drive cover must be washed. Gasoline or diesel fuel can be used for this.
- The oil seal is lubricated on top with silicone sealant.
- Carefully place it in place and press down.
- Remove excess sealant from the cover and oil seal with a rag.
- The lid also needs to be wiped with a rag.
- Now you can apply the fixing sealant in two ways - on the cover or on the block. The sealant is applied to the cover along the contour if you can immediately install it correctly; If this does not work out for you, then apply sealant to the block.
- Before installation, wipe the installation area with a rag; There should be no gasket residue or contamination present.
- Place the cover at an angle on the tray and put it in place on the guide pins.
- Tighten the cover, starting with the three tray bolts, and then move on to the main ones.
- Don't tighten the bolts all at once, just tighten them all and then tighten them.
- Now wash the pulley in the same way as you did the cover before.
- To simply install the pulley, note where you have the key on the piece and center it correctly.
- The pulley is installed by twisting.
- If it suddenly does not sit in place, slightly unscrew the cover bolts, push the part and then screw it back.
Video: how to remove the crankshaft pulley Now all that remains is to install all the parts and mechanisms in their places. By screwing the nut into place, it can be placed on a layer of sealant. This is done so that it does not loosen if you suddenly do not twist it very tightly.
Subscribe to our feeds on social networks such as Facebook, Vkontakte, Instagram, Pinterest, Yandex Zen, Twitter and Telegram: all the most interesting automotive events collected in one place.
How to remove a crankshaft pulley bolt: why is everything so complicated?
A knowledgeable motorist usually spends no more than a quarter of an hour on the process of dismantling the crankshaft pulley. But inexperienced drivers, when trying to remove this part on their own, are faced with many problems that they often simply cannot solve. The instructions for carrying out repair work and maintenance of any modern vehicle contain comprehensive information about the dismantling process, but, unfortunately, it does not help car enthusiasts.
First of all, difficulties arise with fixing the crankshaft. It is very difficult to dismantle it if the part is constantly rotating, “slipping” out of your hands. It is also not clear to many from which side to approach the bolt that holds the pulley. And its strong tightening usually makes the process of removing the unit very, very difficult, since dismantling under such conditions is fraught with damage to the body covering or elements of the car’s engine compartment.
All car manufacturers and car service specialists use great force to tighten the nut or bolt of the crankshaft pulley (on some vehicle models the mechanism is supported by a bolt, in others by a nut).
This is done specifically to avoid self-unwinding of this part during vehicle operation. If a bolt (nut) falls out while driving, it will not be easy to bring the car back to life in order to continue driving it, and the repair itself will cost, believe me, a pretty penny. In addition, the described fasteners increase their tightening level independently when the engine is running. And the final “indestructibility” of the bolt is given by the phenomena of coking, sticking, and corrosion.
How to unscrew the crankshaft pulley bolt - solving the problem
The pulleys of front-wheel drive cars are usually secured with a bolt. In such vehicles, the pulley is oriented perpendicular to the axis of the machine, which, of course, complicates repair work (it is very difficult to get to the fastening). In order to unscrew the bolt as quickly and easily as possible, it is advisable to prepare in advance:
- set of auto tools;
- the so-called “stump” (or “tragus”);
- car jack;
- head (socket) with a lever and extension (the head must be selected according to the size of the bolt).
The process with these devices is as follows:
- remove the wheel (of course, before doing this you need to lift the front right part of the car with a jack);
- we install the vehicle on the “stump”;
- remove the engine shield, which protects it from dirt, the air filter (they are located on the top side of the hood) and the generator belt;
- open the plug on the clutch block so that you can fix the crankshaft, and wedge the flywheel teeth using a pry bar;
- We put the head on the bolt and begin to unscrew it (if it does not give in, we slowly increase the length of the lever).
I think there is no need to talk about how to tighten the crankshaft pulley and return the car to its pre-repair condition. All operations are performed in reverse order.
Faulty pulley: what does it mean?
Malfunctions are fraught with consequences not only for the operation of the main unit, but also for the motor shaft. The fact is that while the car is in motion, the crankshaft is also in constant motion. This causes slight vibrations, but this is enough to cause the crankshaft to break. Therefore, this serves as a kind of protection for him and is therefore so important. This also has a positive effect on the operation of the belt, which operates without strong vibrations. The belt also stretches less, allowing it to stay in good condition longer. And if you don't replace it in time, the belt may even break. In addition, the functioning of the battery and its charge also depend on the correct functioning of this part. If it doesn't work properly, the battery drains too quickly. If you replace it on time, the battery will last longer. The replacement helps to change the gear ratio, which saves fuel, since when idling it will turn slower than usual, which means less fuel consumption.
How to unscrew the crankshaft pulley nut?
This procedure is easier to perform using a lever and an extension for it (you can use a relatively long piece of pipe), as well as a socket or socket wrench (38 or 36). A nut, called a “ratchet,” is usually used to secure pulleys on rear-wheel drive vehicles. Such a nut usually has special ledges.
To remove it, you need to get under the car and try to unscrew the element with a wrench and extension. In cases where it absolutely does not lend itself, the gearbox should be put in neutral, the spark plugs should be removed, the key and lever rested on the side member or floor, and an impulse should be given by turning the ignition switch. After this procedure, the nut easily comes off on the first or second try.
Let us add that a device for removing the crankshaft pulley makes the dismantling process easier. It consists of a nut with a pin with 2-3 grips attached to them (the pin rests on the center of the shaft, the grips are placed over the edges of the pulley). Such a “folk” puller makes it possible to pull the pulley off the shaft without any problems by turning the device clockwise.
Method 3
A jammed VAZ 2114 crankshaft pulley can be removed with some effort. Even an additional tubular lever does not always help break the nut. In such a situation, you can resort to a rather complicated option for removing the spare part using a starter. Because the starter drives the flywheel and the pulley itself: its force can be useful for sharply unscrewing the support. Step-by-step instructions for removing a part using these methods seem simple:
- The photo below shows one type of reliable fixation;
- Place the gearbox in neutral;
- When the starter starts, the nut is loosened.
- Move into the cabin and turn the key in the ignition a couple of times;
- After disassembling the generator and timing belt, proceed to securely fix the nut with a wrench without blocking the pulley;
- For safety reasons, disconnect the high voltage cables from the spark plugs;
Before carrying out work, it is also recommended to treat the contact surface of the nut with the workpiece with a special lubricant. After this procedure, all fasteners can be easily unscrewed.
After tearing off the nut, remove the part and carry out the necessary manipulations. When reinstalling a part, there is no need to tighten the nut with great force.
The only difficulty that arises when carrying out such a procedure is acidification of the thread. Treatment with chemical lubricants only partially solves the problem, so during disassembly it takes a lot of effort to successfully unscrew it.
Crankshaft pulley VAZ 2114
Replacing the generator drive pulley on front-wheel drive VAZ and Lada cars
The generator drive pulley changes in the same way on cars of the “tenth series” (VAZ 2110, 2111 and 2112), the “Samara” series (VAZ 2113, 2114 and 2115), as well as the “new” models of Lada Kalina, Priora and Grant.
The generator drive pulley is located on the “toe” of the engine crankshaft on the side of the first cylinder (right wheel) and drives the generator and, if equipped, air conditioning and power steering using a belt.
The main reasons for replacing a pulley are damage to the ring gear or delamination of the pulley itself.
Damage to the ring gear leads to unstable operation of the motor. If the teeth are broken, the car may not start because the crankshaft sensor (CSS) cannot determine the top dead center (TDC) for the ignition count.
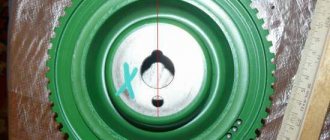
Delamination occurs on damper pulleys (not cast iron). The fact is that on these pulleys the outer part is attached to the central part through a rubber spacer. It acts as a vibration damper (anti-resonance) on the engine crankshaft. It happens that the outer race rotates a little. Then the toothed pulley moves relative to the dead center and, as a result, the car becomes “sluggish” during acceleration, and the idle speed becomes unstable. If the pulley is too misaligned, the car cannot be started. Also, the car will not start with the upper race completely peeled off from the central part of the pulley.
Such damage is easily diagnosed by the lack of rotation of the alternator belt.
In rare cases, the seat key on the shaft breaks, and the pulley begins to vibrate and rotate. If the movements are small, then the ECU does not display an error on the instrument panel, but at the same time the engine at idle is unstable and “troits.”
Checking the condition of the pulley is quite easy. To do this, you need to inspect the condition of the ring gear for chips and cracks. The ring gear is located on the outer race closer to the engine (indicated by an arrow) and is clearly visible from above:
After this, you need to set the first cylinder to TDC. To do this, in an 8-valve engine, remove the rubber plug on the gearbox and ensure that the mark on the flywheel aligns with the slot on the plate:
You can check by the mark on the camshaft. To get to the mark, you need to unscrew the plastic protective cover. Fasten with three “10” bolts (two are shown in the photo, the bottom one under the hose from the end of the casing):
Khabarovsk Forum – 27R.Ru – 27 Region
Repair. The key on the crankshaft under the timing pulley was broken.
Seems like a fairly common failure:
The end bolt on the crankshaft that secures the timing belt toothed pulley and the large outer belt pulley has become slightly loose. As a result, the key under the timing gear pulley was broken. Replacing this pulley and installing a surrogate key did not help much. It broke again in 4 days.
The eternal question: WHAT TO DO? Do not suggest replacing the crankshaft or replacing the engine. Interesting concrete experience with results, both positive and negative.
There are proposals to put this entire farm on good cold welding. What do you say?
Re: Repair. The key on the crankshaft under the timing pulley was broken.
Re: Repair. The key on the crankshaft under the timing pulley was broken.
Unread message TDA_ » 07 Nov 2009, 20:01
surik_v wrote: The eternal question: WHAT TO DO? Do not suggest replacing the crankshaft or replacing the engine. Interesting concrete experience with results, both positive and negative.
There are proposals to put this entire farm on good cold welding. What do you say?
Re: Repair. The key on the crankshaft under the timing pulley was broken.
I think the problem is that the limit switch on the crank is also a little broken. therefore, even a new pulley could be put on the shaft easily by hand without effort. Apparently such play will also eat up the new keyway. Therefore, two options come to mind: - bore the pulley inside and make a bushing with a new groove so that it fits very tightly onto the shaft. — put on cold welding (very good)
why not use current for cold welding? what are the contraindications?
Re: Repair. The key on the crankshaft under the timing pulley was broken.
why cold welding, just put it on tape.
if it’s completely broken, it might actually be grabbed in a couple of places by regular welding, not cold, with that in mind. so that you can blow it off with a grinder if you need to remove it.
Re: Repair. The key on the crankshaft under the timing pulley was broken.
Unread message mals » 07 Nov 2009, 21:26
yeah, that's right about the tape. I had the same canoe, I took it to Lamarck, they “welded” the cjr, like cold welding, and gave me a lifetime guarantee. I only had it for 1,500 km, then I went to Vladik and back again. The glue guy himself went crazy, he walked around confusedly about what couldn’t stand it, “how can this be, it’s fastening it tightly.” So I sold the car, then I heard that it was broken again and the crankshaft was replaced.
ps. True, I constantly kept the revs in the region of 4.5-5 with peaks of up to 6.7 when I drove to Vladik and back, maybe because of such a load, but nevertheless.
Re: Repair. The key on the crankshaft under the timing pulley was broken.
mals wrote: yeah, right about the tape. I had the same canoe, I took it to Lamarck, they “welded” the cjr, like cold welding, and gave me a lifetime guarantee. I only had it for 1,500 km, then I went to Vladik and back again. The glue guy himself went crazy, he walked around confusedly about what couldn’t stand it, “how can this be, it’s fastening it tightly.” So I sold the car, then I heard that it was broken again and the crankshaft was replaced.
ps. True, I constantly kept the revs in the region of 4.5-5 with peaks of up to 6.7 when I drove to Vladik and back, maybe because of such a load, but nevertheless.
Re: Repair. The key on the crankshaft under the timing pulley was broken.
Catzilla will not be able to mill a new groove - if you move the teeth on the timing gear - that's it. The TDC and timing marks on the large pulley will go away - that’s two.
so not everything is as simple as it might seem. Considering the material of the knee, it is most likely due for replacement. If the pulleys are broken, then it’s a little simpler. In the large one, you can gouge out the groove and mark new marks, and gouge out the small horseradish. Firstly, it is nitrided, secondly, it is hardened, and thirdly, it is made from 30 CHC. Good luck.
There is only one way out - find a milling machine operator. which will make a new groove in the knee with a 180 degree offset. This will be the least error. Then relabel the pulley. First you need to count the teeth on the small gear. If their number is not a multiple of 2, then you are very unlucky.
Re: Repair. The key on the crankshaft under the timing pulley was broken.
Unread message TDA_ » 07 Nov 2009, 23:34
if it’s not a multiple, then you can make the angle a little smaller Because cold welding sucks. There are actually many options.. For example, put it on paint.
More promising but also less correct. Weld the key to the shaft and sell the car.
If you want to do it well, and don’t mind the sex, make a key from copper and fix it on the shaft. Fill the chips on the shaft. Pull out the key. Treat the shaft so that the pulley fits. Collect.
Re: Repair. The key on the crankshaft under the timing pulley was broken.
Well, laugh with laughter, but this is not the first time I’ve heard about tack welding, but I haven’t tried it myself.
To change the knee and butt, you will have to remove the box, and sometimes the entire engine.
Re: Repair. The key on the crankshaft under the timing pulley was broken.
Re: Repair. The key on the crankshaft under the timing pulley was broken.
Re: Repair. The key on the crankshaft under the timing pulley was broken.
Re: Repair. The key on the crankshaft under the timing pulley was broken.
Unread message TDA_ » 08 Nov 2009, 21:58
Re: Repair. The key on the crankshaft under the timing pulley was broken.
Re: Repair. The key on the crankshaft under the timing pulley was broken.
Re: Repair. The key on the crankshaft under the timing pulley was broken.
The keys are not made from any kind of rod, simply from a material suitable in terms of strength and hardness on a conventional surface grinding machine. At least that's what we do. The blanks are milled, then heated, and then finished on a grinder. Total business. And about the mythical rod. - give it a standard designation in the assortment, then I’ll believe it.
The question is - why change the earbuds if they are still quite normal? Is it really impossible to put the same ones in their places? What will change? IMHO - they install a new one only so that later they don’t have to disassemble the engine a second time for capital, since it has already been disassembled. Then change the rings and the seals around the edges.
Remill the groove; no amount of surfacing or graphite keys will help. The deposited material will be worse + you will get a heat-affected zone on the shank of the elbow and be happy if the pulley does not fall off at all after 1000 km. Milling a keyway is the simplest procedure, performed on a vertical machine with a finger cutter (calibrated according to the normal class). An hour's work with installing the part into the machine. What makes you think that this is more expensive than a new knee?
There are no electrodes specifically for surfacing. There is a material, there are its physical and chemical properties, and there is an electrode corresponding to all of this. Whether it will be E42 or UONII or Sarmite is chosen solely from what you want to get after surfacing. You can also fuse SV08G2S and it will work out well, depending on what for.
Re: Repair. The key on the crankshaft under the timing pulley was broken.
mail_robot Oh Dima, there are so many certificates in the office wall, and you don’t know about the inserts
Standard inserts come in several size groups, and one is selected for each neck at the factory. As far as I remember, Toyota has 3 main numbers, 5 connecting rod numbers. This is done to ensure a more even oil gap.
If you install a standard shaft - the dimensions of the journals (within thousandths) - will be different, the oil gap will no longer be even, it is unlikely to go beyond the tolerance limits, but it is still wrong. And if somewhere the load is high, it may not be able to withstand it.
In general, the liners on the capital are replaced due to their wear. Of course, there is no direct metal-to-metal contact, but a constant oil film and uncleaned dirt particles wear out the liner.
Signs of malfunction and replacement of the crankshaft position sensor on a VAZ 2114
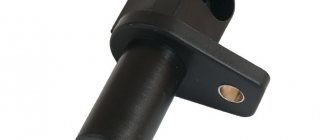
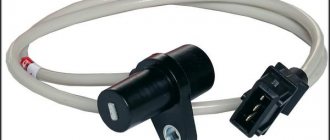
First, let's look at what a crankshaft position sensor is. The crankshaft position sensor of the VAZ 2114, like many other VAZ models, is an electromagnetic device that transmits information about the position of the crankshaft to the electronic “brains” of engine control. This sensor is very important; the correct operation of the fuel injectors and the ignition system depends on it. It doesn't break down often. But if you are going on a long trip, it is advisable to have a spare one.
Crankshaft position sensor VAZ 2114
Sensor types
Sensors differ in operating principle and design features.
- inductive type. Inside there is a metal rod with a magnet at the outer end. It is designed to magnetize the rod. A winding of copper wire is wound around this rod, the ends of which are brought out in the form of connectors for connecting wires. The operating principle of the inductive type crankshaft position sensor: when a steel object is located next to the rod, a signal appears at the terminals.
- The operating principle of the next type of crankshaft sensor is slightly different. It has a hall sensor inside. When a metal object is brought close to it, its state changes (from logical zero to one and vice versa).
- frequency Let's look at how this type of crankshaft sensor works. The engine control unit generates pulses of a certain frequency. They are fed to the sensor and when a metal object is brought to the sensor, the generation frequency changes. By changing the frequency, the controller determines the presence of an object near the sensor. The sensor reacts to the metal of the crankshaft ring teeth (on some cars it is located on the flywheel).
Symptoms of a problem
Signs of a malfunction of the DPKV can be different. Often, dirt adheres to the end of the sensor itself, which can interfere with reading. Also, symptoms of a faulty crankshaft sensor may be as follows:
- The idle mode is unstable;
- Engine speed rises or falls spontaneously;
- Power drops;
- During acceleration, a “failure” is felt;
- The car doesn't start well.
In these cases, for the most part, the VAZ 2114 crankshaft position sensor is replaced.
In addition, the VAZ 2114 crankshaft sensor may well be in good working order. And on the “tidy” the DPKV error will appear (0335 or 0336). The reason for this may be a broken wire near the connector. This is easily determined visually; then it is enough to replace the connector without replacing the sensor itself.
If the owner notices signs of a malfunction of the crankshaft sensor on his car, then this is a “signal” about the need for diagnostics.
It is not difficult to guess where the crankshaft sensor is located on a VAZ 2114. Like many other VAZ models, it is attached to the engine, and more specifically to the oil pump, near the generator drive pulley, on its cover. The sensor is attached with one bolt, which is typical for many models of this family.
Here is the crankshaft sensor on the VAZ 2114
Typical causes of failure:
- Physical damage to the case;
- The interturn closure of the winding turns entails a change in the generation frequency transmitted to the control unit (frequency type sensors);
- Emergency wear or loss of pulley teeth.
Functionality check
If you decide to check the serviceability of the sensor yourself, treat this procedure responsibly and carry it out correctly. On a VAZ 2114 car, the crankshaft sensor is checked in several ways.
- Using a multimeter. The serviceability of the induction sensor can be assessed by the resistance of its coil. In a working product it is 500-700 Ohms.
- On the multimeter, set the measurement limit to 200 millivolts, connect the probes to the terminals (where the standard wires are connected). Pass a steel object several times in front of the core. The working sensor will “see” the metal and there will be voltage spikes on the multimeter display. If there are none, replace the part.
- But the most accurate results when checking are provided by an oscilloscope. When using this device, one hundred percent results can be guaranteed; it reads all the information from the sensor while the engine is running. It can be observed on the device screen. The engine, during tests, should operate at different speeds. They start with eight hundred revolutions, then two thousand, and raise it to six thousand. If the lines (on the device screen) are of different lengths, you need to look for the cause of the malfunction. Remove dirt, check the pulley for defects, and so on.
Remove from the engine
The malfunction has been identified. Let's start eliminating it. Let's look at this operation using the VAZ 2114 as an example.
Turn off the car ignition. We open the hood, fix it firmly, and visually determine where the VAZ 2114 crankshaft sensor is located. Before removal, it is advisable to remove all contaminants in the area where it is located. Next, carefully remove the block with wires from the connector.
Connector DPKV VAZ 2114
Using a “10” wrench, unscrew the fastening bolt.
Removing the crankshaft sensor on a VAZ 2114
Removing the DPKV VAZ 2114
After dismantling the sensor, it is advisable to check the generator drive toothed pulley for defects. Since its damage can introduce errors into the operation of the entire system.
After we are convinced that there are no defects of any kind, we proceed to assembly. The seat must be clean. We install the new part in place and fasten it with a bolt (the tightening torque should not exceed 8-12 Newton meters). In this case we use adjusting washers. They are sold complete with a new sensor. Thus, using a special probe, we ensure that the gap between the pulley and the sensor core is one millimeter. The permissible error is 0.41 millimeters in the larger direction.
The gap between the pulley and the crankshaft sensor core on a VAZ 2114
What problems might you encounter?
There is a possibility that you may not immediately notice the characteristic disc part under the hood of your car. It may also be difficult to access. It will be difficult to fix the shaft. Over a long period of time, the joints of fasteners will “stick” and you will have to use special liquids.
Related article: How to replace a timing chain in a garage
To perform all the necessary steps step by step, you will need the following tools:
- impact wrench;
- puller set;
- jack;
- a set of wrenches or other tools for removing bolts;
- presence of an inspection hole.
[custom_ads_shortcode1]
We connect the block with wires into place.
After installation and checking the gap, we try to start the engine. With a confident start and stable operation of the engine, we can say that the repair was carried out successfully.
Despite the fact that the breakdown of the synchronizing sensor is not frequent, knowledge of its symptoms and consequences, as well as methods of elimination, will be useful to the car enthusiast.
New sensors are available in almost any auto parts store. The price of DPKV can vary between 200-400 rubles. How much a VAZ 2114 crankshaft sensor costs depends on your region, the location of large spare parts stores nearby (usually cheaper there) and the greed of the seller. Can be ordered in the online store. When purchasing, take the old one with you so as not to make a mistake in choosing a model. To avoid defects and repeated purchases, it is advisable to purchase from well-established sellers.
Signs of generator failure
There are several signs by which a driver can determine that the VAZ 2114 generator is faulty.
Here are the main ones:
- the corresponding lamp on the instrument panel indicates that the battery is not charging;
- insufficient or overcharging of the battery;
- weak headlights and poor performance of the wipers (with the engine running);
- excessively bright headlights;
- the electrolyte in the battery boils;
- appearance of extraneous noise in the generator set.
Replacing the crankshaft position sensor VAZ 2114
One of the most common problems of the VAZ-2114 car is the failure of the DPKV crankshaft position sensor. The fragility and unreliability of the sensor design forces motorists to either shell out considerable sums for repairs at a car service center, or learn the basics of repairs on their own, and, in our economically unstable life, the second option is best. Next, we will teach you how to replace the DPKV with your own hands. So, let's go!
Crankshaft position sensor: principle of operation, types
DPKV is a small electronic device located near the pulley under the hood, which performs a critical function: by transmitting an impulse of the crankshaft position to the engine, the sensor coordinates the movement of the injectors, which directly affects the fuel supply, which, in turn, determines the operation of the ignition system. You need to monitor the condition of the sensor regularly, especially if you have planned a long trip.
Sensors are divided into two types, each of which has its own operating principle:
- Inductive. It consists of a magnet and a metal rod wrapped with copper wire. The inductive sensor gives a signal by reacting to the approach of a steel object, that is, the crankshaft.
- Impulsive. The sensor consists of a hall, which changes its position when a metal object approaches it. Due to this, impulses arise, which are then sent to the power unit and determine the operation of the ignition system.
Signs of breakdown
You can determine that the sensor has failed by the following signs:
- Idling malfunctions, instability in engine operation is observed;
- The engine loses power;
- The engine accelerates chaotically or, conversely, slows down;
- Heavy plant;
- During high-speed movement and, especially during acceleration, dips are observed.
The main malfunctions may be the following:
- Mechanical deformation;
- Broken wires or shorted wires (this problem is especially common in used cars);
- Wear of the pulley and other parts.
Repairing the sensor is difficult and almost impossible at home. But replacement is not difficult, and it is not that expensive. Let's now find out how to replace the sensor on a VAZ-2014.
Step-by-step instructions for replacing the sensor
If you strictly follow the instructions, the replacement procedure usually does not take much time.
- First of all, to make further work safe, turn off the ignition and raise the hood.
- We find the device and, if it is covered with dust and dirt, which is observed quite often in the practice of motorists, be sure to use a rag to clean both the sensor and its installation location, so that when installing a new device, there is no short circuit in the wires.
- Now we have access to the device. A positive point is the ease of removing the sensor, which cannot be said about other parts. But here it is very important to observe the subordination of actions: first, by bending the fasteners, remove the block and wires, then, after unscrewing the bolt, carefully, slowly, remove the DPKV
- Just in case, it is worth diagnosing the condition of the pulley; toothed parts are often deformed, which also causes a disruption in the fuel supply system and leads to errors in the data transmitted by the sensor, which can already be dangerous.
- We check that the installation site of the new part is clean.
- We mount the sensor.
Installation is carried out in the reverse order of dismantling: tighten the bolt, fasten the block, start the engine, check the sensor data.
An important point during installation is to maintain the required gap, which should not exceed 1 mm. If the gap is too large, you should select a device of the appropriate size: do not try to fix the DPKV of the wrong type, as this connivance can lead to negative consequences.
How to check for sensor malfunction with the device?
Despite the fact that a sensor malfunction is usually determined by the above symptoms, this may not be enough for a correct diagnosis, since different types of breakdowns have the same symptoms. Dips during acceleration can also occur when other parts are deformed, such as the ignition system or braking system, and this also occurs when the engine itself malfunctions.
You can definitely check the sensor using the following method:
We buy a voltmeter (it’s easy to find in any car store) or a multimeter, which is even better. On the multimeter we turn on the voltmeter function, measuring 200 mV. Now we connect the probes to the sensor. And then the most interesting thing: take any screwdriver (necessarily with a metal rod) and hold the screwdriver close to the sensor. The data on the voltmeter will change, monitor its data: if the device shows 0.3 V, then the device is working properly; If the readings fluctuate, replace the sensor without a doubt.
If you find an error, please select a piece of text and press Ctrl+Enter.
conclusions
After the pulley has been removed, you can begin installing a new part, before installing which the seat will need to be lubricated with grease. At this point, the work can be considered completed.
In general, about two months ago I changed the bearings in the gene, but I didn’t put it in the log book because the process was not photographed, and after this time the bearings began to hum again. After driving like this for several days, I said “Stop putting up with this” and drove to a friend’s garage for pit.
We will need: ***bearings 202 and 302 (I personally have these, BATE generator), if you don’t know which ones you have, then first remove them and go to the store) ***generator bearing puller ***brushes (if you haven’t climbed there for a long time , or they didn’t change them, grab them at the same time, I changed mine recently)
I will describe the process of removing and disassembling the generator (I apologize for the quality of the filming, I filmed it on my phone):
1.Remove the negative terminal from the battery 2.Remove the + and - contacts, we will need a key for 10.
3. Loosen the generator position lock with a 13 key and unscrew the long bolt for adjustment, it is 10
4. You can remove the generator in different ways, I personally remove it together with the fasteners because it takes 2 minutes, there are 15 bolts.
5. Next on the table I remove the mount itself from the generator, there is a long bolt at 13. I remove it together with the fastener because it is this bolt that rests on the spar.
6.Next, we remove the pulley from the generator. It seems like a 22mm head is needed, and it is advisable to have a vice. We insert a screwdriver or something else through the generator, thereby blocking the pulley from turning (just be careful, do not bend the blades). Because the first ones once when I was changing the bearings of the generator, we had a vice, we were able to unscrew it without much difficulty, now the vice was already broken and we just inserted screwdrivers: one held the generator from turning, and I unscrewed the pulley nut.
7. Using a Phillips screwdriver, unscrew the screws securing the front and rear covers of the generator, there are four of them (I advise you to spray it with WD40, and in general, spray everything there, spray the entire generator)))) You will also make marks so that you can put them correctly later.
10.After you have removed the front cover, turn it over and place the 22nd head on the bearing, knock it out with a hammer and immediately drive the new bearing through the old one, this can be done without any problems, just be careful.
11.Next, remove the back plastic cover (it opens with 3 latches), unscrew the brushes. 12.Pull out the rotor (I got it out without any problems)
13.Take a puller and remove the bearing.
14. Install the new bearing by driving in the old one. New bearing - old one on top - head on top, and carefully drive it in.
And put everything back together in the reverse order, first having a little smoke break))!
I want to change the pulley on the generator to a multi-ribbed one. Generator Pulley
How to unscrew the damn nut? I unsoldered it with a VeDeshka, tried to clamp the pulley in a vice, but almost broke the workbench, the nut did not move a millimeter. I twisted the nut counterclockwise (I tried). Could it be a reverse thread?
If anyone has done something similar, please tell me how to overcome this nut.
- Car: Toyota
- Name: Yuri Trezub
- Gender: Man
- City: Darnitsa
- Dream, Fatman, Kooper and 2 others like this
- Auto: HD
- Name: Alexander
- Gender: Man
- City: Kyiv
- Car: Niva VAZ-2121, diesel 2.1 TD
- Name: Dmitry
- Gender: Man
- City: Kyiv
- Car: Patrol 60 “FENIX”
- Name: Andriy
- Gender: Man
- City: Lviv
- Bryntsev likes this
- Auto: The hare (was), now in search.
- Name: Alexey
- Gender: Man
- City: Kyiv
- Car: TLK 4x4, Citroen
- Name: Igor Ivanovich
- Gender: Man
- City: Kyiv
We unscrewed 2 pulleys using a wrench (tire changer) very easily. It’s true that it’s better to simply remove the nut from its place and continue to turn it either at a slower speed or by hand.
- Bryntsev likes this
- Auto: Bicycle
- Name: OLEG
- Gender: Man
- City: Vyshgorod
disassemble the gene and clamp the rotor in a vice,
- Car: Wrangler TJ 4.0, TLC79 1KD-FTV, TLC80 1HD-FT
- Name: Vladimir
- Gender: Man
- City: Uzhgorod
- Fat man, rut and Shyrik like it
- Auto: MPS
- Name: Sanya
- Gender: Man
- City: Kyiv
And the best assistant in this case is an impact socket or impact wrench. . Well, the last option is to cut off the nut. you put it on the nut, twist the rod and it cuts through the nut itself.
- VALERIUS, Kooper and Bryntsev like this
- Car: Wrangler TJ 4.0, TLC79 1KD-FTV, TLC80 1HD-FT
- Name: Vladimir
- Gender: Man
- City: Uzhgorod
An impact wrench is a good option, and also the advice of cutting the nut with a tool is also a good option, but not everyone has such a tool.
- Shyrik likes this
- Auto: NIVA and underdrive
- Name: Sergey
- Gender: Man
- City: Kieff
- Kooper and Bryntsev like this
- Car: Niva VAZ-2121, diesel 2.1 TD
- Name: Dmitry
- Gender: Man
- City: Kyiv
- Car: Niva VAZ-2121, diesel 2.1 TD
- Name: Dmitry
- Gender: Man
- City: Kyiv
- Auto: Bicycle
- Name: OLEG
- Gender: Man
- City: Vyshgorod
At the tire service, they unscrewed it without any problems with a pneumatic impact wrench in a minute and 5 UAH.
- Car: Niva VAZ-2121, diesel 2.1 TD
- Name: Dmitry
- Gender: Man
- City: Kyiv
- Car: Wrangler TJ 4.0, TLC79 1KD-FTV, TLC80 1HD-FT
- Name: Vladimir
- Gender: Man
- City: Uzhgorod
I'll remove the vacuum pump from the back, fix the rotor, and tighten it properly. There is a rather thin shaft, I was afraid that when I removed the nut I would twist it. The torque to tighten is less than the torque to break the nut.
- Car: Niva VAZ-2121, diesel 2.1 TD
- Name: Dmitry
- Gender: Man
- City: Kyiv
I also remembered that when my grandfather changed the drill cartridges, he rubbed the mating surfaces with rosin. Can we do the same here?
Modern cars are equipped with a large amount of electrical equipment, both basic and additional. The source of current for its normal functioning is the battery. The battery is recharged when the engine is running by a generator set (also known as a generator).
