A detail that does not catch the eye and seems insignificant, actually plays an important role in ensuring the functionality of all vehicle systems. Having a fairly simple and reliable device, the crankshaft pulley sometimes needs to be replaced. Most often it is removed when it is necessary to replace the crankshaft oil seal. In this regard, it is important to know what types of pulleys exist, what can cause breakdowns, and how replacement is made.
Types of pulleys for the crankshaft
The vast majority of car mechanisms use energy received from the rotating crankshaft to operate. If the rotation of the wheels is ensured by a whole system of shafts and gears, then a crankshaft pulley is used to drive the gas distribution mechanism (GRM), generator, pump, air conditioner.
In different periods of the automotive industry and for different brands of cars, pulley design solutions independent of each other were used. It makes no sense to say which type of pulleys is better; for different operating conditions of the car there is a different type of pulley.
Crankshaft with pulley for V-belt
Almost all cars, trucks, and buses with engines developed by domestic designers in the Soviet era are equipped with a belt drive for the generator. The pulley for such a belt has an all-cast (all-welded) design, and the groove repeats the configuration of the V-belt.
The pulley is mounted on the end of the shaft through a key, which prevents it from turning, and is secured with a nut (less commonly, a bolt). The simplest design allowed the pulley to be used throughout the entire period of operation of the motor.
Crankshaft Timing Pulley
In order to facilitate the gas distribution system and wire, the designers proposed using a belt rather than a chain. A similar design is found on almost all modern cars. In order to achieve maximum coincidence of the angle of rotation of the crankshaft and camshaft, the inner surface of the belt has grooves, and teeth are applied to the outer rim of the pulley. That is why such a pulley is called toothed. Provided timely replacement of belts and proper operation, the pulley itself lasts quite a long time, and breakdown is rare.
Crankshaft damper pulley
At the moment of startup and a sharp change in crankshaft rotation speed, the belt and gas distribution system are subjected to a strong impulse mechanical effect. The developers proposed equipping the pulley with a damper - a rubber layer between the inner race and the outer working disk. This design has found wide application in engines for minibuses and light-duty vehicles.
The designers achieved the desired result, but at the same time significantly reduced the life of the pulley. Rubber loses its elasticity and breaks down due to temperature changes, aggressive environments, and mechanical loads. Car owners are forced to continuously monitor the condition of the damper and urgently change the pulley if defects appear. Sometimes the pulley breaks, completely immobilizing the car.
How to replace a crankshaft pulley
Whatever design the pulley is used on the motor, the principle of dismantling and installation remains the same. If the motor is located along the engine compartment, then the pulley is located in the lower front part, behind the cooling radiator. If the block is located transversely, the pulley can be accessed by removing the right front wheel.
The most frequently asked question on auto forums is: what thread is on the crankshaft pulley? The problem is that the nut or bolt is too tight. Experiencing serious difficulties during dismantling, car owners doubt the correct direction of their efforts.
In this case, there is only one answer - the thread is right-handed, that is, the nut (bolt) must be unscrewed counterclockwise. The crankshaft rotates in the opposite direction, which results in a gradual, strong tightening. If we add to this the processes of oxidation and corrosion, then it is very difficult to remove such a tightening by hand.
Knowing some techniques, the whole process can be reduced to 10 minutes. The algorithm of actions is as follows:
- the car is installed on the inspection hole, the wheels are fixed with stops;
- when the block is positioned transversely, the wheel is removed and a “tragus” is placed under the brake disc;
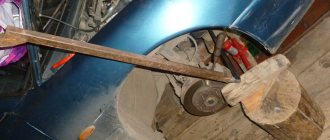
- a socket wrench with an extended lever is put on the head of the crankshaft bolt (nut) and rests against the floor in the direction of rotation;
- the armored wire is removed from the ignition distributor so that the engine does not start;
- By briefly turning on the ignition, the starter is activated, the force of which is usually sufficient to tear off the bolt (nut).
We recommend: What is a calcium battery, its pros and cons
This technique can be repeated several times until the puff is released. Next, unscrewing is done manually. To facilitate the process, it is recommended to cover all joints of parts with a layer of WD type lubricant or brake fluid in advance.
Pulling the pulley off the crankshaft is also not easy. Firstly, the landing dimensions are selected for the most durable connection and elimination of backlash. Secondly, the crankshaft pulley key also provides resistance due to the tight fit. It is ideal to use a special screw puller. In the absence of such devices, the pulley is removed using a pry bar, gently pressing on the back surface of the pulley in different places.
If the car owner managed to dismantle the pulley, then there will be no problems with its installation. Everything happens in the reverse order, and the crankshaft will provide itself with reliable clamping.
Crankshaft pulleys and their varieties
To operate the timing mechanism (gas distribution mechanism) of a pump, air conditioner or generator, a crankshaft pulley is used. There are different types of pulleys, each car has its own type.
Crankshaft with V-belt pulley
Many modern cars use a belt that interacts with the alternator. For such a belt, a pulley with an all-cast or all-welded design is used, with the grooves clearly repeating the shape of the belt.
The pulley is secured with a nut or bolt, depending on the design, and is inserted through a key onto the end of the shaft. Thanks to its simple design, the pulley lasts a very long time and easily withstands the entire service life of the motor.
Crankshaft toothed pulley
If earlier a chain was used to drive the timing belt, then over time many cars abandoned it and switched to using a belt in order to lighten the system. Now all modern cars use exactly this design with a timing belt for timing drive. To ensure that the rotation angles of the crankshaft and camshaft match as well as possible, grooves were made on the inner surface of the belt, and there were teeth on the pulley.
And the teeth fit perfectly into the grooves for the belt. So, it is precisely because this pulley has teeth that it is called a crankshaft timing pulley. If you change the timing belt on time, the entire system will last a long time. If you forget to change the belt, then you will have to overhaul the entire engine.
Crankshaft damper pulley
Since when starting the engine or during a sharp increase in crankshaft speed, an increased load is created on the belt and the entire timing system. Therefore, car manufacturers began to equip the pulley with a special rubber layer - a damper. This layer is located between the outer working disk and the inner race. This design is widely used in engines installed on minibuses and other similar vehicles.
Thanks to the use of a damper, it was possible to reduce the service life of the pulley, since due to temperature changes, the rubber loses its elasticity and breaks down. Therefore, for the system to work properly, car owners need to monitor the condition of this damper and, if something happens, change the pulley so that the car remains on the move.
How much does an overrunning clutch cost?
The price of a generator coupling depends on the make and model of cars:
- If you buy an original one, then for cars of class “B”, “C” the overrunning clutch will cost up to 3,000 rubles.
- For class “D” cars the price will be up to 4000 rubles.
- For a luxury car, the clutch will cost up to 12,000 rubles. Alternators in expensive cars are large.
When replacing the overrunning clutch, it is advisable to immediately replace the alternator belt, tensioner and drive rollers.
The above prices are for original spare parts. If you take Chinese ones, you can take from 700 rubles.
Purpose of the crankshaft pulley
The design serves as a transmission from the drive to the attachment and consists of a massive disc-shaped cast iron part that is located on the axis. In addition, it contributes to cushioning during changes in rotation, balancing of the rotating device, and cooling of belts.
The design has a gap, with the help of which the disc is mounted on the camshaft in the front part, which comes from the carburetor or from the valve injector. The fasteners will be placed on it. And on top there are holes for attaching V-belts and poly-V-belts. The structure itself is quite heavy, so during manufacturing at the factory holes are made to reduce weight.
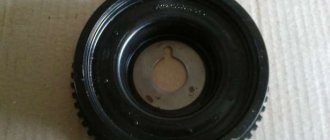
The part comes in two types - a crankshaft damper pulley and a regular one. Unlike the damperless part, the part has massive rings. There is a gasket on the outside, which is located separately from the base. The gasket reduces vibrations. In addition, the part is equipped with an outer disk and periphery connected by durable rubber. The rubber gasket protects against temperature changes and other influences. With prolonged use of the vehicle, the gasket wears out. Therefore, it needs to be changed from time to time in order to keep intact the more important part - the massive disk. External aluminum car part with irregularities. The toothed coating facilitates the operation of the part position sensor.
We recommend: Engine preheater: do-it-yourself installation
What is a PTO on a walk-behind tractor - description and functions
A power take-off shaft is an element that is necessary for installing various types of attachments on a walk-behind tractor. Walk-behind tractors with a power take-off shaft allow the use of such types of attachments as mulchers, seeders, harrows, stump grinders, mounted mowers, as well as attachments installed directly into the trailers used for work.
The main function of the power take-off shaft is to receive and transmit rotational forces from the engine to the attachment. In most cases, this important element is located at the rear of the walk-behind tractor, which allows you to connect almost all known types of attachments to it.
Among the main advantages of the power take-off shaft are its versatility, high strength and reliability. In addition to the advantages, the PTO has several significant disadvantages, which include the large weight of the element and the need to use an additional gearbox with it.
Step-by-step procedure for removing the crankshaft pulley on a VAZ-2114
Before you begin dismantling the crankshaft pulley, you need to unscrew some components and parts on the VAZ-2114.
- First of all, we park the car and ensure it is stationary.
- Next, loosen the generator belt tension bolt and completely remove the locking bolt.
All bolts are indicated by red arrows.
- Then, remove the front wheel on the right, after lifting the car.
- We dismantle the opened mud guard of the wheel by unscrewing the bolts along the perimeter of the wing arch.
- When access to the engine is open, we finally remove the alternator belt.
- Next, you need to fix the flywheel so that it cannot turn; to do this, it is best to insert a screwdriver into the plug, which is located on the side of the gearbox. The screwdriver is inserted directly into the opening that will appear when the plug is opened.
Insert the screwdriver into the hole indicated by the mark.
When the flywheel is secured, you can proceed to dismantling the crankshaft pulley.
- We remove the timing belt, having previously set the marks.
The marks are indicated by red arrows.
- In order to make it easier to tear off the fixed bolt, it must be treated with the above-mentioned WD-40, and if it is not at hand, then with any liquid that, one way or another, affects corrosion, for example, brake fluid.
- When the bolt is saturated with this mixture, you need to take a head of the appropriate diameter with an extension, and using a wrench, turn it counterclockwise so that it moves from its original location.
- If it is not possible to unscrew the bolt the first time, it is possible to influence it by lightly tapping it with a hammer and applying a new treatment of the anti-corrosion mixture, and then again try to tear it out of place.
- One way or another, after several manipulations the bolt will give in and come off.
- When the bot is unscrewed, pay attention to the presence of a key on the shaft. It can be removed easily, the main thing is not to lose it afterwards.
This work should be carried out very carefully.
- If nothing else interferes, you can proceed directly to removing the shaft. To do this, you can use a special puller, or, if you don’t have one, use pry bars or screwdrivers.
- Next, we move on to dismantling. When working with a puller, as a rule, no questions should arise, but when working with hand tools, you must do the following.
- Taking two screwdrivers or “installers” we insert them between the pulley and the crankshaft on both sides.
It is more convenient to pry off the crankshaft using a pry bar.
- Next, with successive movements we move the part from its place of fixation, gradually moving to the beginning of the shaft.
- Before proceeding with removal, it is best to tap the pulley itself with a wooden or rubberized hammer. This way you can avoid distortions during removal and additional exposure in the presence of corrosion and sticking.
Pulley removal
Unscrewing a fastening bolt or nut is only half the battle. Next you need to pull the pulley out of the shaft. The pulley cannot be removed easily by hand unless its seat is broken. In addition, if the pulley fits tightly onto the shaft, it is also secured against turning by a key.
There are special pullers for removing the pulley from the shaft. There are mechanical and hydraulic pullers.
The design of a mechanical puller is simple. Usually it has three legs, with which you need to hook the pulley itself, and rest the central rod against the shaft. After which, you need to rotate the rod, the legs will straighten and pull the pulley towards you.
There are even simpler pullers that you can make yourself.
If there is no removable device for the pulley, then you can use pry bars. If one person is filming, then take turns, moving it a little on each side so that there is no distortion. If there are two, then at the same time, from different sides, the pulley is pressed out from the crankshaft with a sharp movement.
It also happens that when using a puller, the walls of the pulley grooves cannot withstand and break off. Therefore, when using pry bars, they must be engaged as close to the shaft as possible.
How to replace a crankshaft pulley
Each car has its own characteristics for replacing the crankshaft pulley, but the principle is generally the same. If the engine is located lengthwise in the engine compartment, then the pulley will be in the lower front part of the engine compartment, immediately behind the radiator of the cooling system. If the engine is located transversely in the engine compartment, then in order to change the crankshaft pulley, you will have to remove the front right wheel.
Also, many are concerned about what kind of thread is used on the crankshaft pulley, so as not to accidentally tear it off. After all, the nut that holds the crankshaft pulley is usually very tightly tightened. Therefore, you need to know exactly which way to turn.
We recommend: Coolant temperature sensor (TES): characteristics, principle of operation, symptoms of malfunction, replacement
But there is nothing complicated here - the thread is right-handed, so if you need to unscrew the nut, you need to turn it counterclockwise. You also need to understand that the crankshaft rotates in the opposite direction from the thread, so the nut is tightened even more during operation.
In addition, no one has canceled oxidation and corrosion, so after a certain time it will be really problematic to unscrew such a nut.
But if you know what to do, then everything becomes quite simple and replacing the crankshaft pulley will be a piece of cake. The actions are:
- The first thing you need to do is place the car over the pit and fix the wheels;
- if the motor is located transversely, then remove the wheel and place something under the brake disc instead of the wheel;
- We put a wrench of a suitable size on the nut or bolt head, but with a large lever and rest against the floor in the direction of rotation;
- remove the armored wire from the ignition distributor so that the engine does not start;
- Using the ignition key, we set the starter in motion; this force is enough to unscrew the nut or bolt.
As soon as the nut begins to unscrew, you can then manually unscrew it using a wrench. By the way, to make it easier to unscrew the nut, you can apply WD grease or another similar lubricant to it.
Next, you need to pull the pulley off the crankshaft, which is also not an easy task, since the belt and pulley are very firmly connected to each other and there is no play between them. In addition, the crankshaft pulley key is tightly fitted, which also provides resistance.
Therefore, it is advisable to use a special screw puller; you can also remove the pulley using a pry bar, pressing in different places on the back surface of the pulley.
If you manage to remove the pulley, then the most difficult work has already been done. It will not be difficult to install the pulley in its place; you need to do everything in the reverse order, and the crankshaft will provide a reliable clamp on its own.
And then a video about how to quickly unscrew the crankshaft pulley using the method described above:
Possible faults
Removal and, if necessary, replacement of the pulley may be required in the following cases:
- If the hub has turned. It must be said that most often this happens due to previous inept repairs. The fact is that the VAZ 2110 has a fixing sleeve in the seat for the damper, pressed into the gear. It tends to fall out of the gear, causing the hub to rotate;
- Oil leaked from under the front crankshaft oil seal;
- The lightweight crankshaft began to resonate strongly;
- The old-style pulley or damper is loose;
- The damper seat broke. In case of such a breakdown, a replacement is needed, preferably together with the crankshaft gear;
- If it is necessary to remove the crankshaft - for repairs, replacement of liners, half rings, converting it into a lightweight one, etc.
Removing the damper
On a VAZ 2110, the damper is removed in the following sequence:
- Disconnect the ground from the battery;
- Remove the radiator fan and fluid coupling;
- After loosening the bolts securing the fan pulley, remove the belt;
- It is advisable to remove the radiator, but if it does not interfere, you can leave it, protecting it from damage from the engine compartment with a sheet of plywood or cardboard;
- Remove the pulley from the radiator fan;
- We gain access to the damper, unscrew the bolts, dismantle it;
- When removing the hub, you need to secure it from turning (for which there is a special tool).
Next we proceed depending on the purpose of the analysis. If you only need to replace the damper, we do it and assemble everything in the reverse order.
You should know that replacing the liners on a VAZ 2110 can be done either with or without removing the crankshaft. But this requires a special device, and besides, it is better to entrust such work to an experienced mechanic - a mechanic.
If the crankshaft was dismantled to replace the liners or half rings, then we continue:
- Remove the lightweight or regular crankshaft;
- We remove the half rings;
- We evaluate the condition of the liners, and if they do not need replacement yet, then be sure to remove them and mark each of them;
- But, unfortunately, no matter how carefully the owner treats his VAZ 2110, sooner or later the time for physical wear comes for the liners - they need replacement.
- Four repair kits of inserts are produced for the VAZ 2110. You need to buy them only as a set, and only in a strict sequence of sizes. Sometimes, however, situations are possible when you have to purchase them “through size”;
- thus, the crankshaft only lasts for four (and sometimes even three) overhauls;
- replacement of liners cannot occur without grinding the crankshaft. The only exception is if it is replaced with a new one. At the same time, an experienced craftsman can turn the crankshaft into a lightweight one.
But if replacing the crankshaft pulley is not such a difficult task, and almost any home craftsman can do it, then grinding and tuning the crankshaft should be entrusted only to experienced motorists.
When reassembling, please note that the groove on the hub must be aligned with the segment key. In addition, the bolt holding the hub requires a torque wrench. Its tightening torque should be 400 N/m.
Dismantling the “single” pulley (old model)
Actually, removing and reassembling the old-style pulley does not have any special differences, except that it is easier to remove. It is enough to unscrew just one central bolt and pry off the pulley with two screwdrivers.
If you find an error, please select a piece of text and press Ctrl+Enter.
Source
Reasons for dismantling the crankshaft
Dismantling the crankshaft on a VAZ-2114 may be required in the following cases:
- The reason that comes first is most often the replacement of the timing belt and other work that is somehow related to the gas distribution mechanism. Work should be carried out in accordance with the regulations, or if the mechanism fails.
- Another reason for dismantling is the failure of the crankshaft oil seals. They are changed when oil leaks occur in the places where they are installed.
Pulley fastening
On all VAZ-2114 vehicles without exception, the crankshaft pulley is fixed using a massive bolt, which can cause problems when removed.
A curved spanner wrench is good for fixing.
- First of all, this is due to its location, since it is difficult to securely and securely fasten the key or socket head.
- Secondly, even if you managed to position the key correctly, you will have to make every effort to dismantle it . This is due to the fact that at the factory it is tightened as tightly as possible in order to avoid the facts of self-unwinding. Also, the right-hand thread may not be the best for unscrewing it, which during operation only screws the pulley in tighter and causes the part to stick.
When performing work to remove it, it is best to keep WD-40 on hand.
BMW 5 series E60 Airlines ✈ › Logbook › Torsional vibration damper or trouble alone does not come
This typical M57 problem did not escape me either.
Not critical and without consequences. Only nerves and worries due to not knowing what and how. PS this is my third entry in 56,000 km in the “breakdown” category.
There were no signs of trouble, after two days of downtime, I had to go to Germany, take my cousin with his wife and two children to the wedding, choose the shoes myself and go shopping.
I love Germany for this sign. What does it mean, I don’t think it’s worth saying.
I found a store, parked on the second floor of a spiral parking lot, did some shopping, put my bags in the trunk, turned the key, pressed the button, started it up and out of the parking lot. Halfway down the descent, the taxiing became incredibly difficult, and for a couple of seconds the red battery light came on with the notification “Battery is not charging.” I turned off the engine, got out, and there was a strong smell of rubber. I opened the hood - at least put on a gas mask + they were smoking under the hood. I don’t know, but my first thought was that something caught fire in the car.
However, the factory damper still failed to cope 200 km before the break-in 300,000 km.
What to do? Saturday at about 19.00 in the evening, I don’t know if it’s possible to drive with such an almost breakdown, I’m in Germany in an unfamiliar city, no services or spare parts stores are open, the journey to home is over 100 km. Pick up four more passengers. Where to leave the car? Getting to Zurich by taxi would cost several hundred euros, on Monday I would have to go back to Germany, drag the car to the service station on a trailer, pay an inflated price for the part + labor. In Germany, auto repair services are expensive, I’m not talking about Switzerland.
It was decided: turn off the climate control, drive carefully, no higher than 2000 rpm, without sudden acceleration and fierce turns of the steering wheel.
His Majesty the damper. Its code 11238511371
, price in Germany 347.46 €.
The name is not Deutsche - SCHWINGUNGSDÄMPFER
. Don't break your tongue)
Just a couple of months ago, someone on the drive described a similar problem, but the author’s consequences were more tragic.
But when I changed the timing chains and all sorts of little things in March, they warned me that cracks and twists in the rubber were already visible. Worth changing. I, being sure that the BNV does not break, left this matter not because of greed or economy, but considered it unnecessary to make a replacement. I wanted it in the fall. And even despite all these “tips” that, they say, check that damper, maybe it’s really worth replacing, I didn’t take any measures. It could have ended worse.
What to order? Febi, Swag, Corteco? I decided on Swag. I chose the one with the fastest delivery: from Wednesday to Thursday. Ordered on Sunday. On Monday the message comes “Guten tag, Swag is out of stock, take cheap shit for 117 euros, MAXGEAR
O_o." I had to take it.
How to pick it up? There was no point in ordering in Switzerland, because...
In Germany, the total price for the same damper is 117 euros, in Switzerland - 228 francs + 35 delivery, a total of 263 francs. Converted to euros - 242 euros. Twice))) Although I was dumbfounded, after ordering in Germany, I found a damper on the local market for 146 francs (140 euros) + 35 delivery. BTA company. And there would be no train costs, plus 4 hours of travel.
The damper cost 117 euros, + 5 euros for accepting my parcel, 2 euros for recycling the packaging (at my request) + a train trip - expensive. Very. Someday I’ll write about local prices and why I ordered from Germany.
In general, I ordered on Sunday, on Monday they accepted the order (I expected it to be sent on the same day), on Tuesday it was sent, on Wednesday it was there at 14.00, on Thursday I picked it up and started changing it.
I did everything according to this video. A very smart guy in my opinion.
It was a bit of a hassle to remove the fan, or rather remove the hose from the lower right mount. Only later did I understand why it didn’t work out.
To unscrew the damper, you need to lock the crankshaft, remove the mini-plug and push a screwdriver or any other suitable tool into it.
I unscrewed the damper and gave in normally, without WD-40. But in order to remove it properly (and then install it), you need to lower the tensioner. To do this, you will need a 24mm socket or wrench. This was the end of my evening work, because I didn’t have this.
In the morning at the household. shop behind the head.
How not to immortalize it against the backdrop of the new cheapness?
Source
