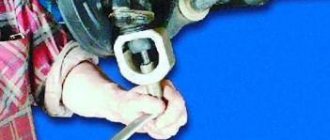
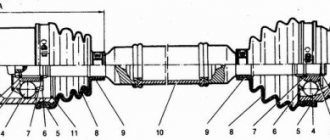
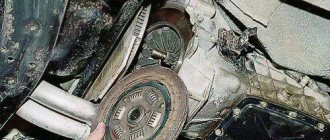
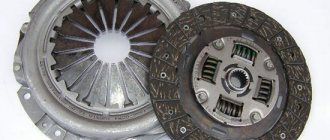
To replace the clutch cable on a VAZ-2112, you need to drive the car onto an inspection hole or overpass. If this is not possible, then you can simply raise the left side of the car on a jack. But the latter replacement method will be less convenient. Also, in this case, you will need to put the car on the handbrake, and put a beam under the rear wheels so that the car does not move while the work is being carried out.
Operating principle of the cable
VAZ models 2112 are equipped with a standard mechanical clutch drive for Volzhsky Automobile Plant products. Its distinctive features:
- structural simplicity;
- cheapness;
- ease of maintenance;
- decent endurance.
The main element connecting the clutch with the control mechanism is the cable discussed in this article. It is enclosed in a protective shell, which ensures the preservation of the lubricant placed inside and a number of other auxiliary functions.
The pedal is located in the cabin itself, and pressing it moves the clutch fork. The force is transmitted precisely by our cable.
At the end opposite from the foot drive there is an extremely simple adjustment device that allows you to set the pedal stroke length. It consists of two nuts screwed onto the end of the cable. It is not difficult to find - look at the area where the clutch fork is located. The upper nut is responsible for the actual adjustment, and the lower one prevents it from spontaneously unwinding.
The principle of operation of the mechanism is as follows: the person sitting behind the wheel presses the VAZ pedal, which pulls the cable, which, in turn, pulls the fork along with it. The latter moves the release bearing, causing it to press on the basket. As a result, the clutch disengages.
Replacement procedure
There are two generally accepted methods that allow you to remove a worn cable from a VAZ of the model in question. In the first case, dismantling of the frill and windshield wipers is required; in the second, this stage is skipped. Many believe that if you do not remove these devices, the work will take less time, but this is debatable. The problem is that these elements will really interfere when it’s time to install a working cable. After all, the owner's manual clearly states that both the frill and the windshield wipers need to be removed.
The procedure is as follows:
- de-energize the on-board electrical system - to do this, disconnect the negative cable from the battery;
- dismantle the wipers and frill;
- unscrew the nuts that hold the cable in the bracket - this can be done conveniently with a pair of 19 mm wrenches;
- release the flexible rod;
- disconnect the cable end from the clutch fork (if it is torn, then the lower fragment is probably already lost, and then you will not have to dismantle it);
- unscrew the screws securing the protective cover of the foot drive and remove it;
- remove the locking bracket that secures the cable end directly to the pedal (lift it to the maximum and pry the clamp with a flat-head screwdriver).
Now you need to move into the interior - here you need to unscrew the bolt holding the thrust plate of the cable end. To remove it, use an 8mm wrench.
Please note that some sites recommend dismantling the steering column before working in the cabin, but in reality this operation does not make sense.
So, after the support plate is released, nothing prevents you from freely pulling out the damaged cable. This is done from the salon - it’s more convenient.
Installation of a working element begins with pulling a flexible rod through the hole in the bulkhead separating the cabin from the engine compartment. All further actions are performed in the reverse order to those described.
The last step is adjusting the pedal
As follows from the car's operating manual, the travel of the foot clutch cannot exceed 125 millimeters. In this case, the boundary tolerances are no more than 0.5 cm in both directions. The limit above which the car cannot be operated is 16 cm.
Having finished with the theory, we proceed to the practical implementation of the task. First measure the actual pedal stroke. Place the ruler at its bottom - keep it strictly parallel to the floor. If the values are within the limits mentioned, then adjustment is not necessary.
Otherwise, move to the fork - here, as previously noted, there is a finishing mechanism. First, loosen the lock nut, and then, using a wrench, rotate the one above it to make the adjustment.
At the end of the procedure, measure the stroke - if everything is in order, then press the pedal several times to make sure that everything is working properly. Next, use the ruler again. Maintaining a normal indicator means that you did everything right.
Return to the fork and secure the position of the adjuster with the locknut.
An important point: it is advisable to make sure that in the end the pedal that releases the clutch is below the gas level. This speeds up the response of the mechanism and significantly reduces its wear.
What to do if the clutch pedal does not work
If this is exactly what happened, do not panic, call a tow truck or ask other drivers to tow the car. You can drive without using the clutch, start in first gear and either drive slowly with the hazard warning light on, or rev the throttle while changing gears. Driving for a long time without a clutch will “kill” the gearbox, but if you need to get to the garage or workshop once, you can. Of course, you can do it your way if there is no other choice and the price of transportation suits you.
Purpose of the cable and its place in the device
VAZ 2112 cars have a mechanical drive; it is installed on passenger cars of the VAZ family and not only, which are equipped with low-power power units. This type of drive compares favorably with others due to its very simple design and low cost of production. In addition, a mechanical drive is easy to repair and maintain because it contains a minimum number of necessary elements, see photo below:
Schematic design of a mechanical clutch
- As can be seen from the diagram, the main element of the mechanical drive is represented by a flexible cable enclosed in a shell
- The clutch pedal is located inside the car and is connected to the lever (clutch fork) through a flexible cable.
- At the junction of the fork and the cable there is an adjustment device, which is designed to regulate the free play of the pedal
- The operation of the drive is incredibly simple: the driver presses the pedal
- This sets the VAZ 2112 clutch cable in motion, which pulls the lever device
- This device (fork) moves the release bearing along the guide
- The release bearing presses on the legs (petals) of the basket
- Thus, the clutch is disengaged
Advice from professionals
A vehicle breakdown causes a lot of inconvenience and requires unexpected cash costs. To prevent such situations, it is recommended to take the advice of professionals.
- Carry out technical inspections of your vehicles regularly. This manipulation will allow us to identify future breakdowns and eliminate malfunctions at an early stage of development.
- Respond promptly to emerging signs. Do not operate a vehicle with worn parts.
- When making repairs, use only new and high-quality spare parts.
- Once again, spend a little and entrust the work to qualified mechanics if you don’t know how to remove the clutch cable of a VAZ 2110.
- To extend the life of the clutch cable, systematically lubricate it with a special substance using a syringe provided for this procedure. This feature will prevent chafing of the element.
Carefully monitor the condition of your car. Timely maintenance will extend the life of the vehicle.
Close Window.
Let's start replacing
As you know, there are two ways to replace the clutch cable on a VAZ 2112, with and without removing the frill and wiper. Which one is faster is a moot point; without removing it, it seems to be faster, but then when installing the cable in place, a lot of inconvenience arises, so I recommend leaving the method without removing the frills to the yogam. The standard instructions included with the car require their removal, therefore:
- Carry out work on a cooled engine.
- Disconnect (just in case) the battery terminals
- Take off the frill, don't be lazy
- Unscrew the wiper so it doesn't interfere
- We unscrew the nuts that secure the clutch cable in the bracket on the VAZ 2112 using two 19mm wrenches (twist one, hold the other)
- After this, remove the cable from the bracket
Unscrew the nuts securing the cable in the bracket with two keys 19
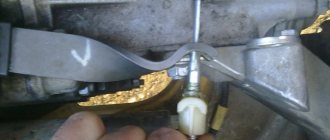
- Then you need to disconnect the cable end from the fork
- If the cable breaks, there may be nothing left to remove
Loosen the nuts on the end of the cable and disconnect it from the fork
- After this, use a screwdriver to unscrew the protective cover covering the clutch pedal.
- And remove the casing
Unscrew and remove the protective cover
- Unhook the bracket that secures the cable end to the pedal
- To make this easier, you need to raise the pedal as much as possible and use a screwdriver to pry out the clip
- Since we removed the frill, it is now much more convenient to remove the bracket from under the hood
From under the hood, use a screwdriver to remove the clip securing the cable to the pedal
- From the interior, using the “8” key, unscrew the bolt that secures the thrust plate of the upper cable tip
- In the image below, the steering column was removed for clarity; in general, replacing the clutch cable on a VAZ 2112 does not require removing the column
Unscrew the bolt that secures the thrust plate (the steering column has been removed)
- Then we pull out this support plate
- Pull the cable into the cabin
- Now push the new cable under the hood from inside
- After this, replacing the VAZ 2112 clutch cable in the reverse order of disassembly
- You can coat the inside of the cable with engine or transmission oil
- For lubrication in the winter season or closer to it, grease is better, as is used in CV joints
- Just keep in mind that it is most difficult for her to lubricate the cable from the inside.
- As you can see, replacing the clutch cable on a VAZ 2112 is quick and easy, all that remains is adjustment, which you shouldn’t forget about
Clutch pedal adjustment
According to the manual, the pedal travel (from the top position and all the way to the floor) should be 125 millimeters (+/- 5 millimeters), its maximum permissible travel is 160 millimeters, let's move on to adjusting it ourselves:
- To adjust the pedal stroke, unscrew nut 2, and when finished, tighten lock nut 1 (see photo after the line about disconnecting the end of the cable from the fork)
- Pull the rubber washer as far as possible towards the fork
- You can adjust the pedal so that it is lower than the brake pedal
- Then the clutch will engage almost immediately after releasing the pedal
- It is not recommended to adjust the pedal higher than the brake pedal, then the clutch will engage at the end, because a high pedal accelerates wear on the basket
The video on replacing the cable will clarify any unclear points, if any. That's all, take care of your car.
Add a commentAdd a comment We recommend readingVAZ 2109: replacing the clutch cable on your ownVAZ 2110: replacing the clutch cable in a garageReplacing the clutch cable on a VAZ 2110 on your own
To replace the clutch cable on a VAZ-2112, you need to drive the car onto an inspection hole or overpass. If this is not possible, then you can simply raise the left side of the car on a jack. But the latter replacement method will be less convenient. Also, in this case, you will need to put the car on the handbrake, and put a beam under the rear wheels so that the car does not move while the work is being carried out.
Stories from our readers
“Fucking basin. "
Hi all! My name is Mikhail, now I’ll tell you a story about how I managed to exchange my two-wheeler for a 2010 Camry. It all started with the fact that I began to be wildly irritated by the breakdowns of the two-wheeler, it seemed like nothing serious was broken, but damn it, there were so many little things that really started to irritate me. This is where the idea arose that it was time to change the car to a foreign car. The choice fell on the melting Camry of the tenth years.
Yes, I had matured morally, but financially I just couldn’t handle it. I’ll say right away that I am against loans and taking a car, especially not a new one, on credit is unreasonable. My salary is 24k a month, so collecting 600-700 thousand is almost impossible for me. I started looking for different ways to make money on the Internet. You can’t imagine how many scams there are, what I haven’t tried: sports betting, network marketing, and even the volcano casino, where I successfully lost about 10 thousand ((The only direction in which it seemed to me that I could make money was currency trading on the stock exchange, they call it Forex. But when I started delving into it, I realized that it was very difficult for me. I continued to dig further and came across binary options. The essence is the same as in Forex, but it’s much easier to understand. I started reading forums, studying trading strategies. I tried it on a demo account, then opened a real account. To be honest, I didn’t manage to start earning money right away, until I understood all the mechanics of options, I lost about 3,000 rubles, but as it turned out, it was a precious experience. Now I earn 5-7 thousand rubles a day. I managed to get the car buy after half a year, but in my opinion this is a good result, and it’s not about the car, my life has changed, I naturally quit my job, I have more free time for myself and my family. You’ll laugh, but I work directly on the phone)) If If you want to change your life like me, then here’s what I advise you to do right now: 1. Register on the site 2. Practice on a Demo account (it’s free). 3. As soon as you get something on the Demo account, top up your REAL ACCOUNT and go to REAL MONEY! I also advise you to download the application to your phone, it’s much more convenient to work from your phone. Download here.
In the store I ask jokingly that I need a clutch cable for a ten, which will never break! They answer me: change the car. I bought a clutch cable for a VAZ 2110 in Balakovo. Of all, he was the most expensive.
You can replace dozens of clutch cables in various ways:
- Remove the frill and the windshield wiper (to make it easier to get to the attachment of the cable end to the clutch pedal)
- Without removing the frill (method for those who are able to take the lotus position)
The standard instructions for replacing the VAZ 2110 clutch cable involve removing the frill and windshield wiper, but I decided to take the shortcut and not disassemble anything.
Also, after replacing the cable, the clutch needs to be adjusted.
Replacing the VAZ 2110 clutch cable without removing the frill
We unscrew the clutch cable fastening using a 19 key. Next, you need to remove the cable tip from the clutch release fork, but since the cable was torn, there was no need to remove anything
In fact, replacing the VAZ 2110 clutch cable with your own hands is quite simple. I did this procedure for the first time. The replacement was carried out in the winter outside in the evening with a flashlight in hand. I spent 2 hours replacing the clutch cable. I spent most of my time in the pedal area when removing and installing the cable.
Adjusting the clutch pedal VAZ 2110
The clutch pedal travel (all the way to the mat) should be 125mm (+-5mm). The maximum permissible pedal stroke is 160 mm. To adjust the clutch, you need to unscrew or tighten nut No. 2, after completing the adjustment, tighten lock nut No. 1. Tighten the rubber washer as much as possible to the fork.
You can adjust the clutch so that the pedal is lower than the brake pedal, then it will grab almost immediately after the pedal leaves the floor. If you make the clutch pedal high (higher than the brake pedal), then when you lower the clutch it will grab almost at the very end. A pedal that is too high can accelerate wear on the basket.
Replace the clutch cable on the “ten” yourself..
Replacement Tools
To work you will need:
- The key is "8".
- Two keys for "14".
- Screwdriver (phillips).
Sequence of work
For comparison, old and new clutch cables
They go in this order:
- Move the air filter housing to the side.
The air filter housing will interfere with us, so we will move it to the side. Moreover, all the housing latches were broken and it was dangling under the hood - Unscrew the clutch cable from the gearbox. To do this, you will need two keys at “14”. They loosen the two nuts that hold the cable in the bracket. We need this key. Remove the clutch cable bolt.
- Pull the cable out of the bracket.
Pull the cable out of the bracket - Unscrew the protective cover with a screwdriver.
It is located in the engine compartment. Removing the casing - Release the cable from the pin on the pedal. This removes the stopper. It must be removed carefully, as it will be used again.
- Next, the metal plate located under the pedal is unscrewed.
Clutch cable bracket in the cabin - you'll have to tinker with it - The cable extends completely into the cabin.
- A new cable is installed.
- The finger on the pedal with the new cable stops.
- The cable is fixed to a bracket on the gearbox.
Important! Before installing the cable, you need to adjust the clutch pedal so that it is 10-13 centimeters from the floor level. We have already written in more detail about replacing the clutch itself on a VAZ-2112.
Video about replacing the clutch cable
Clutch adjustment on a VAZ-2112
During clutch adjustment
To adjust, you will need to rotate the bolt, which is located on the cable on the gearbox side. When the pedal distance is adjusted, tighten the nut and press the pedal 2-3 times. If all is well, then tighten the locknut on the casing. Next, the car is assembled in the reverse order.
The clutch cable must first be lubricated with LSC-15 or Litol-24.
Loading, Please Wait!
This may take a second or two.
Hi all! We continue to mock the car, and this time we will make the clutch pedal softer and quieter.
I think many owners of tens and other front-wheel drive VAZs have noticed that the clutch pedal becomes tighter over time and a squeak appears. There may be several reasons for this, and I want to talk about the fight against one of them. In search of the cause of the tight pedal and creaking, I took the easy way and first tried to lubricate the cable and boss, which naturally did not bring any effect.
Having eliminated the cable, I moved on. The cause of a tight pedal and squeaking is the friction that occurs between the bushings and the axis of the clutch release fork. This happens because over time the lubricant loses its properties.
The main source of the problem is the lower bushing, since it is metal, and as you know, metal slides without lubrication with great reluctance, with the risk of scuffing, etc.
i.e. with excess friction. The upper bushing is plastic and even without lubrication the axle glides well in it.
This is what these bushings look like.
Thus, the main task is to lubricate the lower bushing. Ideally, you would have to remove the box, replace both bushings with new ones and fill them with fresh grease. But since we have enough more important things to do, throwing away the box in vain was not part of my plans. I decided to implement an improvement that I learned about a long time ago, but as always, I never got around to it.
The essence of the modification is to drill a hole in the plastic bushing of the clutch fork axis, and then lubricate both bushings through this hole.
It all sounds very simple, and in reality the same thing happens. Next in order: We remove the air filter box so that it does not interfere. We find this very bushing. And it is located at the checkpoint, strictly under the thermostat.
We drill a hole in it with a diameter of about three millimeters so that the nose of the syringe can fit through. By the way, in order to reach the bushing, you will need a fairly long drill. You can probably try to drill a short one, but the wiring harness and CO pipes will get in the way. You need to drill until the drill rests on the fork axis.
Then we fill the syringe with oil, I used transmission oil, and slowly pour it into the hole. The oil will not go away quickly, because...
The bushing fits tightly to the axle.
To speed up the process, you can slightly lift the bushing (as far as the latches will allow) by prying it around the perimeter with a screwdriver.
You need quite a lot of oil so that it flows along the axis and properly lubricates the lower bushing. I poured about thirty cubes, there is no need to be afraid of overdoing it, the excess will simply flow out. You can plug the hole using a screw.
If you suddenly need to lubricate the bushings again, this can be done by simply unscrewing the screw.
After the procedure has been completed, we get behind the wheel, squeeze the clutch and almost have time to get upset, because nothing has changed. But We don’t give up, we press the clutch five or ten times again, and on the next press the pedal falls down with less effort and without the nasty squeak.
Conclusions:
After lubrication, I finally got rid of the annoying squeaking noise and the clutch pedal became much softer. The feeling can be compared to replacing the clutch with a new one.
PEACE to everyone, like and share the post with friends
, this is another modification for the VAZ from the
MUST HAVE category!
Issue price: 50 ₽ Mileage: 179,800 km.
conclusions
As you can see, this work is quite simple and you can handle it yourself without resorting to the services of a specialist. If difficulties arise with its implementation, you can always call a specialist for help.
Home » Repair » VAZ 2110 – 2112 » The clutch cable of the VAZ-2110 has the following design: a metal cable runs inside a rigid plastic sheath.
On one side it is attached to the pedal, on the other hand it is connected to the release fork through a bracket by means of a mechanism for adjusting the position of the clutch pedal.
Causes of wear
Separately, it should be said about the correct operation of the machine. With a sharp start at high speeds or with regular movement, when your foot is on the clutch pedal, which causes slipping, this is also a wear factor.
Operational reasons are not the only ones. Cable wear may occur earlier than expected due to the following factors:
- low quality cable installation;
- Carrying out repair work with many mistakes;
- ignoring the first signs indicating a breakdown.
Every factor must be taken into account to avoid unexpected damage and expense.
Malfunctions
Any driver experiences an unpleasant feeling when the clutch pedal sinks to the floor. This can happen if the clutch cable breaks; it is also possible that the release fork breaks (this case is discussed in another article). The cable breaks more often on older cars that are used in extreme conditions or all year round.
The cable may become frayed, which affects the smoothness of the pedal and the operation of the clutch. This cable also requires replacement.
If the clutch cable is broken, you can drive your car to the repair site. You need to start the car in first gear and shift while driving. The following situation is possible: the cable broke while the gear was engaged, and the car stalled.
There is a possibility that it will be difficult to engage the neutral position. Then your car won’t even be able to roll off the roadway. The transmission is disengaged by rocking the car forward and backward and disengaging the transmission at the same time. You can jack up one of the wheels and spin it by hand, this will also help.
Even if the cable is not replaced, gear shifting is possible. It is possible to get to the service station, but such driving has a negative impact on the service life of the gearbox.
The cost of the spare part is low, about 300 rubles. The cost of replacing a cable in a car service is 400 rubles.
Why is this happening?
In general, the cable is a very reliable element, and it is quite difficult to break it. As a rule, such a breakdown occurs due to a heavy load on the part (or the car has traveled more than 300 thousand kilometers).
The main symptom of a malfunction is a failed clutch pedal. We also note that this symptom is observed when the clutch fork breaks. Its resource is an order of magnitude smaller. But in any case, without a clutch, you can drive to the service center yourself. To do this, start the car in first gear and start moving when the engine starts. Switching to the next speed is done with a re-throttle. When getting to the repair site, avoid major intersections. Otherwise you will stall in gear.
Replacing the clutch cable of a VAZ-2110
This procedure is simple and will not take much time.
- It is recommended to remove the windshield wiper and frill, this makes access easier, but you can do without it.
- There is a mounting bracket on the gearbox; you need to pull the cable out of it. To do this, you need 2 “19” keys, which are used to loosen the cable fixing nuts. The tension weakens and the cable can simply be removed from the mount.
- While holding the clutch fork, release the cable from it.
- You need to unhook the cable from the clutch pedal.
- The clutch pedal protective cover can be easily unscrewed with a Phillips screwdriver. This can be done if the frill and windshield wiper are removed. Without removing them, you can get to the support bracket (which is the next step) from the interior in an awkward position, raising the clutch pedal all the way.
- Use a screwdriver to pick up and pull out, together with the cable, the locking bracket that secures the cable head to the pedal.
- Use a 10 key to unscrew the support plate.
- You need to evaluate the integrity of the bushing on which you will put the new cable. If it is severely worn, it requires replacement.
- Installing a new cable is done in the reverse order.
- The cable requires lubrication; the ideal option would be a grease that protects against freezing.
- The final step is adjusting the pedal. The distance between the pedal and the floor should be 125-130 mm. To begin with, the clutch pedal should be at the same level as the others. Loosen the cable fastening nuts on the gearbox bracket. Using the adjusting nuts, the new position is adjusted: the lock nut is unscrewed to the maximum distance, and the second one is unscrewed until the pedal moves freely. The rubber bushing slides up to the fork. The locknut is tightened.
This completes the installation.
Dismantling
Next, you need to remove the old cable, which will allow you to install a new element of the clutch system. The sequence of work will be as follows:
- Remove the windshield wiper from your "ten".
- Loosen the locknut and adjusting nut slightly.
- Remove the rim of the damaged cable from the clutch release fork.
- Slightly move the cover of the lower end of the cable casing using a 17 wrench.
- At the same time, you need to loosen the nut securing the tip to the bracket. The tip must be held with a second key of 17, which will prevent turning.
- Remove the required tip from the bracket.
- The windshield wiper mechanism bracket is held on by 2 nuts that need to be unscrewed. Plus, dismantle the bracket itself directly.
- Do not forget that during reassembly, the bracket must be installed with the inclined part towards the front of the car.
- Now you tighten the screw that secures the protective cover and remove its holder.
- Bend the cover a little, which will allow you to reach the fastening of the cable tip to the pedal responsible for the clutch.
- Using a flathead screwdriver, pry and remove the support bracket from the “finger”, and then remove the cable end from it.
- The next step is to remove the bolt securing the cable holder to the pedal bracket. This way you will finally be able to pull the damaged cable through the interior.
- But that's not all. Remove the bushing from the pedal pin.
- If the bushing is broken or worn out, be sure to replace it with a new one. But keep in mind that the design stipulates that the sleeve is cut. Therefore, this is not a defect that arose during operation, but the manufacturer’s idea.
