Gazelle business 4216 - fuses and relays
Gazelle Business - a family of trucks and minibuses produced primarily with engines UMZ 4216 in 2010, 2011, 2012, 2013, 2014, 2015 and 2016. After that, Gazelle Business was restyled and the updated version was produced in 2022, 2022, 2022, 2022 and to the present. In this publication we will show description of fuses and relays Gazelle business 4216 with block diagrams and photos - examples of their implementation. Note the fuse responsible for the cigarette lighter. In conclusion, we suggest that you read the complete operating instructions for Gazelle Business.
Malfunctions of Gazelle generators
The generator, like any other part in the car, tends to break down; there are several types of malfunctions:
- charging disappears completely;
- there is an “undercharge”;
- high voltage appears in the network (more than 14.7 Volts);
- the generator starts to make noise.
There can be several reasons for the noise:
- bearings are worn out or defective;
- the drive belt has defects;
- The belt tension is weak, and therefore a whistle occurs;
- the impeller touches the belt or generator housing;
- pulley damaged;
- The generator fastener came loose.
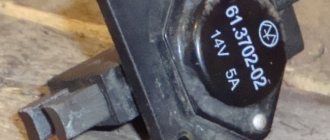
If the voltage in the vehicle's on-board network is higher than the permissible norm, there is only one cause of the malfunction - the relay regulator has failed. For the same reason, there may be an undercharge - the voltage regulator does not cope with its functions.
If there is not enough charging, or it is completely absent, there may be several reasons for such problems:
- the brushes in the brush assembly are worn out;
- there are breaks or short circuits in the armature winding;
- these same defects are present in the stator winding;
- The diode bridge is faulty.
Block in the cabin
On the left in the instrument panel, under the protective cover, there is the main relay and fuse box.
Photo - diagram
Description of fuses
p, blockquote 7,0,0,0,0 —>
| F1 | 10A Side light lamp in the left block - headlight, side light lamp in the left rear light, side light indicator, license plate lamps |
| F2 | 10A Side light lamp in the right block - headlight, side light lamp in the right rear light, glove box lighting lamp, backlight lamps for switches, sockets and cigarette lighter |
| F3 | 15A Low beam lamp, left block - headlights, low beam indicator |
| F4 | 15A Low beam lamp, right block - headlights |
| F5 | 15A High beam lamp, left block - headlights, high beam indicator |
| F6 | 15A High beam lamp, right block - headlights |
| F7 | 10A Fog lamps in rear lights |
| F8 | 10A Turn signal relay in turn signal mode |
| F9 | 15A Turn signal relay in hazard warning mode |
| F10 | 10A Brake pedal position sensor in brake signal mode |
| F11 | 20A Fog lamps (optional) |
| F12 | 15A Differential lock (optional) |
| F13 | 10A Instrument cluster, speed sensor, reverse light switch, heater valve, heater pump relay coil |
| F14 | 10A ABS control unit |
| F15 | 20A Electric motor and windshield wiper relay and right steering column switch |
| F16 | 5A Lighting control unit (except for side lights and instrument panel backlight adjustment) |
| F17 | 15A Heating and ventilation control unit, auxiliary heater fan switch |
| F17 | 5A Power mirrors (optional) |
| F18 | 25A Electric motor and electronic heater fan speed controller, heater pump relay |
| F18 | 15A Additional heater (cars GAZ-2217 and mod., GAZ-2752 and mod. with two rows of seats) |
| F19 | 20A Electric motors for glass lifts (optional) |
| F19 | 15/20A Heater |
| F20 | 20A Electric glass lifts (optional) |
| F21 | 20A Horn Relay, Cigarette Lighter , Socket |
| F22 | 15A Engine compartment lamp, interior (cabin) lamps, step lamps, passenger compartment lamps, heated mirrors |
| F23 | 10A Audio head unit |
| F24 | 5A Diagnostic block, heating relay for exterior rear-view mirrors, electric drives for exterior rear-view mirrors (optional) |
| F25 | 15A UMZ-4216: Engine control system (terminal 15/1 of the ignition switch) |
| F25 | 5A ISF2.8s4129Р: Engine control system (terminal 15/1 ignition switch) |
| F26 | 20A UMZ-4216: Winding and contacts of the main relay ISF2.8s4129Р: Heating system heater (optional) |
| F27 | 15A UMZ-4216: Fuel pump relay ISF2.8s4129Р: Reserve |
| F28 | 5A UMZ-4216: Engine control unit, diagnostic block ISF2.8s4129Р: Diagnostic block, preheater control panel (optional), tachograph (GAZ-3221 vehicles and mod.) |
| F29 | 10A Electric pump of the heating system (cars GAZ-3221 and mod., GAZ-2705 and mod. with two rows of seats), air conditioning compressor clutch (optional) |
Charging the battery from the generator
While the vehicle is moving, the electricity generation installation generates charging voltage, which is the main resource for recharging the storage unit. The process of charging the battery from the engine is carried out in a gentle mode, completely eliminating the possibility of boiling the electrolyte in the banks.
What kind of charging should go from the generator to the battery?
How much should the battery be charged from the generator to ensure its full operation? It is generally accepted that to fully replenish the energy costs of a battery, a generating device with a charging current volume of at least 10% of the capacity of the storage device will be sufficient. In other words, for a 70 ampere/hour battery, the generation system must provide at least 7 amperes of charging current, which will be normal charging of the battery from the generator. The power of the storage source must comply with the recommendations of the vehicle manufacturer.
If a more powerful storage unit is used, the current value generated during operation of the car engine may not be enough to fully restore energy consumption. This can further lead to battery discharge and problems starting the engine. In addition, you should remember about the load from all electrical appliances that the machine is equipped with - the generating source must also cope with it.
How can an ordinary car enthusiast check whether the battery is charging from the generator?
How to independently check whether the generator is charging the battery?
Motor vehicles of the 21st century are equipped with on-board electronic systems that control the operation of all mechanisms, and also allow checking the battery charging from the generator. If the battery loses charge, its icon on the instrument panel will light up red. In addition, with the help of modern electronic devices you can monitor the voltage value in the network.
But what about those who have an old-style car, without bells and whistles? There are so-called “driver’s” methods that allow you to check whether the generator is charging the battery:
- Removing the terminal from the battery - if the generator malfunctions, the engine will immediately stall (only suitable for systems with mechanical ignition).
- Short circuit of the positive terminal to ground for a short time - check for a spark.
The above methods cannot be used when diagnosing modern cars - the control unit, fuses or diode bridge will instantly fail.
How to check the charging of the generator with a multimeter?
The operation of the generator set should be monitored and diagnostics of current, voltage and resistance values should be carried out at least twice during the year.
How to check if the battery is charging? Diagnostics of potential difference can be carried out using two methods:
- Directly on the generator winding.
- Through the battery pack, with which the energy generation source is inextricably connected directly with a large cross-section wire.
Let's connect the wires of the device in any order to the battery terminals and determine the mains voltage, the value of which should not be lower than 12 V. When the engine is idling with the load completely disconnected, the permissible voltage is determined by the range from 13.5 to 14 V. In this case, deviations of no more than 0.2 V down or up.
Blocks under the hood
The engine control unit
Relay block diagram
Decoding
p, blockquote 13,0,0,0,0 —>
- Fuel pump relay
- Fan clutch relay
- Main relay
The starter relay is mounted on the front panel, next to the vacuum booster.
Fuse box
It is located on the battery mounting bracket, behind the closed cover.
Designation
p, blockquote 18,0,0,0,0 —>
| Fuse box on vehicles with ABS | |
| 1 | 90A UMZ-4216: Generator power circuit (connection of the generator with the battery), starter relay contacts, ignition switch, fuses F9, F10, F18, F21–F24, F26–F28, air conditioner circuit |
| 1 | 125A ISF2.8s4129Р: Air heater |
| 2 | 25A UMZ-4216: ABS control unit |
| 2 | 40A ISF2.8s4129Р: Car light circuit and air conditioner circuit |
| 3 | 40A UMZ-4216: ABS control unit |
| 3 | 30A ISF2.8s4129Р: Engine control unit |
| 4 | 90A UMZ-4216: Low and high beam relay contacts, lighting control unit |
| 4 | 6A F2.8s4129Р: Fuel heater and the general positive circuit of the car, except for the light, positive generator, starter and air conditioner circuits, fuse link |
Fuse box on vehicles without ABS
p, blockquote 19,0,0,0,0 —>
- 90A Light circuit and generator positive circuit
- 60A Common positive circuit of the vehicle, except for the light, generator and starter circuits
Additional fuse box on vehicles with ABS and diesel engine
p, blockquote 20,0,0,0,0 —>
- 40A ABS control unit
- 25A ABS control unit
Under the hood, on the front panel, near the engine control system relay, a 15A fuse is inserted into the KPMSD wiring harness to protect the gas control unit.
Generator replacement
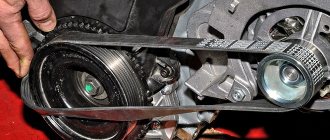
The entire generator unit on a car is changed in the following cases:
- if many parts in the device require replacement, and repairing the unit is not economically profitable, it is easier and cheaper to buy a new generator;
- you need to go on a flight urgently, and there is no time to do repairs;
- a new generator is installed, and the old one is repaired and put away as a reserve - it is a backup.
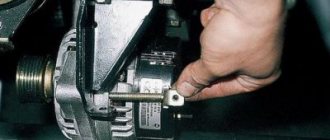
The difficulty of replacing the generator unit also depends on the engine model, but on any engine the work is done quite quickly, since it is still simple on all brands of Gazelle cars. The easiest way is to replace the generator on a car with a 402 engine; we carry out the work as follows;
- we place the car on a flat surface; in this case, you can easily do without a pit or a car lift;
- de-energize the electrical circuit - remove the terminal from the battery (preferably the mass one);
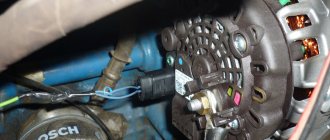
- unscrew the nut securing the power wire from the back of the generator (10 mm wrench);
- pull out the generator brush connector;
- unscrew the bolt of the tension bar of the alternator belt (12 mm wrench);
- first move the generator towards the engine with your hands, remove the generator belt;
- then we pull it away from the engine, unscrew the bolts and nuts (2 pcs.) – securing the generator unit to the brackets;
- dismantle the unit, install a new generator, attaching it to bolts and nuts;
- Do not tighten the fasteners all the way, press the generator housing against the engine, and put on the belt;
- Using a wrench or pry bar, we tension the belt and tighten the tension bolt;
- After tensioning the belt, we secure the bolts and nuts to the end - they are now located under the generator, and getting to them is somewhat more difficult.
Gazelle 3302 2705 (Sable) fuses and relays
Gazelle is a general designation for a series of cargo ( Gaz 3302 ), cargo-passenger ( Gazelle 2705 ) and passenger minibuses ( GAZ-2217 Sobol ). The most popular is the Gazelle 3302 with gasoline engines ZMZ 402, ZMZ 405, ZMZ 406 . Years of production: 1994, 1995, 1996, 1997, 1998, 1999, 2000, 2001, 2002, 2003. This model was restyled and updated was produced in 2004, 2005, 2006, 2007, 2008, 2009 and 2010. In this article you will find a description of fuses and relays Gas 3302 with block diagrams and their locations. Let's highlight the fuse responsible for the cigarette lighter. In conclusion, we suggest that you familiarize yourself with the electrical circuit of the GAZel 3302.
Depending on the year of manufacture, different designs of the fuse box (old and new model) are possible.
Prices for Gazelle generators
For Gazelle and Sobol cars, generators are produced by different manufacturers, the most well-known companies are:
- ELDIX (Bulgaria);
- PRAMO-ISKRA (city of Rzhev);
- KZATE (old name KATEK, Samara);
- BATE (Belarus).
In 2016, generators for GAZ commercial vehicles cost on average from 4,000 to 9,000 rubles; the cost of the unit largely depends on the manufacturer, engine model and the power of the generator itself. The most expensive parts are for the Cummins turbodiesel, prices for spare parts range from 8 to 15 thousand rubles, the most expensive are original production parts. The ZMZ-402 generator produced by KZATE for 65 Amperes is relatively inexpensive - on average 4.5-5 thousand rubles.
Block in the cabin
It is located under the panel on the left side, behind the protective cover.
Old style block
Upper block
p, blockquote 9,0,0,0,0 —>
| 1 | 16A Electric heater motor, electric heating pump (vehicles with two rows of seats) |
| 2 | 8A Reserve for the electric motor of the additional heater (vehicles with two rows of seats), relay for the electric fan of the engine cooling system (installed on parts of vehicles) |
| 3 | 8A Direction indicators |
| 4 | 8A Instrument cluster, parking brake warning lamp switch, EPH system, windshield wiper relay, reverse light, diagnostic warning lamp |
| 5 | 8A Hazard alarm |
| 6 | 8A Buzzer and lamp for onboard platform lighting, brake signal |
| 7 | 8A Radio equipment, remote battery switch, |
| 8 | 8A Electric motors for windshield wiper and washer |
| 9 | 16A Cigarette lighter , horn, portable lamp sockets |
| 10 | 16A Reserve |
Fuse number 9 at 16A is responsible for the cigarette lighter.
Bottom block
p, blockquote 11,0,0,0,0 —>
| 1 | 16A Fog lights |
| 2 | 8A Cabin lighting lamp(s), cargo compartment lamp (GAZ-2705, -27057), engine compartment lamp, lamps for the left row of passenger compartment seats and footrest lighting |
| 3 | 8A Instrument cluster illumination |
| 4 | 8A Rear fog lights |
| 5 | 8A Right front side light, left rear side light, license plate lights, side light warning lamp |
| 6 | 8A Left front side light, right rear side light, fog light relay |
| 7 | 8A Left headlight (low beam), electric headlight range control |
| 8 | 8A Right headlight (low beam), electric headlight range control |
| 9 | 16A Left headlight (high beam), high beam indicator lamp |
| 10 | 16A Right headlight (high beam) |
New sample block
Designation
Upper block
p, blockquote 15,0,0,0,0 —>
| 1 | 25A Engine control system (ZMZ-40522, UMZ-4216) |
| 2 | 15A Hazard warning lights |
| 3 | 15A Ground switch (on buses), radio |
| 4 | 10A Electric motors for windshield wiper and washer, right row of bus interior lamps |
| 5 | 10A Headlight relay, ABS (for buses) |
| 6 | 10A Brake lights |
| 7 | 20A Horns, cigarette lighter |
| 8 | 20A Heater motor, additional heater electric pump |
| 9 | 15A Additional heater motor |
| 10 | 10A Instrument cluster, reverse light, speed sensor, parking brake warning light switch, wiper relay |
| 11 | 5A Oxygen concentration sensor (ZMZ-40522, UMZ-4216) |
| 12 | 15A Engine management system and fuel pump |
| 13 | 10A Direction indicators |
Gas 3110. Generator repair. Volga
Repairing a generator yourself is difficult and impractical, since a special stand will be required to determine its serviceability and compliance with its characteristics.
| NOTE During electrical tests of the generator, especially in the rectification stage, the equipment used should not produce voltages higher than 14 V to avoid the risk of destruction of some components. |
Therefore, it is better to entrust generator repair to qualified specialists at a service station, where you can also replace the generator from the exchange fund. Such a generator will be 50% cheaper than a new one.
However, before replacing the generator, you can carry out some checks.
Checking the voltage regulator
on a car
To check the voltage regulator, you must have a DC voltmeter with a scale of up to 15 - 30 V, accuracy class no worse than 1.0.
Check the voltage regulator installed on the car in the following order:
- start the engine and let it run for about 15 minutes at medium speed;
- using a voltmeter, measure the voltage between terminal “30” and the “ground” of the generator;
- The voltage should be between 13.3 - 14.6 V.
If there is a systematic undercharging or overcharging of the battery and the regulated voltage does not fall within the specified limits, the voltage regulator must be replaced. In addition, it is necessary to check the condition of the carbon brushes.
Checking the condition of the carbon brushes
Although this work can be done with the generator installed, it is still recommended to remove the generator from the vehicle.
Blocks under the hood
Fuse box
It is located on the right, near the battery and consists of fuse links.
Cars with ABS (BPR-4)
- 60A Light circuit and generator positive circuit
- 40A ABS
- 25A ABS
- 60A Common positive circuit of the vehicle, except light, generator, ABS and starter circuit
Cars without ABS (BPR-2)
- 90A Light circuit and generator positive circuit
- 60A Common positive circuit of the vehicle, except for the light, generator and starter circuits
The starter circuit is designed for high short-term current, so there is no fuse in the circuit.
Relay block
Designation
p, blockquote 25,0,0,0,0 —>
| 1 | Main relay |
| 2 | Cooling fan electromagnetic clutch relay |
| 3 | Fuel pump relay |
| 4 | Starter relay |
The windshield wiper relay is mounted separately, above the expansion tank.
Electric panel
Old style
Decoding
p, blockquote 29,0,0,0,0 —>
| 651.3747 | Starter relay 651.3747 |
| B116.3705 | Ignition coil B116 |
| 1412-3733 | Control unit EPHH 1412.3733 |
| 13.3734-01 | Transistor switch 13.3734-01 |
| 13.3702-01 | Voltage regulator 13.3702-01 |
| 1902.3741 | Solenoid valve (1902.3741000) |
New sample
Suitable for Chrysler 2.4L DOHC engine
Purpose of elements
p, blockquote 33,0,0,0,0 —>
| 15 | Relay 85.3747 |
| 16 | Dryer relay 90.3747-10 |
| 17 | Relay 113.3747-10 |
| 19 | Control unit MIKAS 11CR |
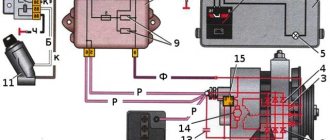
Gazelle generator circuit
The generator on Gazelle cars is a synchronous three-phase electric machine, in the excitation windings of which electric current is generated. The rotor (armature) rotates in the housing and is located inside a constant magnetic field, which is created by the stator (winding). Electricity is generated here as follows:
- when the engine starts, the movement is transmitted from the crankshaft through the drive belt to the generator set pulley;
- the rotor begins to rotate together with the pulley, a magnetic field arises between the stator and armature windings;
- due to electromagnetic induction, EMF is generated, alternating current appears;
- a diode bridge, consisting of diodes of different polarities, rectifies the electric current, making it constant;
- then the current from the rotor commutator is transferred to the brushes and supplied to the relay regulator;
- The regulator limits the voltage, ensuring safe operation of consumers.
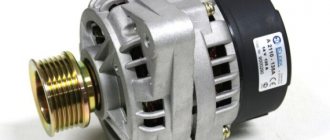
The Gazelle generator circuit is very simple; the assembly consists of the following parts:
- case, it is made of two halves - aluminum front and back covers;
- fixed winding - stator;
- rotating shaft - rotor (armature);
- pulley and impeller;
- diode (rectifier) bridge;
- two bearings on which the armature rotates;
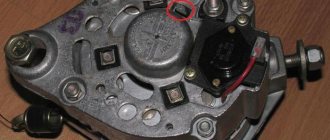
- brush assembly;
- relay regulator (voltage regulator).

