Replacing the instrument panel on a VAZ 2110 is not an easy task, but you can do it yourself, as long as you have the necessary tools. Today, many people install a special euro panel on their cars for the VAZ 2110. This work has some subtleties, even difficulties, but first things first.
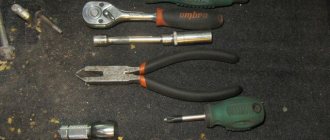
To carry out repair work, you should have a set of tools at hand:
- Phillips screwdriver, different sizes.
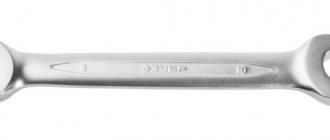
- 10 mm deep head wrench.
- Driver or ratchet.
- Knife.
- A flashlight may be needed.
We install Europanel and make sound insulation on VAZ 2112, VAZ 2111, VAZ 2110
Now we will try to figure out how to install the European version of the panel on a domestic VAZ-2110 car. Before starting the installation process, you need to decide for yourself the need for noise insulation of the body of a domestic car. The thing is that these procedures are better and easier to perform simultaneously. We take the European panel and carefully examine it. What the overlay itself looks like and what the inserts for a variety of buttons and air passages look like. In addition, consider what the panel plugs, bracket, and also the button for heating the glass of the rear of the car look like.
We have at our disposal only the factory version of the domestic VAZ-2110 car, which is equipped with the same factory panel. First of all, do not forget about caring for your car. Before we begin the process of replacing the panel, we begin work related to noise insulation of your vehicle.
To do this, we will need about six sheets of BIMAST-DOMS, as well as about three to four sheets of splen. Of course, we are talking about material that is designed with a margin for malfunctions. In addition, it is worth purchasing thin foam rubber that can self-adhesive; five sheets in size will be quite enough. First, you need to remove the front seats of your car. As for the upper part of the genital tunnel, it must be removed using a screwdriver. After this, we remove the lower part of the tunnel.
After this, we begin to remove the steering casing and steering wheel, and to do this you need to unscrew three self-tapping screws and only four screws. After this, it is necessary to remove the switches under the steering system. Having completed all of the above, we carry out work that involves dismantling the unit, relay and glove compartment, after which we remove the headlight control and the instrument panel. And finally, having reached the fasteners of the factory panel, we unscrew them too. Now all that remains is to remove it from the car body, and in the process of disconnecting it is necessary to unscrew everything that connects the panel and the car’s instruments. Remember that the factory noise insulation system must also be removed, because now you will have a new one. The standard domestic panel trim must be removed and a universal instrument panel must be installed. Now you need to secure the instrument harnesses and seal the joints of the air holes. It is also worth remembering that additional functions will require additional buttons, which will find their application in the European version of the car panel, and of course, additional wires that need to be connected right now, since this will not be possible later.
After all of the above has been done, you can start wrapping in bitoplast and all its connectors, which are available on the euro panel. We also screw the Euro linings using self-tapping screws. After this, it is worth noting that the work associated with installing the new panel is completely completed. Now you can apply materials that will ensure complete noise insulation of your vehicle. After the special material has been applied to all the necessary places, work related to gluing SPLEN must be carried out. Remember that experts note the fact that SPLEN is a fairly convenient material, and the process of working with it will not take a lot of time and will not require much of your effort.
And so, having done the difficult work, the final part of our process has arrived. We install the panel in its place in your car. Remember that you will not need more than two days to complete the entire work, but of the entire period, the largest working part must be spent on making a new connection to the alarm system.
Installation and repair instructions
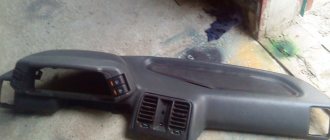
View after dismantling the panel
Replacing the panel, especially if you are installing it on an old VAZ 2112, is a certain difficulty. Older machines do not have some of the functions for which the panel has buttons. The wiring may need to be worked on.
Tools and materials
Standard tools will be required.
But a certain amount of additional materials is needed:
- you will need plugs for extra buttons that are not needed on an old car;
- air duct;
- various inserts, buttons (5 pieces) and pads;
- a new wiring harness suitable for the wiring diagram;
- brackets for mounting the instrument panel;
Algorithm of actions
The shield is fully installed.
First you need to remove the old panel. This is done in the same way as on other models of VAZ cars.
When installing, you need to replace the ignition switch with a decimal or Kalinovsky one, depending on how many terminals there are on the block to the lock. You can leave the old one and rearrange the wires, but the new one will work and look better.
The instrument panel wiring needs to be replaced. Also, connect the dimensions with additional two wires in Ш4/13 and Ш3/13 on the mounting block. This applies to older units with 11 relay spaces.
Depending on whether it is an injector or a carburetor, the connection has its own nuances. If you bought a solid factory panel, then instructions should be included with it. Briefly, it can be noted that the injector is not equipped with a speed sensor, please take this into account when installing.
The car's electrical circuit can be of great help. If it is not there, you can find it on the Internet. There are some differences between the VAZ 21124, 2111 and other car variants, so find yours.
If the instrument panel does not work after turning it on, check that the wiring is connected correctly - this is usually the error.
Europanel on VAZ 2110 instead of the old torpedo
A frequently asked question is where to buy and how to install a Euro panel or dashboard trim on a VAZ 2110 with your own hands. This is not surprising, I’m already tired of dozens of ancient panels and want to somehow update the interior. In this article I will show you what is needed in order to change the old VAZ 2110 torpedo to the euro and many important issues that you will encounter when replacing the old torpedo.
First, let's define what “installing a torpedo on a VAZ 2110” means. In fact, only the panel overlay is different, and the lower part of the panel remains the same. It turns out that the torpedo is collapsible and consists of 3 parts. We are talking about the very top trim, so installing it is not as difficult as replacing the entire dashboard of a car.
About replacing seats
The seats on the VAZ 2112 cannot be called comfortable. This is especially noticeable on long trips. So, at the first opportunity, drivers put seats from other cars on the “two-wheeler.” As a rule, Skoda Octavia acts as a “seat donor”.
It is impossible to install the seats from this car on a VAZ 2112 in the garage, since serious adjustment of the fasteners and welding are required. There is only one option: use the services of specialists with the appropriate equipment.
Removing and installing the instrument panel on VAZ 2110, 2111 and 2112
Before you begin this repair, you must do the following:
After this, you can proceed to further actions. We immediately remove and remove all the elements of the panel, such as: the standard clock, the heater control unit, the display unit, as well as the central deflector, and do not forget about the buttons with the radio. As a result, we get approximately the following picture:
Next, using a screwdriver, pry up and remove the plugs at the upper corners of the instrument panel mounting. In reality it looks like this.
On the other side, we do the same, after which, using a socket and an extension, we unscrew the nuts securing the instrument panel in the upper part.
Now let's move on to the remaining attachment points. At the bottom, in the left and right parts of the panel - in the corners, there is also one screw that needs to be unscrewed. The first one is shown below.
The second one is located on the right side of the panel in the same place - at the bottom in the corner. Also, immediately unscrew the self-tapping screw that secures the diagnostic block:
Now we move on to the side fastening points of the frame, which are located in the center on each side - the photo below shows the left side:
On the right everything will be the same. Next we move on to the internal frame fastenings, which are located in the following places. The first one is under the fuse mounting block, to get there we open the cover and look inside the panel:
The second one on the right is visible when the glove compartment lid is open:
Of course, the mounting block will also have to be removed so that it remains intact with the sub-panel wiring.
We thread it inside with the instrument panel pulled back; you will also have to cut off some of the wiring fastening clamps, for example, in this place, which is shown in the photo:
Now we are trying to remove the VAZ 2110 panel, moving it to the side on both sides, evenly, without much effort or sudden movements.
In the photo above you can see that the headlight hydraulic corrector tubes were cut off, since in my case they were simply not needed. If you need to save them, do everything carefully and remove them by pulling the control unit out of the instrument panel. Next, we finally remove the panel, of course, after first disconnecting all the wires that will interfere with this.
Installation occurs in the reverse order, connecting all wires and connectors to their places, blocks and switches, as well as other elements that were removed as a result of this procedure.
Common faults and solutions
Tidy "tens" with installed LEDs
The control panel may stop working for several reasons.
As a rule, removing the instrument panel is carried out for the following malfunctions:
- The backlight on the “tens” control panel stopped working. In this case, it is necessary to diagnose the condition of the contacts, as well as the condition of the wiring responsible for the suspension. The shield could stop working simply due to the combustion of safety elements, or the lamps could fail due to wear, often the cause is a short circuit. In principle, as practice shows, there are more than enough reasons, so sometimes identifying and solving a problem without a tester can be very problematic.
- One of the most serious problems for which a disassembled device may have to be replaced is complete failure. If there is a system failure, and all sensors and indicators on the dashboard stop working without exception, the controller arrows fall down, and the light bulbs simply do not light up. To eliminate the problem, you must first diagnose safety component number 15, it is marked as F6 and this part is located in the fuse block. If this component is burned out, then this problem can be solved simply by replacing it with a new one. However, first you need to figure out exactly what the reason for its burnout is. First, you should find and eliminate the cause, only then install a new element. As a rule, the cause of a blown fuse is a short circuit in the on-board network.
- The arrows began to spontaneously move up and down. This problem occurs quite often in domestic dozens; as a rule, the main reason is the problem of poor ground contact. Firstly, the ground wire is connected to a partition designed to separate the passenger compartment and the engine compartment. If you need to get to it, you will need to dismantle the audio system from its installation location; the quality of its fixation must be checked. Secondly, quite often during installation the mass is removed to another place so that it is more conveniently accessible. So if you have an anti-theft system, but there is no wire under the car radio, try looking for it under the trim, in particular, next to the driver’s left foot. Thirdly, the ground wire could have been damaged during installation of a new car radio. When the negative wire is connected, the ground wire must be unscrewed. Next, it is reinstalled, however, as practice shows, it is often less reliable than it was originally. As a result of vibrations that occur during driving, driving on uneven roads, including potholes and bumps, the mount begins to weaken over time. Accordingly, this leads to the contact being lost, and this, in turn, leads to the inoperability of the control panel. So, first of all, you need to securely fix the wiring, as this can cause certain difficulties in the future.
- Malfunctions related to the operation of the device itself. If you need to qualitatively check whether everything is normal with this device, dismantle it as much as possible from the installation site, but to do this, do not disconnect the wires that power it. First, the white wire marked X2 is diagnosed, which is connected to the first contact. In addition, using a multimeter, you should also diagnose the presence of voltage on pins 9 and 10. If the system is working properly, you will notice when diagnosing that the system voltage is 12 volts. We also recommend checking the back of the dashboard - all conductive tracks on it should be intact.
- As practice shows, the problem of the control panel not working is often caused by the failure of the cigarette lighter itself. This is because many car enthusiasts practice connecting various electronic devices and gadgets to this socket for various functions. For example, it could be a charger for a mobile phone, a tablet; the charger can also power a video recorder, radar detector, GPS navigator and other devices. Since devices of this type consume a large amount of current, the devices are often damaged by the cigarette lighter itself, and the problem of burnout of the F19 fuse element can also often occur. Accordingly, the control panel either turns off completely or continues to function, only incorrectly. If the fuse is working, you can try to disconnect the plug socket. If these steps do not produce any results, then simply replace the safety device.
- Tuning the dashboard of a VAZ 2110 is often the reason for its performance. The new shield may not have been installed correctly and is no longer working. Or, during installation of the device, not all wires were connected, or they could simply be bent. If the problem is in the wires, then replacing them will solve the problem (video author - LedStyle70).
Soundproofing panel VAZ 2110
To soundproof the “tens” dashboard, they mainly use bitoplast, modelin, sealant and even polyurethane foam. Bitoplast and modelin are used to cover plastic panels on a disassembled dashboard, which eliminates squeaks and improves sound insulation. Something like this in the photo below -
Bitoplast is glued with a special glue; when installed in place in the right places, this material is compressed where necessary. It is recommended to paste over the panel naturally from the inside.
Some craftsmen turn the front panel into an impregnable fortress for vibrations and squeaks using ordinary mounting foam. However, it is not recommended to use such a radical method without some experience. As a result, this is what sticks out from under the torpedo -
In addition to soundproofing the VAZ 2110 panel, it is necessary to carry out a similar procedure with the floor, roof, and doors. Such comprehensive sound insulation will ensure maximum acoustic comfort in the cabin.
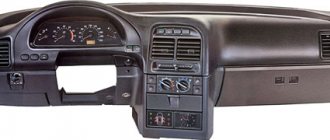
In conclusion, I would like to say that there are two panels installed on the “ten”, old and new models. Photos of the old version can be found at the beginning of our article. A photo of the new version of the panel is attached below.
The most interesting thing is that a new-style panel or a Europanel for the “ten” can be installed instead of the old-style panel. In principle, they are interchangeable, but it is worth considering that along with the installation of a new panel, you will have to install a new instrument panel assembly, another ACS unit (automatic control system for interior heating) and add an electric heater damper drive. The mounting points of the old and new panels themselves are the same, so there are no problems with installation.
VAZ 2110 panel, removal, installation of dashboard, sound insulation of VAZ 2110 panel
The VAZ 2110 panel or the “tens” dashboard has become a new word in the interior design of Lada cars. Despite its interesting shape and ergonomic appearance, panel 2110 eventually begins to make a lot of unnecessary sounds when the car is moving. This is especially noticeable on cars with high mileage. Therefore, very often the “tens” torpedo is completely disassembled in order to carry out total sound insulation and eliminate squeaks.
Let's say right away that disassembling the VAZ 2110 panel is not difficult in principle, but it is a very labor-intensive job that requires time and attention. The fact is that to remove the panel you will have to completely unscrew the steering wheel and disconnect a lot of electrical connectors. In order not to damage the electrics, before disassembling the VAZ 2110 dashboard, be sure to disconnect the battery. This is how the “tens” panel looks schematically.
This figure shows in detail, in the smallest detail, all the fasteners of the VAZ 2110 panel.
- 1 – panel
- 2 – side nozzle for ventilation and heating of the cabin
- 3 – instrument panel trim
- 4 – cover fastening screws
- 5 – panel fastening screws
- 6 – box
- 7 – console trim
- 8 – cover
- 9 – instrument panel panel
- 10 – mounting block cover
If you remove the panel completely, then only this should remain, look at the photo -
The red arrows indicate where the nuts and screws are attached, and the two large white arrows indicate the special mounting pins. When installing the panel, it must be installed on them; they serve to center the dashboard relative to the body.
Ceiling covering
The material from which the ceiling covering in the VAZ 2112 is made gets dirty very quickly. Over time, a dark spot appears on the ceiling, directly above the driver's seat. Similar spots appear above the heads of passengers (but, as a rule, later). Re-upholstering the ceiling covering on your own is not an easy task. But finding a reupholstery specialist is not easy, plus his services are not cheap. So VAZ 2112 owners do it simpler and simply paint the ceilings of their cars using universal paint in spray cans (to paint the ceiling of a “two-wheeler” you need 6 of them).
Sequence of work
Painting the ceiling directly in the salon is not an option. First, the coating must be dismantled.
- The ceiling covering in the VAZ 2112 is held on by 10 screws and 13 plastic latches located around the perimeter. To remove the screws, use a Phillips screwdriver. The latches are opened manually.
With panel disassembly
The first stage is carried out according to the plan already described. Next, we proceed like this:
- We assemble the trim, installing our instrument cluster, air duct panels and those accessories included in the kit;
- At the base of the panel we carefully attach the wiring harness;
- We connect the wires from the Euro pad to this harness, tightening everything with mounting ties;
- We connect devices to the required buttons using connectors;
- We secure the cover with self-tapping screws.
This method, although it takes more time, provides high-quality sound insulation to eliminate all annoying squeaks.
We also recommend replacing light bulbs with high-quality analogues or LEDs. So, the updated panel will look even more solid.
Installation of Europanel instead of the usual one on VAZ 2110, 2111 and 2112
Many owners who have owned a VAZ 2110 for a long time would like to change the boring panel to a more modern one. In this case, you can install a new type of panel from cars manufactured after 2006, or from the “Bogdan” versions, which are analogues of the tenth family, except that they were assembled in Ukraine.
With such alterations, basically you won’t have to change anything, but it’s worth considering that in this case you need to buy a complete Europanel:
- instrument panel frame assembly with trim
- instrument panel (combination)
- buttons and switches
- heater deflectors
- New heater control unit
- sub-panel wiring
- steering wheel, cover and switches
Only in this case everything becomes without any problems with minimal labor costs.
Content
Immediately after the appearance of the VAZ 2112, it became very popular.
This is due to the fact that the car, compared to its predecessors, has fairly good equipment and a rather attractive appearance. The car especially attracted fans of tuning. While some thought that earlier models were not worth the investment, this one is worth the attention and money spent. When changing a VAZ car, the interior is almost always upgraded, since the build quality is terrible, as is the insulation. Let's look at all the most popular ways to modify the interior of the car in question. VAZ 2112 interior tuning can be done independently at minimal cost.
Let's prepare a new dashboard trim for installation
To do this, we cut off the remaining material of the Euro lining. There is no need to cut out any space under the dashboard, otherwise there will be a gap between the control column and the trim. In this place you simply need to make 2 cuts on the sides so that this part of the lining can be slightly bent as needed. Also, there is no need to cut off 10 mm from the sides of the lining in the area of the side air ducts; these places must be adjusted to the location.
We measure the panel overlay and adjust it as necessary. At this step, it is recommended to use anti-creak (soundproofing the panel). This way, you will insure yourself against squeaks in the future.
To install the dashboard in the Euro trim, you can use one of the methods:
- Use fasteners from the Euro lining kit.
- Use fasteners from an old lining (from drilling).
- We connect connectors and Europanel keys according to the instructions:
When the overlay is ready, let's try to install it. Fastening the Europlate in positions 1-7 of the diagram. We fix 35mm screws on top, which are then hidden under a plastic cover.
The advantage of this method is time. If you dismantled the panel, then you will spend no more than 3 hours changing the lining. If this is the first time you are faced with a similar type of work, then about five hours.
Vibrant variety of colors
Today, the fashion for changing the dashboard lighting is gaining fantastic momentum. Almost everywhere cars have neon lighting or internal LED illumination. However, all these innovations are not a cheap pleasure, which not everyone can afford. The situation is different when replacing the factory backlight with a multi-colored one.
You can, no doubt, use ready-made tuning options, but this will also cost a lot. It is best to do it yourself. In this situation, the main thing is to have the necessary materials and patience. First you have to disassemble the “tidy”. The protective glass must be removed. Next we remove the arrows. To do this, you need to use a screwdriver and hard cardboard.
It should be placed under the arrow, and then pry it off with a screwdriver. Then you need to carefully and slowly lift it to the top. Next, remove the backing. A utility knife will be useful for this. It must be inserted between the panel and the substrate and a layer of sealant must be cut in a circle. Then remove the backing. Let's disassemble the panel and get started.
1. Remove the filter layer using a utility knife. A filter is a colored layer of paint. It is applied from the back of the substrate and gives color illumination to the speedometer numbers and other sensors. To completely get rid of the filter, you can use acetone or another liquid that contains alcohol.
2. Next, change the backlight color. First, you can change the odometer backlight. To do this, you will need to dismantle the odometer screen, and then remove the blue film and remove the backlight bulb. It should be replaced with a multi-color universal LED. He can change colors. We connect the LED to the socket of a standard light bulb. Reinstall the odometer screen.
3. Now you can start completely replacing the backlight. We attach the LEDs to the “tidy” frame. Such LEDs can be purchased complete with a color switch. We install them in place and attach them to the standard dashboard backlight contacts.
4. Let's move on. Now we need to make sure that the arrows have the ability to change the backlight. To do this, remove the layer of red paint from the arrows. For this operation, you can use a stationery knife and acetone. Once the arrow is clean, it can be painted using white nail polish. The main thing is that the arrow is white, since this color conveys the color scheme of the LEDs.
5. Before the final stage, you need to attach the LED color switch to the panel. Such a switch can be installed, for example, in the lower right corner of the dashboard. After this, you can install everything in place. First, the substrate is installed. For greater reliability, you can use a sealant. After this, we put the arrows in place. We insert the protective glass. After that we admire the result.
Removal and installation of VAZ 2110 panel
Below are step-by-step instructions for removing the “tens” dashboard.
- Disconnecting the battery
- Remove the steering wheel and steering column switches
- Be sure to remove the top lining of the floor tunnel
- Remove the glove compartment and unscrew the mounting screws
- Remove the headlight hydraulic adjustment handle by pulling it towards you
- Unscrew the hydraulic corrector nut and remove it
- Remove the upper side air duct deflectors by prying them up with a screwdriver
- Under the deflectors we find the panel fastening nuts, unscrew them
- We unscrew the screws from the bottom of the dashboard, next to the hood release lever, at the mounting block, in the niche of the glove box, etc.
- Now you can remove the door seals, remove the lining covering the front pillars
- Disconnect the electrical wiring terminals
- You can remove the panel by holding the steering column adjustment lever in the desired position
The fully unscrewed VAZ 2110 panel is supported by two guide pins (see photo above) with white arrows pointing to them. We assemble the panel in the reverse order.
Installation of an instrument panel from Priora on a VAZ 2110-2112
There is another method of modifying and tuning the instrument panel, which consists of replacing the dashboard from the Priora - VAZ 2170. Of course, the appearance will be much more interesting than even the Europanel, but connection and installation require a lot of investments, both financial and physical. The main problem with this modification is that the connectors for the under-panel wiring of the Priora and the under-hood of the VAZ 2110, which of course need to be connected, are different, and the connectors simply do not fit together.
In this case, there are two ways:
- Completely take all the wiring from the Priora, including the engine compartment harness, interior harness, power window control unit, comfort unit, etc.
- Join completely two different types of wiring manually, cutting off the connectors and insulating almost every wire.
Everyone decides for themselves whether the game is worth the candle, namely whether the result obtained is worth the money and time that will be spent on all these improvements and alterations. Even if you take the price of the Europanel, you will have to pay up to 20,000 rubles for it. new or from 8000 for a used one, it’s already expensive. As for the panel from Priora, everything here will be even more expensive - the assembled panel alone can cost 25,000 rubles. new and from 10,000 rub. boo. at a car wrecker.
Panel covers for VAZ 2110
Now there are several types of overlays on euro panels:
- Euro - 1, it is also called whim, that is, it is identical to the regular dashboard of the VAZ 2110, only there is no shelf on the passenger side.
- Euro - 2, and of course, you can find Euro - 3, but they are more suitable for modern VAZ cars.
But still, this version of the lining can be installed. If we talk about the quality of such linings, then they are high-quality and soft, unless, of course, you buy a fake.
When purchasing, you should pay attention to ensure that the pad has a complete package of components:
- The pad itself.
- Instrument buttons.
- Instrument panel.
- The design is different, so it is worth purchasing plugs.
- All buttons and pads.
- Air ducts.
- Fuse panel mounting.
Installation of Europanel on VAZ 2110, 2111, 2112
On the Internet, many are tormented by the question of where to buy and how to install a Euro panel on a VAZ 2110. This is not surprising, the old panel is already tired and I want to somehow update the interior. In this article I will show you what is needed in order to replace the old VAZ 2110 panel with the euro and an equally important question - where to find it:
installation of europanel on vaz 2110
For those who don't understand:
- Removing the europanel of a VAZ 2110 is the same as dismantling the old panel, there is no difference (see instructions below).
- To replace only the panel trim, it is no longer necessary to remove the panel!
So, let’s look at the panel overlays, which differ in:
- Euro-1, another name is “Caprice” and has an index of 21104. The distinctive features of this lining are that it has no shelf.
- Euro-2, index 2110L, the cover already has a shelf.
- Euro-3, an overlay without a shelf, but under the instrument panel of a new type (Kalina, Priora), has a climate control unit with 3 knobs and a large emergency stop button.
The euro overlay for the panel consists of:
- The pad itself
- Inserts for buttons (small button insert 2110L-2120031, large 2110L-2120032)
- Air ducts (2114-81080623)
- Instrument panel trim (2110L-5325124)
- Double button for turning on the headlights and low beam
- Button for turning on the rear fog lights (with locking)
- Button for turning on the heated rear window (with locking)
- Pads for buttons - 2 pcs.
- Plugs instead of buttons - 6 pcs.
- Wiring harness for connecting the dual headlight and low beam switches
- Block
- Instrument panel brackets
- You may need to purchase separately various buttons for the VAZ-2114 and pads for them.
Now we move on to installation, and here we can distinguish two methods, each of which has its own advantages and disadvantages:
Installing the Euro trim without removing the panel
We try on the panel overlay and adjust it if necessary. At this stage, it is recommended to use anti-creak (panel soundproofing). This way, you will insure yourself against squeaks in the future.
To install the dashboard in the Euro trim, you can follow one of the following methods:
- Use the brackets from the Euro trim kit.
- Use brackets from the old trim (drill).
We connect the Europanel buttons according to the instructions:
The advantage of this method is time. If you have already resorted to dismantling the panel, then you will spend about 3 hours replacing the lining. If this is your first time encountering this type of work, then about 6 hours.
Installing Euro trim with panel removal
If you decide to completely remove the dashboard, then follow these instructions.
Similarly, we cut the euro-overlay around the perimeter, according to the instructions attached to it. We assemble the cover: install the air duct panels and accessories that came with it.
We fix the Euro-overlay to the panel with dozens of self-tapping screws.
Replace the old panel with Euro-3
- Buy a Euro-3 torpedo assembled with under-torpedo wiring, find wiring diagrams for the old-style and new-style panels and do the docking yourself. Forum thread.
- Buy Euro-3 overlay.
Then you should replace the old-style automatic control system (2 knobs) with a new one (3 knobs) according to this instruction, or this one. Leave the old device, or replace the old-style dashboard with a new one (Kalina/Priora, 1118-3801010-12), again manually connect connectors (they are different) according to pinout diagrams.
Conclusion
VAZ 2110 with Europanel
By the way, if you still want to change the panel completely, then try installing a panel from the Priora in the top ten.
If I decided to replace the VAZ 2110 dashboard, then..
Components
When purchasing, you will receive what is included in the kit, namely:
- Europlate;
- Inserts for switches (buttons) of devices;
- Trim on the instrument panel;
- Since your instrument combination may differ from those whose installation is structurally provided, there should also be six plugs; they can be inserted instead of buttons;
- The buttons themselves and two pads for them: • Double – for low beam and dimensions; • To turn on the fog lights; • Heated rear window.
- Air ducts;
- Block and wiring harness designed to connect a double button for side lights and low beam;
- Brackets securing the instrument panel.
In addition, if you are not entirely satisfied with this combination, and you need more buttons for other devices, then they, as well as the pads for them, can be purchased separately.
1. The pad itself
2. Inserts for buttons, air ducts, instrument panel trim
3. Buttons, pads, plugs, harnesses
Installation without completely disassembling the panel
The panel, as many people know, consists of three parts, but the Europanel of the VAZ 2110 is, in fact, only the upper part of the dashboard. And if the goal is only to replace it, without any modifications or other tuning, then you can safely do a partial disassembly without removing all the equipment.
You will need:
- Drill;
- Screwdriver;
- Self-tapping screws.
The dismantling process goes like this:
Remove the dashboard; Open the glove compartment and unscrew the three screws from the inside. It is quite difficult to unscrew the screw near the windshield, but still doable; Next to the ECU, pull out 4 buttons and unscrew the screws from the inside; We loosen the fastening of the backlight adjustment. You can unscrew it completely, as is more convenient; Having opened the instrument fuse box, we also unscrew 2 screws from the inside; There are still two self-tapping screws that hold the panel trim, but they cannot be unscrewed without complete disassembly. Therefore, either these screws are carefully broken out, or even cut out by lifting the overlay on the right, using a metal file. At the same time, the appearance of the future updated “face” of the interior will not be affected, since the Euro trim will cover these places; Now you can safely remove the cover. We carry out actions with the overlay according to the instructions We lay a harness at the base of the panel We stretch and tighten additional wires into bundles The connectors under the overlay are wrapped in bitoplast Installing the Euro overlay and tightening it with self-tapping screws Installing the Euro overlay and tightening it with self-tapping screws View of the assembled panel from the inside
Photo instructions
So, we only need two Phillips-blade screwdrivers:
The first step is to unscrew the two self-tapping screws at the top of the shield trim, for which you will need a short screwdriver:
Then also two bolts from the bottom along the edges (shown below as an example of one side):
Now carefully detach the cover from above and move it to the side.
Now you need to disconnect the plugs with wires from the buttons on one side in order to move the cover to the side:
Now you can unscrew the two bolts securing the VAZ 2110 instrument panel, on both sides (the self-tapping screw is shown on the right):
Then carefully move the shield back, disconnecting it from the upper plates:
To completely remove it, you need to disconnect the two plugs with bundles of wires that go to the back of the instrument cluster:
And without any problems we remove it from the instrument panel, the result of which is clearly shown in the photo below:
Where can I get Europanel?
The fact is that europlates, as well as assembled europanels, have become in short supply, since their production was discontinued more than five years ago. Therefore, they mostly sell used ones in good condition; it is quite difficult to find a new one. If suddenly the offered product does not suit you, you can install the Priorovskaya by completely disassembling the old one.
Didn't find the information you are looking for? on our forum.
We recommend reading:
Why does the backlight on the instrument panel of the VAZ 2109 not light up?
Rotating axle VAZ 2107
VAZ 2110 how to change a frog on a car, diagnostics and replacement
The injector throws antifreeze out of the expansion tank of a VAZ 2114, reasons for how to prevent breakdown
VAZ 2110 how to insulate a car
Which seats from a foreign car fit on a VAZ 2107 without modifications?
Shell Helix engine oil for Priora
VAZ 2109 carburetor troits when cold - causes of malfunction
Tuning the instrument cluster
Let's look at the types of instrument cluster tuning in order:
- In many car parts stores, as well as on the Internet, you can easily find special 'inserts in the instrument cluster', with the help of which you can change not only the backlight colors, but also the design of the dials. However, in my opinion, they are unreasonably expensive, although anyone can make them on their own, the only drawback of this method is the need to remove the instrument needles
- The second option for changing the backlight is to replace the backlight bulbs with high-brightness blue LEDs, but this inevitably leads to the disappearance of red elements on the scales
- But if you simply paint the backlight bulbs blue using tsaponlak, this is a bad option, firstly, you will end up with a blue color that is not at all saturated (not bright), secondly, the red elements will disappear from view, and thirdly, the installed insert devices has a filter with a green tint
Let's make a substrate
First, change the backlight bulb to an LED in the odometer screen:
- The green filter should not be touched; it will not change the color or shade of the blue LED
- The action that will need to be performed with the LED is to grind off its bulb (since the bulb has a lens installed that concentrates the light and makes the diode shine directionally, like a flashlight)
- After this, we leave 0.5-1 mm of the inside of the LED (with the contacts on which the light element is attached), add a drop of Super Moment type glue
After this, we move on to the option of making an insert into the shield ourselves:
- It is best to have a template, download it from the Internet and print it, or take a scale from non-working instruments, remove the insert with the scales, scan it in film mode so that the pictograms of the indicator of dimensions, fuel, oil and others are visible
- Next, the CorelDRAW graphic editor will help you vectorize
- A radical change in the design of the scales is simply a waste of time, so you can easily leave the standard design, the main thing is that the readings are perfectly readable
- The base can be printed using a phototypesetting machine, you just need a good density of black color, otherwise you will have the entire panel glowing, and not just its numbers
Tuning trim for instrument cluster
To make a color base there are two options:
- Option one: take a film for a laser printer, print the outlines of the scales, setting the “mirror” mode, it is better to set the outline color to 5%
- We recommend that you first enlarge the contours (slightly) by 0.5 millimeters, in case there are any discrepancies between the tracing paper and the photo output
- We color the tracing paper with paints that are used in silk-screen printing, since such paints dry quickly, they are transparent and give a good rich color
- Option two: you can print the colored substrate on the film of an inkjet printer, however, most likely, you will have to run it several times to achieve a bright, saturated color
- To achieve the invisibility (invisibility) of the symbols of the control lights, we take a transparent film specially for an inkjet printer, print colored squares on it, which we lay according to the sample
- When the control light is not on, the designation pattern is practically invisible, and to achieve a better effect you can glue a piece of tint film onto the base
The final stage in making a “sandwich”:
- Taking into account the fact that the film from the phototypesetting machine came out glossy, we put a matte film as the first layer in order to laminate it, which has a thickness of 25 microns
- We put a base under the film
- The next layer is a laminating film to glue two sheets of paper together, instead of double-sided tape
- Then a colored substrate and again a matte film
- Film layers 1, 3 and 5 will give us additional dispersion, as a result of which we get uniform illumination
- Then we put it all through a laminator.
- Finally, carefully cut out our insert
- We use a punch to cut out holes for the shafts for the arrows
- Just a piece of iron tube of suitable diameter will do; the edge needs to be sharpened
- However, as a result, it quickly became clear that the scales glow, not so brightly, I would like it to be brighter, even worse than before (the power of the standard backlight is not enough), so we move on to a method of radically changing the entire backlight
Inserting LEDs
We take an instrument panel for a VAZ 2112 and carry out tuning by replacing the lamps in the standard backlight with LEDs. Which leads to a brighter and more saturated glow of the scales, in addition, it makes it possible to change the backlight color by simply re-soldering LEDs of a different color:
- To carry out the upgrade, you will need to remove the instrument cluster, completely disassemble it, and make an insert for the dashboard (either make it yourself or modify the standard one)
- Buy 10 mm LEDs in the amount of 7 pieces for the panel plus resistors, a white corrector, colored electrical tape (what is on sale: green, blue, red, yellow, orange you are unlikely to find, although everything is possible), in addition you need a piece of tint film about 8 ×8cm (not too dark), and double-sided tape
We begin tuning the VAZ 2112 instrument panel by disassembling the instruments:
- To do this, it will be necessary to remove the transparent visor from them.
- Remove all lamps along with sockets
- Then comes the removal of arrows
Attention: This process requires the greatest caution, as you can easily damage the axles of the devices, and then do not purchase new devices.
- To remove the arrows we need scissors and paper (thick paper)
- Cover with paper so as not to spoil the insert, and use scissors, slightly shaking from side to side, to pull the arrow up (the arrow will come off with force)
We disassemble the instrument lighting
- Now we need to unscrew the screws on the back of the devices
- Remove the plastic wall, then straighten the frames pressing the LCD
- We work carefully so as not to break it, almost half of the work is already done
How to remove the Europanel on a VAZ 2112 + video
The average owner of a VAZ 2112 rarely faces the need to remove the instrument panel of his car. The main reason why you have to dismantle the Europanel is body repair, electrical repair or repair of devices installed directly behind the instrument panel. Since it can be very difficult or even impossible to get to such devices without removing the instrument panel, in such cases you have to remove the entire europanel.
Removing the instrument panel is also required when eliminating squeaks and other noises that occur while driving a car, or when installing additional sound insulation for the interior. In addition, even with careful handling of the car, over time the instrument panel may lose its appearance and require replacement with a new one.
In this article we will try to cover the main stages of removing the europanel from a VAZ 2112 car. The “Euro” instrument panel can be found on cars of the VAZ 2110, VAZ 2111 and VAZ 2112 line. Therefore, everything that will be said below about dismantling the VAZ 2112 europanel is also true for the rest models. In addition, it should be noted that the fastenings of the Europanel are identical to the fastenings of a conventional instrument panel, so this step-by-step instructions can also be used when dismantling a conventional panel.
So, when removing the Europanel from a VAZ 2112 car, the sequence of actions should be as follows:
For safety reasons, it is necessary to turn off the power to the vehicle's on-board network. To do this, you need to disconnect the negative terminal from the battery.
The steering wheel needs to be removed. To do this, use a flat screwdriver to pry up and remove the decorative trim with the inscription “LADA” from the steering wheel. Next, using a Phillips screwdriver (PH2), unscrew the two screws that are located in the recesses under the removed cover. After this, remove the horn switch cover.
Now you need to fix the steering wheel. This can be done in two ways: turn the steering wheel all the way to the left or remove the key from the ignition switch and turn the steering wheel in any direction until it clicks when it locks. After this, you should unscrew the central nut holding the steering wheel. To do this, you will need a socket wrench with a 24mm head (for convenience, it is advisable to use a socket wrench with a ratchet).
For safety reasons, there is no need to immediately remove the central nut - it should be left on the last 3-4 turns of the thread. After this, set the steering wheel to the middle position (the front wheels should be parallel to the longitudinal axis of the car). In order not to waste time finding the correct position of the steering wheel when installing it, before removing the steering wheel, you can apply coaxial marks on the steering wheel itself and the upper plastic cover of the steering column.
Next, you need to use medium-force blows on the rear of the steering wheel from the left - right and from above - from below to knock it off the splines of the steering shaft. After this, you can completely unscrew the central nut and remove the steering wheel.
The process of removing the steering wheel from VAZ 2110-2112 cars is shown in detail in the following video:
Now you need to remove the side panels on the left and right sides of the center console. Each shield is secured at the rear with two screws, which must be removed using a Phillips screwdriver (PH2).
Next, use a Phillips screwdriver (PH2) to unscrew the screws securing the glove compartment, located underneath the glove compartment at the front wall of the car interior. Having removed the glove compartment from its place, it is necessary to disconnect the wires going to the glove compartment illumination lamp. After this, the glove compartment can be completely removed.
The next step is to use a Phillips screwdriver to unscrew the screws securing the instrument panel. One of the screws is located in the glove compartment niche, the rest are along the edges at the bottom of the instrument panel.
Now you need to use an 8-mm open-end wrench and a Phillips screwdriver to unscrew the screws securing the instrument panel in the area of the center console.
After this, remove the protective grilles of the air ducts located along the edges of the instrument panel. To do this, just pry them off with a flat-head screwdriver.
Next, use a socket wrench to unscrew the nuts located under the removed air duct grilles.
Remove the instrument panel from the studs by lifting it up and pulling it towards you. After this, you need to disconnect all the connectors on the wiring harnesses going to the instrument panel, having previously marked them for subsequent assembly. Now the instrument panel can be completely removed.
The process of removing the instrument panel from a VAZ 2112 is shown in the following video:
We hope our instructions will be useful for you!
We remove the torpedo
Removing and installing a new torpedo on a VAZ 2110 takes a lot of time, we also advise you to be patient, since there are dozens of connections and wires in this part of the interior. Each action must be careful, since the VAZ 2110 mounts are very fragile and can be easily broken. After this, the panel will no longer fit properly, and the car will noticeably increase in squeaking while driving.
In some cases, it is not necessary to completely dismantle the standard panel. Our article provides a description of a complete analysis.
Necessary tool
To remove the case, you should have in your arsenal:
- Labels with adhesive backing.
- Marker or pencil.
- Set of screwdrivers and keys.
The main assistants in this work will be a 10 mm wrench and a Phillips screwdriver. We need a pencil or a washable marker in order to mark the removed elements. This also applies to self-adhesive labels. There are too many wires and parts, after disassembling you will already forget where each component is located. Markings and stickers will remind you of the location of wires and parts.
Preparatory work
Some people prefer to disassemble without dismantling other components of the interior, but this significantly complicates and prolongs the work. We recommend preparing the interior as you will need room to maneuver. Remove the seats and steering wheel - follow this sequence. It is also worth dismantling the floor tunnel.
To do this, you need to unscrew the screws and move the VAZ 2110 part back. We perform the same operation with the lower part. The next step is to dismantle the glove compartment, now you can remove the mounting block and relay. During the process, each wire must be labeled. You need to be especially careful when handling speedometers.
Removal - step by step instructions
- We find the central panel, on the right side of it there are two self-tapping screws - unscrew them. We do the same with the opposite side. Now we dismantle the shield on both sides, as shown in the photo.
- Next, use a flat screwdriver to pry off the plug installed on the central tunnel. Now you can unscrew the tunnel fastenings; they are located on the back and sides.
- Now this part can be completely dismantled. We now have access to the cigarette lighter - we disconnect all the wiring from it, and then remove the cover from the gearbox knob.
- We move on to the air duct - using the “tenth” key we remove it. Now we have access to the central panel, it is held in place by fastenings at the rear and front. After removing the screws, we dismantle the panel.
- We removed the glove compartment in advance, so all we have to do is disconnect the backlight and unscrew the fasteners behind it. You need to unscrew the screws on each side of the panel, after which the panel can be unscrewed using a wrench and a Phillips screwdriver - we clamp the nut with the wrench and twist the screwdriver.
- Using a flat screwdriver, pry up the air duct and remove it. There is a nut left on the dashboard that needs to be removed. Now the panel can be completely removed, lift it up and pull it towards you, the panel will then come off the pins. We mark the wiring and take out all the plugs. There are quite a lot of wires, don’t get tangled up in them - a marker will help you make this
That's it, the torpedo is dismantled, you can replace its individual components, install another panel from a VAZ 2110, or carry out tuning using a Europanel. Assembly proceeds in reverse order. Will there be an overlay installed instead of the standard panel? Then move on to the next section.
Installing the Euro trim without removing the dashboard
In this option, you need to have a drill and screws on hand.
Rely on the lining mounting diagram and start in order:
- Remove the dashboard.
- Open the glove compartment and unscrew the three screws from the inside (positions 1,2,3 in the diagram). Trying to unscrew the screw (pos. 9) from the inside near the windshield is difficult, but doable.
- Remove the 4 keys (next to the control module) and unscrew the screws from the inside (pos. 4.5)
- Unscrew or loosen the fastening by adjusting the backlight (pos.
- Open the fuse module and unscrew 2 screws from the inside (pos. 6 and 7)
- Now the panel overlay is held in place only by screws, positions 10 and 11. They cannot be unscrewed, so we break them out or lift the overlay by the right edge and cut them off with a file. (Note: the Euro trim will cover the entire top of the panel up to the windshield, so you don’t have to worry about the appearance when you cut or break the screws)
- Remove the old dashboard trim.
Replacing a conventional torpedo with a “Euro” panel
VIP Member
612 messages
- Car make: VAZ 21102
- From: MO
View Garage
VIP Member
540 messages
- Car make: VAZ 2112
- From: RUS150
View Garage
#3 Bankol
VIP Member
612 messages
- Car make: VAZ 21102
- From: MO
View Garage
I’ll say right away that I have a complete euro panel with the lower part and the steering wheel, it’s all there.
I'm wondering what changes to the wiring? are there many of them?
And in what order should you remove the old panel and install the new one?
#4 Bankol
VIP Member
612 messages
- Car make: VAZ 21102
- From: MO
View Garage
This is the panel now:
I want to install this one: Steering column controls, the steering wheel itself, the instrument cluster, all the keys in the Europanel itself, it’s all there))) fully assembled, it’s shorter.
Replacing the steering wheel
Here's what's required to replace the steering wheel on a VAZ 2112:
- large flat screwdriver;
- socket head 22;
- new steering wheel.
Sequence of work
The first step is to get rid of the decorative trim on the steering wheel. It is most convenient to pry it off with a thin knife.
- The horn switch is attached to three self-tapping screws. They should be unscrewed using a large screwdriver.
- There is a 22 nut under the panel. It is most convenient to unscrew it with a socket head on a long wrench.

