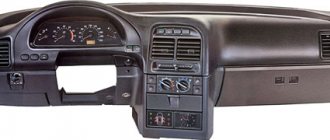
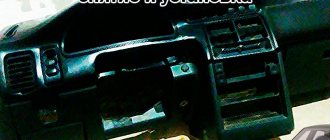
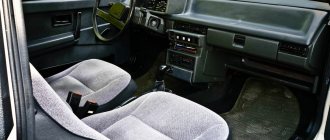
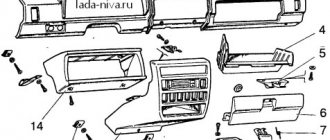
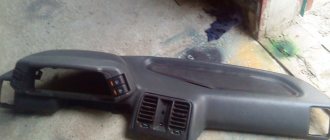
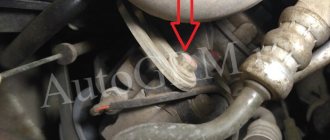
Removing the instrument panel on VAZ 2110, 2111 and 2112 cars is not an easy task. But at the same time, it is possible to carry out this repair yourself, if you have the necessary tools at hand, as well as clear instructions. Regarding the action plan, there are not many detailed guides on the Internet for removing and installing the instrument panel, and all this is due to the fact that the procedure has a number of difficulties and subtleties that not everyone can remember when writing such an article.
However, I will try to make material that will at least 90% help give the overall picture and the main points that should be taken into account when removing the panel on a VAZ 2110-2112. To perform the repair you will need the following tool:
- Phillips screwdriver, both short and long.
- The head is 10 mm, preferably deep.
- Ratchet handle or crank.
- Wire cutters or sharp knife.
- Flashlight if necessary.
Dismantling
There is nothing complicated about dismantling the instrument panel on a VAZ 2110; you only need a certain amount of free time, a minimum of tools and your own desire.
The dismantling process consists of the following steps:
- Before directly removing the panel, disconnect the negative terminal from the battery, this will avoid future electrical problems;
- Using plastic spatulas, remove the top lining of the floor tunnel;
- Glovebox. Open the glove compartment and use a Phillips screwdriver to unscrew the fastening screws located at the bottom. After this, you can remove the glove compartment itself, only you will first need to disconnect the wires going to its lighting;
- Remove the mounting block with the cover;
- Controls. Next, remove the hydraulic corrector mode switching handle; to do this, you only need to pull it out of the panel towards you with a little force. Unscrew the switch nut using the appropriate size socket. Then remove the switch itself from the inside of the VAZ 2110 panel so that it remains hanging on the mounts;
- Air system. After this, it will be necessary to remove the upper side nozzles; this can be done by pushing down the plastic latch with a plastic spatula and turning the nozzle. After this, the nozzle can be removed. It is also worth doing from the other side;
- Fastenings. The removed side nozzles will provide access to the nuts that will need to be unscrewed. Also unscrew the screws at the bottom of the VAZ 2110 panel on the left, near the hood opening lever, in the niche where the mounting block is attached, on the left and right of the console, behind the glove compartment and at the bottom right;
- Seals. Next, you need to remove the rubber seal from the front pillars of the car, and then use a plastic spatula or screwdriver to pick up the trim so that the plastic fasteners come out of their seats. Now the decorative trim can be removed;
- Wiring. After the previous steps have been completed, proceed to disconnect the wiring. There is a bundle of wires next to the ignition switch; you need to disconnect the block with the wires from the lock. To do this, you need to cut off the clamp that tightens the bundle of wires and disconnect the block. Next, you need to disconnect the connectors with the wires next to the gas pedal, the immobilizer connector, the two connectors to which the brake signal contacts go, and the connectors on the harness under the instrument panel on the driver’s side.
After all the steps have been completed, you can easily remove the dashboard on the VAZ 2110 yourself and start repairing it. The panel must be installed in the reverse order. To avoid misunderstandings, it is best to mark where you disconnected which wires.
Removing the instrument panel on VAZ 2110, 2111 and 2112 cars is not an easy task. But at the same time, it is possible to carry out this repair yourself, if you have the necessary tools at hand, as well as clear instructions. Regarding the action plan, there are not many detailed guides on the Internet for removing and installing the instrument panel, and all this is due to the fact that the procedure has a number of difficulties and subtleties that not everyone can remember when writing such an article.
However, I will try to make material that will at least 90% help give the overall picture and the main points that should be taken into account when removing the panel on a VAZ 2110-2112. To perform the repair you will need the following tool:
- Phillips screwdriver, both short and long
- 10 mm head, preferably deep
- Ratchet handle or crank
- Wire cutters or sharp knife
- Flashlight if necessary
Installing a new cover
Installation of a new lining occurs after preliminary preparation:
- It is necessary to measure and trim off excess material;
- But it’s better not to cut off what seemed to be superfluous under the instrument panel, otherwise there will be a gap near the steering column, and you can make cuts to bend it a little if necessary;
- Near the side air ducts, trimming is also done during installation, measuring on site;
- We carry out fitting and adjust trimming;
- We apply anti-creak to avoid squeaking in future operation;
- We choose the method of installing the dashboard with a Euro trim: use new brackets included in the kit or drill them out from the old trim;
- All that remains is to install the instrument cluster you need and secure the Euro trim with self-tapping screws, which are then hidden under the plastic trim.
Alternative torpedo
The alternative dashboard is softer than the standard “tens” dashboard, but the main advantage is the absence of unpleasant grinding and squeaking. Motorists decide to get rid of the standard one precisely because of the squeaking. For the VAZ 2110 car there are several types of panels that differ in design.
The panel is sold as a set:
- The panel itself, which is an alternative to standard plastic.
- Buttons, brackets and inserts for blowers and instrument panels.
- A set of wires and a block for a double switch.
- Buttons for low beam, heating, dimensions and fog lights.
- Plugs for buttons are installed in places where keys are not needed.
Tuning ideas
VAZ 2112 with Europanel
If you have a VAZ 2112, tuning is available for a panel that is not too wide. But you can install additional instrument lighting so that you can see all the readings at night in the dark. It just looks stylish, especially if you use a tuning blue color for the lighting.
This panel has a lot of space for buttons that are not needed on an older machine. But you can install heated side mirrors and turn it on via these buttons.
We remove the torpedo
Removing and installing a new torpedo on a VAZ 2110 takes a lot of time, we also advise you to be patient, since there are dozens of connections and wires in this part of the interior. Each action must be careful, since the VAZ 2110 mounts are very fragile and can be easily broken. After this, the panel will no longer fit properly, and the car will noticeably increase in squeaking while driving.
In some cases, it is not necessary to completely dismantle the standard panel. Our article provides a description of a complete analysis.
Necessary tool
To remove the case, you should have in your arsenal:
- Labels with adhesive backing.
- Marker or pencil.
- Set of screwdrivers and keys.
The main assistants in this work will be a 10 mm wrench and a Phillips screwdriver. We need a pencil or a washable marker in order to mark the removed elements. This also applies to self-adhesive labels. There are too many wires and parts, after disassembling you will already forget where each component is located. Markings and stickers will remind you of the location of wires and parts.
Preparatory work
Some people prefer to disassemble without dismantling other components of the interior, but this significantly complicates and prolongs the work. We recommend preparing the interior as you will need room to maneuver. Remove the seats and steering wheel - follow this sequence. It is also worth dismantling the floor tunnel.
To do this, you need to unscrew the screws and move the VAZ 2110 part back. We perform the same operation with the lower part. The next step is to dismantle the glove compartment, now you can remove the mounting block and relay. During the process, each wire must be labeled. You need to be especially careful when handling speedometers.
Removal - step by step instructions
- We find the central panel, on the right side of it there are two self-tapping screws - unscrew them. We do the same with the opposite side. Now we dismantle the shield on both sides, as shown in the photo.
- Next, use a flat screwdriver to pry off the plug installed on the central tunnel. Now you can unscrew the tunnel fastenings; they are located on the back and sides.
- Now this part can be completely dismantled. We now have access to the cigarette lighter - we disconnect all the wiring from it, and then remove the cover from the gearbox knob.
- We move on to the air duct - using the “tenth” key we remove it. Now we have access to the central panel, it is held in place by fastenings at the rear and front. After removing the screws, we dismantle the panel.
- We removed the glove compartment in advance, so all we have to do is disconnect the backlight and unscrew the fasteners behind it. You need to unscrew the screws on each side of the panel, after which the panel can be unscrewed using a wrench and a Phillips screwdriver - we clamp the nut with the wrench and twist the screwdriver.
- Using a flat screwdriver, pry up the air duct and remove it. There is a nut left on the dashboard that needs to be removed. Now the panel can be completely removed, lift it up and pull it towards you, the panel will then come off the pins. We mark the wiring and take out all the plugs. There are quite a lot of wires, don’t get tangled up in them - a marker will help you make this
That's it, the torpedo is dismantled, you can replace its individual components, install another panel from a VAZ 2110, or carry out tuning using a Europanel. Assembly proceeds in reverse order. Will there be an overlay installed instead of the standard panel? Then move on to the next section.
We install Europanel and make sound insulation on VAZ 2112, VAZ 2111, VAZ 2110
Now we will try to figure out how to install the European version of the panel on a domestic VAZ-2110 car. Before starting the installation process, you need to decide for yourself the need for noise insulation of the body of a domestic car. The thing is that these procedures are better and easier to perform simultaneously. We take the European panel and carefully examine it. What the overlay itself looks like and what the inserts for a variety of buttons and air passages look like. In addition, consider what the panel plugs, bracket, and also the button for heating the glass of the rear of the car look like.
We have at our disposal only the factory version of the domestic VAZ-2110 car, which is equipped with the same factory panel. First of all, do not forget about caring for your car. Before we begin the process of replacing the panel, we begin work related to noise insulation of your vehicle.
To do this, we will need about six sheets of BIMAST-DOMS, as well as about three to four sheets of splen. Of course, we are talking about material that is designed with a margin for malfunctions. In addition, it is worth purchasing thin foam rubber that can self-adhesive; five sheets in size will be quite enough. First, you need to remove the front seats of your car. As for the upper part of the genital tunnel, it must be removed using a screwdriver. After this, we remove the lower part of the tunnel.
After this, we begin to remove the steering casing and steering wheel, and to do this you need to unscrew three self-tapping screws and only four screws. After this, it is necessary to remove the switches under the steering system. Having completed all of the above, we carry out work that involves dismantling the unit, relay and glove compartment, after which we remove the headlight control and the instrument panel. And finally, having reached the fasteners of the factory panel, we unscrew them too. Now all that remains is to remove it from the car body, and in the process of disconnecting it is necessary to unscrew everything that connects the panel and the car’s instruments. Remember that the factory noise insulation system must also be removed, because now you will have a new one. The standard domestic panel trim must be removed and a universal instrument panel must be installed. Now you need to secure the instrument harnesses and seal the joints of the air holes. It is also worth remembering that additional functions will require additional buttons, which will find their application in the European version of the car panel, and of course, additional wires that need to be connected right now, since this will not be possible later.
After all of the above has been done, you can start wrapping in bitoplast and all its connectors, which are available on the euro panel. We also screw the Euro linings using self-tapping screws. After this, it is worth noting that the work associated with installing the new panel is completely completed. Now you can apply materials that will ensure complete noise insulation of your vehicle. After the special material has been applied to all the necessary places, work related to gluing SPLEN must be carried out. Remember that experts note the fact that SPLEN is a fairly convenient material, and the process of working with it will not take a lot of time and will not require much of your effort.
And so, having done the difficult work, the final part of our process has arrived. We install the panel in its place in your car. Remember that you will not need more than two days to complete the entire work, but of the entire period, the largest working part must be spent on making a new connection to the alarm system.
FakeHeader
Comments 21
You don't have everything. You all boast that this car is an awesome car. Solaris is a bucket compared to it. They'll just cut something off and screw it on there. No, ours haven’t learned how to do it.
What does Vesta and Solaris have to do with it?! o_O My car is from a completely different generation)
The question is amateurish - why is the vibration glued in pieces, as if there wasn’t enough for pasting? Well, I mean, not the whole area is covered, but some places
There is no need to cover 100% of the area with vibration insulation, especially plastic) 100% of the area needs to be covered with sound insulation...
Excellent On occasion I will sell a panel from 2110 completely assembled 2k
I don’t even want to do this, it’s a lot of wasted time and money, but it still won’t become a Lexus, TAZ is TAZ
No one is forcing you...you have been given information, but how to manage it is your business =) Which car is not a TAZ for you?
oh he can’t let you go)))
Didn't understand the comment?)))
everything is noise, noise is noise)) soon there will be not a torpedo, but TediBir from paralon)))
This post is not about soundproofing)
Great! Where did you get that sponge?
Thank you) This is soundproofing from StP)))
(defects in the VAZ assembly) - in fact, they are a common continuous defect, you rule out one, the other comes out.
It rather depends more on who is doing it
I also did this with my ex. When I removed the panel, half of the fasteners were missing, and the remaining part was not screwed in. I coated the upper and lower parts with sealant along the border of the air ducts. And I threw out the distributor that stands behind the radio, vertically. Because for him alone it was necessary to use at least one and a half tubes of sealant. Instead, I glued four corrugated pipes, two in front, two for the rear passengers. And everything else is the same as yours. The income from the rework is significant.
I also threw out the air duct that blows into my feet...because of its stupid design. I’ll write about him in the next blog)
Did you remove the top cover from the panel? All the creaking comes from the joints of these two parts.
Igor, of course I filmed it... it’s in the BZ) The next BZ according to plan is just about your adapter-spacer for the stove
What can I say...it's a medal! Good job.
With panel disassembly
The first stage is carried out according to the plan already described. Next, we proceed like this:
- We assemble the trim, installing our instrument cluster, air duct panels and those accessories included in the kit;
- At the base of the panel we carefully attach the wiring harness;
- We connect the wires from the Euro pad to this harness, tightening everything with mounting ties;
- We connect devices to the required buttons using connectors;
- We secure the cover with self-tapping screws.
This method, although it takes more time, provides high-quality sound insulation to eliminate all annoying squeaks.
We also recommend replacing light bulbs with high-quality analogues or LEDs. So, the updated panel will look even more solid.
Components
When purchasing, you will receive what is included in the kit, namely:
- Europlate;
- Inserts for switches (buttons) of devices;
- Trim on the instrument panel;
- Since your instrument combination may differ from those whose installation is structurally provided, there should also be six plugs; they can be inserted instead of buttons;
- The buttons themselves and two pads for them: • Double – for low beam and dimensions; • To turn on the fog lights; • Heated rear window.
- Air ducts;
- Block and wiring harness designed to connect a double button for side lights and low beam;
- Brackets securing the instrument panel.
In addition, if you are not entirely satisfied with this combination, and you need more buttons for other devices, then they, as well as the pads for them, can be purchased separately.
How to easily and quickly remove the dashboard on a VAZ 2110 with your own hands?
Without a doubt, the dashboard is the most noticeable interior detail in a car, because it is located right in front of the eyes of passengers and drivers. The need to remove the dashboard on a VAZ 2110 may arise for car owners for a variety of reasons.
So, by removing this part, you can get full access to all the electrical components of your vehicle, replace the burnt-out wiring with a new one, connect additional devices or lighting, install a Euro trim or sound insulation.
Options for replacing the standard VAZ 2110 panel:
If desired, you can cover the dashboard with various materials of your choice, thereby making the desired changes to the interior of the cabin.
Subtleties
I would like to say right away that removing and replacing a torpedo on a VAZ 2110 will require a lot of time and patience from you
In addition, all repair work must be carried out extremely carefully and carefully so as not to accidentally break the fastening, since the dashboard will not fit back as it should and will creak when driving
To work you will need the following tools:
- marker;
- self-adhesive labels;
- set of screwdrivers and wrenches.
Removal instructions
It is recommended to remove the VAZ 2110 torpedo in the following sequence:
- Interior details. Before starting work directly, it is necessary to prepare the interior, since disassembling the front panel of the VAZ 2110 is best done with room for maneuvers. Therefore, the first thing we do is remove the front seats and steering wheel of the car. It is advisable to carry out dismantling in exactly the same sequence as indicated above, since otherwise it will be extremely difficult to remove the driver’s seat. In order not to break anything, consider your strength when pulling the wheel out of the column splines; to do this, loosen the steering wheel nut a little, and then pull it towards you while loosening it from side to side;
- Transmission tunnel. After the salon is prepared and there is a place to work, we are faced with the next task - dismantling the floor tunnel in the salon. Simply unscrew the screws and push the top of the part being disassembled back. Then do the same with the bottom of the tunnel;
- Steering wheel and steering column. Unscrew the screws on the steering column casing of the VAZ 2110, and then remove the steering column switches. Mark all the wires and connectors released during disassembly with a marker or labels; this will later work to your advantage when, when assembling the torpedo, you end up with a large number of wires of different colors. It is recommended to use the marking especially for owners of cars that are already equipped with an audio system and alarm system;
- Glovebox. The next stage of work will be to dismantle the glove compartment, after which it is necessary to remove the relay and mounting block. Don’t forget to mark the wires as you work and take special care with the fragile speedometer and other dashboard elements that also require special treatment;
- Torpedo. And now we can move on to the immediate purpose of the repair - we have to remove the dashboard. To do this, it is necessary to unscrew the screws in the resulting void behind the glove compartment and unscrew the fastenings. After that, use a screwdriver to hook the air duct on the left side and remove it. Then all that remains is to unscrew the nut, holding the torpedo with your hand, the torpedo and pull it out from the studs, at the same time do not forget to mark the wires with a marker so as not to get confused.
The dashboard has been removed, we have disassembled everything that needed to be disassembled, all that remains is to carry out the repair work, for which the whole procedure was actually started.
Finally, I would like to advise - take the opportunity, do not be lazy and clean the ventilation ducts, sooner or later they will still become clogged and you will have to remove the dashboard again.
Removing the torpedo step by step
- We find two screws on the central panel on the right and unscrew them. We perform the same action on the other side on the left. After this, carefully remove the shield from both sides.
- Using a flat-head screwdriver, pry off the plug, which is located on the central tunnel. We unscrew the tunnel fastenings located on the sides and behind it. Unscrew the screws holding the central panel.
- This part of the interior can already be removed completely. We see that there is access to the cigarette lighter. We mark the wiring and disconnect it, then remove the cover from the gearbox handle.
- The next step is the air duct. We take the key for 10 and dismantle it. There is access to the central panel, which is held on a mount in the front and rear. Unscrew the screws and remove the panel. After dismantling the central panel, you can move on to the main body of the torpedo.
- The glove compartment was removed in advance, as it interfered with the overall process. All that remains is to disconnect the backlight and unscrew the fastener on which it was held.
- Carefully pry up the air duct with a screwdriver and then remove it. There is still a nut on the dashboard that needs to be unscrewed. Now the panel can be easily removed by lifting it up and slightly pulling it towards you. Now it will easily slide off the stilettos. We take out the plugs, not forgetting to mark them with a marker.
The torpedo has been dismantled and can easily be replaced by installing a new panel from a VAZ-2110 or tuned using a more prestigious panel. Assembly must be done in reverse order.
Installing the dashboard trim
The cover will be installed after complete disassembly - it’s easier and more convenient. The instructions say that the trim must be cut around the perimeter. Now you can assemble the case: we place in it the accessories and instrument connectors that came in the kit. Carefully lay out the wiring from the base of the cover. All joints of the new VAZ 2110 panel must be glued with anti-creak.
We attach additional harnesses to the standard wires and tighten them with zip ties. Please note that there are additional buttons on the cover - standard connectors must be connected to them. The cover is attached to the original panel using self-tapping screws. Now you can carry out the installation in reverse order.
Controls, instrument panel and interior equipment
Controls
- Left side deflector.
- Outdoor lighting switch.
- Instrument cluster.
- Egnition lock.
- Rear fog lamp switch button.
- Rear window heating switch button.
- Instrument lighting control knob.
- Immobilizer sensor with indicator.
- Right side deflector.
- Glove box.
- Center console.
- Cigarette lighter.
- Front ashtray.
- Gear shift lever.
- Accelerator pedal.
- Brake pedal.
- Clutch pedal.
- Steering wheel.
- Steering column locking lever.
- Hood release lever.
Center console:
- Left center deflector.
- Air distributor flap control lever.
- Recirculation switch.
- Blank (reserve space for installing an additional equipment switch).
- On-board control system display unit.
- Car radio.
- Watch.
- Blank (reserve space for installing an additional equipment switch).
- Hazard warning light switch button.
- Heating control unit.
- Right center deflector.
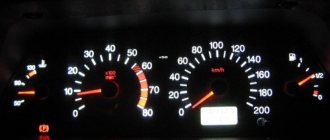
Instrument cluster:
- Coolant temperature gauge.
- Tachometer.
- Speedometer.
- Fuel level indicator.
- Trip counter reset button.
- Odometer and trip odometer display.
- Clock display.
Control unit between the front seats:
- Parking brake lever button.
- Parking brake lever.
- Front left door power window switch.
- Driver's seat belt buckle.
- Rear left door power window switch.
- Blank (reserve place for installing switches for additional equipment).
- Rear right door power window switch.
- Front passenger seat belt buckle.
- Front right door power window switch.
- External rear view mirror control unit.
Note
Some versions of cars of later releases (in particular, models produced) are equipped with a modified instrument panel - the so-called “European panel”.
- Left side deflector.
- Outdoor lighting buttons.
- Instrument cluster.
- Egnition lock.
- Right steering column switch (windshield wipers and washers).
- Hazard warning light button.
- Instrument lighting control knob.
- Immobilizer sensor with indicator.
- Rear window heating switch.
- Plugs (reserve places for installing switches for additional equipment).
- Central deflectors.
- Heater control panel.
- Covers for niches for installing car radios.
- Right side deflector.
- Left steering column switch (direction indicators and headlights).
- Hood release lever.
- Steering wheel.
- Clutch pedal.
- Brake pedal.
- Accelerator pedal.
- Socket for connecting a portable lamp.
- Gear shift lever.
- Ashtray cover.
- Cigarette lighter.
- Glove box.
- Parking brake lever.
- Side light switch.
- Indicator for turning on side lights.
- Indicator for turning on headlights.
- Headlight switch.
- Indicator for turning on the rear fog lights.
- Rear fog lamp switch.
- Plugs (reserve places for installing switches for additional equipment).
- Headlight level control.
Errors on the dashboard 2112
VAZ cars have always stood out for their ease of operation and maintenance. Regardless of the type of engine, injector or carburetor, here the user can independently perform diagnostics and read errors without additional equipment. Symbols may appear on the instrument panel.
| Number | Meaning |
| 2 | Critical voltage drops have been detected in the on-board network. |
| 3 | The gasoline level sensor is damaged or does not work correctly. |
| 4 | Likewise for the antifreeze temperature sensor. |
| 5 | The outdoor thermometer is faulty. |
| 6 | There is critical engine overheating. You need to stop and let the engine cool. |
| 7 | The oil pressure in the engine is insufficient for normal operation. |
| 8 | The brake expansion tank is empty and needs to be topped up. |
| 9 | The battery is not charging properly. You will need to check the generator and its wiring. |
| E | BC firmware is damaged. |
Most two-digit codes are a combination of two errors.
Where can I get Europanel?
The fact is that europlates, as well as assembled europanels, have become in short supply, since their production was discontinued more than five years ago. Therefore, they mostly sell used ones in good condition; it is quite difficult to find a new one. If suddenly the offered product does not suit you, you can install the Priorovskaya by completely disassembling the old one.
Didn't find the information you are looking for? on our forum.
We recommend reading:
The instrument panel on the VAZ 2115 does not work - injector, causes of failure, repair
How to drain gasoline from a VAZ 2110, a few simple recommendations
VAZ 2114 injector boils, reasons
VAZ 2107 pulls to the right when braking, the main reasons for cars
How to install a tow bar on a VAZ 2114
How to remove the gearbox on a VAZ 2107
VAZ 2121 how to change silent blocks on a car
VAZ 2114 how to adjust the clutch
Indicator lamps located on the additional panel of the VAZ-2112
An additional panel is installed in the VAZ-2112 dashboard, on which the designers also placed several indicators. In particular, in the middle there is a silhouette of a car with its doors open. If one of the doors is illuminated, it means that it is not closed tightly enough.
On the left side of the vehicle indicator (one above the other) there are three indicators:
- low engine oil warning (optional);
- warning about low fluid level in the windshield washer reservoir;
- additional warning about high coolant temperature.
To the right of the car silhouette, again one above the other, there are three more indicators:
- indicator of malfunction of brake lights or side lights;
- warning of high brake pad wear;
- seat belt warning.
Description and location of indicators on the panel
After 2006, a new dashboard was installed on VAZ 2112 cars. For reasons that are not entirely clear, any description of it includes the prefix “euro”, probably due to its modernity and quality.
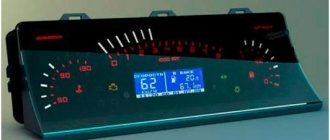
But in order to use it, you need to know the symbols, which are not always easy to understand even from the instructions. You can often only guess what this or that indicator and light bulb mean. To make this task easier for yourself, pay attention to the diagram of the instrument panel below and its explanations.
Description of the panel
- Arrow pointer. Intended to indicate the approximate coolant temperature. The data is obtained from a sensor that is installed between the cylinder head and the thermostat. This allows you to obtain accurate data. The sections have a range of 20 degrees, the lower level is 50, and the upper level is 130.
- Tachometer. Its purpose is known to any driver - to show engine revolutions per minute. Sections of 5 units, digitized every 10 units. To get the real value, add a couple of zeros to the number. Starting from 55, the engine enters the red zone in terms of revolutions.
- Left turn signal indicator.
- A similar indicator for the right turn signal.
- Speedometer. It is of the induction type and receives speed data from the sensor on the gearbox. Unfortunately, it’s definitely not very high; the error can be up to 5 km/h or even more.
- Fuel level indicator. The sensor is located directly in the tank.
- A warning light indicating a dangerously low fuel level.
- Low beam indicator.
- Lamp for monitoring the amount of brake fluid.
- High beam indicator.
- Lever for adjusting the clock.
- Total (odometer) and daily mileage.
- Alarm.
- Failure of electronic systems leading to critical engine failure.
- Clock and thermometer.
- Low battery charging voltage.
- Handbrake warning lamp.
- Critical oil pressure level.
- Fuel mixture enricher indicator.
Based on the above diagram, you can easily remember what this or that alarm light means. And although this is an instrument cluster for the VAZ 2112, it is approximately the same on other VAZ cars.
Installation of an instrument panel from Priora on a VAZ 2110-2112
There is another method of modifying and tuning the instrument panel, which consists of replacing the dashboard from the Priora - VAZ 2170. Of course, the appearance will be much more interesting than even the Europanel, but connection and installation require a lot of investments, both financial and physical. The main problem with this modification is that the connectors for the under-panel wiring of the Priora and the under-hood of the VAZ 2110, which of course need to be connected, are different, and the connectors simply do not fit together.
In this case, there are two ways:
- Completely take all the wiring from the Priora, including the engine compartment harness, interior harness, power window control unit, comfort unit, etc.
- Join completely two different types of wiring manually, cutting off the connectors and insulating almost every wire.
Everyone decides for themselves whether the game is worth the candle, namely whether the result obtained is worth the money and time that will be spent on all these improvements and alterations. Even if you take the price of the Europanel, you will have to pay up to 20,000 rubles for it. new or from 8000 for a used one, it’s already expensive. As for the panel from Priora, everything here will be even more expensive - the assembled panel alone can cost 25,000 rubles. new and from 10,000 rub. boo. at a car wrecker.
