Typically, the main focus in the list of characteristics of car alarms is on their resistance to hacking: the cryptographic strength of the communication channel, the start-up blocking mechanism. But theft is not, alas, the only method of theft: we must not forget about banal robbery, when the protective properties of the alarm are useless, because the system has already been disarmed by the owner and the engine has been started.
Measures to counteract such attacks in car security systems appeared a long time ago; in the instructions of the most primitive models, the term Anti-hijacking appeared. This method of theft in many countries was even more relevant than opening a car in the absence of the owners. If suddenly a black man with a pistol burst into your car at an intersection, then this was not a description of part of the GTA San Andreas gameplay, but the ordinary everyday life of Cape Town or Detroit.
Therefore, security systems began to receive the ability to counter robbery - a mechanism for forced or automatic engine shutdown, even if the alarm system is disarmed.
Operating principle, turning on the mode
Anti-robbery mode (a term adopted by StarLine) is most relevant for alarms that do not operate in Slave mode and do not use wearable tags. In these security systems, the engine would be turned off automatically when the owner voluntarily or forcibly left the car.
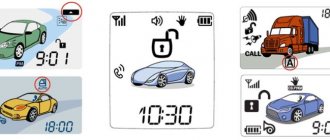
What is StarLine anti-robbery mode? The mechanism is simple: after activation, the siren and hazard warning lights are turned on, and the engine blocking is triggered periodically at ever-decreasing intervals until the engine is completely blocked.
Depending on the settings, activation can occur immediately after turning on the mode or after the robber performs a certain action (usually the brake is pressed during installation, this is safer for the car and others). At the same time, it makes sense to enable StarLine anti-robbery only if the locks are connected correctly. If the installer has placed a lock on the starter circuit, its operation will not provide any benefit while the engine is running.
Enabling anti-robbery is done in several ways:
- Using a key fob: simultaneously pressing and holding the disarming and arming buttons - therefore, no matter how much you would like to hang the alarm key fob on your keys, you cannot do this for security reasons!
- On analog alarms without autostart, the ignition must be turned on; “CAN” alarms and systems with autostart must “see” the fact that the engine is running.
- Using a mobile application on telematics systems: press and hold the “gun” icon.
- While waiting: in advance, with the engine running (using the A91 as an example), press the Valet service button for two seconds. After this, when checking the alarm status, an icon with a gun will appear on the key fob screen, indicating the activated anti-robbery mode. Now it will turn on automatically when the doors are opened without any driver action that could be interfered with by intruders. This activation method is designed for potentially dangerous areas, where, in the best traditions of the city of San Andreas, a car can suddenly be broken into, and there will be no time to take any action.
Engine starting options
There are several ways to start the engine using the Starline A93 alarm:
- Starting the engine based on temperature. The system monitors the temperature and, if necessary, starts the engine to warm it up.
- Trigger by time or so-called trigger by alarm clock. The engine will start at a certain time.
- Periodic engine starting.
To start the engine on time, first of all, you need to set the time on the Starline A93 key fob. Setting up the clock is intellectually understandable and for most users it will not be difficult to set the time on the key fob, but if difficulties suddenly arise, instructions are provided below that will help you deal with the problem that has arisen:
How to disable StarLine anti-robbery?
The basic mechanism is simple - the first press of the disarm button on the key fob will turn off the alarm, the second will unlock the doors. It’s just as easy to use the mobile app. There is also a way to disable it using the Valet button:
- turn on the ignition and open the door.
- After the siren is triggered, close the door and press the Valet button for 3 seconds.
- turn off the ignition.
The anti-robbery mode will be disabled, but the vehicle will not be disarmed. Next, we will follow the steps that are indicated in the article describing how to disarm the system without a key fob (do not forget to set your PIN code in advance).
To summarize the above
That's all the simple steps to ensure that the time setting is successful. To exit the “Functions Menu”, you can briefly press button 4 to scroll through the remaining menu items until you exit, or if you do not perform any actions for 8 seconds, the menu will be exited automatically. Setting the time is the initial step for subsequent work with the alarm, and will allow the owner to use functions such as timed start, periodic start, or combine engine control and vehicle safety.
Panic Mode
What is “Panic” mode in car alarms? It is often confused with anti-robbery mode, although they are different. The anti-theft mode is activated only when the car is disarmed and the ignition is at least turned on, if the alarm system does not have the ability to monitor the fact that the engine has started. The “Panic” mode, on the contrary, is activated only when the car is “armed” and the ignition is turned off.
From the key fob, “Panic” is activated in the same way as the anti-robbery mode (which adds to the confusion). After its activation, a sound and light alarm is triggered - this is intended to scare away suspicious people seen near the car and to attract attention. There are no special anti-theft functions provided.
Reasons why time settings fail
It is clear that if you remove the battery and reinsert it, the clock will go wrong. But why does this happen even without removing the battery?! There are several reasons why the key fob may not work. The first and most common is mechanical damage to the key fob. Do you often drop it? But electronics really don’t like this!
Next are the cheap batteries. My friend changed several batteries in his StarLine A93 key fob over the course of a week. It looks like new, but it only works for a couple of days and that’s it. Try to use batteries from trusted brands.
The third reason is a leaking battery and oxidized contacts. Yes, this happens too. Again, the use of low-quality batteries and careless use of the key fob. These consequences can only be completely eliminated by specialized services.
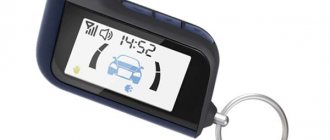
How to set the clock on the StarLine A93 alarm system
First of all, install a battery or battery into the communicator. This is done simply - open the cover on the back and insert the battery into a special socket. About setting the time on the Starline key fob.
As soon as the battery is in place, the key fob will turn on. In some cases, the owner may encounter key blocking, but this problem is resolved in a few seconds. After turning on, press button 4 and hold it in this position until a special signal is heard in the speaker. A distinctive feature of the desired sound signal is its melody. After the main sound, the key fob will emit 2 more short ones.
Immediately after this, the device will beep - it will go to the time parameters menu.
To set the clock, use buttons numbered 2 and 3. The first of them is used to lower the indicator, and the last one is used to increase it. Quick changes in chronometer indicators are achieved by holding down the buttons. To go to the clock setting menu, use key number 4. As for adjusting the indicators, the same buttons are used for this as in the previous case, each of which has exactly the same role. In addition to setting the clock, the Starline A93 alarm allows you to set an alarm clock, through which you set the time for the automatic start of the car’s engine. This also requires a number of manipulations:
- the function menu is activated;
- the cursor on the screen is moved to the icon in the form of a clock and after fixing it, the first button is pressed;
- as confirmation of the action, a melodic signal will sound and the lights on the key fob will blink once;
- the alarm time will appear on the screen, which must be set in the same way as a clock - using the second and third keys;
- After completing the steps to select the alarm time, a five-second pause is made, after which the indicator will begin to show the desired value.
Instructions for autostart Starline A63
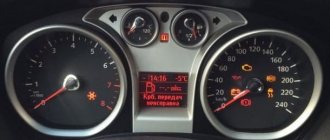
You can start the engine using the Starline alarm clock only during one start cycle. An active indicator in the form of a clock with a bell on the control panel will serve as evidence that the function has been launched.
Even the new Starline A93 key fob can break. It may suddenly start showing the wrong time. There are three main reasons why this can happen:
- the battery runs out;
- new battery;
- program failure.
If the charge capacity is lost, the battery cannot fully support the correct operation of software functions, including time display. A clear indication that the owner of the device has encountered exactly this will be the signal of a special indicator. Indication is made both through the demonstration of a special symbol on the screen and with the help of a sound signal.
Disabling the Starline A91 alarm using the valet button
Replacing the battery with a new one can also cause the key fob to display the time incorrectly. This is due to the fact that the program provides for resetting the parameters when replacing the battery. Absolutely all settings are reset, not just temporary ones. To reconfigure them, you must first activate the auto protection feature. As soon as it is armed, access to the menu opens.
As for the last reason - software problems - they can be caused either by a failure in the device or by moisture. To fix the problem, they use solutions such as flashing the device or drying it out. The method you choose depends on the cause of the problem. But flashing the key fob requires some skills, so it is better for inexperienced users to entrust this to service workers.
The main methods for setting up Starline A93 can be found in the video instructions.
What risks can it save you from?
Quite often, law enforcement agencies are faced with the concept of theft through robbery. When you start the car, an intruder runs up to your door and, with the ignition on, tries to pull you out of the car. In this case, the system is triggered.
If the car is used for private transportation, it will be useful to set a mode. This way you can lock your car doors and turn on the hazard lights if you are attacked. The attackers will not go anywhere, even if they try to use force. Quite often, this situation arises when passengers refuse to pay the fare and want to run away.
Many car owners carry significant amounts of money in the car. They are usually kidnapped the moment the car is parked. Criminals have time to steal things from your car before you set the alarm and open the door. They may steal money, papers, an expensive mobile phone or jewelry.
Situations often arise when a car and its owner are attacked by a person from outside. For example, as a result of an accident, a dissatisfied participant may try to pull you out of the car or try to open the door. When the system is turned on, the doors are locked and the alarm is activated. This will automatically prevent anything from being done to your car, even if you are not in it.
The second situation in an accident is when police officers drop you off and they try to illegally confiscate your car. Unfortunately, this is not uncommon. You can, even being at a distance from the car, turn on the system - and this will be an unpleasant surprise for the police.
Problem solving
If problems arise, first of all we check the serviceability of the alarm radio path; we must at least make sure that the cable connectors are securely connected to the antenna module and the central alarm unit. Be sure to turn off third-party energy consumers (recorder, navigator, emergency xenon) during the test.
A radical solution to the problem is to software disable anti-robbery in the alarm settings. For example, on the A91 this is done in the first settings table, function 8 is set to value 3 or 4 (anti-theft mode is turned off). On the A63/A93, the function number and values are the same; the AF settings menu is used.
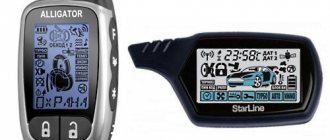
On alarms with activated Super Slave, special attention should be paid to interference. At the same time, the alarm constantly communicates with the key fob, monitoring the fact that it is in the car - in conditions of strong interference or problems with the antenna module, the locks will begin to operate without any external reason.
Something else useful for you:
Installation instructions
During installation, you need to decide on the placement of elements:
- The control unit is mounted in the cabin, in a place that is as hidden as possible and inaccessible to external factors. You can install the device behind the instrument cluster. Double-sided tape or plastic ties are used for fixation. The block must be placed with the connector facing down to prevent possible accumulation of moisture inside the case.
- The transceiver module is placed on the windshield or rear window, the surface of which must be cleaned and degreased in advance. Fixation is carried out with double-sided tape. The module with the antenna must be placed as high as possible to ensure a high-quality signal, but it should not be placed next to metal. The presence of electronic devices nearby can also lead to signal deterioration.
- The siren is installed with the horn down under the hood of the car, in the most hidden and protected place. Do not install the device near the intake manifold or cylinder head. After installation, you need to make sure that there is no access to the siren and its wires from under the bottom of the car.
- The service button and sensitivity and tilt controllers are installed in the cabin. It is recommended to place them as secretly as possible. The sensors should be installed in the central part of the body, and the emergency button should be installed in the dashboard area so that the driver has access to it.
- Limit switches are installed on each door, hood and luggage compartment.
Installation of the Starline A93 automatic start system is carried out with the battery disconnected.
When the battery is turned on, there is a possibility of a short circuit in the wires and, as a result, failure of electrical equipment. Therefore, you need to open the hood and disconnect the negative contact from the battery terminal.
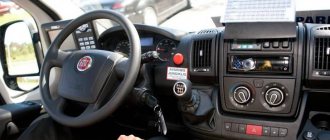
The installation procedure for the Starline A93 security system is shown by the “AvtoService Nikitin” channel using the example of a Land Rover car.
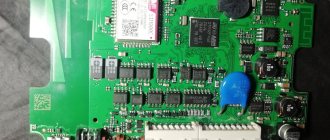
Purpose of connectors
The first block X1 consists of six contact elements:
- switching opening relay;
- normally open contact of the unlocking relay;
- normally closed contact element of the opening relay;
- a switching contact component of the closing device;
- normally open locking relay contact;
- normally closed contact element of the closing relay.
In the second block X2, the assignment of contacts is as follows:
- Red wire. Used to power the main module.
- Black contact. It is grounding or “mass” and is connected to the body.
- Black-green and yellow-green contacts. Designed for connection to the positive output of lighting devices.
The main block X3 is designed for 10 contact elements (one of them is not used):
- Black and white output. Required to connect an additional fifth channel.
- Red-black contact. Power unit blocking output.
- Black and gray contact element. Designed to connect the motor operation control input.
- Pink exit. Used to connect the immobilizer bypass module.
- Gray contact. Designed to connect the siren control output (this is a plus).
- Black and yellow contact element. Used to connect the first additional channel.
- Red-yellow. Second additional channel.
- Yellow-white. Third additional channel.
- Blue contact. Designed to connect a fourth additional channel.
The X4 block includes six contacts:
- Yellow exit. Used to connect the positive ignition input.
- Red-blue contact. Required for connection to the handbrake sensor.
- Orange and white output. Used to connect the negative trunk input.
- Orange-lilac contact. Designed to connect to the positive input of the brake pedal controller.
- Black and blue output. Needed to connect to the door entrance.
- Gray-orange contact. Required for connection to the negative hood input.
User Yuri Kadyrov spoke about connecting the Starline A93 security system in a Lada Kalina car.
Connecting power circuits
When making a connection, first connect the black wire of the X2 connector - grounding. To do this, you can use the standard ground bolt. A wire with a crimped terminal must be connected to it.
When connecting the ground of the Starline A93 alarm system, the use of self-tapping screws is not allowed, since they will not be able to provide high-quality fastening and contact.
When connecting electrical circuits with a voltage of +12 volts, you must consider the following:
- The connection is made with standard conductors, the cross-section of which will be at least 6 square mm. It is also possible to connect directly to the battery directly. We are talking about connecting power to the microprocessor module, power to the body electrical control mounting unit, and the ignition switch.
- When connecting to standard electrical circuits, you should pay attention to the rating of the safety device - it determines the current to power the equipment. This parameter must match.
- The power supply of the microprocessor module, as well as the relay, must be connected to different conductors. Each cable must be protected by a fuse of the appropriate rating.
- If the connection is made directly to the battery, then the electrical circuit should be equipped with an additional safety device. Its rating should be 30 amperes.
Connecting interlock circuits
When connecting the blocking circuits, it is necessary to break one of the standard power lines to ensure the operation of the power unit. An additional relay is connected to the gap. The consumer can choose one of two modes of blocking operation - normally closed or open.
Electrical circuit for connecting a normally open blocking mode
Connection map for normally closed interlocking mode
Limit switches
Features of connecting limit switches:
- The black-blue contact of the X4 six-pin block is connected to push-button door switches or to the interior lamp. In some vehicle models, the state of the switches is polled by standard systems; this can lead to false alarms of the Starline A93. Then you will have to resort to the diode isolation method. Similarly, this method is used if the car has the “Polite Backlight” function.
- The gray-orange pin of the six-pin connector connects to the hood limit switch. When it opens, the limit switch must close to ground.
- A white-orange cable of the same block is connected to the “limit switch” of the tailgate. When the trunk is opened, the contact should close.
Additional channels
Additional channels are designed to expand the anti-theft and service options of the security system. Each of them has its own flexible configuration method, as well as fixed programming options. This allows you to program the channel for one of the options: two-step opening of door locks or unlocking the tailgate. Thanks to the flexible programming function, the user has the opportunity to widely customize the values of the output pulses and operating logic.
How to set up the Starline A93 key fob after replacing the battery
Correct setting of the Starline key fob after replacing the battery is directly related to the battery itself. There are two ways to do this. In the first case, the battery is changed as usual - the cover is removed at any time, the old one is pulled out and a new one is inserted. After which all the necessary settings are made again. But before that, you need to arm the car.
Setting up Starline A9 autorun
In the second option, the power source is replaced at exactly zero hours zero minutes. In this case, additional time settings are not needed, since the device will automatically start counting from this value on its own.
What happens if you don’t set the clock on the key fob?
The correct setting of the software clock determines how accurately the alarm time will be set for remote starting of the car engine. If there are problems with the chronometer, the start will occur at the wrong time, which can lead to unpleasant consequences.
This does not mean that the engine will not start at all - it will simply not occur when the car owner needs it. As a result, the latter may encounter a situation where the engine is simply not warmed up at the right time. And this will lead to rapid wear of the starter mechanism. The alarm function and reminder function will not work correctly.
Activation and configuration
In order to turn it on using the key fob, you must continuously hold down buttons 2 and 1 with the ignition on or the engine running. In this case, all the locks on the car will close, the engine will be blocked in accordance with the system settings, the alarm will turn on, and the key fob will flash sound and vibration alarm. In case of automatic activation, you do not need to press the key fob buttons.
Sometimes a hidden mode activation is required. In this case, you need to press and hold the key fob service button. When turned on hidden, there is no indication on the key fob. The alarm does not turn on, it waits until one of the doors is opened. After this, a 30-second countdown will begin, and the mode will be fully activated - door locking, engine locking in accordance with the settings.
Configured using a key fob. There are two locking options - blocking the engine after pressing the brake pedal or immediately. The engine is completely blocked only after 30 seconds - before this there is a pulse blocking.