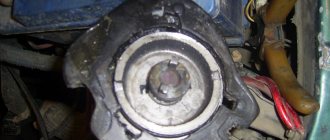
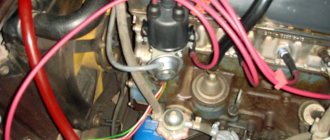
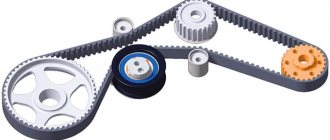
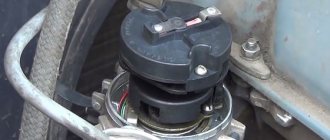
The VAZ-21124 engine has a special feature: no matter how its pulleys are turned, it does not bend its valves. With the 21120 engine (16v 1.5 l) such jokes will not work! If the pulley positions are not too far off, try putting on the belt and turning the mechanism to the “TDC 1 and 4” position. From now on, always use the following instructions:
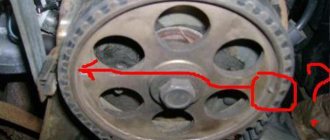
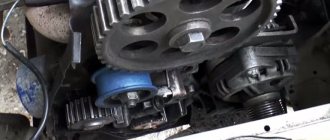
- The crankshaft is set to the required position by checking the mark on the generator drive pulley (photo 1) or on the crankshaft pulley (photo 2);
Alternator drive pulley and crankshaft pulley
- Let us clarify: there should be 20 teeth between the DPKV sensor and the “pass”;
- The marks on the “upper” pulleys should point straight up (photos 3 and 4). These pulleys must be fixed, after which the tension can be released;
Exhaust and intake shaft pulley
- When the belt is loose, the crankshaft cannot be rotated.
- The number of belt teeth between the “upper pulley” marks is exactly 16;
- The mark on the crankshaft pulley sometimes breaks off - use the control method “1” (photo 1) or “3” (lower photo).
In theory, on the VAZ-2112, marking is carried out the same way, no matter what engine we are talking about. Here are photos for engine 21120.
What it looks like in reality and in the instructions
Take the time to find the inspection window on the gearbox housing. There is another mark under the plug.
The last step is optional. And they do it so as not to redo all the work “from scratch.”
Updates for VAZ-21124
On a 1.6 engine, all actions are performed in the same way as described above. There is one exception - the generator drive pulley is aligned according to the mark on the casing (see photo).
Generator drive pulley, motor 21124
However, if this mark is not there, use the proven method: 20 teeth are counted from the DPKV body. Instead of the 21st there should be a “pass”.
The timing pulleys can be rotated as you like - the pistons will not touch the valves in any case. Compare what the pistons of two different engines look like and it will become clear what we are talking about.
Two different 16 valves
For those who don't understand anything
The number of teeth on the crankshaft pulley is 21, on the camshaft pulleys – 42. When the crankshaft rotates 360 degrees, the camshafts rotate 180. In general, the full engine operating cycle consists of two crankshaft revolutions (720 degrees).
In theory, you can use an alternative configuration method. Let the camshaft pulley marks point straight down. Then the mark on the crankshaft pulley should face up (TDC 1 and 4).
If there is no fixing device, you can make it yourself. Even a puller for suspension springs will do (see photo).
They took it and fixed it
Setting timing marks on a 16-valve VAZ-2112 with your own hands
Car: VAZ-2112.
Asks: Kostikov Vladimir Igorevich. The essence of the question: I can’t correct the timestamps, how to set TMV tags? I have a problem. When replacing the timing belt, the upper pulleys were not blocked and now it is not clear how to expose them. The marks on the pulleys do not "point" in exactly one direction. Maybe it would be easier to turn all the pulleys to TDC in cylinder 1? If we are talking about 16 valves, then the markings on the VAZ-2112 are familiar to me: I performed this operation on timing belt 21124. Well, I have a 1.5 engine. Are there any differences?
Belt faults
You can determine that the timing belt has become unusable by visually inspecting it. Its further use is not recommended if:
- there are cracks or cuts on the surface of the belt;
- delamination of its structure takes place;
- its teeth are damaged on the inside.
The listed malfunctions are a consequence of:
- operation beyond the recommended period;
- contact with the surface of active substances (oil, coolant, fuel, etc.);
- mechanical impact due to malfunction of the water pump, tension or support rollers;
- incorrect belt tension adjustment.
Failure to timely diagnose the condition of the belt can cause the rollers, pump, and generator to go out of working order if fragments of a broken timing belt get on its pulley or shaft.
But the main danger is that if it breaks, the pistons and valves begin to move randomly, which leads to their collision.
If this happens, the valves bend, damaging the top surface of the pistons, as well as the cylinder head and timing components.
In this case, it will not be possible to do without a major overhaul of the engine.
The timing belt on a VAZ 2112 should be changed at least every 50 thousand kilometers. In addition, its condition must be checked once a month. If the slightest damage is detected, the belt must be replaced.
About timing marks and their displacement — Lada 2111, 1.6 l., 2005 on DRIVE2
I have been looking for information about the valve timing of 124 internal combustion engines for a long time, and now I came across this material completely by accident. In general, I understand what is being said here. But it would be nice if someone thoroughly chewed on what exactly a change in one or another direction of pulsations, the angle of inclination of the first peak, passing through zero and the maximum value of the vacuum vacuum mean.
From my own experience, I can say that shifting the entrance 1 tooth to the right adds elasticity. And also the intake and exhaust are shifted to the right. And shifting the descent to the left gives a noticeable jerk (acceleration) somewhere around 3500 rpm.
Timing PHASES on a VAZ 2112. The belt is specially moved to one tooth, forward and backward. Engine 21124 (1.6 16kl.) Gearboxes:
Gear 2112
.
Norm
• ХХ = 840 rpm (engine is warm, measured after turning off the fan, t = 97 degrees) • the difference between DR and DPKV is 0.32 degrees; First, auto-tuning is performed according to DPKV, then an indicator (1 or 2) is set at the beginning of the line (i.e., the value of the marker displayed on the line will be equal to 0). Auto-tuning is then performed based on DR and the marker value (on the ruler) previously set at the beginning of the ruler. The displayed value will be considered the difference. 2) the difference between DPKV and DR is calculated as in point 1, but vice versa. First, auto-tuning is performed using DR, then using DPKV 3) Real UOZ - UOZ according to the scanner 4) As a result of all experiments, the ECU did not generate a direction finding error (phase sensor
Release the norm of tooth 0; 1 posterior tooth entry
Release the norm of tooth 0; 1 posterior tooth entry
Signs: • ХХ = 840 rpm (t = 92 degrees) • The angle of inclination of the 1st peak has increased, it has become softer • Pulsations have decreased • The maximum values of vacuum and vacuum have decreased • Extra transitions from 0 to appeared) Automatic adjustment by DR • the difference between the DR and DPKV is -8.44 degrees • SOP 25 degrees (real 15 degrees) • the closing degrees of the exhaust valves have shifted slightly to the right • the phase overlap has shifted slightly to the right side b) Auto-tuning for DPKV • the difference between DPKV and DR is +8, 27 degrees • SOP 16 degrees (actual 15 degrees) • Exhaust valves close late and intake valves open later • Overlap phase shifted to the right
Release the norm of tooth 0; Input 1 tooth forward
Release the norm of tooth 0; Input 1 tooth forward
• ХХ = 850 rpm (t = 92 degrees) • The angle of inclination of the 1st peak has decreased, it has become steeper • The pulsations have become larger • The maximum values of vacuum and vacuum have become much larger • There are extra transitions through 0 a) Auto-tuning in accordance with DR • difference between DR and DPKV is +15 degrees • UOZ 3 degrees (15 real degrees), missing in DR waveform b) Auto-tuning according to DPKV • difference between DPKV and DP – 15 degrees • UOZ 16 degrees (15 real degrees) , missed within the DR waveform • Exhaust valves close earlier and intake valves open earlier • Overlap phase shifted to the left Release 1 tooth forward; Normal input 0 tooth • XX = 840 rpm (t = 92 degrees) • The inclination angle of the 1st vertex has remained virtually unchanged • Pulsations have decreased • The maximum values of vacuum and vacuum have decreased slightly DPKV to + 3 degrees • SOP according to DR 12 degrees ( real 15 degrees) b) Auto-tuning by DPKV • difference between DPKV and DR is -3.47 degrees • UOZ by DPKV 15 degrees (real 15 degrees) • Drain valves close a little earlier and inlet valves open a little earlier • The overlap phase is shifted to the left
Release 1 tooth forward; Standard input 0 teeth
Release 1 tooth forward; Standard input 0 teeth
VAZ 2112 tale about timing marks — DRIVE2
I’ll tell you an interesting incident that many masters do not pay attention to. The car is an unremarkable VAZ 2112 with a 16 valve engine 21124. The owner’s complaint is that it has already started to throttle, and has lost power. Before that, he went to many services where almost everything was changed for him, but things are still there. I approach my work with complete immersion, and if I don’t find the reason right away, I find it in an hour. But people, apparently because of the high dollar, go to have their cars repaired at local tire shops, which will inflate the tires and do diagnostics and chip their brains.
But let's move on to our sheep, hmm, more precisely one. The trouble with the car was quickly corrected; a quick inspection revealed 2 non-working ignition coils, as well as a fuel filter and a mesh in the tank. But after replacing everything, there was a residue that something was wrong. And the solution was to screw the pressure sensor into the first cylinder and see how everything is there. Those who know will understand what I mean, but those who don’t know just read what other methods there are for repairing your cars.
I screwed the sensor in like this and connected it to the oscilloscope
mega hood holding device
And what we see, and this is what we see
the area marked with a blue circle shows the spark moment with a red line, and the top of the hump is TDC. And what can you say, but the fact is that the spark is supplied after TDC, but should be before TDC, otherwise how can we ignite the mixture. From this it turns out that the drive pulley has turned (which is the green pulley). But that’s not all, with a green circle I highlighted the place where the exhaust valve opens, in our case two valves. For all normal engines, opening begins at 140 degrees after TDC, but for us (green small circle) at 125 degrees. The difference is 15 degrees and from experience I will say that this is equal to 1 tooth. Therefore, the timing belt is incorrect. After disassembly, a discrepancy between the timing marks and a broken groove on the drive disk and crankshaft gear was revealed. It’s a pity there are no photos; it was already dark; the car needed finishing. I replaced the crankshaft gear and the drive disc and the car started working so I said “I like it,” which only means one thing that everything is fine with the car.
By the way, here’s an oscillogram taken after the repair, I didn’t mark the location, but you can see the spark went to TDC, and the opening degrees of the exhaust became 140. I think if you compare it, you’ll see the before and after.
For ordinary car owners, this entry may not arouse interest, but the purpose of all this is to make it clear to the owners that everyone should mind their own business, a tire fitter should do the wheels, and diagnosticians should do the diagnostics.
www.drive2.ru
Set the timing marks correctly - otherwise you will bend the valves!
The VAZ-21124 engine has a peculiarity: no matter how its pulleys rotate, it does not bend the valves. With the 21120 engine (16v 1.5l) such bits will not work! If the pulley positions do not drop too far, try putting on the belt and moving the mechanism to the "TDC 1 and 4" position. And from now on, always use the instructions:
- The crankshaft is brought to the required position by checking the mark on the generator transmission pulley (photo 1) or on the crankshaft pulley (photo 2);
Alternator drive pulley and crankshaft pulley
Exhaust and inlet pulley
Theoretically, the marking on the VAZ-2112 is the same, regardless of what type of engine we are talking about. Here is a photo of engine 21120.
What it all looks like in reality and in the instructions
Take the time to locate the inspection window on the gear housing. There is another sign under the thorn.
The last step is optional. And they do this so as not to redo all the work from scratch.”
- The mark on the crankshaft pulley sometimes breaks: use control method “1” (photo 1) or “3” (photo below).
- The number of belt teeth between o is 16;
Updates for VAZ-21124
On the 1.6 engine, all actions are performed as described above. There is one exception: the generator drive pulley is installed according to the mark on the casing (see photo).
Generator drive pulley, engine 21124
However, if this sign is not present, then use the proven method - count 20 teeth from the body of the DPKV. Instead of 21 there should be "pass".
The timing pulleys can be turned at will - the pistons never touch the valves. Compare the appearance of the pistons of two different engines - it will become clear what we are talking about.
Two different 16-valve valves
For those who don't understand anything
The number of teeth on the crankshaft pulley is 21, on the camshaft pulleys – 42. When the crankshaft is rotated 360 degrees, the camshafts rotate 180 degrees. Typically, a complete engine cycle consists of two revolutions of the crankshaft (720 degrees).
In theory, an alternative tuning method could be used. Place the marks on the camshaft pulley down. Then the mark on the crankshaft pulley should point upward (TDC 1 and 4).
If there is no clasp, you can make one yourself. A suspension spring remover will also work (see photo).
Video
The timing belt (gas distribution mechanism - approx.) plays a very important role in any vehicle, and the VAZ-2112 was no exception. On a 16-valve engine of the VAZ family, a break in this element in some cases can negatively affect the condition of the entire engine as a whole, as this leads to bending of the valves and expensive repairs and replacements. Therefore, the timing belt should be changed on time, and if cracks or abrasions appear on it, then there is no point in waiting for it to finish. Below we will tell you how to independently replace the timing belt on a 16-valve VAZ-2112 engine with your own hands.
The video describes the process of replacing the timing belt on a VAZ-2112 in detail, see:
Replacing the timing belt 16 cl engine — Lada 2112, 1.6 l., 2007 on DRIVE2
Replacing the timing belt VAZ 2112 1.6 16 cl.
1. Remove the timing belt cover. Timing belt guard secured with six bolts. Remove the chip from the crankshaft sensor, unscrew the bolt and remove the sensor.
2. There is a missing tooth on the pulley, this is not without reason, this allows the crankshaft sensor to determine the top dead center, and also allows you to block the crankshaft, unscrew and tighten the pulley bolt.
3. The pulley is then aligned with the crankshaft sensor hole and a suitable tube or other suitable object is inserted through the sensor hole, in my case it is a hex wrench, the pulley is locked and then unscrewed and removed.
4. Loosen the tensioner pulley nut and remove the old timing belt.
5. Install a new belt, the belt can be installed by moving the right camshaft with a wrench, or you can remove the tensioner roller in any way you like.
6. Tighten the pulley bolt back and align the timing belt drive gear to the marks. If there are no marks on the oil pump body, put marks on the flywheel and for one make a mark on the oil pump with a chisel, this will be more convenient.
7. We join the marks of the camshaft pulleys so that the timing belt drive gear does not get lost
8. Use a special wrench to tighten the belt with the tension roller. If there is no key, don't worry, you can tighten it with two nails and a screwdriver between them, or you can take a steel fork, remove the two center prongs completely, shorten the outer two in half and fold them over. Don't forget to tighten the tensioner nut. (To tighten the belt, turn the tensioner pulley counterclockwise (about 10-15 °), to loosen it clockwise)
9. We check the crankshaft two full turns and check the marks, if all three marks match, put the pulley in place, do not forget the generator belt and crankshaft sensor, then the belt cover and you can start the engine.
Timing belt tension
1. Check the belt tension. A correctly tensioned belt should rotate 90 ° from the finger force (1.5-2 kgf) in the middle between the crankshaft and camshaft pulleys.
2. I run two fingers between the camshafts and up and down. 5-6 mm swings back and forth, then I go away.
3. Adjust the timing belt tension using a suitable tool. The most correct belt tension is 2 kgf. Having achieved this, fasten the fixing nut.
4. The manual inspection method is described in detail in the "Manual". It involves checking the tension of the timing belt at the center of the branch between the camshaft pulleys. It should be such that the belt deflection is 5.4 mm under the influence of an object 3 mm wide with a force of 10 kg. Deviations in any direction are allowed no more than 0.2 mm. The engine must be at “ambient air” temperature (+ 15-30 ° C). A belt that is too tight will break - the strength of the strings is limited. And the tighter the belt is, the faster the threads will break. Even a weakened belt will not run for long, because when entering the pulley, the belt teeth do not fall into the grooves of the pulley teeth - undercutting occurs and the subsequent separation of the teeth from the base.
Features of labeling
Before installing another timing belt, it is better to set the crankshaft and camshaft to the specified marks from the very beginning. We set the gears to 0 position. Points A, B, C, D, E, F must match as shown in the picture. After this, you need to set the marks on the camshafts and the belt casing in the same position.
Timing belt tension diagram
To check the location of the crankshaft, remove the plug from the box, which is installed under the thermostat, and look for the flywheel. If the marks on the camshaft and the casing match, then there should be a match in the cut on the flywheel and on the metal casing.
All alignments must be clear, the marks must match for proper operation of the belt. After the mark is installed on the flywheel, it must be fixed in this position so as not to break off the thread. And then, as mentioned, you can begin to tension and adjust the timing belt.
Injector types
The injector controls fuel injection and can also control the ignition. On all new injection machines, the ignition is set by a computer and adjusted by compiling various firmware. But this was not always the case, and on old cars, the same Japanese ones from the 90s, the ECU only regulates fuel injection, and the ignition timing is set using a distributor and set in the same way as on old models. Lada, but depending on the speed, the ignition timing is adjusted using a more complex vacuum system than the Zhiguli carburetor. Sometimes a pipe breaks during operation and the traction is lost; you will have to look for and correct this defect.
Ignition system sensors and marks
For the ignition system to work properly, the computer must read the correct information from the sensors. In the future, this information will be processed using fuel maps embedded in the injector.
The main signal comes from the crankshaft sensor. This sensor shows the position of the crankshaft at a given moment and, guided by it, calculates at what moment it is necessary to inject fuel and at what moment the same fuel should be ignited, depending on the engine speed, which is also determined by this sensor.
1 – drive shaft of the drive disk; 2 – crankshaft position sensor; 3 – angle of rotation of the crankshaft; 4 – output signal of the crankshaft position sensor
And here is what a typical signal looks like when the computer receives it from the crankshaft sensor. Notice the 270°: this is like the zero point, which tells the computer that the motor has turned and that a new cycle is starting. This is achieved by missing a tooth on the crankshaft sprocket.
Replacement
- hex key 5;
- spanners or sockets for 15, 17;
- tension roller wrench;
- large flathead screwdriver.
1.We install the machine on a level area. Raise the hood, turn off the power to the on-board circuit by removing the ground terminal on the battery.
2. Unscrew all six bolts securing the timing case to the left of the cylinder head.
3.Disconnect the contacts on the crankshaft sensor.
4. We check the marks on the gears of both camshafts with the marks on the rear cover of the casing (triangular notches).
5. We also check that the mark on the flywheel crown matches. To do this, use a screwdriver to pry off the rubber plug located on the clutch housing under the thermostat. Under it there is a flywheel gear, on which the mark is located. It should coincide with the cut on the left side of the crankcase.
6. Move on to the crankshaft pulley mark. To do this, you need to loosen the tension on the generator belt by unscrewing the tensioner nut.
7. Having removed the belt from the pulley, we fix the current position of the flywheel by inserting a screwdriver between its crown and the crankcase.
8. Place the 17 key on the generator pulley bolt, unscrew it and remove it. Behind it there is a crankshaft gear with a mark, which should coincide in this position with the mark on the oil pump cover.
9. If any pairs of marks do not match, you need to turn off the gear, screw in the bolt securing the generator pulley, and, without removing the key from it, gradually turn the crankshaft until all the marks match.
10.When the marks are in place, remove the tension roller with a 15mm wrench, then the support roller, and remove the timing belt.
10. We install new rollers, install a new belt, starting with the crankshaft pulley.
11.Tighten the belt by rotating the tension roller clockwise using a special wrench (or fixing it with curved pliers) until the tension is optimal. You can check the degree of tension without the help of tools. It is enough to grasp the belt in the area between the crankshaft pulley and the camshaft pulleys and rotate it horizontally. The optimal tension will be at which you can turn it with your fingers no more than 90 degrees.
12. Installation is carried out in reverse order.
13.Pull out the screwdriver from the crankcase hole.
Introduction
1. Gas distribution mechanism (GDM) - a mechanism for timely distribution of the intake of the combustible mixture and the exhaust of exhaust gases in the cylinders of an internal combustion engine.
2. It is carried out by closing and opening the pistons of the cylinder purge windows in two-stroke engines, or by opening and closing the intake and exhaust valves (in four-stroke engines), driven by a camshaft (camshaft) and a cam mechanism. The camshaft has rigid synchronization of rotation with the crankshaft, implemented using a gear, toothed belt or chain transmission.
3. As a rule, on highly accelerated engines, a break or slippage of the timing belt or chain leads to engine failure due to the impact of the pistons on the open valves.
Purpose, devices and principle of operation of the timing belt of the VAZ 2112 car
The gas distribution mechanism (another name is the gas distribution system , the abbreviated name is timing ) is designed to ensure timely supply of air or a fuel-air mixture to the engine cylinders (depending on the type of engine) and release of exhaust gases from the cylinders. These functions are implemented through the timely opening and closing of valves.
The most common four-stroke piston internal combustion engines use valve gas distribution mechanisms , so the timing device is considered using its example.
The gas distribution mechanism has the following general device:
· camshaft drive.
Gas distribution diagram
mechanism
The valves directly supply air (fuel-air mixture) to the cylinders and release exhaust gases. The valve consists of a disc and a rod. On modern engines, the valves are located in the cylinder head, and the place where the valve comes into contact with it is called the seat. There are intake and exhaust valves. To better fill the cylinders, the diameter of the intake valve plate is usually larger than the exhaust valve.
Replacement process
When does a belt need to be replaced? If you naively trust the manufacturer and hope that it will last all 100 thousand kilometers, then problems cannot be avoided. An experienced and knowledgeable driver will always conduct a visual inspection, noting signs of replacement, such as:
- the appearance of hanging threads and loosening of the belt.
- various folds, cuts, ligaments, etc.;
- traces of oil on the belt;
- excessive wear of teeth located on the inside of the belt surface or cracks;
Note. It would be a good idea to check the tensioner pulley, which, if it malfunctions, can cause colossal damage not only to the belt, but also to the main parts of the internal combustion engine.
Replacement is carried out using the following tools:
- long lever or screwdriver.
- special circlip remover;
- keys 15 and 17 (normal and ringtone);
- a special key with which you can adjust the take-up reel;
Belt removal
Let's proceed with the replacement, presented here in the form of detailed instructions:
- place the piston of the first cylinder at the top dead center position;
- remove the generator drive belt;
- de-energize the battery;
- subsequently turn the tensioner roller slightly to reduce the timing belt tension;
- take a 15 mm wrench and unscrew the bolt securing the tensioner pulley;
Note. To easily unscrew the generator drive mounting bolt, you need to rest the support against the crankshaft so that it does not rotate. It is best to use the services of an assistant who will prevent the crankshaft from turning when the bolt is loosened.
- remove, but very carefully, the washer from the drive pulley;
- remove the generator drive pulley;
- then take a 17mm wrench and unscrew the bolt securing the crankshaft pulley;
- remove together with the washer;
- remove the timing belt from the crankshaft pulley.
Installation
Before you begin installing a new timing belt, you should carefully prepare everything. First of all, this concerns cleaning the pulley from oil and dirt, as well as cleaning the take-up reel.
Note. If the parts are very dirty, it is recommended to use a cloth soaked in gasoline or white alcohol.
Like:
- we mount the generator drive pulley in place (there is a special recess on it that needs to be placed);
- put the new belt in place.
Note. When installing a new belt, pay attention to the tension of the drive branch.
- take a 15 mm wrench and tighten the bolt that secures the tensioner pulley.
- turn the roller until the notch on the disk coincides with the protrusion on the inner sleeve of the tension roller (rectangular protrusion);
- We arm ourselves with a special key and extractor;
- insert the key into the grooves of the tensioner roller located outside;
Note. If after installing the belt you hear a characteristic noise in the camshaft, there are probably problems with the tension roller bearing, which is also of great importance for internal combustion engine mechanisms.
To check this, you need to disassemble the rollers and begin to slowly rotate the bearing, making sure that there are no gaps or jams. In addition, you need to pay attention to traces of oil leaks. If the above malfunctions are detected, it is necessary to replace the roller itself.
We change this part too
To replace the tension roller you will have to buy a new one, which is not that expensive. It is also recommended to watch this video.
Note. When installing a new tension pulley, make sure the holes for the special wrench are facing outward.
Installing a new timing belt
We check that the marks on the camshafts and crankshaft match. We install a new timing belt. If there are no directional arrows, put it so that the inscription is read from left to right.
The right, or descending, branch of the belt should be tight. You can turn the right camshaft clockwise a few degrees, put on the belt and turn it back. In this way we will stretch the descending branch. The tension roller has two holes for a special key. You can find it in any auto store. The issue price is 60 rubles. To tighten the timing belt, insert a special key and counterclockwise . Since there is a lot of controversy about tensioning the timing belt, let's write it this way: a tensioned belt should not have a sag between the camshafts of more than 5 mm when pressed and 7 mm on the longest branch (specially experimented).
Remember: an overtightened belt reduces the service life of the pump, and an undertightened belt can lead to cylinder head repair. (photo below)
We check all the marks. We turn the crankshaft two turns and check the marks again. If the pistons and valves do not meet and the marks coincide, then accept my congratulations. Then we put everything back in place in the reverse order of removal. Don't forget to tighten the bolts. We tighten the service belt roller with the same wrench as the timing belt tension roller. Fill with antifreeze and start the car. We wish the belt many years of service, but don’t forget to check it periodically; after all, it was made in Russia.
Ignition control
Electronic ignition control
How to set the ignition angle? In systems with electronic ignition control, this can be done using computer diagnostics that are connected to the electronic control unit (ECU) or "brains" of the car. And there you can see how the engine operates in real time: what signals the sensors receive, what engine speed, fuel consumption, injection time, ignition time and other input and output data.
Essentially, you don't need to change anything while running unless you change the firmware. That is, if the machine somehow began to work incorrectly, then most likely there could be several reasons:
- An incorrect signal is received from the sensors: in this case, you can replace the supposedly faulty sensor with a replacement one that is known to be good, and see if the result changes.
- The mains voltage is incorrect and as a result the sensors produce an incorrect signal. The input signal to the sensor is 5 V, if this value is different, the ECU will receive incorrect input data and the engine will not be able to operate normally.
- Faulty ECU. Quite often it happens that, having considered everything possible, it turns out that the brain has flown. But it’s not scary, they are cheap at VAZ.
Therefore, the ignition itself is not installed on injection machines; it is already included in the system, but it is worth checking whether the signs are set correctly.
Adjusting the ignition marks on the VAZ-2110 injector
When the engine is running, some phases must work synchronously, the camshaft must coincide with the crankshaft, and the timing of fuel injection and ignition must be associated with them. Let's look at all this using the VAZ-2110 as an example.
How to set the ignition on a VAZ 2110 injector
If the car does not start, shoots, sneezes and everything is in the tube, then there are no signs somewhere and this needs to be solved.
On any car, the timing marks must be set perfectly, only then it will work normally. On the VAZ-2110, the crankshaft mark is located on the flywheel. You need to look through the inspection window on the gearbox housing, through which you can see the flywheel. It's better to use a flashlight because it's not that easy to see.
Causes of belt breakage
One of the common problems with the model is the failure of the timing belt. The reasons for this may be different:
- Simple wear and tear caused by a long period of use of the vehicle;
- Regular increased loads under which the engine has to work intensively;
- Mechanical damage as a result of improper operation or received during the repair of other components;
- Manufacturing defect.
Regardless of the causes of the problem, it must be eliminated.
Over time, it stretches so much that the gear teeth jump by 1-2 links. This disrupts the valve timing and causes interruptions in engine operation. But this is the best-case scenario for such a situation. The worst is when the strap breaks and the valves bend.
How to set the ignition on a VAZ 2110
Among the most popular domestic cars, it is worth highlighting the VAZ 2110, or as it is also called “Ten”. This car was produced from 1995 to 2007. The 8-valve VAZ 2110 was a kind of replacement for the usual carburetor. The main difference between the models is the method of supplying fuel to the fuel cylinders. In the injection machine, everything happened under pressure.
The VAZ 2110 has 8 valves and the engine is more powerful. In this case, fuel consumption is lower. Repairing a car requires the use of additional equipment and painstaking work. Engine capacity 1.5 – 1.6 liters. How to correctly set the ignition on the valve injector of a VAZ 2110 8? To do this, you need to know the technology of work, and then all the actions will seem simple. This will be discussed further.
Belt replacement
Replacing the timing belt must be described separately, depending on how many valves your VAZ 2110 has - 8 or 16. Self-repair of the unit on an 8-valve engine is considered easier, although you should not have any serious problems with a 16-valve engine.
8 valve
The sequence of work will be as follows:
Disconnect the battery by removing the negative cable; Unscrew the bolts from the belt protective cover; Remove this protective cover; Remove the front wheel on the passenger side, while simultaneously removing the mudguards and engine compartment protection; Turn the generator pulley clockwise so that the marks on the cover and the pulley match; Remove the protective plug from the gearbox and check in the resulting hole to see how much the control marks match; Using a metal screwdriver or other object, you need to block the flywheel; After this, you can unscrew and remove the generator pulley; Make a few turns to loosen the nut that holds your belt tensioner pulley in place; Remove the old belt. You won’t need it anymore, so feel free to send it to the landfill; The space needs to be cleaned and degreased. White spirit is perfect for this; After rinsing, dry everything using a dry and clean cloth; Install a new roller, following the direction arrows
If they are missing, then take the inscription into account. It should be located from left to right, that is, you could read it without any problems; To tighten the belt, move the roller counterclockwise; Check that all marks and the degree of belt tension match correctly; The compression ratio should be checked on a cold engine and at an air temperature within 15-30 degrees Celsius; Turn on the motor and with the unit running, check whether you have installed everything correctly; If the sound is normal, then the installation was completed correctly; Reassemble the removed elements in reverse order.
16-valve
The VAZ 2110 is equipped with two types of engines - with 8 and 16 valves. At the same time, replacing a 16-valve valve is considered more difficult. Experienced craftsmen assure that for a high-quality timing belt change it is enough to put in a little more effort and attention.
Therefore, in this case, the work must be done as follows.
- Remove the six nuts that hold the protective cover in place. Remove the protection cover.
- Release the crankshaft sensor.
- Find an area on the pulley that is missing a tooth. It will act as a guide to find top dead center.
- Install the piston from the first cylinder so that it is at top dead center.
- Align the pulley and crankshaft sensor, lock the pulley, unscrew and remove it.
- Next, loosen the nut located on the tensioner pulley.
- Remove the old belt and also remove the tensioner pulley.
- Clean the freed space from dirt, oil, and clean it with a dry cloth.
- Install a new belt and secure the pulley with bolts. It is recommended to replace the roller itself at the same time.
- Make sure that the belt and drive marks match, as well as the timing gear marks.
- Tension the belt using the tensioner roller.
- Check the elasticity after stretching.
- Make two full revolutions of the crankshaft to check the quality of the assembly.
- Make sure that the marks match, after which the pulley can be installed in place.
- Turn on the engine, check for correct installation, and then reinstall the protection casing.
When to tension the timing belt
The timing belt tension on the VAZ-2112 and other VAZ models is carried out in the following cases:
- Installing a new belt;
- Loose belt;
- “Slipping” of the belt with a violation of time;
- Replacement of the tension roller and other timing drive mechanisms.
If the reason for the operation is a break or “slippage” of the belt, you must first make sure that the valves are in good condition. Failure of the gas distribution mechanism (drive) leads to engine failure on 16-valve 1.5-liter power units. However, if the drive fails at high speeds, the valves and CPGs also fail on other engines.
Check the functionality of the timing belt on the VAZ-2114 and other models equipped with 8-valve units by turning the camshaft manually. The operating mechanism should turn with some effort. This usually does not affect the faulty one.
During the procedure, it is necessary to check the compression in each of the cylinders. The easiest way to do this is to cover the candle hole well with paper. If there is pressure in the cylinder, the pin will be pushed out of the seat at some point during the firing of the camshaft. It is not recommended to carry out such a test on 16-valve engines. The risk of damage to initially good fittings is too great. There are no holes in the pistons of one and a half liter engines of this type. Consequently, the downward moving valves bend as they contact the piston surface.
Replacing the timing belt on VAZ 2112 cars 16 valves from A to Z
In what cases is replacement required?
To understand that the timing belt needs to be replaced, you need to visually inspect the element.
It is necessary to stop using it if the following damage is detected:
- cracks, cuts have appeared on top of the timing belt, or its base is delaminating;
- if the notches located on the inside of the belt are damaged.
The most common reasons why a belt breaks:
- the car enthusiast simply does not know how to tighten it properly;
- improper operation or use of the belt for longer than the specified period;
- contact with the belt surface of coolant, fuel, lubricant;
- incorrect operation of the water pump;
- play in the belt rollers: tension and support.
If you do not ensure the correct adjustment of the belt, do not inspect and replace the rollers on the VAZ 2112, this can lead to other breakdowns. We will find out which timing belt rollers for the VAZ 2110-2112 16v are better from the author of the video, MegaMeyhem.
If the timing belt breaks, it will disrupt the operation of the entire engine. Then everything descends into chaos: valves and pistons touch each other because their movements are not controlled. As a result of the impact, the valves bend and, touching the pistons, damage their outer walls, scratch the cylinders and important parts of the gas distribution mechanism.
In addition to visual diagnostics of delamination, cracks and other things, it is recommended for a VAZ 2112 car (including the injector) every 50 thousand km. movement to change the belt. Which timing belt for a VAZ is better to choose is described below.
Selection options
In the automotive market you can find several companies that produce high-quality belts. Its length should be 742 mm.
When choosing a belt for 16-valve engines, you can pay attention to:
- Factory belt from the Volzhsky Automobile Plant: Lada 21126-1006040. This is a durable belt made from quality material. It is not so expensive that you can spare money.
- Lynx 137FL22 – timing belt from a Japanese manufacturer. On its inner side there are 137 serrated cuts. Since it is relatively inexpensive, it will have to be replaced more often than others. This does not mean that the quality of the material is bad. Japanese products have proven themselves well among car enthusiasts.
- Belts from Bosch. This company has established itself in the market as the embodiment of quality and sustainability. The belts from the manufacturer turned out to be excellent and, as a result, they are deservedly popular among car enthusiasts. The recommended service life of the straps is fully met.
- German ContiTech belt. Manufacturers tried to make the product durable by including polyamide fabric, fiberglass and synthetic rubber.
- Optibelt. Belts from this company are also installed on 12-valve engines. They enjoy a good reputation among car enthusiasts due to their large resource. This is because cases of belt “death” are almost never recorded, and it serves its life due to the quality of the materials used.
- Gates 5631XS heads the line of the most popular belts, the quality of which is at its best. This is a well-deserved sales leader. Gates belts are made of high-quality material, and therefore the risk of timing belt breakage on a VAZ with a 16-valve engine is reduced to zero.
- BRT belts of domestic production. Experts believe that BRT is the Russian analogue of Gates. What is noteworthy is that the quality of a domestic belt is not inferior to a foreign product, but its price is an order of magnitude lower.
After how long to change the timing belt, we find out from the video from the AVTOTEMA TV channel.
Features of labeling
Before installing another timing belt, it is better to set the crankshaft and camshaft to the specified marks from the very beginning. We set the gears to 0 position. Points A, B, C, D, E, F must match as shown in the picture. After this, you need to set the marks on the camshafts and the belt casing in the same position.
Work order
Before starting work, you need to enter information into the control unit. Sensors will help with this.
To set up the ignition on the 8-valve injector of a VAZ 2110, you need to have some skills related to car repairs:
- Find the gas distribution mechanism and remove it from the case.
- The distance between the sensor and the crankshaft toothed disk should be no more than 0.5 - 0.7 mm. This is necessary so that the pulse from the sensor can pass without continuous sparking.
- The crankshaft pulley should remain in place. How can I check this? The marks located on the flywheel will help with this. They should match the marks on the gearbox. To do this, you need to turn the crankshaft.
- Make sure the mark on the oil pump aligns with the cylinder block protrusion.
- The mark on the camshaft drive wheel should align with the rib on the timing belt cover.
- Pistons 1, 4 cylinders, while all points are aligned, will be in the upper position. The distance between the teeth should correspond to the protrusion on the cylinder block. The tooth located in the 20th position will coincide with the crankshaft sensor.
- The signal will be sent from the sensor to the internal combustion engine control system. This will mean that the piston of the first cylinder is in the upper position in a compressed state.
Replacing timing belt VAZ 2110 16 valves
Replacing the VAZ 2110 timing belt 16 valves in VAZ 2110, VAZ 2112 cars. Requires regular performance. Of course, an injector with sixteen valves adds agility to our Lada and this is pleasantly pleasing. There is a fly in the ointment. The timing belt must not be allowed to break due to wear. This leads to damage to the cylinder head.
The content of the article:
How to avoid valve failure
The camshafts are stationary and at the moment when the piston approaches top dead center, the valves remain open, resulting in the piston hitting the open valves, which leads to the valves bending and in some cases destroying the seats and guides. Repairs are of course expensive.
This can be avoided by installing pistons in the engine with recesses for the valves, such as in the photo. It is not advisable to replace this on purpose, since engines have a significant service life, and there is no point in disassembling a working engine. Therefore, it is easier and cheaper to simply change the timing belt in a timely manner, especially since it does not require extensive experience in locksmith work and deep knowledge in the field of car repair, but just attentiveness and knowledge of some of the nuances when installing the belt itself.
Disassembling the timing belt
Where to start replacing the belt. First, you need to remove the alternator belt drive pulley. It’s convenient to do this if you remove the right front wheel and the protective cover, if you still have one. The pulley mounting bolt must be unscrewed. Then remove the timing belt protection covers and the mechanism before your eyes. The nuts securing the tension rollers must be unscrewed so that when replacing the belt, the rollers can also be changed, and remove the rollers, then remove the belt itself
Installing timing marks
The crankshaft is installed so that the piston of the first cylinder is at top dead center, this position must correspond to the mark on the crankshaft timing pulley, it must align with the rib on the oil pump housing
In addition, there is a mark on the flywheel; it should be located in the center of the ignition timing scale; it is clearly visible through the inspection window located on the flywheel housing.
Having installed the crankshaft, install the camshafts in this way. So that the valves have a position corresponding to the moment of compression of the fuel in the cylinders. When the piston is at top dead center.
For this purpose, there is a mark on the camshaft timing pulley.
must align with the slot on the body of the protective casing
this is typical for both pulleys
Belt tension
Having installed the tension rollers, install the belt as shown in the photo
The hole for fastening the left tension roller is offset from the center. Due to this, the timing belt is tensioned. Using holes into which a special key is inserted (a screwdriver is also suitable)
After tensioning the belt, turn the crankshaft two turns and align the marks again. This is necessary for self-testing. If this time the marks coincided clearly. Then after installing the generator drive pulley and protective covers, the engine can be started. timing belt replacement VAZ 2110 16 valves must be done every 80,000 km
Setting the piston of the first cylinder to the TDC position of the compression stroke
Setting the piston of the first cylinder to the TDC position
When carrying out work related to removing the camshaft drive belt (timing), the valve timing can be interrupted, to prevent this from happening, the piston of the 1st cylinder is set to the TDC (top dead center) position during the compression stroke. If the valve timing is incorrect, the engine will not run smoothly and will not perform properly. Set TDC according to the mark on the camshaft pulley (when installing according to the marks on the flywheel or crankshaft pulley, the piston of the 1st or 4th cylinder may be in this position). Then make sure the marks on the flywheel or crankshaft sprocket are aligned (if the alternator drive pulley was removed). If the marks on the flywheel or crankshaft pulley do not match, the valve timing is incorrect (the piston of the 1st cylinder is not installed at TDC). In this case, you need to remove the camshaft drive belt and rotate the crankshaft until the marks match. Important! Rotate the crankshaft only by the pulley bolt (do not rotate the crankshaft through the camshaft pulley itself).
TIP Since it is inconvenient to turn the crankshaft using the pulley bolt, there are two ways to do this
- Engage any gear and suspend the front wheel. Then rotate the suspended wheel until the mark on the camshaft pulley aligns with the mark on the rear camshaft drive belt cover.
- Engage any gear (preferably IV) and slowly move the car until the mark on the camshaft pulley aligns with the mark on the rear camshaft drive belt cover.
TDC marks VAZ 2110 2114 8 valves
The TDC marks are located on the camshaft sprocket (lug) and on the camshaft drive belt rear cover (screw).
In addition, the markings are located on the flywheel (risk) and on the scale of the rear cover of the clutch housing (triangle cutout). For clarity, the gearbox has been removed.
In addition, marks are located on the crankshaft sprocket (dot) and on the oil pump cover (V-groove). These marks are only visible when the generator drive pulley is removed.
You will need: 17" wrench, 10" socket wrench. 1. Disconnect the cable from the “-” terminal of the battery.
2. Set the gear shift lever to the neutral position, place stoppers under the car wheels.
3. Remove the right front wheel and the right fender in the engine compartment.
4. Open the hood and remove the three screws that secure the front camshaft belt housing. Note. Screws on the mounting side of the cover also secure the cable clamps. Remove the front cover.
5. Rotate the crankshaft using the bolt securing the generator drive pulley until the marks on the camshaft pulley and the rear cover match.
6. Remove the plug from the hole in the clutch housing and check the alignment of the marks on the flywheel.
TDC marks VAZ 2112 2111 16 valves
About the engine mod. 21126 (16 cl) are located on the camshaft sprockets (lugs A) and on the rear camshaft drive belt cover (slots B).
In addition, the markings are located on the flywheel (risk) and on the scale of the rear cover of the clutch housing (triangle cutout). For clarity, the transmission has been removed.
Also, all engines have marks on the crankshaft sprockets (dot) and on the oil pump cover (V-groove). These marks are only visible after removing the alternator drive pulley.
You will need: 17" wrench, 5" hex wrench, T30 TORX wrench, Phillips screwdriver.
1. Disconnect the cable from the negative terminal of the battery.
2. Using a Phillips screwdriver, remove the screw that secures the right fender to the wheel arch trim
3. Using a torx t30 wrench, remove the two screws that secure it to the case
4. Remove the screen.
5. Open the hood and use a 5-point hex wrench to remove the five bolts that secure the upper front timing belt cover 6 . and remove the cover.
7. Using a 17-inch wrench, rotate the crankshaft by the bolt that secures the alternator drive pulley to it until the marks on the camshaft pulleys and the rear cover line up.
8. Remove the plug from the hole in the clutch housing and check the alignment of the marks on the flywheel (the thermostat has been removed for clarity).
Stories from our readers
“Fucking basin. "
Hi all! My name is Mikhail, now I’ll tell you a story about how I managed to exchange my two-wheeler for a 2010 Camry. It all started with the fact that I began to be wildly irritated by the breakdowns of the two-wheeler, it seemed like nothing serious was broken, but damn it, there were so many little things that really started to irritate me. This is where the idea arose that it was time to change the car to a foreign car. The choice fell on the melting Camry of the tenth years.
Yes, I had matured morally, but financially I just couldn’t handle it. I’ll say right away that I am against loans and taking a car, especially not a new one, on credit is unreasonable. My salary is 24k a month, so collecting 600-700 thousand is almost impossible for me. I started looking for different ways to make money on the Internet. You can’t imagine how many scams there are, what I haven’t tried: sports betting, network marketing, and even the volcano casino, where I successfully lost about 10 thousand ((The only direction in which it seemed to me that I could make money was currency trading on the stock exchange, they call it Forex. But when I started delving into it, I realized that it was very difficult for me. I continued to dig further and came across binary options. The essence is the same as in Forex, but it’s much easier to understand. I started reading forums, studying trading strategies. I tried it on a demo account, then opened a real account. To be honest, I didn’t manage to start earning money right away, until I understood all the mechanics of options, I lost about 3,000 rubles, but as it turned out, it was a precious experience. Now I earn 5-7 thousand rubles a day. I managed to get the car buy after half a year, but in my opinion this is a good result, and it’s not about the car, my life has changed, I naturally quit my job, I have more free time for myself and my family. You’ll laugh, but I work directly on the phone)) If If you want to change your life like me, then here’s what I advise you to do right now: 1. Register on the site 2. Practice on a Demo account (it’s free). 3. As soon as you get something on the Demo account, top up your REAL ACCOUNT and go to REAL MONEY! I also advise you to download the application to your phone, it’s much more convenient to work from your phone. Download here.
Set the piston of the first cylinder to the TDC position on the compression stroke:
- Turn the crankshaft clockwise by the pulley mounting bolt using a 19mm socket.
- Aligning the marks on the camshaft timing belt with the mounting tab on the rear timing cover.
- Remove the rubber plug at the top of the clutch housing.
- Make sure that the mark on the flywheel is located opposite the slot in the clutch housing cover.
Further actions:
- We fix the crankshaft from turning by inserting a screwdriver through the hole in the clutch housing between the flywheel teeth.
- Unscrew the bolt securing the generator drive pulley and remove it.
- Loosen the tension roller mounting nut using a 17mm wrench.
- Rotate the tension pulley until the belt is as loose as possible, and then remove the timing belt.
How to evaluate the work already done
Accurate diagnosis is carried out using a computer. However, you can also independently evaluate the correct operation of the circuit.
- With the ignition off, check the contacts.
- Find the voltage inside the module at terminals C and B.
- Check the high voltage cable. To do this, you need to take a candle and put it in the cap. In this case, it should be secured to the cylinder block. If you start the internal combustion engine with the starter, a spark will appear. The check is carried out for all wires. If the spark does not appear, the entire ignition system must be checked or even replaced.
- If the engine continues to run poorly, the fuel system needs to be checked.
For the VAZ 2110 carburetor model, markings are also made to adjust the ignition system.
If the ignition of the 8-valve injector of the VAZ 2110 occurs earlier or, conversely, late, then the ergonomics of the entire engine deteriorates. Power is also reduced. The engine is exposed to high temperatures and excessive loads. Among other things, detonation may occur. All this can lead to loss of ignition in the VAZ 2110.
Replacing the belt drive
First, about the tools that we will need when carrying out repair work:
- hexagon;
- socket heads;
- ring and open-end wrenches;
- screwdrivers with different tips;
- roller tensioner.
1. The repair must begin by placing the car on a flat surface. The hood opens and the left terminal is disconnected from the battery. This is how the car is de-energized. 2. Now you need to remove the timing system housing. . 3. On the crankshaft sensor, you need to disconnect the contacts and check the location of the marks. These marks are located on the crankshaft gears and the inside of the casing.
4. The marks on the flywheel crown should also converge. To trace their coincidence, you need to unscrew the plug on the crankcase. The mark is on the flywheel gear. If it matches the mark (cut) located on the crankcase, then everything is fine.
5. Loosen the tension on the belt drive and check the mark located on the crankshaft. We fix the flywheel by installing a screwdriver between the crankcase and the crown. 6. Unscrew the crankshaft pulley. We check the alignment of the marks on the crankshaft gear and the oil pump. 7. Now you can change the belt. To do this, you first need to remove the tension roller. Then the belt is removed. 8. We tighten the new gear. The tension roller rotates clockwise. This is easier to do with a special key, which should be prepared in advance. If there is no key, then you can use pliers for this, the ends of which are curved. The tension needs to be adjusted until it is optimal. 9. Now we collect everything from the opposite. Don't forget to remove the screwdriver from the crankcase.
Checking the ignition coil with a multimeter
Checking the voltage at the wire terminal block
:
- Disconnect the block with wires from the ignition coil (on the H4M engine, to access the coils of cylinders 1 and 2, remove the intake pipe).
- Turn on the ignition and measure the voltage at terminal 3 of the block (the pin numbering is indicated on the ignition coil).
- The output voltage must be at least 12 V. If it is less or less, the battery is discharged, there is a fault in the power circuit, or the engine control unit (ECU) is faulty.
- Turn off the ignition.
Setting the ignition timing
Required for carburetor models only. To work you will need a tool - a strobe light. It is sold in almost all car dealerships and at a reasonable price. It is also advisable to have a wrench to unscrew the nut that secures the distributor.
When choosing the correct ignition timing, mark 1 on the flywheel should be between the central division (notch) 2 and the previous division 3 of the scale. If not, adjust the ignition timing.
To adjust the ignition timing on a VAZ 2110 you need to:
- Do minimal work. The crankshaft should rotate at a maximum speed of 820-900 rpm. The tube coming from the carburetor and connecting to the vacuum valve must be disconnected.
- Take a strobe light and connect the cables to the “-” and “+” terminals of the battery. The tip of the high-voltage wire must be removed from the socket and the wire coming from the strobe inserted.
- Remove the rubber plug from the slot in the crankcase and point the strobe light at the free space. Next you need to start the car. During its operation, it is necessary to apply a mark to the flywheel. As soon as the engine starts, the strobe light starts. Flashing will indicate a sign. The flashing will be fast and the sign will remain stationary. However, if you move the dispenser, the label will move.
- To move the label and dispenser, you must loosen the top nut securing the dispenser, as well as the 2 lower nuts. Subsequently, the distributor can be turned slightly. At this time, the mark will also move with the strobe light.
To understand the process of adjusting the ignition in more detail and clearly, it is recommended to watch the corresponding videos. To resolve the issue of how to set the ignition on the VAZ 2110 8 injector, you can also consult with experienced car owners.
Preparatory work
Before you start work, familiarize yourself with the timing system diagram and the location of the marks on the camshaft and crankshaft.
This is what a detailed timing belt diagram looks like.
Scheme: 1 . Crankshaft pulley. 2 . Timing belt. 3 . Water pump pulley. 4 . Tension roller. 5 . Intake camshaft pulley. 6 . Timing belt upper protective cover. 7 . Exhaust camshaft pulley. 8 . Phase sensor synchronization dial. 9 . Support roller.
Read more about the engine diagram here.
A – TDC mark on the crankshaft pulley. B – Mark on the oil pump cover. C – Installation mark on the protective cover. D – Mark on the exhaust camshaft pulley. E - Mark on the intake camshaft pulley. F - Installation mark on the protective cover.
Tools for work
To carry out all the work you will need:
- New timing belt for the 16-valve VAZ-2112 engine.
- Socket head for “10” and “17”.
- The key is "17".
- Screwdriver.
- Tensioner pulley key.
