Chassis malfunctions are accompanied not only by increased vibration and extraneous sounds. The car unexpectedly pulls to the side, when turning, the body sways, the shock absorbers begin to leak - it becomes impossible to adequately control the situation on the road. Quite often, the culprit of the problem is the front or rear wheel hub. What factors lead to its failure and how to replace a broken part?
The key to hub reliability is regular diagnostics of the chassis system
Hub functions
The main part of the car chassis assembly that experiences the heaviest loads is the hub, both front and rear. Because it is an intermediate part connecting the wheels and suspension of the car. If this important part breaks down, there is a threat to all road users. Each wheel has its own hub. The wheel is rigidly attached to the hub and performs a rotational movement around its axis, and the hub is attached rigidly to the car’s suspension. Depending on what kind of drive the car has, the functions of the hub differ. If the car has rear driving wheels, then the rear wheel hubs perform an additional function - this is the redistribution of torque from the crankshaft to the wheel. It turns out that the rear hub of such cars is an element of the transmission, and not just the chassis. The following parts are attached to the wheel hub - brake discs or drums. Inexpensive machines have drums installed. Therefore, another function of the rear wheel hub is to provide braking. In addition, the hub serves as a location for installing various sensors (speed, ABS, control and other technical indicators) that modern cars are equipped with. These are the functions of the rear hub:
- Ensuring rigid, reliable fixation of the wheel to the suspension.
- Ensuring the wheel rotates around its axis.
- Maintains anti-lock braking and braking systems.
- Serves as a mounting location for various sensors.
Tips for maintenance and operation of bearings
- How to lubricate a wheel bearing.
- Keep dust away from grease and bearings. Lubrication of external surfaces prevents corrosion. For external lubrication, perform the following operations:
- First, you need to cleanly rinse the seat of the clip with kerosene, wipe it dry, then lubricate the seating surface with a thin layer of lubricant. Put on a clean rubber glove, apply lubricant to your palm and rub it into the bearing, then insert the part inside and additionally wipe the surface with a rag moistened with lubricant.
- You can use any anti-corrosion lubricant; specialized lubricants for bearing units are sold on the market. When applying, observe the amount of lubricant - there should be no leaks from the unit.
- Lubrication of the bearing inside is possible if it is open or has rubber seals. Add lubricant inside, but here you also need to follow an important rule - there should be no excess lubricant (turn the races repeatedly, excess lubricant will come out, it should be removed).
Recommended lubricant is presented in the table:
| Lubricant brands | Manufacturers | Thickener | Base oil |
| RareMax AF-1 | Kyodo Yushi Co., Ltd. | Urea | Mineral oil |
| 6459 Grease N | Showa Shell Sekiyu, KK | Urea | Mineral oil |
| Pyronoc Universal N-6C | Nisseki Mitsubishi Oil Corporation | Urea | Mineral oil |
| HB-1 | Kyodo Yushi Co., Ltd. | Urea | Mineral oil |
| Ronex MP | Exxon/Mobil | Lithium | Mineral oil |
- How to extend service life.
Tighten the axle nut to the recommended torque. Excessive tension will cause excess friction, the lubricant will heat up, dry out, and the rubbing parts will become deformed. Insufficient fastening torque will cause more play than is permissible, which will lead to premature wear. Use original spare parts (nut, cotter pin, retaining ring, etc.) to repair bearings.
Calculate service life "Wheel Bearing Life Calculator"
Read the article “Tightening torque of wheel bearings”
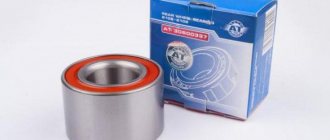
- Which wheel bearing to choose based on manufacturer, and what to look for when purchasing.
The original number is indicated on the case; the manufacturer recommends installing it. If it is not possible to get the original, there are replacement brands. The main thing is that the dimensions and technical characteristics match. On the packaging, look at the inscriptions, barcode, stamped number on the case, and the package contents.
Read the article “Rating of the best wheel bearing manufacturers”
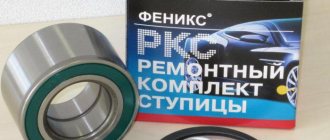
- Wheel bearing kit - what it includes.
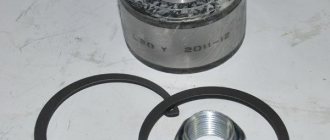
The repair kit includes consumable parts: wheel nuts 1 or 2 pcs., wheel bolts - set, lock ring 2 pcs. cotter pin Possible oil seals, outer races and even lubricant.
- What to use a press or puller.
For high-quality work, use a press, remove the assembly, take it to a service station, and for a small fee they will replace the assembly parts in 1-1.5 hours. The puller is used when replacing independently, purchased or rented. An assistant's hand will be useful for holding the key.
Important point:
Do not put pressure on the inner race of the bearing, as this may damage the elements of the bearing assembly.
- ABS bearings.
The presence of an impulse ring can be easily checked by placing a metal object on one side of the seals. The magnetized side is placed inside the hole of the fist to the connector of the reading sensor.
Rear hub device
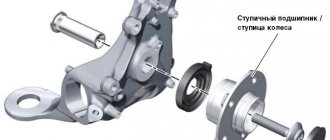
The design of the rear hubs differs depending on whether the vehicle is front-wheel drive or rear-wheel drive. The hub is a round metal piece with an outer rim that has many small holes and one large internal hole.
The outer rim with holes is needed to attach the wheel. Guide bolts and studs are screwed into the holes to secure the wheel axle. Wheels are usually mounted with either 4 or 5 bolts, but there are also up to 8 bolts. The inner hole of the hub is designed to fit onto the bearing. The CV joint is installed in the hole in it. Some hubs have multiple locations for electronic sensors for ABS, speed, etc. All hubs are secured with two bolts and one washer. The hub is seated through the bearing onto the axle. The axle is also a very important part in the chassis of a car. Roller or cone bearings are used.
Hub unit design
It is important to understand the design of the hub itself in order to safely replace the bearings. Popularly, the hub assembly is often called the steering knuckle, because mechanical energy is transmitted through it to the wheels. The bearing plays an important role in the operation of the unit, since if it breaks, it will cease to function normally.
The device of the car hub unit
Note! There are several types of wheel bearings (ball, tapered and others). But the replacement occurs according to the same algorithm for all types of parts.
Wheel bearing structure
The bearing consists of several parts: the outer and inner ring, the cage, and the rolling element. To reduce the coefficient of friction, grease is used. During operation of the part, rotation is transmitted through the rolling body. The inner and outer bearings have no connection with each other, since the outer one is connected to the steering knuckle, and the outer one is connected to the car hub. The transmission of torque to the wheels occurs thanks to splines located inside the hub assembly.
Be sure to use hub lube
Rear wheel hub failure
Serious breakdowns can be avoided by timely diagnostics and, if signs of malfunction are detected, prompt elimination.
What breaks hubs:
- A sporty driving style, that is, with jerks, drifting, turning at high speeds, as well as fast driving over bumps.
- Overload of a vehicle.
- Getting stuck in mud and snow when the car sat on its bottom.
During such operation of the car, the hub housing may crack and the bearing may jam.
Causes of wheel bearing failure
Friction is the main enemy of balls or rollers. Over time, the lubricant loses its quality and abrasion begins on the spherical surface of the elements enclosed inside the cages. A sign is excessive heating, an increasing hum while driving, a metallic grinding sound.
Failure of one of the assembly elements: the axle or hub will certainly affect the operation of the bearing: the force of impacts on the cages will increase, and excessive axial and radial loads will appear.
Other reasons:
- extreme riding;
- poor road and climatic conditions: dirt, dust, potholes;
- improper installation, adjustment, use of impact methods when assembling the unit.
Symptoms of a problem
Options for self-diagnosis:
- When cornering, it is especially audible if the wheel bearing begins to fail.
- Push the rubber of the wheel crosswise with your foot to determine if there is any play. If there is play (free play), then it’s time to change the hub.
- If there is a hum in the wheel area. In this case, you need to lift the car with a jack and check the wheel for play. In this case, sounds of crunching and creaking are possible. When such a hum appears, you can no longer operate the car, because the hub or bearing has already worn out to the maximum and the wheel can jam at any moment.
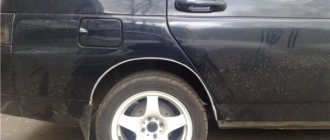
When changing a wheel, you should also check the hub. If it is replaced, you must ensure that the thread does not break when tightening the rear wheel hub bolt.
Diagnostic procedure
Self-checking of the wheel bearing is carried out in the following order. You should alternately jack up the left and right sides of the vehicle and spin the wheels.
Having found a wheel that makes a hum when rotating, you should rock it in different directions. As a rule, backlash is quickly detected. In some cases, this is caused by a loose hub nut. To eliminate this possibility, it should be tightened using a torque wrench and locked. If the play and extraneous noise have not disappeared, the wheel bearing should be replaced.
Since the VAZ-2110 has been out of production for quite some time, it cannot be under warranty. This car is not equipped with overly complex electronics, unlike many foreign cars. Therefore, if you have the necessary tools and some skills, you can replace the wheel bearing on the “ten” yourself.
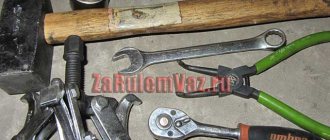
Rear hub replacement tools
To dismantle the hub you will need the following tools:
- Set of socket heads with extension.
- Pliers (pliers) for removing the locking ring.
- A spanner wrench for unscrewing the brake drum guide pins.
- A block of wood to prevent metal from hitting metal.
- Percussion instrument (hammer, cleaver, half sledgehammer).
- Mount.
- Chisel.
How to replace the hub:
- Loosen the wheel nuts.
- Raise the car with a jack. Place supports for belaying. Place anti-recoil devices (shoes).
- Remove the decorative cap (center of the wheel).
- Unscrew the wheel nuts.
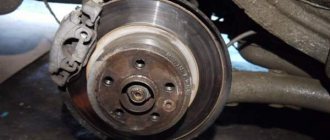
- Remove the brake drum from the hub or remove the disc brake caliper.
- Unscrew the bolts securing the hub to the bracket. The bolt is unscrewed through a special hole in the hub itself. To gain access, you need to rotate the flange until the holes line up with the bolts. These nuts are tightened with a large torque, so unscrewing them is not so easy.
- Unscrew the caliper mounting bolts, steering knuckle mounting bolts and brake pad guides.
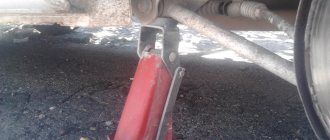
- Pull out the hub. The rear hub is removed from the bearing. You need a special puller to press the hub off the bearing.
Step-by-step replacement: 11 steps
- Place the desired side of the vehicle on the jack, and also use supports for safety.
- Put the gearbox in first gear and the car on the handbrake.
- Unscrew the wheel bolts and hub nut with a wrench.
- Remove the front wheel, and then use a wide screwdriver to remove the hub protective cap.
- Remove the caliper from the brake disc. To do this, turn the brake drum together with the stand towards you and unscrew the fastening. To keep the drum mechanism out of the way, move it to the side and tie it up.
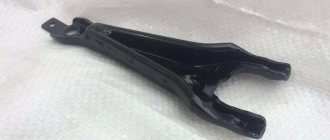
- Remove the ball joints and steering ends, having previously treated them with an anti-rust agent.
- Remove the brake disc by unscrewing the two bolts in the hub, and then the central nut using a wrench or, if that fails, a chisel.
- Unscrew the fastening of the central part of the wheel with a special puller, having first removed the plug. Remove the hub and replace the faulty part, such as a bearing. Remove the latter carefully so as not to damage the sockets and the corkscrew ring: it is not always supplied with the new component.
- If you are replacing the entire assembly, wash all seats and apply new lubricant. Press in the bearing rings and install the mechanism in place.
- Reassemble everything in reverse order.
- Go to a service station to perform a wheel alignment: after removing the tie rod, the settings require updating.
The impact pressing method, for example with a hammer, is not suitable: microcracks cannot be avoided
And finally, a piece of advice. If the problem affects only one bearing assembly, change both at once: the load on them is the same, and therefore the degree of wear is identical. Of course, it is better not to wait for a suspicious hum and regularly check the condition of the chassis. God protects those who are careful, especially since preventive examinations do not require much effort and large financial investments.
What tools will you need?
Before you replace the rear hub or its bearing, be sure to have all the necessary tools. It is unlikely that it will be possible to dismantle the bearing without special pullers. If you plan to install a new hub assembly, then there will be no problems - it already has a new bearing, which is installed according to all the rules.
But if you buy all the elements separately, having a puller is highly desirable. You need to have the following tools on hand:
- Jack – preferably a rolling type. And definitely reliable supports. If there are none, then you can use wooden blocks.
- Balloon wrench for wheel bolts - usually a 19, 17 or hex head.
- Pliers.
- 30mm socket or socket wrench.
- A piece of durable pipe.
- Hammer, chisel, drift.
- Wooden beam or bronze hammer.
- Mounting blade.
- A puller of any design for pressing out a wheel bearing.
- A two-legged puller is required.
What are the dangers of wear and unprofessional repair of the hub?
Heavy vehicles constantly work under load, and one of the first systems to suffer is the suspension. If the assembly rules are violated (for example, insufficient or uneven tightening of the nuts) or use (lack of lubrication), then wear occurs many times faster. In particular, the seats for wheel and brake discs, bearing races, and stud placement points are broken down. The result is the appearance of gaps, play and inevitable breakdown, which usually occurs during operation, leading to loss of control and accidents.
To avoid troubles, do not forget to perform regular suspension maintenance and allow only professional mechanics to repair the hub and assemble the unit.
How to change the rear wheel bearing on a VAZ 2110: sequence of actions
First you need to remove the wheel bolts and jack up the car.
Attention, under no circumstances should you carry out work on a car mounted on a single jack; you must additionally use a wooden stand of suitable size.
This is due to the great effort that will have to be exerted during the work process. A car on a jack will be very unstable. The further procedure is as follows:
- The bolts are unscrewed and the wheel is removed;
- Now you can remove the hub boot.
- The wheel guides are unscrewed. Sometimes this is not easy to do, they “sour” in aluminum. The main thing here is not to break the edges, so there is no need to rush;
- Next, the brake drums are removed. It all depends on how long ago they were not filmed. Sometimes they are dismantled “by hand”, and sometimes you have to knock with a hammer, through the wood, from the back side. There is another way. The guides are screwed into special holes. It must be borne in mind that the discs cannot be removed with pins; this will lead to the destruction of the aluminum threads. You can only tighten them until they are slightly tight, and then try tapping the disc through the wood. It should help.
- The hub nut is unscrewed. You'll have to try - it's twisted very tightly. Therefore, the knob is reinforced with a piece of suitable pipe. Care must be taken as the car will sway.
- The hub is removed. Here, of course, it is better to use a three-legged puller. However, not everyone has it, so you will have to use the “proletarian” method. It consists in the following. The wheel is installed on the hub and screwed in, but not completely, but so that there is a gap of several centimeters between the disc and the hub. Thus, a kind of reverse hammer is obtained. With a few sharp jerks of the wheel, the hub can usually be removed. And that's half the battle.
- Using round-nose pliers inserted into the corresponding holes, remove the retaining ring.
- Using a universal puller, the old bearing is pressed out or simply knocked out;
- The hub axis is carefully inspected. Sometimes the old bearing race remains on it. It needs to be removed. The bearing has been removed, you can proceed to installing a new one. But first you can inspect the brake wheel cylinder. If it has leaks, you will have to change it so as not to have to remove the drum again.
- The axle and hub are inspected for damage, cleaned of dust, dirt and rust and lubricated with lithol-type lubricant.
- The new bearing is pulled out of the packaging, its race is also easily lubricated along the seating part;
- Using a universal puller, the bearing is installed in place. If you do not have a tool, you can press the bearing using a vice. In this case, the old clip is used as a mandrel. It is not recommended to hammer the bearing, as this may lead to its destruction.
- Now you can install the retaining ring;
- Carefully, using a mandrel or pipe of a suitable diameter, with light blows, the hub is put in place;
- Fixed with a nut;
- The brake drum is put in place, the guides are screwed in;
- The wheel spins. Just for fun, it’s worth trying to shake and twist it. There will be no extraneous sounds or backlash.
Time and cost of hub repairs
Bearing race seat
| Job title | Execution time, hour | Cost, rub |
| Metal surfacing on worn areas | 2-4 | 2000-4000 |
| Gradual cooling | 1-2 | |
| Rough turning | 2-4 | 2000-3000 |
| Finish turning | 1-2 | |
| TOTAL | 6-12 | 4000-7000 |
Press-fit brake disc seat
| Job title | Execution time, hour | Cost, rub |
| Metal surfacing on worn areas | 2-5,5 | 3000-4000 |
| Gradual cooling | 1-2 | |
| Rough turning | 3-5 | 3000-4000 |
| Finish turning | 2-4 | |
| Pressing the disk in with the installation of clamps | 2-3 | 1000-2000 |
| TOTAL | 10-19,5 | 7000-10000 |
Wheel rim seat
| Job title | Execution time, hour | Cost, rub |
| Metal surfacing on worn areas | 2-4 | 2000-3000 |
| Gradual cooling | 1-2 | |
| Rough turning | 2-4 | 3000-5000 |
| Finish turning | 2-3 | |
| TOTAL | 6-13 | 5000-8000 |
Bottom line
After removing the car from the stands and jack, you can try it out while driving. Enjoyment of silence and satisfaction from the work done will be ensured. And most importantly, now you have confidence in the reliability and safety of your car.
The wheel bearing, brake drum and wheel disk provide forward motion, braking, and control of the vehicle's wheels, ensuring the safety of the driver and passengers. Replacing the VAZ 2109 hub is quite possible with your own hands if you have all the necessary materials and tools at your disposal.
The time standards for replacing the hub, according to the technical data for the VAZ 2109, are 27 minutes with the wheel removed. These instructions with photos will help you change the rear hub.
When a part needs to be replaced
If you hear a noise, hum or howl from the rear that increases significantly when cornering, this indicates that it is time to check the rear hubs. Modern verification methods are quite simple:
- Having stopped the wheel diagonally - opposite to the jacking point, you need to hang the two rear wheels alternately.
Note! Why each one separately? Mistakes are often made in identifying the side of the noise; in addition, it often becomes necessary to replace two bearings at once.
- The raised wheel needs to be spun as much as possible. If you hear extraneous sounds similar to a hum, in any case you cannot do without replacing the part;
- if you still have some doubts, you can look at the lateral play. You need to take the wheel by the edges and roll it away from you - towards you. If the bearing is bad, you will feel the movement of the wheel on its axle.
Today, stores sell individual bearings and assembled hubs. In fact, there is no point in buying an assembled unit (except in individual cases), since replacing the bearing is not as difficult as it immediately seems.
Work examples
An example of restoring a seat along a bearing race on a SAF hub.
The work is carried out with a guarantee; after restoration, due to the reinforcement of the metal in the areas of surfacing, the likelihood of the holder turning again is eliminated; it is more likely to eat the holder itself. Cost from 3500 rub. recovery time is from 3.5 hours. The situation is similar with BPW hubs.
In order to accurately and objectively determine whether there is a need to replace or repair a truck hub, you need to pay attention to the characteristic signs that clearly indicate a violation of the normal operation of this part.