Causes of problems with gearboxes
Almost every owner of a domestic car has at least once encountered problems with partial gearbox failure. If reverse gear on your VAZ-2109 has stopped engaging, then the cause may be one of the malfunctions:
- The clutch is not completely disengaged. Reverse gear won't engage? no problems were found, Which VAZ engine is better. With this problem, problems occur when all gears are engaged, but sometimes only the reverse one fails.
- The gearbox levers are damaged or broken or their mountings are loose. Problems can only be resolved by diagnosing the box, as well as replacing damaged parts. In this case, moving the lever may be accompanied by a crunching sound.
- If only reverse gear does not work, then with a low degree of probability it is time to claim that the transmission fluid has simply run out. Reverse gear won't engage? Causes. Usually, with this problem, all gears do not engage. If, however, you notice that the gear oil level in the box is extremely low, then simply top it up.
- In practice, there were cases when the rear “speed” could not be engaged due to the poor quality of the fluid in the gearbox. In this case, it must be replaced.
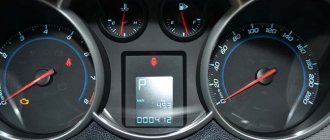
- The most common problem with engaging certain gears is an unadjusted gearbox universal joint. You can notice it by this sign: at first, the backward movement was activated unclearly, and then another mode was activated instead. Later the box stopped working normally altogether.
Let's look at the last two problems in more detail, since often the problem is hidden precisely in them.
Troubleshooting
Many transmission malfunctions that cause the reverse gear to disappear or fall out can be eliminated without removing the unit from the car.
If the cause is a loosening of the bolt securing the clamp on the rod, then to correct the defect it is necessary:
- Place the car on a lift.
- Completely loosen the clamp nut.
- Place the gearshift lever in the fully engaged reverse gear position.
- Fully engage reverse gear at the gearbox using the shift rod on the crankcase.
- Tighten the clamp mounting bolt.
Backstage adjustment
If tightening the clamp does not help get rid of the problem, then you need to check the condition of the shift drive parts. One of the reasons why the reverse gear does not engage may be a poorly adjusted rocker.
To make adjustments to the mechanism, you may need the following tools:
- two wrenches with a size of 13 mm, preferably a socket design;
- any wrench or 10 mm socket;
- small hammer;
- slotted screwdriver.
Since the cause of malfunction of the link can be wear of parts, spare parts may be needed:
- universal joint of the rocker;
- Sometimes the shift rod seal may need to be replaced.
Two people are required to adjust the rocker or replace parts of its drive. One person must change gears from the passenger compartment, and the second must adjust the travel of the shift rods.
The order of work is as follows:
- Provide access to the bottom of the car by placing it on a pit or a lift.
- Using a 13 mm wrench, loosen the clamp installed on the gear shift rod.
- Remove the rod from the box rod.
- Using a screwdriver, carefully remove the boot.
- Using a 10 mm wrench, unscrew the fixing bolt on the cardan shaft.
- Knock off the cardan shaft with light blows of a hammer. It is important not to damage the shaft.
- Remove the universal joint seal boot.
- If there is an oil leak, the sealing gland on the box rod must be replaced.
- Install a new boot (or leave the old one if it is intact) and install the universal joint on the shaft.
- Align the hole on the cardan with the notch on the shaft.
- Tighten the 10 mm clamp and install the boot completely in place.
- Install the rod on the cardan rod and adjust the gearshift lever travel.
- The second person should sit in the driver's seat, set the gear shift lever to neutral, move it slightly to the right and hold it in that position.
- After this, you need to tighten the 13 mm clamp nut.
Typically, after such a repair, the reverse gear starts to engage without problems. In addition, the operation of the entire gear selection mechanism on the VAZ-2109 becomes clearer.
The video from the author MegaMeyhem shows the process of replacing the backstage.
Changing the gearbox oil
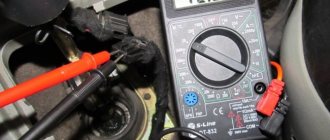
If the oil seal on the rod is damaged, oil leaks out of the gearbox housing, and dirt can get into the box itself. These factors may be the reason why reverse gear stops engaging. In addition, the oil in the box loses its properties during operation, so it must be replaced preventively at least once every 35–40 thousand kilometers. Before replacing, you need to check the condition of the oil in the box. To do this, you need to remove the oil dipstick installed in the gearbox housing and visually assess the quality of the oil. The presence of metal and dirt particles in the oil on the dipstick is unacceptable. The oil itself should be quite liquid and not stick to your hands in a thick layer.
Dipstick with oil level marks
To replace, you will need the following materials and tools:
- New oil. When purchasing oil, you need to consider the type of gearbox. For fairly rare four-speed gearboxes, three liters of oil are required, for newer five-speed ones - 3.3 liters. The oil itself must have a tolerance of 80W-85, the manufacturer does not matter.
- A container for draining old oil with a volume of at least 4 liters.
- A funnel with a hose for pouring new oil or a syringe.
- Wrenches 12 and 17 mm of any type.
- Rags and cleaning solvent.
The actual work order is as follows:
- Place the car with the heated gearbox on the pit.
- Remove the rubber plug from the gearbox ventilation valve installed on the top of the crankcase.
- Clean the valve and plug from dust and dirt. It is convenient to clean parts with thin wire and a rag.
- Reinstall clean parts.
- Wipe off dirt from the bottom of the box. Unscrew the plug on the bottom of the box housing.
- Place a container under the drain hole and drain the oil. It will completely merge in at least 20-25 minutes.
- After this, screw the drain plug back into place and carefully tighten it with a wrench. First, the plug and hole must be thoroughly wiped with a rag.
- Pour fresh oil through the oil level dipstick hole in the box.
- During filling, it is necessary to check the oil level, which normally should be between o and “MAX” on the dipstick rod.
- If there is an overflow, the oil can be pumped out with a large medical syringe with a tube on the spout.
- Within a few days after the change, it is advisable to check the level and appearance of the oil. You also need to make sure that there are no leaks through the plug and box seals.
How to repair a gearbox on a VAZ 2110
Adjustment does not always achieve the desired effect. Therefore, the motorist will need to carry out repair work. Practice shows that repairing a VAZ 2110 gearbox involves dismantling and reassembling the gearbox. Now I will tell you in detail how to do this.
How to remove/dismantle a VAZ 2110 box
How to remove the box? Before disassembling the gearbox, it must be cleaned
It is important that water does not get inside the box.
- Power from the battery is turned off.
- The block is disconnected from the speed sensor.
- Transmission fluid is drained.
- The bolts securing the jet thrust are removed.
- It is necessary to remove the constant velocity joints from their standard location.
- The existing ball joint bolts are loosened.
- Using a tool, unscrew the nuts holding the clutch cover to the gearbox housing.
- The bolts securing the gearbox to the engine are disconnected.
- The power plant must be lifted (use a jack).
- The engine mounts must be removed.
- To pick up the gearbox, you can use a screwdriver.
- The speed box slides off the guides. The input shaft should disengage from the clutch.
How to properly disassemble a VAZ 2110 gearbox
- We remove dirt and wash the outside of the gearbox (do not allow water to enter the crankcase).
- Using a 17mm wrench, unscrew the bolt securing the power unit suspension bracket.
- Using a 13mm socket, unscrew the six nuts securing the rear crankcase cover.
- Remove the bracket.
- Tapping with a copper hammer (or an ordinary one through a soft metal mandrel) on the tides of the lid, and remove it along with the sealing gasket from the studs.
- Having pressed the gear selection rod all the way, we turn on the third gear, or, by retracting the rod all the way, we turn on the fourth.
- Using a 10mm spanner, unscrew the bolt securing the fifth gear fork.
- Using a soft metal drift, we strike the fork downwards, including the fifth gear of the VAZ 2110
- Use a beard to straighten dents in the nuts of the primary and secondary shafts
- Using a 32" socket with a powerful wrench, unscrew the shaft nuts.
- Using a screwdriver, pry off the fifth gear fork and remove the fifth gear assembly. Remove the fifth gear shift fork.
- Remove the synchronizer sliding clutch from the hub. Remove the synchronizer blocking ring. We take out the thrust plate.
- We move the hub inside the sliding clutch of the Synchronizer and remove the hub, springs, clamps and crackers of the fifth gear synchronizer.
- Using a copper hammer we strike the end of the input shaft. Insert two screwdrivers into the resulting gap between the thrust plate and the fifth gear drive gear. Prying up the gear with screwdrivers, we press it
- Using the “13” socket, unscrew the three plugs of the gearshift rod clamps. Remove the springs and retaining balls from their sockets.
- Using a Phillips impact screwdriver, unscrew the four screws securing the thrust plate. The screws have special lock washers.
- Remove the thrust plate. Use two screwdrivers to pry off the thrust washer of the fifth gear driven gear bushing. We insert the puller arms into the resulting gap between the end of the rear bearing and the thrust washer and compress the gear sleeve and the thrust washer.
- Use two screwdrivers to separate the retaining ring on the input shaft and remove it. In the same way, remove the retaining ring from the secondary shaft.
- We insert a screwdriver into the socket of the latch and, applying a magnet to it, remove the ball.
- Using a “13” socket, unscrew thirteen nuts and one bolt securing the gearbox housing to the clutch housing.
- By inserting a screwdriver into the groove at the junction of the crankcase mating planes, carefully lift the box crankcase and remove it.
- Using a 10mm spanner, unscrew the bolt securing the 1st-2nd gear shift fork to the rod. We lift the rod up and disengage the fork. Using a 10mm spanner, unscrew the bolt securing the 3rd-4th gear shift fork to the rod. Use a screwdriver to remove the rod from the gear selection mechanism.
- Raise the rod up and remove the fork from the groove of the synchronizer sliding clutch.
- By turning the 5th gear engagement rod, we remove it from the gear selection mechanism. We take out the axis of the reverse intermediate gear.
- Remove the reverse intermediate gear. We simultaneously remove the primary and secondary shafts from the roller bearings of the clutch housing.
- We take out the differential assembly.
Crunching noise when shifting gears: causes and methods of eliminating them
The causes of a crunching, crackling or grinding noise when the gearshift lever is engaged may be different. It all depends on the specific case.
In the event of a minor breakdown, without interfering with the box mechanism itself, the problem can be eliminated by replacing the damaged part. In another case, more serious, the problem is solved by overhauling the manual transmission itself.
The main breakdowns that cause crunching or crackling when changing gears:
- Failure of synchronizers. Synchronizers are responsible for smooth gear shifting. Over time, they wear out and cease to perform their functions. This leads to a crunching or crackling sound when changing gears. The problem is solved by replacing damaged synchronizers with new ones.
How to avoid crunching noises in the gearbox
Incorrect operation and untimely maintenance of the manual transmission leads to problems in the operation of this unit. What you need to pay attention to first:
- Timely change of oil in the box. The quality and quantity of oil ensures optimal lubrication of shafts, gears and other mechanisms of the manual transmission. Vehicle manufacturers recommend changing the gearbox oil every 60 thousand kilometers of the vehicle.
- An insufficient amount of oil in a manual transmission can also lead to problems in the operation of this unit, namely, causing a crunching or crackling sound when shifting gears. In this case, the oil is either topped up or changed partially or completely.
How to change gearbox oil
oil needs to be changed 2109
The work of changing the oil in the box is carried out as follows:
- Place the car on an overpass or over a pit, warm it up slightly so that the liquid is not viscous. Locate the oil drain plug on the bottom of the box.
- The unit has a rubber cap that needs to be cleaned along with the breather. After cleaning these parts from dirt, return them to their place.
- As soon as the preparatory work is completed, place the container, twist the plug with a wrench, and begin draining the transmission oil.
- The waste liquid will drain completely within half an hour.
- Screw on the plug, tighten it well, but do not strip the thread.
- Under the hood, find the transmission dipstick and remove it. In place of the probe, stretch a hose, at the other end of which a regular watering can or funnel is installed. Pour transmission oil into the box through the hose. On older units, the fill plug is located next to the drain plug.
After the work is completed, check the lubricant level with a dipstick and take a control measurement after 2-3 days. If necessary, add oil; if it becomes critically low, inspect the box for leaks.
Replacing and adjusting the gearbox driveshaft
So, if only reverse does not work, and all other modes do not fail, then you will need to replace the universal joint and adjust it. To do this, prepare a new spare part, a gear selector shaft seal, a set of keys, a hammer and several screwdrivers of different sizes.
Carry out the work according to the instructions:
- Place the machine on an overpass or over a pit. Find the gearbox from below and loosen the clamp bolts on its drive rod. Remove the actuator completely from the stem.
- Using a screwdriver, pull the boot towards the unit. Often during this step the boot is completely damaged, in which case it can be removed and then a new one installed. Unscrew the fixing screw on the universal joint.
- Carefully tap the driveshaft off the assist shaft with a hammer. Remove the boot if you have not damaged it previously. Install a new oil seal on the speed shaft.
- Install a new boot, place the cardan on the shaft so that the position of the fixing screw coincides with the recess on the shaft.
- Tighten the retaining screw and place the rod on the rod, but do not tighten the clamp.
- To make the adjustment, ask an assistant to move the gearshift lever to the neutral position and a short distance to the right. He should hold it in this position while you tighten the clamp.
If the reason for the failure of the reverse gear was hidden in the cardan of the carriage, then you will no longer have problems after this repair.
TOP 6 common mistakes with manual transmission
Shifting gears without clutch
It sounds very strange, given the type of gearbox, but beginners and drivers who have been driving an automatic for a long time often forget to depress the clutch when shifting.
The result is a strong crunch, and a quick realization of the mistake made. At these moments, the box experiences unforeseen loads due to the fact that at the moment of switching the box is not disconnected from the engine, and therefore is under load. Sometimes such pranks end in licking or, even worse, breaking off fragments of gear teeth. As a result, the mechanism “grinds” itself and the manual transmission is simply inevitable.
Clutch depressed
Many car enthusiasts systematically hold the clutch pedal depressed for a long time. For example, when they are standing at traffic lights or just stopped.
This, at first glance, harmless action leads to increased wear of the clutch disc, but what “suffers” the most is the release bearing, which is tirelessly forced to rotate under load. As a result, it quickly becomes unusable (it buzzes), as a result of which it will require immediate replacement, because there is a risk that it will “scatter” right on the move. By the way, to replace it you will have to remove the box, which is not a cheap pleasure.
Engaging reverse gear without coming to a complete stop
A classic of the genre, the driver tries to quickly turn around in the yard, in a hurry, first and then reverse gears. We hear an unpleasant grinding noise when we obviously try to engage the rear.
The reason is simple: the pilot is trying to engage reverse without making a full stop. This has an extremely negative effect on the teeth of the reverse gears, which slowly become unusable due to licking off on one side. If such an error becomes permanent, the reverse gear will engage worse and worse from time to time, until it completely fails.
Downshifting by two or more
Due to the fact that in a manual transmission the function of selecting gears is assigned to the driver, there is a high probability of engaging an inappropriate gear. In cases with downshifts, this is especially dangerous. After all, if the wheel speed turns out to be higher than the maximum possible in the gear selected by the driver (cutoff), when the clutch is released, extreme engine braking will occur. As a result, not only can the gearbox and clutch fail, but also the timing belt in the engine can jump over a couple of teeth (the chain is no exception, but less often), or even break completely (usually an expensive repair).
In addition, with such sharp engine braking, the drive wheels will slow down momentarily, incomparably with the speed of the car, which can cause the car to fall off the trajectory when turning, especially in winter.
If you drive a manual transmission, you should know which gear is which “maximum speed” and avoid “wrong” downshifts.
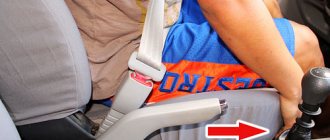
Hand on the lever
Many drivers, when moving, keep their hand on the gearshift lever, as if on an armrest.
On the one hand, it seems to be convenient, on the other hand, it loosens the mechanism and “kills” the forks that directly move the clutches in the gearbox. Those who want to save the box must understand that while driving the car oscillates chaotically and the driver does not consciously hold on to everything his hands are on. As a result, the load on the lever turns out to be not so small, and the box loses its original “tightness”
How to get rid of a crunching sound when engaging reverse gear
Now we invite you to familiarize yourself with the solution to the problem (crunching noise when engaging reverse gear) that service workers shared with us, as well as Prior owners who encountered this problem in their car:
- engage reverse gear 2-3 seconds after pressing the clutch;
- engage reverse through first gear. That is, first engage first gear, then, without releasing the clutch, engage reverse;
- An effective way is to loosen the clamp bolt nut on the transmission control rod by 3-5 turns;
- For some, it helped to lubricate the shaft on the box;
- Prior owners advise engaging reverse gear without fully squeezing the clutch.
Useful video from advice
Note that rear gear crunching is a fairly common disease in almost all VAZ cars, which is found on Kalinas, Grants, Vestas, X-Rays, etc.
Fixing the problem
Let's look at several ways to help fix the problem with engaging reverse gear.
Backstage adjustment
Before you begin solving the problem, take with you everything you might need:
- new gearbox driveshaft;
- speed selector shaft oil seal;
- two ring wrenches 13;
- wrench 10;
- hammer;
- screwdriver.
To fully replace the cardan, you will need to drive into a pit or overpass. In addition, you will need an assistant who will shift the gearbox lever while you adjust it.
Let's start replacing the cardan and adjusting the rocker:
- You need to crawl under the bottom of the 2109 and find your gearbox. Take two 13mm wrenches and loosen the clamp located on the transmission drive rod. After this, you can remove the drive from the gearbox mechanism rod.
- Then take a screwdriver and, with a little force, pull the boot closer to the unit. If you accidentally damage the boot, you can simply dismantle it so that it does not bother you. Now take a 10mm wrench and unscrew the locking screw on the cardan.
- Next, take a hammer and very carefully knock the gearbox driveshaft off the shaft. Do this carefully so as not to damage the shaft. Remove the cardan boot if you did not remove it initially. If necessary, replace the speed selector shaft oil seal.
- At this point we can consider that half the work has already been done. Now you need to install the driveshaft of the box. We install the element in the reverse order. First, install the new boot in place, and then place the cardan on the shaft. Remember that the position of the retaining screw must coincide with the recess on the shaft.
- When the universal joint is in place, tighten the fixing screw and install the boot on the universal joint. You also need to put the gear shift drive rod on the cardan rod, but there is no need to tighten the clamp.
- Next, you will need the help of another person, since you need to adjust the gearshift lever. Ask your assistant to sit in the driver’s seat: he should set the gearshift lever to “neutral” and move it slightly to the right. In this position, an assistant should hold the lever while you tighten the cardan clamp.
Causes of problems with gearboxes
Almost every owner of a domestic car has at least once encountered problems with partial gearbox failure. If reverse gear on your VAZ-2109 has stopped engaging, then the cause may be one of the malfunctions:
- The clutch is not completely disengaged. Reverse gear won't engage? no problems were found, Which VAZ engine is better. With this problem, problems occur when all gears are engaged, but sometimes only the reverse one fails.
- The gearbox levers are damaged or broken or their mountings are loose. Problems can only be resolved by diagnosing the box, as well as replacing damaged parts. In this case, moving the lever may be accompanied by a crunching sound.
- If only reverse gear does not work, then with a low degree of probability it is time to claim that the transmission fluid has simply run out. Reverse gear won't engage? Causes. Usually, with this problem, all gears do not engage. If, however, you notice that the gear oil level in the box is extremely low, then simply top it up.
- In practice, there were cases when the rear “speed” could not be engaged due to the poor quality of the fluid in the gearbox. In this case, it must be replaced.
- The most common problem with engaging certain gears is an unadjusted gearbox universal joint. You can notice it by this sign: at first, the backward movement was activated unclearly, and then another mode was activated instead. Later the box stopped working normally altogether.
Let's look at the last two problems in more detail, since often the problem is hidden precisely in them.
Causes
The reasons why reverse gear engagement is poor or difficult may be as follows:
- loosening of the fastening clamp of the rocker, due to which the length of the rod is not enough to fully engage the gear;
- jamming of the reverse speed lock;
- spring breakage and debris getting into the guide grooves of the gear selection mechanism;
- spontaneous loosening of the selection mechanism mounting bolts;
- the clamp bolt is cut off;
- wear of the clutch disc and release bearing;
- incorrect adjustment of the clutch and clutch pedal;
- low oil level in the box or the need to replace it.
Problems with reverse gear on automatic transmission
In practice, gearbox malfunctions associated with engaging reverse gear occur on both manual and automatic transmissions. "Automatic machines" have different designs. Robotic boxes are similar in design to “mechanics”. But the automatic transmission has its own list of breakdowns when it works hard or the reverse gear has disappeared.
- The fluid level is below normal, or it is contaminated and has lost its working qualities. The automatic transmission device is sensitive to the quality of the lubricant and its level. Therefore, it is better to start finding out the cause by checking the transmission fluid. An excessive oil level also contributes to improper operation of the unit. The service life of the fluid is limited to a mileage of 60 thousand km, but sometimes it is necessary to change it more often, as the lubricant becomes cloudy and contaminated.
- Wear of friction discs. The correct operation of reverse gear, as well as the “D” (drive) mode, depends on this. Worn clutches may prevent 3rd, 4th and reverse gears from engaging. In this case, eliminating the breakdown consists only of replacing the clutches.
- The splines on the drive drum are cut off. The car can move forward, but it will be impossible to go backward.
- Worn friction brake band. There is no reverse movement, but forward movement works.
- The brake band piston cuffs are torn or worn. This will only be noticeable when you engage reverse.
- Control solenoids or hydraulic units are jammed.
Sometimes the lack of communication between the torque converter and the oil pump gear also affects the reverse operation.
Creaking and grinding noise when reversing
Creaking and grinding noise when reversing @ Niva 4×4
Nivovodov Club. Founder - Ermolov Alexey Igorevich, aka ALER
NIVA-FAQFAQ mapSpare parts catalogArtNivaFrom adminForum rules
Niva 4×4 / Niva technology / Sounds, vibrations, smells
Reg.: 03/16/2005 Threads / Messages: 2 / 535 From: Capital Age: 36 Car: GMC Truck)
There will be an incomprehensible (metallic) creak. only when driving backwards. It’s not clear where it came from, either from the transfer case or from the front. I was guilty of the protective rings that stand at the output of the shafts from the transfer case (box, axles) and rub against the flange bolts, but they don’t seem to be (not worn). While there is no second person who could listen, I decided to ask. I’ll figure it out, otherwise I’m tired of it already!
the unfortunate animal is the octopus. He has legs from his ears, and his arms from his ass, and his ass itself has ears. and the brains, in fact, are also in the ass.
Reg.: 12/06/2004 Threads / Messages: 628 / 51730
Hmm, I had this happen, when examining the patient, it turned out that the crosspiece on the cardan near the bridge was dying, replacing it with an Italian analogue from the Miteli company fixed everything.
Reg.: 02/24/2005 Threads / Messages: 3 / 396 From: Ivanovo Age: 43 Car: VAZ-21219 (1994), Chevrolet Cruze (2012)
can the crosspieces creak? I also have a quiet, constant creaking, with a slightly floating tone at a steady speed in reverse...
Reg.: 12/06/2004 Threads / Messages: 628 / 51730
I was creaking. They called it the first sign of imminent death. She died 2 thousand later.
Reverse speed of automatic transmission does not engage
automatic transmissions are different
The level of the ATF transmission fluid has deviated from the norm, the fluid in the automatic transmission is contaminated or has lost its properties. As you know, an automatic transmission is extremely sensitive to the level and quality of oil. For this reason, the check should begin with the transmission fluid.
Please note that both under and over levels can cause gears to shift incorrectly. Also, ATF oil has a limited service life, that is, the fluid needs to be changed every 40-60 thousand
km., contamination, clouding, etc. are not allowed.
Wear of automatic transmission clutches (friction discs). This malfunction often affects both reverse gear R and gears in drive mode D. Problems with clutches lead to gears not being engaged, and certain speeds may disappear (for example, the car goes to 1 and 2, but not 3 and 4, as well as reverse gear). To fix the problem, you will need to replace the automatic transmission clutches.
Other automatic transmission malfunctions and breakdowns. For example, if the splines of the drive drum are cut off, the machine can move forward, but there is no reverse gear. There may also be complete absence of movement both forward and backward. To solve the problem, the drum needs to be replaced.
Another reason may be a brake band and a worn friction layer. Problems may also affect the clutch pack of the reverse gear R. In this case, the box works normally in drive mode, but when reverse is engaged, there is no reverse movement.
Other problems include broken brake band piston cuffs or severe wear. The malfunction only appears when the driver engages reverse gear, that is, the car moves forward normally, but there is no reverse movement. Another common problem with similar symptoms is failure or jamming of valve body valves and individual solenoids.
VAZ 2114 1-2 gear crunch
Moderator: Kolya Taran
VAZ 2114 1-2 gear crunch
RaF » June 19, 2015, 11:07 pm
HELLO! In general, the situation is like this: the 2nd gear crunched (and constantly crashed) and the rear gear when you switched. disassembled the box: changed the 2nd gear synchronizers, changed the release lever, changed 2 cushions at the gearbox on the left and the far support (HZ as they are called)
Well, little by little, the magnet has been cleared of chips. The oil was left the same, because it is light/clean and the car is new, it has run about 70 thousand. Not even a week later, the crunching noise repeated itself (as soon as we got to Kazan) In general, the rear one turns on without a crunching sound when you stop normally (wait a few seconds), squeeze the clutch and carefully shift. and in general there is a crunching noise when switching. The second gear - it’s unclear how it crunches, when you start to accelerate, you shift, it crunches like a knife to the heart, and sometimes it’s normal, the impression is that it managed to shift during the shift (it got into revs) there will be no crunch. all other transmissions are normal! what to do where to dance? Should I take the box off again? Threat, what do I remember from the last checkpoint analysis. on the 2nd gear gear, the corners of the teeth seem to be worn out by 1-2mm, I don’t know whether they (the corners of the gears) should be sharp or blocked, there are no such gears on our collective farm, just when we took the synchro, they showed the gear in the store, the seller said don’t mess with it the brain is a normal gear! PS PS, sorry for describing it in detail, I’ve never climbed into boxes and don’t know how it works.
Re: VAZ 2114 1-2 gear crunch
[email protected] » June 19, 2015, 11:20 pm
Re: VAZ 2114 1-2 gear crunch
RaF » June 19, 2015, 11:36 pm
Re: VAZ 2114 1-2 gear crunch
[email protected] » Jun 19, 2015 11:49 pm
Evonokak)) to start playing with the pedal then. Isn't the link short-stroke by any chance? Did you remember to put a stopper on the 1-2 gear hub? Are the balls and springs all in place? Did you disassemble the 1st-2nd gear clutch or did you remove the entire assembly? If you took it apart, was it reassembled correctly? But in theory, if it worked, then most likely it was correct. Did you remember to put a thick washer under 5th gear? Did you put retaining rings on the bearings? I don't know what else to guess. With this mileage I would change the oil better. And I adjusted the clutch. And then crawl into the box.
Read more: Generator kzate 115a bearing replacement
Added after 1 minute 27 seconds: Do the gears turn on in the end? Or do they just crunch and not turn on?
Re: VAZ 2114 1-2 gear crunch
RaF » June 20, 2015, 00:19
The slide may be standard, I didn’t pay attention.
play with the pedal? what does it mean - 1 cm below the brake pedal, then ride - align with the brake pedal - ride above the brake pedal, set to 1 cm. Is that what you mean?
The stoppers were all in place, the balls and springs were all in place. But there was a problem with the thick puck, I remember exactly that we didn’t know where to put it, where did it end up? ))) I do not remember.
And all the gears are engaged without exception, just 2nd and Rear with a crunch. but when you stand still, squeeze the clutch and carefully engage the rear one, there is no crunch, the same with the second one.
Re: VAZ 2114 1-2 gear crunch
[email protected] » June 20, 2015, 08:05
Well, the rear with a crunch is still tolerable. Even on fully functional boxes it sometimes turns on with a crunch. It doesn't have a synchronizer. Somehow I changed the clutch on a grant. After that, the rear one also began to turn on with a crunch. Adjusting the cable helped. The crunch has almost disappeared. By the way, if you turn on the rear one through the first one, it doesn’t crunch)) But the second one does. does it crunch and turn on and not fly out on its own? When you bought the spare parts, weren’t they confusing the 08 with 10 gears? There are also old and new models. Carefully inspect the removed parts. I trained here two weeks ago with my little girl. The first one didn't turn on. After the sixth removal/installation I was only able to find out the reason. Everything was changed related to 1-2 gears, but spare parts are junk these days. There was too much axial play at the hub with the coupling. Well, either you collected everything normally. It’s just that the owner tears the box and again damaged the second gear synchro. Are there any extraneous noises from the gearbox?
Added after 41 seconds: And remember about the puck.
Re: VAZ 2114 1-2 gear crunch
RaF » June 20, 2015, 08:48
Re: VAZ 2114 1-2 gear crunch
Trid43 » June 20, 2015, 09:37
Re: VAZ 2114 1-2 gear crunch
RaF » June 20, 2015, 10:21 pm
Re: VAZ 2114 1-2 gear crunch
RaF » June 24, 2015, 10:36 pm
So, I split the box, took a photo of the clutch and the 2nd gear. Evaluate and give a verdict, is it because of the gears or the clutch or something else? The box is now disassembled. Tomorrow we need to think about going and buying something. Damn the photos didn’t upload, I’ll get to the laptop right now
Added after 1 hour 47 minutes 41 second: the photo can be enlarged by clicking on it or downloaded to your computer and taken a closer look
Added after 9 minutes 15 seconds: wear is visible on the gear! I called a friend from the service center, came and took a quick look, and said that the teeth were sweating partly due to a crappy clutch. could it be like this? And in general, is this wear so critical?
Re: VAZ 2114 1-2 gear crunch
[email protected] » Jun 24, 2015 10:59 pm
Even from my phone I can’t make out what the crap is in the second photo? The basket doesn't seem to be very worn. I wish I could take a larger photo of the clutch disc. On the fifth (from the top) photo is the secondary shaft. Why did they take it apart? There, the first and second gears on the other side are disassembled. And yet in this photo the second gear gear is upside down. Or was this done specifically for the photo? Or I can't see well on my phone. Are you sure the components weren't mixed up? There are old and new samples and 08 and 10.
Read more: Laurel 202 and 203
Added after 1 minute 13 seconds: Where was the thick washer?)) From fifth gear which.
Re: VAZ 2114 1-2 gear crunch
RaF » June 24, 2015, 11:24 pm
in the fourth photo these rings are under the 2nd gear gear, so to speak, inside the next gear
Added after 2 minutes 11 seconds:
Re: VAZ 2114 1-2 gear crunch
[email protected] » Jun 24, 2015 11:26 pm
Re: VAZ 2114 1-2 gear crunch
RaF » June 24, 2015, 11:28 pm
ummm, I didn’t turn anything over in the photo, I took a photo of how they stand on the shaft. and then removed it from the shaft
Added after 1 minute 17 seconds:
Re: VAZ 2114 1-2 gear crunch
[email protected] » Jun 24, 2015 11:41 pm
The shaft that cannot be disassembled and sticks out of the box is called the primary shaft. And the shaft from which the gears are removed is a secondary one.
Added after 2 minutes 11 seconds: Unfortunately, I haven’t climbed into boxes younger than 10-11 years old. Haven't they really made such changes to the details? ((
Added after 4 minutes 25 seconds: Photo with title on h-KRO. It has a secondary shaft located in the gearbox housing. The bottom gear is first gear. Above is the 1-2 gear clutch. The second gear gear is even higher. This gear should be the other way around. I’ll get to the laptop now and take a closer look.
Added after 5 minutes 28 seconds: Got there. I looked. I don't recognize the detail. I went to study the manuals for the Kalina gearbox.
I’ll say right away that this is not synchronous, although the sound is similar. The likelihood that this is synchronous is very small. Because I let the secondary shaft slow down before engaging second gear. It all started with a slip in a snowdrift. It fell through in second gear and stalled. The clutch is scorched, but the rest engage normally, the rear one sometimes with a crunch. It also crunches in place, video on YouTube is attached. I waited 5 seconds and turned it on softly, etc. It still crunches. It doesn't crunch only when the box is cold. And that's not always the case. YouTube link:
Because You are not logged in. To come in.
Because you are not a trusted user (phone number is not verified). Enter and confirm your phone number. Read more about trusts.
Because The topic is archived.
2114) does not provide such freedom as the UAZ. besides, confidence on the road costs a lot.))) 
Extending the service life of gearboxes
You will be able to use your car for many years without going to car repair shops if you can follow basic recommendations. They will extend the service life of the gearbox, minimize possible problems, breakdowns and the need for repair work.
Transmission shaft assemblies
There are only two recommendations.
- Always try to monitor the oil level in the gearbox. If it drops, be sure to top it up immediately, do not delay the procedure until later. When the oil becomes unusable, change it completely, rather than fill in the missing amount.
- Avoid aggressive use, do not jerk the gears sharply, accelerate smoothly, and brake similarly. A simple caring attitude towards the gearbox will allow you to avoid wear and tear and numerous breakdowns.
As you can see, solving problems with checkpoints is not so easy. Therefore, the best option is to prevent their occurrence.
avtoexperts.ru
When comparing different types of transmissions, “mechanical” usually turns out to be the most problem-free and resource-efficient, but nothing lasts forever - with long-term use, problems can begin with a manual transmission. They often start with a crunching sound when changing gears. This does not immobilize the car - putting up with the unpleasant sensations, you can continue driving, but extraneous sounds should alert the driver - this is the first symptom of an impending gearbox failure. If the box still “crunches,” then what should you do?
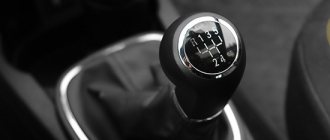
Photo: hand on the gear knob
Causes of crunching
The manual transmission unit is complex, but conservative. It almost does not use computers, sensors, or complex control systems, so the main breakdowns are associated with mechanical reasons, most often with simple wear and tear of components.
1. Synchronizer failure . A synchronizer, let us remind you, is a device that equalizes the speed of gears when changing gears, which makes the speed change smooth and easy. Previously, before synchronizers were used in gearboxes, drivers had to re-gear, which made driving a car much more difficult; modern drivers have forgotten about this. But the synchronizer helps only as long as it is in good working order; the worn element can no longer synchronize the speeds of the shafts, so an extraneous sound appears when engaged. If only one gear crunches, then it is most likely due to the synchronizer.
What does a synchronizer consist of?
A classic example is the gearbox of the front-wheel drive Lada family. When designing it, engineers unsuccessfully chose the gear ratio of the second speed, which is why the elements of this transmission experience increased loads. The second speed synchronizer is usually the first to break on these boxes.
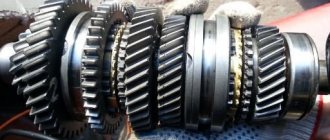
2. Worn shafts . The primary and secondary shafts of the box are susceptible to breakdowns - the teeth on the gears wear out, the bearings break, and the alignment may be disrupted. Due to problems with the shaft, there will most likely be a crunching sound when you engage not one gear, but several, and perhaps there will be a crunching sound when the car is moving.
Manual transmission shaft wear
By the way, problems with the shaft can also have a temperature effect. If the gears shift normally when cold, but after the oil warms up, extraneous sounds begin, then there is reason to suspect the shafts.
3. There is little oil in the gearbox . The reason is trivial, but in practice it is not so rare. Oil may “leak” due to depressurization of the box due to mechanical damage, spontaneous unscrewing of the drain plug, wear of the seals, or other reasons. For example, in many Renault cars, the gearbox is connected to the inner CV joint of the left drive, and oil can leak through it.
Manual transmission drive oil seal leaking. Photo – drive2
4. Clutch basket failure . The petals of the basket may wear out from long work or even break off, then the clutch will not disengage completely, which can lead to problems when shifting gears. The box itself will not be to blame here.
Clutch basket
5. Problems with the clutch drive . Depending on the type of drive used (cable or hydraulic), a whole bunch of problems are possible here - from cable breakage to fluid leakage and clogging. This also has no direct relation to the gearbox, but if the clutch does not disengage normally, then you can also forget about soft and quiet gear changes. Usually clutch problems affect all gears in the box, this will give reason to think in this direction.
Hydraulic clutch drive
By the way, a crunching sound when engaging a gear is not always a malfunction. On modern budget cars (for example, Renault Logan), there is often no synchronizer in reverse gear, so when you quickly engage reverse gear without completely stopping the car, a crunching sound is heard. This is not a malfunction, but a characteristic feature that cannot be “treated.” Only changing the method of shifting gears by the driver will help, for example, engaging the rear with some delay and only when the car has completely stopped.
Repair methods
Repairing a transmission is not an easy task, but there is not much to diagnose. If the gearbox is crunching, then you need to start with the easiest thing - checking the oil level. This is done differently for all boxes, but the main thing is to make sure that there is enough lubrication for the rubbing parts. If this was not the problem, then you need to remove the box and diagnose the clutch, otherwise - nothing. If no critical problems are found here, then the unit itself will have to be disassembled and defective. Worn and damaged elements are replaced with new ones (fortunately, gearbox components are usually sold separately), and then the structure is put back together.
Recommendations for use
No one can predict a gearbox breakdown, but often the driver provokes it through his actions by improperly operating the car. What you need to pay attention to to make the box last longer.
1. Change the oil . In modern service books for almost all cars with “mechanics” it is written that the oil in the transmission is designed for the entire service life of the car. This has given rise to the opinion among drivers that the oil only needs to be changed in automatic transmissions, and not in manual transmissions. But in reality it is necessary. Of course, a manual transmission is not so critical of the cleanliness of the lubricant, but with high mileage, wear products accumulate in it, which worsen the performance of the box. How often to change oil in a manual transmission is a debatable issue, but the most popular recommendations revolve around mileage of 80-100 thousand kilometers.
In the photo: draining oil from a Ford Focus II manual transmission
2. Choose the right gear . Switching to too low or too high speeds harms the entire car, including the gearbox. Loads on transmission elements increase, and their service life decreases. So there is no need to engage first at 60 km/h, and fifth at 30 km/h.
3. Do not hold the clutch depressed for a long time . It would seem that this is a recommendation from a driving school, but as practice shows, not everyone understands the harm from this. Long squeezing is an additional load on the clutch elements, the service life of which is far from eternal.
The crunch of a box is always unpleasant. And the acoustic effect is annoying, and bad thoughts creep into your head. However, if the transmissions have already begun to “stick” with additional sound, then, most likely, repairs will have to be made, and it will certainly not be the easiest or cheapest. It’s better to try not to let it get too crunchy and to extend the life of the gearbox by changing the oil in a timely manner and treating it more carefully.
Wear of release bearing, springs, forks, gears, synchronizers, shafts
As a rule, all these breakdowns are accompanied by extraneous noise during operation, which is difficult to ignore. Repairs will require dismantling the gearbox and the participation of specialists. Your task is not to delay your visit to the service station. This will save you money and possibly prevent irreversible damage.
We deliberately did not touch upon the problems with engaging reverse gear in an automatic transmission, for the simple reason that automatic transmissions are foolproof from birth - it is very difficult to break them yourself. But the most important thing is that the automatic transmission signals the driver about its problems with characteristic jolts when operating in normal mode. It is impossible not to notice them.
The transmission is noisy in neutral and howls at speed.
Main causes of malfunction:
- insufficient oil level in the manual transmission. If there is a lack of transmission fluid, the lubrication of the rubbing pairs deteriorates. Thermal expansion and dry friction leads to noise and howling when moving. If the car has covered hundreds of thousands of kilometers, you should not be alarmed by slight noise when operating in neutral. We recommend limiting yourself to only changing the oil in the manual transmission.
If extraneous noise from the gearbox occurs when the clutch is depressed, the release bearing is faulty.
- gear wear. The reason is the development of gear teeth at the contact points. In this case, only replacing worn parts will help eliminate noise and howling;
- wear of the bearings of the driven, drive or intermediate shaft. As a result of oil starvation, heavy loads, increased torque after boosting the engine, or natural wear, abrasions, scuffing and uneven performance appear on the rolling elements and bearing races;
- production of differential parts for front-wheel drive cars. In such cases, vibrations are common when accelerating.
Some VAZ models are worthy of a special note, in which the manual transmission begins to make noise, howl and vibrate at relatively short distances. Many people attribute the malfunction to a design defect and the quality of manufacturing of transmission parts, which makes the idea of any repair very doubtful.
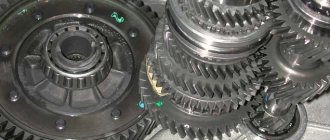
Checkpoint diagram
The gearbox design is as follows:
- To ensure gear shifting, the gearbox contains a primary shaft consisting of a gear block. They are constantly engaged with the drive gears from the first to the fifth speed (that is, those that are oriented towards driving forward);
- The secondary shaft is equipped with a drive gear for the main transmission, and it also has gear synchronizers that ensure forward movement of the driven gears. There are also bearings plus an oil sump;
- VAZ two-satellite differential, with the driven gear of the main gear attached to the flange of its box;
- the gearbox drive consists of a gear shift knob, a ball joint, a selector rod, a rod, gear selection mechanisms, and gear shifting mechanisms;
- Jet thrust is designed to protect the gearbox from flying out of gear. Its ends are attached to the support and the power unit.
Gear shift drive diagram
Crunching sound when engaging reverse gear
Reposted from Wikipedia again:
To silently engage unsynchronized gears (including reverse), a special technique is used - by squeezing the clutch, first move the gearshift lever to the position corresponding to one of the synchronized gears, and then, without releasing the clutch pedal, engage the desired unsynchronized gear.
At the same time, the speeds of the gearbox shafts are aligned, which gives an effect similar to the presence of synchronizers in this gear. The use of this technique allows you not only to avoid an unpleasant grinding noise when engaging an unsynchronized gear, but also to significantly increase the life of its gears. Most cars have reverse gears that do not have a synchronizer. It should be turned on with a double squeeze or by analogy with the transition to an unsynchronized transmission described above using a synchronized transmission.
Symptoms of delayed gear shifting
Like any complex mechanism, an automatic transmission can have malfunctions. There are often cases when the automatic transmission changes gears with a delay, delaying them for 2-3 seconds. At this moment, a “failure” of power occurs, and the car sharply loses speed.
Who invented and invented the world's first automatic transmission
In order for the shift transition to take place, the oil pressure increases. The pump wheel transmits torque to the turbine wheel. When they reach a certain acceleration, the clutches brake the lower gear, and the oil through the valve accelerates the next stage. This is how automatic transmission speeds change without “failure”.
During tightening, the speeds do not switch on time, although the torque increases to a dangerous 3.5 - 4 thousand. After this, there is a delay in switching for a couple of seconds. The car then loses power and shifts into overdrive. The presence of such failures during automatic transmission operation is a serious flaw and a reason to start diagnosing the unit.