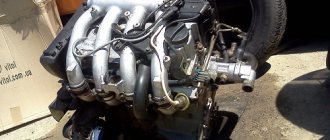
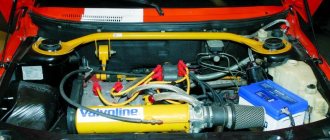
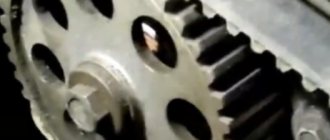
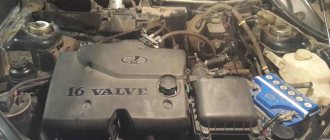
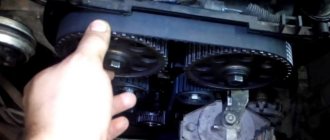
In this article we will look at the installation of sports and tuning camshafts on VAZ 2112, 21124, 21126 and 11194 engines. First, you need to remember that engines 2112 and 21124 have their own timing belt drive and are incompatible with the timing belt of engines 21126 and 11194 - this worth considering when purchasing split gears. Engine gears 21126 and 11194 have rounded teeth, so the belt, pump, lower crankshaft gear and camshaft gears have their own. To install the camshafts you need to do the following:
1. Disconnect the TPS, IAC and mass air flow sensor connectors, loosen the clamps holding the inlet pipe on the receiver, loosen the ventilation clamp for the crankcases of the cylinder head cover and dismantle the intake pipe assembly with the mass air flow sensor;
2. Unscrew the nuts that secure the receiver to the cylinder head; it is most convenient to do this with a ratchet with a 13-mm socket;
3. Remove the receiver assembly with the throttle;
4. Remove the timing belt cover using a ratchet and a short 8mm socket;
5. Loosen the bolts of the camshaft gears;
6. Set the crankshaft position to TDC of cylinder 4, aligning the mark on the flywheel and, loosening the tension roller, remove the belt from the camshaft gears;
7. Completely unscrew the bolts of the camshaft gears and remove the gears themselves. Be careful - the keys for fixing the gears on the camshafts can fly out and, due to their small size, can easily get lost;
8. Using a ratchet and a 8mm socket, unscrew the timing cover bolts and remove it. Using the same tool, unscrew the bolts of the bed and also dismantle it;
9. Remove the standard camshafts, not forgetting to remove the keys that secure the gears;
10. Remove the hydraulic compensators using a magnet. It is advisable to number the hydraulic compensators by wells in order to install them in their places. If the camshafts are not full-base, install the included bearings on the valve stem;
Camshafts 2112 lift 11.8/11.8 mm Sport
7,800 rub. Club price 7,500 rub. 11. Place new camshafts and check them for rotation in bed. If the cams cling to the hydraulic compensator wells slightly, use a sharpened screwdriver or chisel to carefully modify the edges of the wells to rotate the camshaft cams. To ensure that this procedure is as safe as possible and that shavings do not fall into the wells, it is recommended that before processing the well, fill it with cotton wool or a piece of cloth; after processing, this should be removed and the well should be blown out. If the camshaft cams do not turn at all, and the wells need to be thoroughly modified, it is strongly recommended to dismantle the cylinder head, modify the wells using a drill or machine, wash it and install it back, otherwise, in the case of rough return, excess chips can clog the oil channel or, by over-modifying the well, worsen the performance of the hydraulic compensator by reducing oil pressure;
12. Clean the surface of the bed from sealant on both sides; the seats of the bed bolts must be blotted from oil using a thin screwdriver and a piece of cloth so that when tightening the bolt you do not pull out the thread (remember that oil does not compress, and if the bolt has nowhere to twist - it will begin to pull the threads out of the cylinder head), apply new sealant to the lower plane of the bed;
13. Having aligned the new camshafts with the veneer grooves vertically upward, place the bed and tighten its bolts, starting from the central holes towards the timing belt and pump;
14. Place the split gears on the camshafts and tighten their bolts, put on the timing belt; Guided by this article, set the valve timing recommended by the manufacturer; Clean the cylinder head cover, apply new sealant and close the cylinder head cover, tighten it with bolts, starting from the center and moving away to the sides of the timing belt and pump; Repeat the installation operations of the receiver, timing case and sensor connectors in reverse order.
Camshafts of engines 2112 and 21124 (16v) - removal and installation
The work is shown on engine 21124. For details of performing work on engine 2112, see the text.
1. We prepare the car for work (see “Preparing the car for maintenance and repair”).
2. Remove the camshaft pulleys (see “Camshaft pulleys - removal and installation”).
3. Remove the tension and guide rollers (see “Timing belt - replacement”).
10 mm socket wrench
unscrew the six bolts securing the rear timing belt cover and remove it.
5. Remove the cylinder head cover (see “Cylinder head cover for engines 2112 and 21124 (16V) - removal and installation”).
6. To avoid damage, remove the oil pressure sensor (see “Emergency oil pressure sensor in the engine - replacement”) or disconnect the wire tip from it.
8 mm socket wrench
Evenly, half a turn, unscrew the 20 bolts securing the camshaft bearing housing.
8. Remove the camshaft bearing housing.
On the 2112 engine, remove the camshaft bearing housing together with the guide pipes of the spark plugs (spark plug wells). We remove the pipes from the bearing housing.
9. We remove two plugs for technological holes from the seats in the cylinder head (near the rear ends of the camshafts).
10. Remove the camshafts of the intake and exhaust valves.
11. Remove the seals from the shafts.
12. Inspect the shafts. The journals and cams of the shaft should not show signs of heavy wear, scratches, cracks, or traces of metal envelopment.
1. Lubricate the bearing journals and shaft cams with clean engine oil.
2. Place the camshafts in the cylinder head. The shafts are not interchangeable and have different markings.
The exhaust valve shaft is marked 1006014.
The intake valve shaft is marked 1006015.
In addition, the intake valve shaft has an additional belt.
When repairing an engine, do not use sealant with a high content of silicone (silicon compounds), the vapors of which can get through the crankcase ventilation system into the cylinders and then into the exhaust tract. Use a sealant that specifically states on the packaging that it is safe for the oxygen concentration sensor.
Do not apply too much sealant to the mating surfaces of the bearing housing. When tightening the mounting bolts, the sealant squeezed into the internal cavities of the engine can clog the oil passages.
3. Apply a thin layer of Loctite sealant No. 574 or similar to the plane of the cylinder head and to the lower surface of the bearing housing around the holes of the spark plug wells according to the following scheme:
4. Install the camshafts into the cylinder head with the keyways facing up.
5. Install the bearing housing on the cylinder head and evenly tighten its mounting bolts until the bearing housing comes into contact with the cylinder head. We finally tighten the bearing housing mounting bolts in pairs, to a torque of 8.0-10.0 Nm (0.8-1.0 kgfm) in the following sequence (see photo).
Tightening sequence for camshaft support bolts
6. Press in the camshaft oil seals (see “Camshaft oil seals - replacement”).
7. On engine 2112
Apply clean engine oil to the rubber O-rings of the spark plug guide pipes (spark wells) and install the pipes into the head.
8. Further assembly is carried out in the reverse order of disassembly.
Source
Why are guide bushings needed?
Before installing the cylinder head, perform the following steps: clean the threaded holes, as well as all holes for the bushings (photo 1). Each bushing is installed in place, and only then a gasket is placed on top.
Metal parts adjacent to the gasket must be degreased. We looked at the cylinder head tightening diagram, but the cylinder head itself must be installed correctly:
- We place the cylinder head on the cylinder block;
- By moving the part in different directions, we ensure that the bushings fit into the recesses.
After “step 2” the screws can be tightened.
No sealing compounds are used when installing the gasket! Solidol, CIATIM and other lubricants are not even needed. The main thing is that the metal must be degreased. And the cylinder head gasket must be new.
Cylinder head cover and tightening order of its bolts
The metal cover installed on the cylinder head must not allow air to pass through. At points of contact with other parts, tightness must also be maintained. Therefore, sealant is applied to the edge of the lid. An example is shown in the photo.
Cylinder head cover before installation
Here you need to use materials: Loctite-574, ANACROL, etc. The screws on the cover are tightened with an “8” key.
Recommended screw tightening torque
The recommended screw tightening torque is only 3-4 N*m. Don't be surprised: the sealant will do its job. You just need to let it dry after putting the cover in place.
You can unscrew the screws in any order. Their number is 15 or 14. When installing, it is better to follow the sequence shown below.
The order of tightening the cap is marked with numbers and arrows
There is usually no need to replace the screws - the load is too small. We wish you success.
Common Misconceptions
If the bolts are pulled out too much, they are tightened in four steps. At “step 2” the tightening torque will be 70-85 N*m. All of these are common misconceptions that do not apply to 16-valve internal combustion engines.
Installation and replacement of camshafts on a 16-valve VAZ-2112
Replacement of camshafts on the 16-valve VAZ-2112 engine occurs when they wear out and the support journals wear out. Most often this happens when the time for a major overhaul of the power unit or cylinder head passes. This is a rather complicated procedure, but you can really do it yourself.
The video below shows the installation of camshafts and split gears on a 16-valve engine of the VAZ family
The video material will tell you how to replace camshafts on a VAZ-2112 16 valves, and give some recommendations and advice.
Advantages of a 16-valve engine
The VAZ 2112 with 16 engine valves has a number of advantages over cars of the same brand, but with fewer valves. Its main advantage is the ability to achieve maximum engine power, regardless of the type of the latter. (see picture).
For comparison:
- VAZ 2112 with a volume of 1500 cubic cm, has 77 horsepower.
- A VAZ 2112 of the same volume can have a power of up to 90 horsepower.
This difference is possible due to the fact that in the second case the filling of the cylinders with the warm-air mixture is much higher. In addition, the advantages of the 16-valve engine:
Better performance of the cooling system and, as a result, greater strength of the unit. Possibility of increasing engine knock resistance
This is especially important if low quality fuel is used. With 16 valves, the intake and exhaust tracts are located on opposite sides of the cylinder head, which facilitates their installation, repair, etc.
Camshaft replacement process
Camshafts with gears and fasteners
In order to install camshafts on the VAZ-2112 16 valves, they must first be dismantled. Like any spare part, they are installed in the reverse order from disassembly.
So, let's look at the step-by-step process of removing and installing the intake and exhaust camshaft.
Removing camshafts
- To begin with, as with any repair operations, it is necessary to remove the “minus terminal” from the battery.
- Remove the timing belt cover.
After unscrewing the mounting bolts indicated in the diagram, remove the timing cover
Unscrew the fastening nuts and remove the valve cover.
Disconnect the emergency oil pressure sensor
Scheme for dismantling and tightening the camshaft bearing housing bolts
You need to be careful with the camshaft plugs; if you install them incorrectly, oil will leak out. If you don’t notice it in time, you’ll shorten the engine’s lifespan or end up in need of a major overhaul.
Remove the two rear cylinder head plugs
We remove the camshafts from their seats
Remove the seals from the camshaft. If it does not come off, carefully cut it or pry it off with a screwdriver.
Installation of camshafts
Now that everything is removed, you can proceed to installing new camshafts on the car:
- Lubricate the cams and shaft support journals with engine oil.
Lubricate the camshaft journals and cams with engine oil.
The intake camshaft is shown on the left and the exhaust camshaft on the right.
How to apply sealant to the camshaft bearing housing cover
We press new oil seals onto the camshafts
Choice
Cylinder head camshafts for the VAZ-2112 are produced only by the manufacturer, so there is no need to look for analogues.
Original catalog numbers: inlet - 2112-1006015, outlet - 2112-1006014 . Each camshaft costs an average of about 3,000 rubles.
Nuances
When installing the bearing housing and cylinder head, do not apply sealant that contains silicone. This is due to the fact that the motor heats up, and accordingly the sealant heats up, which releases vapors that can get into the cylinders and further through the system . You should use a sealant whose instructions or packaging indicate that it is safe for the oxygen sensor.
When applying sealant to cavities, you should not apply a lot of it, because when tightening the bolts, it can get inside and this will lead to clogging of the oil channels, and therefore there will be no lubrication. The lack of lubricant will lead to increased wear of parts that will quickly fail.
Advantages and disadvantages
The cooling system is not fully developed, and the engine’s capabilities are not used, even half:
- experts recognize that the 2112 cylinder head has an impeccable design of the intake and exhaust tract;
- however, the manufacturer equips it with small-diameter valves from previous versions of the internal combustion engine, using the engine’s capabilities by 35 - 40% maximum.
Read also: Gazelle Next Cummins generator
At the same time, you can increase the power on your own - you need to carefully bore the holes without damaging the partition, and then select springs and lightweight valves and arrange them inside the cylinder head.
Installation and replacement of camshafts on a 16-valve VAZ-2112
Replacement of camshafts on the 16-valve VAZ-2112 engine occurs when they wear out and the support journals wear out. Most often this happens when the time for a major overhaul of the power unit or cylinder head passes. This is a rather complicated procedure, but you can really do it yourself.
The video below shows the installation of camshafts and split gears on a 16-valve engine of the VAZ family
The video material will tell you how to replace camshafts on a VAZ-2112 16 valves, and give some recommendations and advice.
Camshaft replacement process
Camshafts with gears and fasteners
In order to install camshafts on the VAZ-2112 16 valves, they must first be dismantled. Like any spare part, they are installed in the reverse order from disassembly.
So, let's look at the step-by-step process of removing and installing the intake and exhaust camshaft.
Removing camshafts
- To begin with, as with any repair operations, it is necessary to remove the “minus terminal” from the battery.
- Remove the timing belt cover.
After unscrewing the mounting bolts indicated in the diagram, remove the timing cover
Unscrew the fastening nuts and remove the valve cover.
Disconnect the emergency oil pressure sensor
Scheme for dismantling and tightening the camshaft bearing housing bolts
You need to be careful with the camshaft plugs; if you install them incorrectly, oil will leak out. If you don’t notice it in time, you’ll shorten the engine’s lifespan or end up in need of a major overhaul.
Remove the two rear cylinder head plugs
We remove the camshafts from their seats
Remove the seals from the camshaft. If it does not come off, carefully cut it or pry it off with a screwdriver.
Installation of camshafts
Now that everything is removed, you can proceed to installing new camshafts on the car:
- Lubricate the cams and shaft support journals with engine oil.
Lubricate the camshaft journals and cams with engine oil.
The intake camshaft is shown on the left and the exhaust camshaft on the right.
How to apply sealant to the camshaft bearing housing cover
We press new oil seals onto the camshafts
Cylinder head camshafts for the VAZ-2112 are produced only by the manufacturer, so there is no need to look for analogues.
Original catalog numbers: inlet - 2112-1006015, outlet - 2112-1006014 . Each camshaft costs an average of about 3,000 rubles.
When installing the bearing housing and cylinder head, do not apply sealant that contains silicone. This is due to the fact that the motor heats up, and accordingly the sealant heats up, which releases vapors that can get into the cylinders and further through the system . You should use a sealant whose instructions or packaging indicate that it is safe for the oxygen sensor.
When applying sealant to cavities, you should not apply a lot of it, because when tightening the bolts, it can get inside and this will lead to clogging of the oil channels, and therefore there will be no lubrication. The lack of lubricant will lead to increased wear of parts that will quickly fail.
Replacing and installing camshafts on a 16-valve VAZ-2112 is not entirely easy, but it is quite possible. The main thing to ensure results is caution and following instructions. It is worth noting separately that the intake and exhaust camshafts are different and not interchangeable. On the intake there is an additional border for the phase sensor.
VAZ 16v tuning camshafts/overlaps - details
Good day, dear Pavel. I’ve been subscribed to your channel for a long time, I really like your reports about VAZ cars, I did a lot of things with your advice. I won’t do the exact same diagnostics)))) and what city are you located in?
Is it possible to adjust the shafts this way on a turbo two-wheeler?
I have a question: the shafts are 8.6 and the same gears with degrees are installed. Is it possible to set overlaps using these gears without instruments? According to the recommendations, inlet is 1.00 mm, exhaust is 1.00 mm. Do you need to turn the gears clockwise for the intake and counterclockwise for the exhaust? Is it possible to approximately set overlaps using these marks? Currently displayed according to factory marks!
Thank you very much you made my grenade go
There you also need to look at the DMSD, that is, the mass air flow sensor.
Pavel I want to install shafts, tell me which ones are better to install 8.6 phase 272 or 8.7 phase 264
Hello PAVEL. Your opinion is important. The engine of my car 21127 v16 (Granta) has STK plugless pistons (valve non-pressure) I want to increase the power with the help of a camshaft. What can you say about USA 8.6 phase 272 - if you install them? The reliability of the STK (plug-inless) will not be affected if the belt breaks etc. Td? AND ALSO when installing the shaft 8.6 phase 272 Do you need to change the gears to split gears + change the marks? Or is it all stock, factory gear and factory markings? Will everything fit without problems?
In order for the video to be useful, the compression measurements had to be done in different positions of the camshafts. I have a video about this. Well, the video is very useful.
And so make an unreliable technique even more fragile? IMHO it's nonsense
Well, what a fucked up asshole, he read a lot on the Internet, bought all sorts of crap and thinks that he is a guru now. He gave himself such a fucking name, halogen from the turn signal, and his habits are like that... It makes me fucking sick! Rogue fucker
What is the valve overlap on the factory 2112 shafts?
Hello Pavel. Please clarify one point. At the 12th minute you say that 5 thousand will be the maximum amount of hp. Maybe you mean the maximum amount of torque (well, roughly, the force of the gases on the pistons)? And mGy/cycle is the mass of air per filling cycle? Thank you very much for the good educational videos!
Pavel, if you move only the intake shaft to the later side, what will happen? Have you tracked this?
Thanks for the video, I recently changed the timing belt on an Opel Asre G 1.8 Mator and there they set the intake to 1 tooth counterclockwise and the exhaust at 0. And at low speeds there is no powerful engine. And after 3500-3700 rpm it feels . that the car picks up speed more easily. And at first, when all the shafts were put on their mark, there was no power at all. But you can set it like this, for example, the intake is 1 tooth counterclockwise. and release 1 tooth per hour.
Pavel, hello. What do you recommend for an 8bug bug? What program for Android? Unfortunately, only an ELM bluetooth adapter. Openiag is buggy, either it doesn’t like ELM or something else. TorkPRO works, draws a graph on the screen, but not that... Is there something more serious, or is it just a netbook and a line wire?
Removing camshafts and replacing valve lifters of the Lada Priora engine
We carry out work to replace camshafts and valve lifters.
Remove the plastic engine cover.
Use a Phillips screwdriver to loosen the clamp securing the main crankcase ventilation hose...
...and remove the hose from the cylinder head cover fitting. Remove the inlet pipe (see.
“Removing the intake pipe”) and close the channels in the cylinder head with a rag to prevent objects from getting into the engine. We remove the ignition coils (see “Checking the condition and replacing spark plugs”).
Use a Phillips screwdriver to loosen the clamp securing the crankcase ventilation idle circuit hose...
...and remove the hose from the cylinder head cover fitting.
Using a 10mm socket, unscrew the bolt securing the block bracket for the wiring harness of the engine management system... ...and remove the bracket with the blocks from the cylinder head cover. Squeezing the petals of the plastic holder of the engine management system wiring harness with pliers...
...remove the wire harness holder from the bracket secured to the cylinder head cover. Using a “8” socket, unscrew the 15 bolts securing the cylinder head cover.
Location of the cylinder head cover bolts The cover is installed on a sealant, so...
... use a screwdriver to pry the lid off the tide...
...and remove it. To check the serviceability of the hydraulic pusher...
... use a screwdriver to press on the hydraulic pusher (when checking, the camshaft cam corresponding to the hydraulic pusher should be facing the pusher with the “back of the head”, that is, do not put pressure on the pusher). In normal condition, the hydraulic tappet should move in the cylinder head socket with significant force, compressing the valve spring. If the hydraulic pusher itself is pressed with little force, then it must be replaced.
We check other hydraulic pushers in the same way.
Remove the camshaft toothed pulleys (see.
“Replacing camshaft seals”).
We disconnect the wire block from the sensor for the low (emergency) oil pressure warning light in the engine (see “Removing the low oil pressure warning light sensor”).
Using the “8” head, unscrew the 20 bolts securing the camshaft bearing housing.
Location of the camshaft bearing housing bolts
Remove the camshaft bearing housing (A - housing alignment pins). In order to remove the camshafts from the supports in the cylinder head, you do not need to remove the rear timing belt cover, but only unscrew the three upper bolts securing the cover (see Fig.
Camshafts of engines 2112 and 21124 (16v) - removal and installation
The work is shown on engine 21124. For details of performing work on engine 2112, see the text.
1. We prepare the car for work (see “Preparing the car for maintenance and repair”).
2. Remove the camshaft pulleys (see “Camshaft pulleys - removal and installation”).
3. Remove the tension and guide rollers (see “Timing belt - replacement”).
10 mm socket wrench
unscrew the six bolts securing the rear timing belt cover and remove it.
5. Remove the cylinder head cover (see “Cylinder head cover for engines 2112 and 21124 (16V) - removal and installation”).
6. To avoid damage, remove the oil pressure sensor (see “Emergency oil pressure sensor in the engine - replacement”) or disconnect the wire tip from it.
8 mm socket wrench
Evenly, half a turn, unscrew the 20 bolts securing the camshaft bearing housing.
8. Remove the camshaft bearing housing.
On the 2112 engine, remove the camshaft bearing housing together with the guide pipes of the spark plugs (spark plug wells). We remove the pipes from the bearing housing.
9. We remove two plugs for technological holes from the seats in the cylinder head (near the rear ends of the camshafts).
10. Remove the camshafts of the intake and exhaust valves.
11. Remove the seals from the shafts.
12. Inspect the shafts. The journals and cams of the shaft should not show signs of heavy wear, scratches, cracks, or traces of metal envelopment.
1. Lubricate the bearing journals and shaft cams with clean engine oil.
2. Place the camshafts in the cylinder head. The shafts are not interchangeable and have different markings.
The exhaust valve shaft is marked 1006014.
The intake valve shaft is marked 1006015.
In addition, the intake valve shaft has an additional belt.
When repairing an engine, do not use sealant with a high content of silicone (silicon compounds), the vapors of which can get through the crankcase ventilation system into the cylinders and then into the exhaust tract. Use a sealant that specifically states on the packaging that it is safe for the oxygen concentration sensor.
Do not apply too much sealant to the mating surfaces of the bearing housing. When tightening the mounting bolts, the sealant squeezed into the internal cavities of the engine can clog the oil passages.
3. Apply a thin layer of Loctite sealant No. 574 or similar to the plane of the cylinder head and to the lower surface of the bearing housing around the holes of the spark plug wells according to the following scheme:
4. Install the camshafts into the cylinder head with the keyways facing up.
5. Install the bearing housing on the cylinder head and evenly tighten its mounting bolts until the bearing housing comes into contact with the cylinder head. We finally tighten the bearing housing mounting bolts in pairs, to a torque of 8.0-10.0 Nm (0.8-1.0 kgfm) in the following sequence (see photo).
Tightening sequence for camshaft support bolts
6. Press in the camshaft oil seals (see “Camshaft oil seals - replacement”).
7. On engine 2112
Apply clean engine oil to the rubber O-rings of the spark plug guide pipes (spark wells) and install the pipes into the head.
8. Further assembly is carried out in the reverse order of disassembly.
VAZ 21214 engine modifications and their differences
| Motor modification | Availability of power steering | An exhaust manifold | EURO environmental class |
| 21214-41 | welded from stainless steel become | 3 | |
| 21214-34 | _ | cast iron | |
| 21214-33 | |||
| 21214-32* | |||
| 21214-31 | welded from stainless steel become | 4 | |
| 21214-30 | — |
*21214-32 – has fuel pipes with quick connectors, a flywheel for the clutch of 215 mm (200 mm on other models).
The geometry of the cylinder block 21214 and 21213 is the same. There are no liners in the cylinders. Due to the use of an ejector, the configuration of the front engine cover has been changed to accommodate the installation of a crankshaft position sensor. To mount the power steering, a hole is made on the block for installing a bracket; in addition, there is a threaded hole for installing a knock sensor, as well as threaded holes with studs for mounting the ignition module bracket.
The ShPG came from 21213. Crankshaft 21213-1005015 sets the piston stroke to 80mm. The crankshaft pulley is distinguished by the presence of teeth along the outer diameter for the operation of the crankshaft position sensor. The latest internal combustion engine models are equipped with a damping pulley (21214-1005058-10). The presence of a damper made it possible to reduce the load on the crankshaft to prevent cutting of the key, and also make the operation less noisy.
There are two types of heads: Russian 21214-1003015 and Canadian 21214-1003015-30. The differences between the heads are as follows: in the first, the diameter of the threads in the holes for hydraulic compensators is M18/1.5, the wells for hydraulic compensators do not have drainage holes; the second ones have M24x1.5 holes, and the wells have drainage holes (the markings are made in the casting). Interchangeability of heads, as well as hydraulic supports of old and new designs, is not possible.
Removal and installation of the camshaft VAZ 2110, VAZ 2111, VAZ 2112, Lada Ten
Remove the valve cover of the VAZ 2110 cylinder head (see Adjusting thermal clearances in the valve mechanism of the VAZ-2110, -2111 engine).
On the VAZ-2111 engine, using a “10” wrench, unscrew the two nuts securing the “mass” wires to the studs of the VAZ 2112 cylinder head plug and remove the wires from the studs. Using a 10mm wrench, unscrew two nuts and one bolt securing the plug. We remove the plug. . and its O-ring.
On the VAZ-2110 engine, remove the housing of the auxiliary units (see Removing the housing of the auxiliary units of the VAZ-2110 engine). Remove the camshaft timing belt. We unscrew the upper nut securing the rear cover of the timing belt for Lada 2111, 2110 (see Removing the coolant pump on VAZ-2111, -2110 engines).
Using a “13” wrench, evenly in several steps (until the pressure of the valve springs is removed), unscrew the ten nuts securing the camshaft bearing housings.
In what cases is it necessary to change?
The pulleys of the 16-valve VAZ 2112 must be replaced when they are worn out or have mechanical damage. In particular, we are talking about:
- failure or exhausted service life of the pulley bearing journals;
- mechanical bending of the camshaft;
- spent service life, as well as scuffing of element cams.
Lada 2112 with 16 cl internal combustion engine
If some kind of extraneous knock appears in the valves while the engine is running, it is usually caused by one of these damages. If you have recorded a reduced pressure of the engine fluid in the system, this may indicate an increase in the clearances in the bearings.
To do this, in order to eliminate this malfunction, it is necessary to grind and restore the pulley bearing journals. You should also enlarge the grooves through which the engine fluid flows. This is done so that the lubricating fluid, after the next grinding, lubricates the internal combustion engine elements. As for the necks, after grinding they should be polished with green GOI paste.
Other cases in which dismantling of the cylinder head is required
Of course, it is not necessary to remove the cylinder head for every breakdown. This is only necessary if major repairs are needed. Such “major” cases include:
- Gasket wear.
- Formation of carbon deposits on parts.
- Valve deformation.
- Need to replace guide bushings.
- Failure of the camshaft, etc.
Of course, repairing it yourself or through a service in any case involves certain financial costs. To ensure smooth operation of the engine, regular diagnostics of the cylinder head are necessary. It is recommended to use high-quality fuel. In addition, try to prevent the car from overheating - because of this, the cylinder head may lead.
If some points remain unclear to you, then you can visually familiarize yourself with the process of replacing valves by watching the video:
HomeCarsVAZVAZ 2112
How to replace valves on a VAZ-2112 (21120) engine. One of the current methods is to remove the cylinder head
There is nothing special, but it is important to grind the valves in during the process. This applies to all VAZ engines

