Characteristics of VAZ 2107
| Performance indicators | Meaning |
| Maximum speed, km/h | 150 |
| Fuel consumption l: | |
| City | 9,6 |
| Route | 6,9 |
| Mixed | 8 |
| Euro toxicity standard | Euro 2 |
| Engine | |
| Power unit volume, cm3 | 1451 |
| Fuel type | petrol |
| Number and arrangement of cylinders | 4/R |
| Supply system | Distributive injection |
| Number of valves | 8 |
| Maximum torque, N*m at rpm | 115 at 3450 |
| Maximum power, hp | 71 |
| Transmission | |
| Transmission type | Mechanical |
| Number of steps | 5 |
| type of drive | Rear |
| Suspension | |
| Front suspension device | Independent multi-link |
| Rear suspension device | Dependent, on coil springs |
| Front brake mechanism | Disk |
| Rear brake mechanism | Drum |
Initially, the seven was equipped with an engine with a capacity of 1.5 liters, but during the production process the power range was expanded.
Modifications of engines installed on the VAZ 2107.
| Options | Model range of VAZ engines | ||||
| 2103 | 2104 | 2106 | 21067 | 21067-20 | |
| Cylinder diameter, piston stroke | 76 80 | 76 80 | 79 80 | 79 80 | 79 20 |
| Working volume | 1,5 | 1,5 | 1,6 | 1,6 | 1,6 |
| Compression ratio | 8,5 | 8,5 | 8,5 | 8,5 | 8,5 |
| Supply system | carburetor | Distributive injection | carburetor | Distributive injection | Distributive injection |
| Rated power, kW | 52,5 | 52,5 | 54,8 | 54,5 | 53,5 |
| Rated speed | 5600 | 5000 | 5600 | 5000 | 5300 |
| Fuel brand | (AI-92) | (AI-92) | (AI-92) | (AI-92) | (AI-95) |
| Spark plug | A17DVR, FE65CPR, A17DV-10 | А17ДВРМ, BRISR, SUPER, LR 15YC | A17DVR, FE65CPR, A17DV-10 | А17ДВРМ, BRISR, SUPER, LR 15YC | А17ДВРМ, BRISR, SUPER, LR 15YC |
| Toxicity standard | Euro-0 | Euro 2 | Euro-0 | Euro 2 | Euro-3 |
Front suspension diagram
This diagram will help you clearly understand the suspension structure.
1) rubber wheel bearings; 2) hub protection; 3) nut; 4) part of the base with a steering knuckle; 5) cuff; 6), 7) location of the hub and brake disc; protection for the upper ball pin; 9) place of attachment of the upper ball pin; 10) liner for the upper support; 11) lever (upper); 12) the so-called “chipper”; 13) fastening the spring gasket; 14) shock-absorbing element; 15) a pad for attaching a shock-absorbing part; 16) base of levers (upper); 17) rubber hinge bushing; 18) hinged bushing located outside; 19) washers for adjustment; 20) cross member for axle suspension; 21) cushion on the stabilizer bar; 22) place of attachment of the rod; 23) base of the lever (lower); 24) lever located below; 25) clip for attaching the stabilizer rod; 26) spring; 27) rubber bushing for the shock absorber spring; 28) spring support bowl (lower); 29) place for the steering knuckle; 30) location of the ball pin race liner (lower); 31) support bearing (lower); 32) fastening for the lower ball pin.
As you noticed, the scheme is not complicated.
Characteristics and principle of operation of the engine
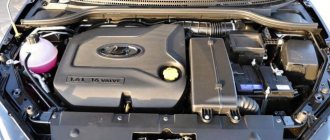
The operation of the fuel injection system is to supply fuel separately to each cylinder. This mechanism is called distributor injection. All modern cars are equipped with a distribution or electronic injection system.
The injection mechanism is classified according to its operating principle, installation location and number of injectors. “Seven” is equipped with 4 nozzles, which are controlled by an electronic control unit. The ECU prepares the mixture depending on the engine load, throttle position and other parameters read by special modules.
The main control element of the VAZ 21074 injector is an electronic control unit. Using built-in sensors, the ECU monitors the quality of the air-fuel mixture supplied to the combustion chamber, sets the ignition timing depending on the speed, and turns the fuel pump on and off. In addition, it regulates the idle speed, controls the emission of CO in the exhaust gases and determines the operating mode of the cooling fan.
The VAZ 21074 injector works in the following order.
The pump supplies fuel from the gas tank through filters to the fuel rail. Next, the fuel is supplied to the injectors. The pressure in the injectors is maintained by a special regulator within 300 MPa. Excess fuel is sent back to the tank. The injector is a sprayer with a solenoid valve, which operates from ECU pulses.
By reading readings from the piston position module in the cylinder, the central unit determines the moment of opening and closing of the injector. The optimal quality of the air-fuel mixture is prepared based on the readings of the mass air flow sensor and the throttle position.
Other parameters are also taken into account:
- cooling system temperature - necessary to determine the degree of engine warm-up and adjust idle speed. The temperature correction affects the degree of richness of the mixture;
- oxygen concentration - used to measure the oxygen content in exhaust gases;
- on-board network voltages - read by the speed sensor to transmit pulses in a certain order.
Design Features
The main parts of the carburetor include the exhaust shut-off valve, the burnt fuel assembly outlet compartment, the transition chamber system, the throttle valve, the dosing system, the econostat, the float chamber, as well as the autonomous exhaust system. Each of these nodes performs its own function. We won’t delve deeply into this issue - the knowledge you’ve already gained will be enough to set it up.
- Float chamber.
- Econostat.
- Autonomous idle system.
- Idle clearance valve.
- Throttle valve.
- Dosing system.
- Transitional system of two chambers.
- Crankcase gas removal department.
Disadvantages and advantages of the model
The VAZ 2107 engine injector has a number of advantages over carburetor modifications:
- the electronic control mechanism ensures stable operation of the engine under any operating conditions;
- the presence of a catalyst and an optimal air-to-fuel ratio reduces the amount of harmful substances in the exhaust gases;
- starts well in cold weather and stalls less often if started incorrectly;
- valve clearances and chain tension are adjusted automatically, which reduces the noise of the power unit;
- smooth torque diagram - the highest point is reached in a wide rev range.
Along with the positive qualities, there are some disadvantages:
- high demands on fuel quality. Using low-quality gasoline will clog filters, injectors and damage the booster pump;
- the exhaust pipe catalyst is located low, so you need to drive through obstacles carefully;
- little space in the engine compartment. This makes it difficult to reach some nodes. However, injection power has a long service life and does not require frequent maintenance;
- cannot be repaired in a garage. If any malfunctions occur, please contact the service center. Diagnosis of breakdowns is carried out using special equipment that reads data from sensors and computers;
- The presence of automatic equipment increases the cost of repairs.
Why do I adjust the carburetor myself?
Self-adjustments save money and time. There are types of work that cannot be done with your own hands without special equipment. But I am capable of servicing a carburetor, which does not have a complex design.
Therefore, I am happy to do this process myself, without outside help. After correct adjustment, there is a feeling of pride and satisfaction for the result obtained. My car runs like a clock, which is nice.
Source ru.megasos.com prosedan.ru vipwash.ru mylada.net make-1.ru
Engine optimization options
Many drivers tune the VAZ 2107 engine in order to improve performance and increase power. An important factor that affects power performance is clean injectors. Their contamination reduces engine performance, impairs efficiency, reduces the injected volume of fuel, which will lead to failures when pressing the gas pedal.
Usually the problem occurs due to the use of low-quality gasoline. Such fuel will contain heavy paraffins that build up on valve plates, injectors and the throttle valve. There are several options for cleaning them.
The first is cleaning and bench testing.
| Names | Indications |
| Number of injectors tested | 6 |
| Supply voltage, V | 220 |
| Injector control voltage, V | 6;12 |
| Diameter of injector sockets, mm | 11;14 |
| Resistance, Ohm | 2…6; 11…20 |
| Maximum power consumption, W | 60 |
| Extreme limit pressure in the ramp, atm | 6 |
| Extreme limit pressure during cleaning, atm | 6 |
The permissible imbalance should be within 1.5%. If the deviation is more than:
- 2.5% - fuel consumption increases;
- 3.5% - unstable operation at idle, difficult cold start;
- 4% - dips occur during sudden acceleration;
- 5% - the engine does not start well, a persistent tripping appears.
The second option is to use special flushing fluid and equipment. Cleaning can be done at home. To do this, you need to dilute the flushing fluid with gasoline and add it to the power system. As a result, the deposits are corroded and enter the cylinder, where they are completely burned.
The quality of the oil used has a great influence on keeping the car in working condition.
Setting the carburetor choke
How much trouble does incorrect carburetor choke adjustment bring to drivers, especially in winter. In some cars, you pull the choke all the way, but the engine does not hold speed, you have to hold the gas pedal until it warms up. For others, on the contrary, you pull the choke to the end, and the engine screams like crazy, although during warm-up such high engine speeds are unnecessary.
The whole point is that the lever for forced opening of the carburetor throttle valve is incorrectly adjusted when the choke is pulled.
All this is easy to fix; in the photo above the arrow shows the thrust for forced opening of the throttle valve at the moment the choke is pulled out. If the engine does not hold speed, then it is possible that the rod is on the lower hole of the throttle lever; the photo shows two holes for the throttle rod. Move the rod into the upper hole of the lever.
If the engine is spinning very quickly on the choke, then use pliers to slightly bend the rod shown by the arrow; it bends easily without removing it from the carburetor; if the engine speed is low, straighten this rod. In this way, you can easily adjust the desired engine speed when starting on choke.
Setting the choke engine speed in a VAZ 2108 carburetor is even simpler; the photo above shows boot 3; by tightening it, the choke engine speed will increase, and unscrewing it will decrease.
I hope that after reading this article, you can easily adjust the carburetor on your car yourself.
Characteristics of oils for VAZ
The service life of the engine depends on the correct selection of oil for injection VAZ 2107. The recommended quality standard for the lubricating fluid is given by the manufacturer. Any type of oil that meets API SJ/CF, SG/CD quality standards can be filled into the car.
The abbreviation API means that a lubricant meets the following basic criteria:
- cleaning properties;
- temperature regime;
- indicator of deposits on engine components before the first oil change;
- release of harmful substances;
- corrosive properties;
- effectiveness of protecting components from friction.
The letters indicate performance characteristics. The further away the letter is from A, the better the quality of the product.
It is recommended to use the following types of oils.
| Oil brand for VAZ | SAE viscosity groups | API standard |
| RAVENOL LLO | 10W-40 | SJ/CF |
| SHELL HELIX SUPER | 10W-40 | SG/CD |
| TNK SUPER OIL | 5W-40, 10W-40, 15W-40, 20W-40 | SG/CD |
| TOTAL QUARTZ | 5W-40, 10W-40 | SL/SF |
| MOBIL SUPER M | 15W-40 | SJ/CF |
| LUKOIL LUX | 5W-40, 10W-40, 15W-40 | SJ/CF-4 |
| NOVOIL-SINT | 5W30 | SG/CD |
| CONSOL | 5W-40, 10W-40, 15W-40 | SG/CD |
| BIZOL GREEN OIL | 10W-40 | SL/SF |
| ESSO ULTRA | 10W-40 | SJ/CD |
| LUKOIL SUPER | 5W-40, 10W-40, 15W-40, 10W-30 | CF-4/SG |
| RAVENOL SUPER HD | 15W-40 | SJ/CF |
| LUKOIL SUPER | 5W-30, 5W-40, 10W-40, 15W-40 | SG/CD |
| ANGROL-SUPER | 5W30, 5W-40, 10W-40 | SG/CD |
| LUX | 5W30, 5W-40,10W-30, 10W-40, 15W-40, 20W-40 | SG/CD |
| ESSO UNIFLO | 10W-40, 15W-40 | SJ/CD |
Adjusting the starter
Setting up a VAZ 2107 carburetor with your own hands necessarily includes adjusting the starting device. Let us remind you that it serves to confidently start a cold engine. To do this, the mixture is twice or three times more saturated with fuel than when normally feeding a hot engine. The starting device for carburetors of the 1107010 family operates at a frequency of 1500 rpm, that is, at the manufacturer’s recommended starting frequency for a cold engine. If you look at the carburetor from the side, you can clearly see the channel through which vacuum is supplied from the space behind the throttle to the diaphragm of the damper opener:
If you remove the carburetor and look at it from the back, you can see the air vacuum supply channel.
If you disassemble the carburetor, you can see the details of this diaphragm starting device.
Below you can see a schematic representation of the carburetor starting device of the 1107010 family.
We explain the mechanism of action of the starting device. By pulling the “choke”, the driver seems to bring the starting device into a cocked state. In this case: • The three-arm lever is “cocked” with a cable counterclockwise; • Facilitates telescopic traction; • The rod, in turn, rotates the air damper through a lever. • The second arm of the lever presses on the axis of the throttle valve 1 of the chamber. • The air flow damper is now fully closed, chamber throttle valve 1 is slightly opened for starting, creating a starting gap.
When adjusting the starting device with your own hands, you first need to remove the carburetor. Then: Turn the choke lever until it closes. The device is now “cocked”.
Now you need to turn the carburetor over, measure the gap between the edge of the throttle valve (chamber 1) and its wall. For “Seven” carburetors this gap is 0.85-0.9 mm. The gap can be measured with a feeler gauge or calibrated wire. To bring it into this range, the drive rod on the throttle valve is bent.
After this, set the gap “A”. It is located between the channel wall and the edge of the air damper below. To do this, close the damper again and “cock” the device. To create an imitation of rarefaction of air, we recess the starter rod: Now the rod pulls the rod along the slot, and as a result the damper opens. Gap “A” is 5-5.4 mm.
To adjust this gap, you need to turn the adjustment screw with a screwdriver, only first removing the screw plug from it.
When to replace
According to the manufacturer's instructions, replacement should be carried out after traveling 10 thousand km when driving long distances and every 6 thousand km if trips were carried out mainly over short distances.
Also, the moment of replacement can be determined by the oil pressure sensor. Long service life dilutes the oil, so a cold engine shows high pressure, but after warming up the indicator drops significantly. Such differences signal the need for maintenance.
Solex carburetor VAZ2107, how to adjust the float system with your own hands
To adjust the float chamber, you must perform the following actions:
- We check the position of the float and pay attention to the shape of the mounting bracket - if it is deformed, it needs to be aligned. This is quite important, since otherwise the float will not sink into the chamber normally.
- We adjust with the needle valve closed. It is necessary to open the float chamber cover and move it to the side. Next, carefully pull the tongue of the bracket. You should ensure that there is a distance of six or seven millimeters between the float and the cover gasket. After immersion, the distance should be approximately one or two millimeters. If it is significantly larger, the needle must be replaced.
- When the needle valve is open, the distance between the float and the needle should be about fifteen millimeters.
It is worth noting that it is not necessary to remove the carburetor from the engine to perform these steps.
Expert advice
- You need to fill in the oil of the brand that was used before. If you want to change the brand, you need to flush the system.
- There is no need to pour synthetics into old engines. It has cleaning properties that will wash away the deposits that cover microcracks in the crankcase.
- On new engines it is recommended to use exclusively synthetics. This will increase its resource and protect it from overheating.
- Perform maintenance regardless of mileage. Under different operating conditions, the maintenance period may vary.
