Sign up for a technical center
We suggest you choose which method is appropriate for you - an electronic form (then you will be contacted after some time), or directly by telephone.
A preliminary agreement with the company is an undoubted convenience, because you yourself determine what time or day it will be convenient for you to arrive. You can make an appointment for the day of the call and for other days.
By the time you specify, the service station will provide a technician and a place in the work area. There will be a free lift and equipment available. In addition, you will be served out of turn.
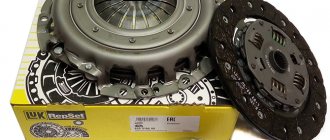
My Largus has driven 219,160 km. And I realized that it was time to change the clutch that was installed at the factory. The clutch began to slip when accelerating or going uphill.
Since I thought that the clutch could fail at any moment, I bought a spare clutch back in 2022 before a trip to the Black Sea. As a result, I rode to the Black Sea with the clutch 4 times. And it’s good that I didn’t need it on the way. Since during repairs at the service center it turned out that I bought a completely wrong clutch. The store shipped me a clutch for a regular Logan/Largus
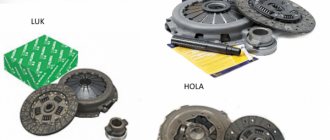
And since my Largus was equipped with 7 seats, it had a completely different clutch. Having loaded everything into a bag as a sample, I rushed to the store to get the right spare parts. And everything in the store was interesting. One set matched the “disc” perfectly. But it was the wrong “basket”. Another set had the same “basket”, but had a different “disc”
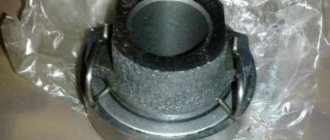
Also, the retractors had to be selected according to the sample. By the way, my car has a hydraulic retractor.
In general, not a machine, but a designer.
Well, we still had to change the ball joints and undergo scheduled maintenance a little earlier.
Price: 26,000 ₽ Mileage: 219,160 km
We are preparing to replace the cable, removing all unnecessary
Of course, the car must be stopped before replacement. We change the rear pads on a Renault Logan with our own hands: video and photos. Next, remove the filter bellows (Fig. 1). Replacement of brake discs for Renault Logan, Lada Largus. On a 16-valve valve, the corrugation is held in place by a clamp, but it will also be easy to remove.
Then, if we talk about 16 valves, it is better to remove the "intake muffler". The plastic box, when there is no corrugation, can be immediately moved to the side (Fig. 3).
The box is the “muffler”.
The cable ends with a tip-rod on which a weight is attached. Friends, watch a good video about checking the oil level in the Renault Logan gearbox, as well as topping up and changing the oil... And this video instruction for replacing the Renault Logan power steering sensor will help you do it yourself and not go to a service station. Replacing a headlight on a Renault Sandero Stepway video This part was hidden from us by the corrugation.
The clutch (friction clutch) is the mechanism that makes the car move and facilitates gear shifting with a manual transmission. Using this device, torque is transferred from the engine to the gearbox. The clutch can be single, double or multi-disc.
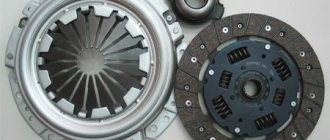
The Largus is equipped with a “dry” single-plate clutch with a diaphragm pressure spring. The device consists of a driven friction disk, a casing in which the pressure disk is located, a spring and a mechanism for releasing the clutch with the drive. The 8-valve engine is equipped with a cable drive with a JH3 gearbox, while the 16-valve engine is equipped with a hydraulic drive with a JR5 gearbox.
Articles
For all cables suitable for cars of the first and second generation, the Renault catalog contains two article numbers - 8200215961 and 6001546867. We are talking about different designations of one part.
Substitutes
3074 600 294 - the most common option for replacing the original spare part
3074 600 294 in Exist
We list analogues suitable for machines from the first two generations:
- CABOR 10.2890
- TRISCAN 8140 25250
- ATE 24372810312 or 591031
- AUTOMOTOR FRANCE AVC6867SAE1 or AVC6867
- BAV DISAN96
- CAUTEX 28439
- ADRIAUTO AD41180, AD410180, 41180, 410180
- CEF RT01186
- CMB AN96
- QUARTZ QZ-154-6867
- FRANCECAR FCR210148
- COFLE 102890
- FTE FKS20023
- KAWE RT01186
- HI-DRIVE CC708
- MALO 26545
- NPA NP51105151
- SPJ 911112
- QH KA93657
- TRW GCC109
- TIMMEN 01441528
- SACHS 3074600294 (pictured above)
- MASTER-SPORT 6001546867PRPCSMS
- ABS K27640
- ASAM 30360 or 31071
- HELLA 8AK 355 700-921
- BRECKNER BK19004
- SEIM 401712
- KAGER 192756
- LEX TR2193
- RICAMBIFLEX 01441528
- METZGER 102890
- TEXTAR 58013900
Replacing the clutch basket (pressure plate)
- preliminary determination of the need to change the basket
- using professional tools specially designed for this purpose
- compliance with the sequence of events
This part of the mechanism is important, since it is where all the clutch parts are located. So that the unit can operate without violating the principle of operation, the pressure plate should be changed only by a qualified technician and where they have real practice in changing the clutch basket.
It is common practice in car service centers to replace the basket assembly. This type of work is considered the most acceptable and high-quality, since it becomes possible to change the casing. Accordingly, the result will be of higher quality.
Replacing the friction clutch
Repairing the Larugsa clutch, like any other car, does not make sense; all worn parts must be replaced. To work, you will need a standard set of tools, amplifiers, a hammer and a new set of spare parts. First, the car must be placed on a lift or its front part raised on jacks above the inspection hole. The front wheels and engine protection are removed. After unscrewing the screws, you need to remove the left shield under the bumper. This will give you access to the shield fasteners in the wheel arch, which must also be removed.
The gearbox oil is drained into a suitable container; to do this, first unscrew the plastic and then the metal plug. Do not remove the reservoir until maximum oil has been drained. Dismantle the brake caliper and put it aside along with the pads.
Removing the steering knuckle
Removal is carried out according to the following scheme:
- disconnect the ABS sensor;
- Using a 16 mm wrench, unscrew the nut on the tie rod screw, use a screwdriver to open the two sides of the knuckle, and press out the ball joint rod;
- on the steering end stud, unscrew the nut with a 16 mm wrench and press out the stud;
- Using two 18 mm wrenches, unscrew the fastening nuts that secure the fist to the stand. Now you can remove the steering knuckle, and also dismantle the CV joint from the gearbox (in this case, the rollers will probably fall out).
It is impossible to replace the clutch on a Largus without draining the oil, since the internal drive mechanisms (CV joints) cannot be unscrewed if there is lubricant in the gearbox.
Working in the engine compartment
First you need to disconnect the negative terminal of the battery and remove the cable. To do this, the counterweight is pulled forward, removed through the slot, after which the rubber coupling is removed through it. The engine harness holder is attached to the gearbox housing. To remove it, just loosen the fastener. Now you need to disconnect all the wire terminals:
- unscrew the two mounting screws and remove the terminal from the TDC sensor;
- Disable the reverse sensor at the gearbox;
- disconnect the speed sensor terminal;
- The oxygen concentration sensor (lambda probe) is also disconnected.
The breather hose needs to be loosened and moved away from the box, unscrew the two wires to ground. Next, find the gearshift knob rod, loosen the fastening and pull out the rod.
Removing the gearbox
It is impossible to replace the clutch on a Lada Largus without removing the gearbox. First you need to remove the subframe by unscrewing the three bolts securing it to the bumper. Then the rear support bracket is removed, the steering mounting bolts and the power steering mounting bolt on the left on the subframe are unscrewed. The exhaust pipe is disconnected from the exhaust manifold and removed from the rubber hangers. The subframe is attached to the body with 4 bolts - they need to be unscrewed. Additionally, you will have to remove the starter.
It remains to remove the two screws on top - they secure the gearbox to the engine - and the four bolts with which the clutch housing is attached to the oil sump. Suitable supports are first installed under the engine and gearbox. At the very end, the left engine mount bracket is dismantled, after which the nuts on the lower studs are unscrewed.
Replacing the mechanism
To remove the basket, perform the following operations:
- using an 11 mm wrench, unscrew 6 bolts that hold the basket, fixing it on the flywheel - one turn at a time, sequentially;
- holding the friction disc, remove the basket.
Replacing the friction clutch
Repairing the Larugsa clutch, like any other car, does not make sense; all worn parts must be replaced. To work, you will need a standard set of tools, amplifiers, a hammer and a new set of spare parts. First, the car must be placed on a lift or its front part raised on jacks above the inspection hole.
Removal is carried out according to the following scheme:
- disconnect the ABS sensor;
- Using a 16 mm wrench, unscrew the nut on the tie rod screw, use a screwdriver to open the two sides of the knuckle, and press out the ball joint rod;
- on the steering end stud, unscrew the nut with a 16 mm wrench and press out the stud;
- Using two 18 mm wrenches, unscrew the fastening nuts that secure the fist to the stand. Now you can remove the steering knuckle, and also dismantle the CV joint from the gearbox (in this case, the rollers will probably fall out).
It is impossible to replace the clutch on a Largus without draining the oil, since the internal drive mechanisms (CV joints) cannot be unscrewed if there is lubricant in the gearbox.
First you need to disconnect the negative terminal of the battery and remove the cable. To do this, the counterweight is pulled forward, removed through the slot, after which the rubber coupling is removed through it. The engine harness holder is attached to the gearbox housing. To remove it, just loosen the fastener. Now you need to disconnect all the wire terminals:
- unscrew the two mounting screws and remove the terminal from the TDC sensor;
- Disable the reverse sensor at the gearbox;
- disconnect the speed sensor terminal;
- The oxygen concentration sensor (lambda probe) is also disconnected.
A mark is left on the fastening clamp using paint so that the rod can be placed correctly during installation.
It is impossible to replace the clutch on a Lada Largus without removing the gearbox. First you need to remove the subframe by unscrewing the three bolts securing it to the bumper. Then the rear support bracket is removed, the steering mounting bolts and the power steering mounting bolt on the left on the subframe are unscrewed. The exhaust pipe is disconnected from the exhaust manifold and removed from the rubber hangers. The subframe is attached to the body with 4 bolts - they need to be unscrewed. Additionally, you will have to remove the starter.
It remains to remove the two screws on top - they secure the gearbox to the engine - and the four bolts with which the clutch housing is attached to the oil sump. Suitable supports are first installed under the engine and gearbox. At the very end, the left engine mount bracket is dismantled, after which the nuts on the lower studs are unscrewed.
Replacing the mechanism
To remove the basket, perform the following operations:
- using an 11 mm wrench, unscrew 6 bolts that hold the basket, fixing it on the flywheel - one turn at a time, sequentially;
- holding the friction disc, remove the basket.
After replacing all worn elements, the assembly is assembled, and the steps are performed in the reverse order. For installation you will need to use heat-resistant grease and a centering mandrel.
Ideally centering and balancing the friction clutch by doing the assembly yourself will be problematic, but possible. To adjust the tension with your own hands, you need to perform a number of actions:
- find the nuts for adjusting the clutch pedal (located under the power steering reservoir);
- unscrew the outer nut to the end of the stud;
- using the second nut, the travel of the clutch pedal is adjusted to the desired cable tension;
- After this, the external nut secures the fastener so that in the future it does not loosen and the cable does not fly off.
Largus owners who changed the clutch themselves note the following:
- It is difficult to do the work yourself; it is better not to try without the skills, conditions, tools and knowledge.
- You can't do it without helpers. But even in this case, it may take all day to replace.
- As long as the clutch works and does not cause concern, there is no point in changing it.
Judging by the reviews, it is better to entrust clutch replacement to specialists, especially since the price of the issue is not so high. Conscientious craftsmen provide a guarantee for their work and bear financial responsibility for it. If you replace it yourself, all actions are performed at your own peril and risk.
In the cold weather, the problem with the transmission, or more precisely with the clutch, returned. We fix the problem ourselves.
Your partner pumps the clutch pedal 10-15 times and releases it, in the meantime you need to press the spring lock
After this, brake fluid will begin to flow out of the hose. As soon as the flow slows down, your partner needs to press the clutch pedal and hold it in this position.
Why does the ESD detect error “p0830”, video explanation
Praise to the author! I am also a terrible car enthusiast, albeit with little experience... I also had right-hand drive ones, but unfortunately, they are not convenient with our traffic. I now have probably the most boring Toyota model. For almost 2 years of owning this car, I had no problems at all, it burned out once a light bulb in the foot, and I changed the brakes and oil according to plan, despite the fact that the car is 8 years old, the mileage is about 150 thousand. It accelerates quickly, drives smoothly, and is maneuverable. spacious trunk and for its size a very comfortable and spacious interior, dad feels completely comfortable in the back seat, and he is a large man. After a night in a windswept parking lot at minus 35, it started up and didn’t even sneeze once. The stove heats perfectly, the air conditioner cools quickly, the consumption is 6-7 liters of 92 in the city. engine 1.5. 106 horses, with its size it will fit into any hole in the parking lot. In short, the car is just great. )))
I've been meaning to adjust the clutch on my Grant for a long time. I made a printout of your article. Tomorrow I’ll arm myself with the necessary tools and go to the garage to do everything with my own hands step by step, as described in the article.
Open the hood, under the air filter there is a clutch foot. It is equipped with a cable with a plastic screw. Lightly pressing the foot, remove the cable to the side. We adjust the cable screw and put it back on the foot.
When accelerating, the engine roars slightly when the leveler revs up
Clutch needs replacement! It's slipping!
When starting off there is jerking, what could be the problem?
Clutch adjustment on Lada (VAZ) Largus
After an unsuccessful or simply incorrect adjustment of the clutch pedal or pressure plate, you may find that the problems have only increased - third-party, clearly unnecessary sounds and noises appear. What happens to the Lada (VAZ) Largus unit itself at this time is unclear, and how the adjustment performed will affect its working life is also unclear.
Usually, experienced car owners adjust the clutch themselves, and they do this on a wide variety of foreign cars. However, this approach is not always successful, especially if the car is new or the owner has no experience.
It is possible to carry out this type of work with a qualified approach for a small amount in a car service center, where the work is performed by a master.
Operations for removing and troubleshooting clutch parts Lada Largus
The work is shown using the example of a car with a K4M engine.
On a car with a K7M engine, the clutch is removed using completely similar techniques. 1. Remove the gearbox
If you are installing the old pressure plate, mark in any way (for example, with a marker) the relative positions of the disc housing and the flywheel in order to install the pressure plate in its original position (to maintain balance). Subsequent operations are shown with the engine removed for clarity.
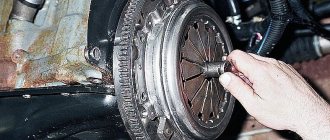
2. While holding the flywheel from turning with a screwdriver (or spudger), remove the six bolts securing the clutch pressure plate housing to the flywheel. Loosen the bolts evenly: each bolt one turn of the wrench, moving from bolt to bolt along the diameter.
This is where the bolts securing the clutch housing to the engine flywheel are located.
3. Remove the clutch pressure and driven discs from the flywheel, holding the driven disc.
4. Inspect the clutch driven disc. Cracks on the parts of the driven disk are not allowed. Check the degree of wear of the friction linings. If the rivet heads are recessed by less than 0.2 mm, the surface of the friction linings is oily or the rivet joints are loose, then the driven disk must be replaced.
If the driven disc linings are oily, check the condition of the gearbox input shaft oil seal. It may need to be replaced.
5. Check the reliability of the damper springs in the driven disk hub sockets by trying to move them by hand in the hub sockets. If the springs move easily in their seats or are broken, replace the disc.
6. Check the axial runout of the driven disk if warping is detected during visual inspection.
If runout exceeds 0.5 mm, replace the disc. 7
Inspect the working friction surfaces of the flywheel and pressure plate, paying attention to the absence of deep marks, scuffs, nicks, obvious signs of wear and overheating. Replace defective components.
8
If the rivet connections A of the casing parts and the pressure plate are loosened, replace the pressure plate assembly. Using an external inspection, evaluate the condition of the diaphragm spring B of the pressure plate. Cracks on the diaphragm spring are not allowed. Places B of contact between the spring blades and the clutch release bearing must be in the same plane and have no obvious signs of wear (wear should not exceed 0.8 mm). Otherwise, replace the pressure plate assembly.
8. If the rivet connections A of the casing parts and the pressure plate are loosened, replace the pressure plate assembly. Using an external inspection, evaluate the condition of the diaphragm spring B of the pressure plate. Cracks on the diaphragm spring are not allowed. Places B of contact between the spring blades and the clutch release bearing must be in the same plane and have no obvious signs of wear (wear should not exceed 0.8 mm). Otherwise, replace the pressure plate assembly.
9. Inspect the connecting links A of the casing and disk. If the links are deformed or broken, replace the pressure plate assembly. Using an external inspection, evaluate the condition of the support rings B of the pressure spring. The rings should not have cracks or signs of wear. Otherwise, replace the pressure plate assembly.
10. Before installing the clutch, check that the driven disk moves easily along the splines of the transmission input shaft. If necessary, eliminate the causes of jamming or replace defective parts. 11. Apply refractory grease to the drive hub splines.
12. When installing the clutch, first install the driven disc using a mandrel...
Install the driven disk so that the protruding part of the disk hub (shown by the arrow) is directed towards the clutch housing diaphragm spring.
13 then install the clutch pressure plate housing on the three centering pins. After this, you can screw in the mounting bolts.
14. Screw in the bolts evenly, one turn of the key each, alternately moving from bolt to bolt along the diameter. The tightening torque of the bolts is 20 N*m.
15. Remove the mandrel.
16. Install the gearbox. 17. Remove air from the hydraulic clutch release system of a vehicle with a JH5 gearbox.
4500 rub.
The clutch on a car is used to temporarily disconnect the engine from the chassis to change gears and when starting to move. The clutch life depends very much on the driver’s driving style, and on average is 150-200 thousand km.
Replacing the Lada Largus clutch, along with a major engine overhaul, is considered one of the most complex and responsible car repair procedures. To replace the clutch, you need to disassemble a large number of units and components of the car, which in itself is a very difficult task.
FAQ
Manufacturers recommend changing spark plugs during regular maintenance. The wear life of “ordinary” spark plugs is 20–30 thousand kilometers, while iridium or platinum spark plugs last on average 2 times longer.
The experience of the masters of the Rulevoy car service allows us to carry out work of any complexity in the shortest possible time. The process of engine overhaul (without taking into account the delivery time of the necessary spare parts) takes about 2-3 days. More precise terms and costs of work are determined on the spot, after an initial inspection by a car service technician.
You can call and our spare parts selection manager will help you choose an option that suits you in terms of price and quality.
Features of adjusting the clutch release drive of VAZ 2105, 2107 cars
Correct and precise operation of the clutch on VAZ 2105, 2107 vehicles is ensured by certain adjustments to its drive. There are two of them: adjusting the gap between the pusher and the piston of the clutch master cylinder and adjusting the free play of the clutch pedal.
The gap between the pusher and the clutch master cylinder piston is 0.1 - 0.5 mm. It is regulated by rotating the clutch pedal free travel limiter. In this case, a certain free play of 0.4 - 2.0 mm is formed at the clutch pedal, which the driver selects when starting to press the pedal.
the gap between the pusher and the piston, free play of the clutch pedal of VAZ 2105, 2107 cars
It is measured with a ruler or tape measure, which is installed from the floor to the middle of the lower part of the pedal platform. We move the platform with our hand relative to the ruler scale by pressing the pedal. If there is a gap, at first the pedal moves very easily, and then with difficulty. If there is no gap, turn the pedal travel limiter out a little. We ensure that the free movement along the ruler fits within the required two millimeters.
This gap is necessary for the clutch to disengage completely. If it is missing, then the piston will not be able to fully return to the rear position when the pedal is released and in the working cavity of the master cylinder, and excess pressure will remain in the entire drive. As a result, the clutch will not disengage completely, since the release bearing will press on the leafs of the pressure spring, and the discs will slip (not be fully pressed against the flywheel). Increasing this gap will lead to the fact that the clutch will not disengage completely and will “drive” (the discs do not fully move away from the flywheel).
Adjusting the clutch pedal free play (the gap between the release bearing and the plane of the pressure flange of the clutch “basket” pressure spring)
It is adjusted by a nut on the clutch slave cylinder pusher. With proper adjustment, the free play of the clutch release fork is 4–5 mm (checked by hand: the fork is pulled away from the stop against the adjusting nut on the pusher), and the free play of the clutch pedal is 25–35 mm. It is necessary to unscrew the lock nut on the pusher and rotate the adjusting nut to set the required free play of the fork. The pedal free play of 25 - 35 mm (until the clutch is disengaged) can be checked using a ruler. It is this value that means there is a gap between the release bearing and the plane of the pressure flange of the clutch “basket” pressure spring.
free movement of the clutch slave cylinder pusher for VAZ 2105, 2107 cars
In the absence of this gap, the release bearing presses on the pressure spring of the “basket” - the clutch “slips”. With an increased gap, it “leads.”
The clutch pedal free play of 0.4 – 2.0 mm is included in the pedal free play of 25 – 35 mm. That is, 25 - 35 mm is the total required size.
Notes and additions
— The clutch on VAZ 2105, 2107 cars is of a constantly closed type, that is, constantly on: when the pedal is released, the driven disk is pressed by the drive disk to the flywheel and rotates with it, as well as the release bearing and the input shaft of the gearbox. There is a gap of 1.5 - 2.0 mm between the release bearing and the lining of the thrust flange of the clutch basket pressure leaf spring. This gap is selected when the driver begins to press the pedal.
— The full travel of the clutch pedal on VAZ 2105, 2107 cars is 140 mm.
— After adjusting the clutch drive, check for smooth gear shifting
Particular attention to reverse gear. The smoothness of its activation is an indicator of successful adjustment
More articles on VAZ 2105, 2107 cars
What malfunctions can happen to the clutch?
Although this list is small, if problems arise it can cause quite a few problems:
- The clutch does not engage - this malfunction occurs when the clutch pedal has too much free play. As a rule, when engaging first gear, a characteristic cracking sound occurs from the gearbox. This problem should not be ignored, as it can lead to even greater problems with the gearbox itself.
- Clutch slipping - the cause of this malfunction is that the car does not gain the required speed when the engine speed increases. As a rule, this is observed first at high speeds, but then becomes noticeable at the “bottoms”. The second symptom is an unpleasant odor that appears at high engine speeds. If such a problem is observed, it is necessary to urgently diagnose the clutch.
- Incorrect travel of the clutch pedal is a sign of this breakdown, uneven travel of the clutch pedal, when the pedal at one time returns to its original position, and at another it is in free floating. It would seem that the reason lies in the spring, but the inspection should begin with the clutch cable.
- The car jerks when you press the clutch pedal - this malfunction is very serious and you should urgently check all connections and the entire clutch for wear and notice them.
Questions (24)
- Most useful
- The newest
Hello! I have a 2013 Largus. The problem is this: not immediately, but after about 20,000 km, a knocking sound of valves appeared (a feature of our VAZ engines). But I have K4M. The mileage is already 145,000 km. I can’t say that the car doesn’t pull or drive. But this knocking sometimes bothers me. As if the valves are not adjusted. What could be the reason? Dmitriy.
Alexey Revin
, editor of the magazine “Behind the Wheel” (automotive information department):
— If the nature and frequency of the knock is similar to the sound produced by large gaps in the valves, then this is the knock of hydraulic compensators. On the K4M engine, the valves are driven by rockers with rollers. And the gaps are compensated by hydraulic supports of the rockers. Although more often they say hydraulic compensators. Since you have been driving with the defect for a long time, of course there is no talk about the fact that the devices are not pumped. Most likely, one or more hydraulic compensators are faulty. The seal of the working volume is broken, and they do not hold the rocker in the desired position. A gap appears, which generates a knock.
I advise you to prepare a valve cover gasket sealant, flushing fluid and find a company where you can purchase hydraulic compensators. I recommend replacing the timing belt at the same time, since it still needs to be removed.
Having removed the cylinder head cover, we try to press the hydraulic compensators by hand. Those of them that are pressed easily are faulty. By raising the camshafts, you can remove the rockers and remove the hydraulic compensators. Then they can be washed or replaced immediately. Hydraulic compensators are quite reliable, and if problems arise with them, then perhaps you once filled in bad oil or installed a fake filter. Dirt particles jammed the hydraulic compensators.
For someone who likes to do everything themselves, the operation will take a whole day. The service will charge from 4,500 rubles for such work. One hydraulic compensator costs from 350 rubles.
Good afternoon I own Largus. I decided to follow your example and install an hour meter and an ambient temperature sensor. I purchased sensors identical to yours (IT5–3, IVN-5). I didn’t understand in the magazine article about connecting sensors to the car’s wiring. Please describe in more detail the connection diagram (for example, to the ignition switch). Thanks in advance! (Paul)
Alexey Revin
, editor of the magazine “Behind the Wheel” (automotive information department):
— If you place the indicators in the same way as we did, that is, on the lining of the floor tunnel, then it is most convenient to take the power from the wires suitable for the cigarette lighter socket. There voltage appears when the ignition is turned on. This is necessary for the operation of both devices. At the same time, the current consumed by the indicators is small and will not overload the cigarette lighter power circuit. To operate the engine hour meter, you don’t need anything else, but to operate the temperature indicator, you need to stretch the sensor wires through the engine compartment to the front bumper. And there, in a shaded and ventilated place, fix the sensor as far as possible from the radiator of the cooling system and the air conditioner heat exchanger.
Good evening. I own a Largus 2014, with a K4M engine, and have already run 170,000 km on it. Surprisingly, I am completely satisfied with the car, except for one “but”. Tell me: do all Largus have such disgusting ABS or is it just me? At one time I drove a Nexia without ABS. So her braking distance was half as long as on this miracle with ABS. It completely prevents the wheels from slowing down even a little, it immediately kicks in, the ABS starts to crackle and the car barely stops. In the snow it’s generally a “complete atas”. I myself have driven many foreign cars; now the family has two cars. Therefore, I imagine how a car with ABS should brake. Largus takes first place in this regard from the end. Tell me, are there any options to somehow correct this misunderstanding? Thank you. (Andrey)
Alexey Revin
, editor of the magazine “Behind the Wheel” (automotive information department):
— Lada Largus is a fairly modern car. For the ratio of total weight and tire size, it has a completely satisfactory braking distance. At least on the editorial machine we did not notice the problems described above. There is probably a malfunction.
The hypothesis is as follows: the problem lies in the rear brake mechanisms. Your car has a lot of mileage and, most likely, the brake cylinders are damaged by corrosion to such an extent that the pads no longer release. Moreover, it is enough that at least one brake cylinder is faulty. What happens when braking? All braking loads fall on the front brakes. Accordingly, the front wheels lock very early. But the activated ABS does not allow them to do this. At the same time, the braking distance increases to unacceptable values, and all because the rear wheels of the car not only do not block, but do not try to brake at all. Please note that for the ABS to operate, it is enough for at least one wheel to lock during braking. In your case, most likely the front wheels are deflated for themselves and for the wheels of the rear axle. What can be done?
I recommend contacting a service center to diagnose the brake system. And if your qualifications allow you to troubleshoot the problem yourself, then I advise you to do the following:
- Remove the brake drums and check their diameter and ovality;
- Check the remaining thickness of the brake pads;
- Check the functionality of the mechanism for automatically adjusting the length of the spacer bar;
- Check the movement of the pistons and the tightness of the seals of both pistons.
Operations for removing the clutch bearing Lada Largus
1. Remove the gearbox if it was not removed to repair the clutch.2. Remove the two bolts securing the clutch release assembly...
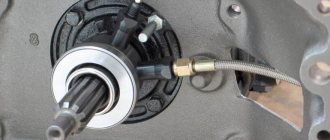
3. ...and remove the cylinder assembly with the clutch release bearing from the clutch housing.
Test the new bearing before installation. It should rotate easily, without jamming or noise, and have no backlash.
Check the ease of movement of the bearing on the slave cylinder guide by pressing it in the axial direction. The bearing must move all the way without jamming and clearly return to its original position using a preload spring.4. Install the clutch release slave cylinder complete with bearing in the reverse order of removal. Tighten the bolts securing the working cylinder to the clutch housing to a torque of 7 N*m.5. Attach the pipeline to the slave cylinder adapter.6. Install the gearbox.7. Remove air from the hydraulic clutch release drive (see, “Bleeding the hydraulic clutch release drive of a vehicle with a JH5 gearbox”).
Your request has been accepted!
You will receive a notification when the product goes on sale to your contacts.
Description of design
Clutch Surely, while in a driving school, everyone took a course on the design of transmission components, but it’s unlikely that everyone went into all the details and, I must say, in vain. Knowledge of the design and principles of operation will allow the owner to identify a breakdown at an early stage, take measures to eliminate it and avoid large costs for major repairs. Therefore, let’s briefly consider the components of the clutch of a Lada Kalina car:
- casing;
- release bearing;
- pressure disk;
- driven disk;
- drive cable;
- fork lever;
- cable length adjustment mechanism.
The type of friction clutch used on this model is single disc, dry with a diaphragm type spring. The aluminum casing is integral with the gearbox. Modifications involve the installation of two types of transmission components - with a diameter of 190 and 200 mm. You can determine which one is used in a particular car by the number of starter mounting bolts: two – 200 mm and, if there are three bolts, then – 190 mm.
The clutch housing is secured to the flywheel with six screws. Three pins on the flywheel fit into corresponding holes in the housing, thereby centering it. As the linings wear out, the cable length changes automatically and does not require intervention from the owner.
Signs of a bad clutch
It's not every day that a clutch breaks. It happens that you don’t immediately realize that the clutch on Largus is failing. This can be easily understood by the following signs:
- When you press the clutch pedal or in the neutral position of the gearshift knob and release the pedal, you hear an extraneous noise - grinding, squeaking, howling or rattling
- Some gears are difficult to engage or do not engage at all
- The clutch does not completely disengage when the pedal is pressed, the clutch moves
- The clutch slips and does not fully engage when the pedal is released and the gear is engaged
If the clutch engages at the very beginning or end of the pedal travel, then the clutch pedal free play may need to be adjusted. Our master can do this. He will also inspect the clutch and be sure to let you know if it needs to be replaced.
Most often, the release bearing disappears due to poor lubrication. It happens that the petals of the diaphragm spring weaken and sag, or critical wear forms at the point of their contact with the bearing. Over time, the damper springs or friction linings of the driven disc may become loose.
If the friction linings on the disc are worn out, cracks or delaminations are visible on them, then the disc must be replaced.
Causes and symptoms of failure
Unfortunately, intensive use has the most negative effect on the operation of the clutch. Its mechanism wears out under the influence of friction, and the speed of wear will also be affected by the quality of the road surface and your driving style. Driving on old, unrepaired roads with a lot of dust leads to greater contamination of components and mechanisms, to an increase in friction force and, accordingly, replacing the Lada Largus clutch will be required sooner than if you were driving, for example, on German autobahns.
The following symptoms will tell you that it is time to change the clutch:
- Incomplete engagement (“Lada Largus” is slipping) and clutch disengagement (“Lada Largus” is driving).
- Engaging the clutch causes noticeable vibration in the vehicle.
- The clutch pedal has become too hard to press or has even sunk to the floor.
- You began to change gears with difficulty.
- Increasing engine speed does not lead to a significant increase in vehicle speed. This is especially noticeable when moving uphill.
