Print this article Font size 16
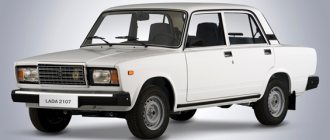
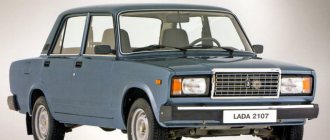
Of course, every car comes with its own steering wheel from the factory. Cars of the VAZ 2110 series are no exception.
However, the appearance, level of comfort and tactile sensations sometimes leave much to be desired. The rim often wears out quickly, the surface becomes smooth, which interferes with normal control.
Factory solution
We install the EUR and power steering on a VAZ 2110 with our own hands
Depending on the year of manufacture, the “ten” can be equipped with a hydraulic booster (power steering) or an electric booster (electric power steering).
Of course, the second option is preferable, since it makes driving the car easier and more comfortable. If your power steering is worn out or you just want to replace it, then as an alternative it is recommended to choose the power steering on the VAZ 2110. This material contains two instructions:
- Installation of power steering.
- Installation of an electric power steering VAZ 2110 instead of a standard power steering.
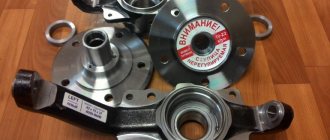
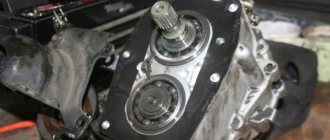
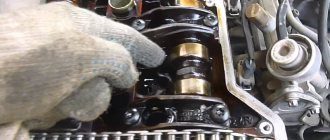
Before installation, you need to understand the structure of these units, and also find out how they differ from each other.
Analysis of the steering rack of a VAZ 2110 car.
Reasons for replacement
There are more than enough reasons to want to replace your steering wheel. But everyone has their own:
- The old steering wheel was worn out;
- The current rim does not meet the driver's requirements;
- The driver feels uncomfortable with the factory steering wheel;
- The unit received mechanical damage;
- Tuning, modifications to the interior and the entire car, etc. are carried out.
Drivers can name many more reasons why they want to get a new one to replace their old steering wheel.
Option for tuning
What to choose?
Based on the presented range of steering wheels suitable for the VAZ 2110, certain conclusions can be drawn regarding the advantages and disadvantages of various options.
We suggest you familiarize yourself with them in the table.
| Options | Advantages | Flaws |
| Native factory | Designed specifically for this model Manufactured according to the appropriate calculations Has a reliable design | Appearance leaves much to be desired Not functional enough Wears out quickly |
| From new VAZ models | More multifunctional Improved appearance It's not difficult to install in place of the old one | There are questions about the quality of workmanship |
| From foreign cars | More modern, functional Attractive appearance Thoughtful design and button placement Comfortable grip | High price It's hard to find a VAZ Possible installation problems |
It’s up to you to decide which one you choose. The steering wheel plays a significant role in ensuring comfort and safety, so you should choose a high-quality product that you can use to comfortably control the movement of your car.
Euro steering wheel
Differences between EUR and power steering
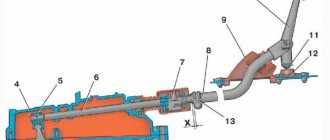
These are completely different units. To understand the main differences, it is enough to study the hydraulic booster. Its main component is a pump driven by the crankshaft, it is integrated with other parts. The operating principle of the hydraulic booster is based on hydraulics.
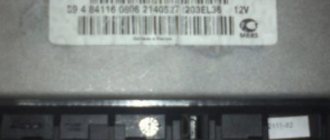
As for the electric power steering, it is driven by an electric motor. Its design also includes an electronic control unit, a steering shaft with a torsion element and sensors. The EUR works according to a different scheme:
- When the steering wheel rotates, the torsion shaft twists;
- Special sensors record changes in the position of the shaft and send data to the electronic control unit;
- After analyzing the information, the unit sends commands to the electric motor;
- As a result, the unit creates the necessary force or facilitates turning the steering wheel.
The design of the electric power steering wheel
Car enthusiasts often argue which option is preferable for the “ten”. In fact, power steering is an obsolete unit that is being actively removed from modern passenger cars. The electric booster works even when the engine is turned off and weighs less than the power steering. The main advantage over “hydraulics” is reliability - the electric unit requires virtually no maintenance. There is less load on the engine, and as a result, less fuel is also needed. The EUR is also good for our conditions because it functions well at low temperatures.
But the electric booster also has its drawbacks. Its design is more complex than that of “hydraulics”, hence the high price. Sometimes the electronic control unit sends incorrect commands, this was especially felt by the owners of the first generation Kalina. If you drive for a long time on a poor-quality road surface (or lack thereof), the EUR may turn off for several minutes due to overheating.
Replacing a VAZ steering wheel
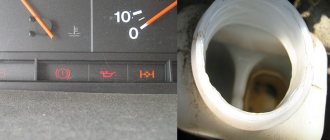
Steering wheel play VAZ 2110
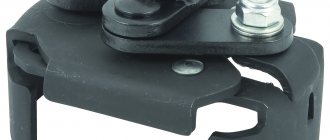
For each steering wheel, factory standards apply, according to which the permissible force on them and the resistance that the structure itself can withstand are determined . That is why, if you plan to replace the steering wheel, it is recommended to give preference to a traditional steering wheel with an additional braid made of materials that provide higher reliability of contacts with the surface of the steering wheel rim. The procedure will require the following materials and tools:
- Phillips screwdriver;
- Head “24”;
- New steering wheel;
- A piece of wire or wire;
- Chalk, marker or something else for marking.
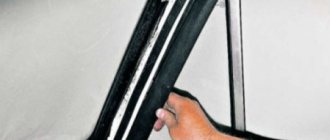
Removing the steering wheel
Replacing a steering wheel is not as difficult as it seems at first glance. When replacing the steering wheel, it is first removed. This procedure is carried out in the following order:
Note. Before carrying out work, do not forget to remove the key from the ignition switch.
- First, the car must be installed on an inspection ditch or lift;
- Then the hood of the car is lifted and the terminal of the “negative” wire is disconnected from the battery terminal;
Note. The disconnection of the terminal is due to the fact that there are electrical connections in the steering wheel. By turning off the power, you can prevent short circuits and unwanted connections between electrical wires.
- After this, the car’s wheels are turned to the left or right;
Note. The steering wheel is turned until the device is activated, which locks the steering shaft.
- Markings are applied to the steering wheel and dashboard;
- Then the seven screws securing the steering column casings are unscrewed and the lower steering column casing is removed;
- By unlocking the steering column adjustment lever, the column moves down. After this, moving up reveals the upper steering column casing;
Steering wheel disassembly
- Using a screwdriver, pry up the cover plate of the signal switch and remove it;
- Using a Phillips screwdriver, unscrew the two screws that hold the horn button and remove the cover;
Note. You should be aware that the steering wheel sits quite tightly on the splines and if removed abruptly, injury may occur. That is why it is recommended to unscrew the nut completely only after the hub has come off the shaft splines. The nut will protect you from injury.
- Using a 24mm socket, the nut that secures the steering wheel to several threaded screws is unscrewed so that it can move;
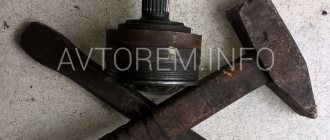
- With rocking, the steering wheel is pulled along the shaft splines.
Note. If the steering wheel cannot be moved by hand, an assistant may be required. One needs to pull the steering wheel towards himself, and the second one needs to strike the end of the steering shaft with a hammer through a drift made of soft material.
- Before finally removing the steering wheel, you should remember, or better yet, mark its position relative to the shaft, as well as the position of the turn signal switch in relation to the plastic ring;
- After unscrewing the nut, the steering wheel is removed;
- After aligning the two wheels, the mark is transferred from the removed steering wheel to the new one that is planned to be installed.
Installation of a new steering wheel
Installation
Installing a new steering wheel is performed in the reverse order of removal:
- During the installation process, the steering column switch is set to the neutral position, after which installation can be carried out.
Note. To prevent the nut that secures the steering wheel from falling out of the head during installation on the shaft, a wire or several strands of wire of the required diameter are inserted between the head and the nut.
- After tightening the nut, the head is removed and the wire is removed, after which the nut is tightened.
- Also, when installing the steering wheel, you should turn the turn signal switch ring so that the pin on the hub fits into the groove of the ring (the ring returns the turn signal switch to its initial position when the car exits a turn).
- When replacing a steering wheel with a new one with an adapter, it becomes necessary to install an adapter on the shaft. The new steering wheel is installed in such a way that it cannot come off while driving. The central nut is secured, after which the decorative plug is put on.
- Then the negative wire is connected to the battery, the functionality of the sound signal and the steering column switch is checked.
Installation of EUR
Required Tools
Let's say you purchased an EUR kit - it could be from a VAZ 2110 or from another model, for example, from a Priora. Prepare the following tools:
- Drill together with a metal drill.
- Set of screwdrivers, grinder.
- Long ruler.
All is ready? Let's move on to installation.
Step-by-step instruction
- You need to remove the standard terminal from the block and place it in the block on the harness. We find the standard drive, which is attached to the block. A free terminal must be installed in its place. Now the wire can be placed between the fasteners.
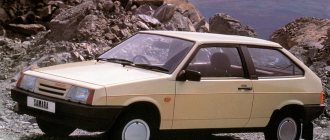
All types of standard steering wheels of the Sputnik/Samara family
We will devote this entry to a seemingly somewhat ordinary topic - steering wheels of the 08 family.
Throughout the assembly line life of Sputnik, there were many variants, most of which were released in small quantities and remained in the shadows of the public eye.
The entire line of steering wheels of the 08th family: 2108, 21083, 2114, 2110
Let's review the varieties in chronological order and start with the Technical Specifications from 1977, where the family's configuration grid already from the very beginning implies several steering wheel options:
Excerpt from the 1977 Technical Specifications for higher trim levels: this means your own steering wheel. adjustable steering column.
- Variant of the period 1978-1979.
Let's start with the very first prototypes of the 1978-1979 model. During this period, a variant of the instrument panel design by Vladislav Pashko was used.
author V. Pashko
V. Pashko and a plasticine model of the future sedan, then still carrying the VAZ-2110 index
This version was the very first steering wheel, and as you can see, its design was made in the trend of the years - a minimum of spokes and excellent visibility. It can be seen in the very first design sketches of the VAZ-2108 interior and demonstration models. There were several copies that died during passive safety tests.
But as you know, beauty requires sacrifice and the option with lower steering spokes will not pass safety tests.
from sketch to running layout.
2. Option for the period 1979-1980.
Another version of the steering wheel, authored by designers Yuri Georgievich Busygin and Nikolai Ivanovich Kuznetsov, chief interior designer of the future VAZ-2108, at that time V. Pashko was already actively working on aerodynamic tests of the G8 and his original version of the instrument panel was not used.
Pre-production steering wheel option Rare photo - 1980, the very first active safety tests of the VAZ-2108. Dmitrovsky training ground NAMI
From a review of pre-production modifications, let's move on to well-known production samples
3. Serial steering wheel 2108 (Standard package).
As we remember from the Terms of Reference above, there were two options. For budget configurations, a well-known steering wheel was used, which lasted on the assembly line right up to the end of the 90s. designers Busygin Yuri Georgievich and Kuznetsov Nikolai Ivanovich
designers Busygin Yu. Kuznetsov N.
option for standard equipment
During the entire production period, there were 3 versions of them:
– Yugoslavian, dark brown color
- Syzran, coffee and gray colors
from left to right 1. Yugoslavia - dark chocolate color. 2. Light beige, produced in Syzran. 3. Gray color, also made in Syzran
Yugoslav plastic production regularly supplied plastic products to the conveyor belt, and the 2108th model was no exception
Yugoslavia, from the back of the signal key
You can distinguish the imported from the domestic version not only by color, but also by the size of the gap between the signal key and the wheel spokes
The Yugoslav version was installed from 1983 to 1989, universally on both early colored and later gray interiors:
Placed on beige
and gray interiors until 1989
Examples of light brown version:
Since 1988 colored interiors are inferior to more fashionable gray and black interior shades:
the shade was not strictly gray, light and dark tones
4. Serial steering wheel 21083 (Lux package).
Catalog number 21083-3402010
The option for richer trim levels included not only the 21083 “luxury” “high” panel, but also its own version of the steering wheel.
it is mentioned in the spare parts catalog
mention in the press about luxury variants of “chisels”
21083rd steering wheel 1985-1986 pre-production copies “luxury” equipment, the panel is not yet final, but the form factor of the serial version can already be traced
Review of the 21083rd steering wheel model in detail:
The rim girth has become larger than the 2108th model
This model was supplied to the conveyor in a limited edition for a limited period of time in the region of 1989-1991, in a chaotic manner, not strictly adhering to the configuration grid:
The originally planned version should have looked like this:
5. VAZ-2110 steering wheel.
It appeared on the assembly line in 1999 and migrated to the cabin of the 8th family due to unification with the VAZ-2110 that recently appeared in production. As a result, the 21083rd “high” panel was equipped in practice with 2108 or 2110 steering wheels.
1987 pre-production steering wheel for the future VAZ-2110
6.VAZ-2114 steering wheel, Samara-2.
For the new family, it developed its own version of the interior with its own 2114th instrument panel, popularly called the “Europanel”, along with it came its own version of the steering wheel - 2114, which was also infringed on by the unified version from the VAZ-2110.
rare photo - pre-production Europanel
In practice, the 2114th steering wheel was rarely installed and mainly on the VAZ-2110M, VAZ 2120 Nadezhda, even on the IZH ODA.
IZH "ODA" with VAZ-2114 steering wheel
The steering wheel of the era of “biodesign”, which was fashionable in the early 90s, had a reduction in the radius of the rim at the bottom, for the convenience of sitting behind the wheel, thick in girth, and is generally considered the most comfortable option, while being controversial in design.
the last and first version of the standard steering wheels of the Samara family
compare the girth thickness of the handlebars
Detailed review:
the correct combination of 2114 instrument panel and 2114 steering wheel, steering column casing with the “original” steering wheel are perfectly matched in geometry24
Installing power steering - step by step instructions
This instruction is intended for VAZ 2110 cars, which do not have power steering at all. Such models were produced a long time ago, but they can still be found on the road today. In this case, the car can be upgraded with your own hands.
You can install the power steering yourself; for this you will need a power steering kit - today it can be purchased for about 20 thousand. From the tools, prepare a set of keys and screwdrivers; you should also take care of the amplifier fluid in advance.