If you plan to service your car yourself - in your garage, then you cannot do without auxiliary devices.
To repair a car, you may need a variety of tools, ranging from a reverse hammer to straighten dents on the body and ending with a universal wrench for an oil filter.
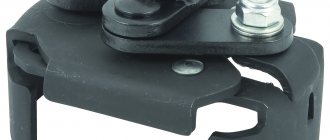
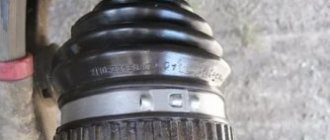
We want to talk about another useful device for the garage, which is a puller
external
CV joint
grenade .
You can buy such a device in a store, but it will be much cheaper to make it yourself - from what you have on hand.
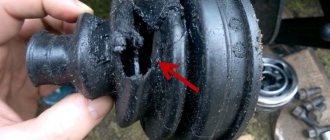
Using homemade
With a puller, you can dismantle not only the CV joint body itself, but also its individual elements - for example,
the outer boot
.
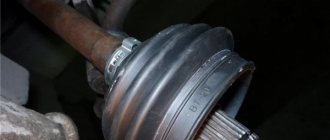
In general, the design of this device is quite simple, and making it yourself will not pose any problems. Dimensions
in most cases the same.
In this article we will take a closer look at two different options for a homemade device. But which one to give preference to is up to you to decide.
Types of CV joints, their design and operating principle
CV joint device: 1. Right front wheel drive;
2. Gearbox; 3. Left front wheel drive; 4. External joint housing; 5. Retaining ring of the hinge cage; 6. 18. Hinge cage; 7. 19. Hinge separator; 8. 17. Hinge ball; 9. Outer clamp of the cover; 10. 15. Protective cover for the hinge; 11. Thrust ring; 12. 14. Left wheel drive shaft; 13. Inner clamp of the cover; 14. Internal hinge lock; 15. 20. Retaining ring of the inner joint cage; 16. 21. Shaft buffer; 17. 22. Internal hinge housing; 18. 23. Axle gear retaining ring. There are several types of CV joints, but only two are widespread in passenger cars:
The design of a ball CV joint includes two cages - an internal one, in the form of a spherical fist (fitted onto the shaft), and an external one (made integral with the shaft end, which is inserted into the hub or gearbox). Between them there are balls placed in special grooves, which are kept from falling out of the hinge by a separator. It is the balls and the grooves along which they move that are the main working elements of the CV joint, since they transmit rotation and allow you to change the angle of one race relative to the other.
To prevent the inner race from coming off the shaft, it is secured with a retaining spring ring located in a special groove on the shaft. The locking ring is also used on the shaft ends of the outer race of the internal joint.
The tripoid joint does not have an internal race; instead, a three-pin fork mounted on the shaft is used. Each cleat on this fork has spherical rollers on needle bearings. Thanks to these rollers, rotation is transmitted, the shaft with the fork can change the angle relative to the cage, and also move longitudinally relative to the outer cage (enter into it), which makes it possible to change the length of the drive.
The connection between the fork and the shaft is splined, but at the same time it fits onto the shaft quite tightly. Additionally, the fork is secured with a retaining ring to prevent it from jumping off.
It is noteworthy that tripoidal CV joints are used only on the gearbox side, but they are not used on the hub side.
Ball joints can be located on both sides. That is, you can find drive shafts on cars with two ball joints, internal tripoid joints and external ball joints, but never with two tripoid CV joints. This is due to the peculiarities of the operation of each of these types of hinges.
It is interesting that some cars (for example, Volkswagen Golf 2) use an internal ball joint of an interesting design - the outer race with the shaft end is not made at the same time, but they are connected to each other by bolts. We'll touch on them a little later.
Basic hinge malfunctions and their symptoms
The comparative simplicity of the design and the small number of components makes this unit quite reliable and capable of working for a very long time without any intervention. But this hinge also has a drawback - it is very sensitive to contamination.
The working elements of the unit - balls, rollers, grooves along which they move, and needle bearings - have a high degree of surface treatment. And sand and dust have a fairly strong abrasive effect, so when they get inside, they lead to intense wear of the surfaces, which ultimately causes the destruction of the unit.
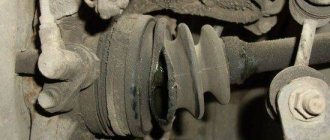
Rubber boots are used to prevent contamination from entering. So they are the “weak point” of the angular velocity hinge. During the operation of the car, the rubber, constantly in contact with the environment, gradually “ages”, and cracks appear in the boot, through which sand gets into the joint.
In general, this is the only reason why these nodes can break. And since they cannot be repaired, they are replaced.
Note that the appearance of a crunch indicates that the hinge has already received damage that cannot be repaired. There are some measures you can take early on. First of all, you should wash the hinge, apply new grease and replace the boot. Then you can change the sides of the installation (that is, for example, swap the left inner hinge with the right one). Another option is to add small shavings of soft plastic to the lubricant.
But since the component parts have already been damaged, all of the above measures only slightly extend the service life and ultimately the unit will have to be replaced, and it is better to do this before it completely collapses, which usually happens along the way.
From the above, it can be understood that the only way to preserve the hinge is to periodically check the condition of the boot and, if even the slightest damage is detected, immediately replace it. After all, a rubber element will cost much less than a CV joint.
Replacing a CV joint is a relatively simple operation to perform, but there are a number of nuances when carrying out an operation with an external and internal unit. Also, the specifics of the work depend on the design of the hinge.
Next, let's look at how to replace external and internal CV joints using the example of several cars that use different types of drive shafts.
Replacing the inner CV joint with your own hands
Oil filter puller: factory and home-made varieties
» alt=»»> The procedure for replacing the “grenade” is the same for the entire front-wheel drive VAZ line, starting with 2108 and ending with the VAZ-2115, “Kalina”, “Priora”, “Granta”. Before removing the inner CV joint, the oil is drained from the gearbox. Then proceed according to the following algorithm:
- Unlock and unscrew the hub nut. To make the work easier, a piece of pipe about 1 meter long should be put on the key.
- The desired side of the car is hung on a jack or lift.
- Remove the wheel.
- Remove the washer located under the hub nut installation site.
- Disconnect the steering tip.
- The CV joint is removed from the hub.
- Using a pry bar, remove the drive and internal joint from the gearbox.
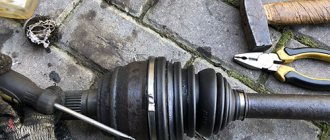
How to change the “grenade” with the drive removed? To do this, clamp the shaft in a vice, loosen the clamps and remove the boot. After this, the hinge is knocked off the splines with hammer blows.
Auto repair school - Do-it-yourself car repair
Oct 12, 2015 Garage by admin
device for removing outer CV joints to my garage arsenal . And finally, the dream has come true! Therefore, I have a great desire to share my joy with you. Check out the device...
I would like to explain the principle of operation of the puller and the need to have it in a garage or auto repair shop during work to replace the outer CV joint or its boot.
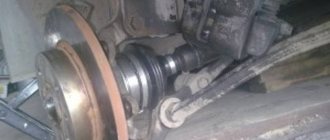
Operating principle: jaws (two bars) are fixed with two bolts on the drive shaft. At the same time, the CV joint shank must pass through the eye of the device until the moment when a nut can be screwed onto the CV joint (2-3 turns are enough). After which, the jaws close completely - using a 14mm wrench, tighten the two bolts. After that, we put a 30mm socket on the nut and begin to tighten it. There is no need to put in much effort at this moment. Since the CV joint “resists” a little only at the very beginning of the process, but after that it goes like clockwork. And oops! Ah, the CV joint has already been removed from the drive shaft! Beauty!
If a person has never independently changed the boot or the entire CV joint itself , then he may not understand the reason for my joy and the advantages of this puller. More experienced motorists and car mechanics, I think, will understand everything without further ado ;). But I can’t help but talk about the advantages of this puller)))
Benefit first! Using a puller can significantly reduce the time and effort spent on work. Since you don’t have to look for a lift or inspection hole, remove the engine protection, drain the oil from the gearbox (then you will need to pump it back in) and use a pry bar to pull the drive out of the gearbox. This is a very significant plus!
Benefit number two. Many may argue that the outer CV joint can be removed from the shaft without a special puller , without removing the protection or draining the oil from the gearbox. A hammer and a soft metal point will be enough! That's right. Agree. But it’s easy to say, but often much more difficult to do. Since for this work you will need an inspection hole or a lift. Plus, in practice, it is not easy to knock the outer CV joint off the drive shaft. There is a high probability that while using a hammer, you will unnoticed break the inner CV joint or simply pull it out of the gearbox (in this case, oil from the box may pour down your collar). And these are unnecessary problems and costs! To avoid them, you will have to call a friend for help, who will try to hold the drive in place while you knock on the outer CV joint. Fun, right?
And the third benefit. The puller will carefully and confidently pull the most stubborn CV joint from the drive shaft! Already checked)) After all, there are cases when it is impossible to knock down the outer CV joint, even if the drive is removed from the car and secured in a vice. This happens if the locking ring gets caught. In this case, active and long-term hammering can lead to damage to the CV joint itself. And, if all the work began with the goal of replacing a burst boot, it ends with the purchase and installation of a new CV joint, which is somehow insulting. Do you agree?
So how? Do you agree that there is no better assistant for working with an outer CV joint ? Have you thought about buying/making such an outer CV joint puller? I hope so))) Otherwise, I was in vain tapping on the keyboard