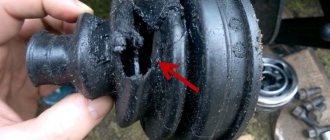
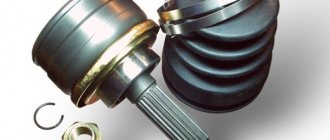
To transmit torque to the steered wheels, shafts with special hinges covered with rubber covers are used. When the casing is destroyed, the lubricant is washed out and dust gets onto the rubbing surfaces. Timely replacement of the CV joint boot reduces repair costs and extends the life of the joint.
What is the dust cover for?
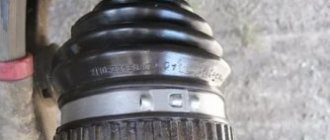
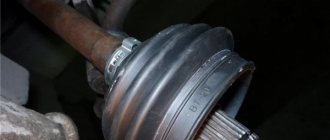
This is a special rubber cover that performs protective functions. Anthers are made in the form of a corrugated tube. During long-term use of the car, various cracks and breaks appear on the surface of the boot, which in turn negatively affect the operation of the grenade (as the CV joint is popularly called).
What is a CV joint boot?
Damage to the integrity of the boot is fraught with serious consequences, because due to dust and moisture entering the mechanism, some of its elements are damaged. Is it possible to drive with a torn CV boot? Experts note that it is highly not recommended to operate a car with such a malfunction, because the hinges may fail due to the ingress of small particles.
Why do you need a grenade boot?
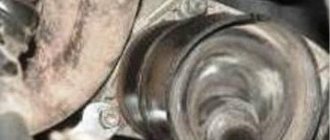
How to inspect the case
This can be done without removing the wheel: just turn it all the way in any direction and shine a flashlight on the part for better visibility. Also feel it with your hands: you will feel the tears immediately. The best inspection option is to remove the wheel (for example, when you are repairing a tube, a tire at a tire shop, or doing a seasonal tire change). Everything will be more noticeable here. Also, for one reason or another, you probably have to put the car in the inspection hole: for example, when changing the oil, adjusting the hand brake, etc. Here, also take the opportunity and inspect the CV joint covers: this can be done more carefully than in previous cases.
You can tell that the cover needs to be replaced by the appearance of thick grease on the suspension parts and on it itself.
Causes of damage
The boot can be damaged for various reasons, from poor quality material to driving style. Let's consider the main ones:
- exposure to large amounts of small particles or moisture;
- excessive amount of lubricant;
- unreliable fastening of the rubber element;
- low quality of the material from which the boot is made;
- natural wear of the part;
- there is too much air left inside the boot after installation;
- aggressive driving style.
Causes of damage to the CV boot
Note! To extend their service life, the anthers must be tightly and securely fixed. But at the same time their flexibility must be preserved.
Basic information about LADA Kalina
LADA Kalina has been produced since 2004; production of the popular second-generation car began in 2013. Kalina-1 is available in three body types: hatchback (model 1119), sedan (model 1118), station wagon (model 1117). There are cars available with petrol engines of three modifications: a 1.4-liter 16-valve engine with a power of 89 hp. s., 1.6-liter 8-valve engine producing 81 hp. s., 1.6-liter 16-valve engine producing 98 hp. With. The LADA Kalina-1 has only a manual transmission with five gears. The front axle has a classic MacPherson suspension, the rear axle has a beam with stabilizer, springs, and shock absorbers.
Typical faults of LADA Kalina-1
Significant malfunctions with Kalina rarely occur, but there are a lot of various undesirable trifles. The car’s clutch is not very reliable and has an impressive service life, regardless of the type of engine, so it can malfunction after 40-50 thousand kilometers. The main source of malfunction is a broken clutch disc.
You need to constantly monitor the oil level in the engine - sometimes it leaks through the gaskets or burns through the piston rings. On the instrument panel there is only an oil pressure warning light, but there is no dial indicator. If the indicator lights up all the time, there is a possibility that the crankshaft is knocking.
A common malfunction of VAZ gearboxes is increased noise. It is difficult to get rid of the humming of the gearbox; sometimes neither replacing the bearings nor refilling with first-class transmission oil comes to the rescue. The transmission is noisy even in new cars, because of this the Volzhsky Automobile Plant has repeatedly completed the transmission.
A problematic element since the days of the VAZ 2108 and VAZ 2109 has been the thermostat in the engine, moreover, the valve in the thermostat was capable of jamming in any position. It's annoying when the engine doesn't heat up to the required operating temperature, but if the engine overheats, it's more problematic.
Electrical problems on LADA Kalina appear mainly of three types:
- the ignition module is often damaged;
- very soon the bearings and diode bridge “die”;
- The window lift cable on the driver's door breaks.
When the ignition coil sparks, the first and fourth cylinders or the second and third cylinders stop functioning. The ESP cable breaks when it falls off the guides.
The main source of cracking noise in outer CV joints is insufficient lubrication; At the factory, in order to save money, they put it in sparingly. The consequence of this is severe wear of the hinges, and as a result, the “grenade” needs to be replaced.
A broken timing belt is a very annoying problem. And if on the 8-valve engine 21114 it is possible to change the belt drive and move on, then on engines 11194 or 21126 the valves bend from the oncoming push from the pistons, repairs will be quite expensive. In addition, a break can occur through a jammed water pump, because of this, if the pump begins to make noise, it must be replaced immediately.
Diagnostic features
You can inspect the mechanism and identify damage to the boot yourself, using a jack and supports. First you need to lift the car and put it on special supports. To ensure stability, the car needs to be rocked slightly. The wheel is then rotated to the side to gain access to the boot, first on one side and then on the other.
Diagnostics of the CV joint boot
If there are tears or deformations, the rubber elements must be replaced. The anthers are changed, as are the brake pads, on both sides at once. It is advisable to carry out diagnostics regularly to eliminate the possibility of hinge failure.
Inspection of the CV joint boot
Installation of spare parts
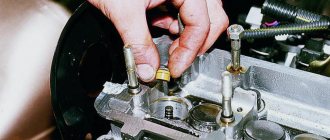
Replacing the CV joint on a Kalina car is done as follows:
- A protective cover is put on the axle. To make work easier, the axle can be treated with lubricant.
- Lubricant is placed in the hinge.
- Lubricant is added inside the protective cover.
- With gentle blows using a wooden block, the grenade is mounted on the axle shaft.
- When the installation of the CV joint is completed, air is removed from the protective cover and fastening is carried out using clamps.
- The steering knuckle is mounted, the hub nut is fixed, and the wheel is mounted in place.
- All fasteners are securely tightened and the car is removed from the jack.
Replacing CV joint boots
At the diagnostic stage, it is necessary to make sure that only the boot needs to be changed and the grenade remains unharmed. If the part is normal, then it is worth starting preparatory work.
Is it possible to drive with a torn grenade boot?
What do you need for work?
To replace the CV joint casing, you must prepare the following tools and materials:
- wheel chocks;
- supports;
- jack;
- a set of new anthers;
- a set of keys;
- special lubricant for CV joints;
- work gloves;
- dry rags;
- mount.
Tools for replacing the CV boot
On a note! You also need to prepare a small amount of gasoline to wash the inside of the CV joint.
Grease for CV joints
Replacement instructions
There is no need to take the car to a service center to replace rubber elements, since anyone can handle this task. Below are step-by-step instructions for replacing grenade boots.
Replacing CV joint boots
Step 1. Place chocks under the rear wheels and jack up the car.
Jacking up a car
Step 2. Place the car on special racks.
Installation of special racks
Step 3. Unscrew the mounting bolts and remove the wheel.
Removing the front wheel
Step 4. To replace the grenade boot, you first need to remove the steering tip. To do this, clean the surface of the tip at the attachment points with an iron brush.
Cleaning the tie-rod mounting area
Step 5. Unscrew the nut securing the steering tip.
Unscrewing the tip fastening nut
Step 6. Using a special puller, remove the tip from its mounting socket. This is done by gently hitting the puller with a hammer.
Removing the tip with a special puller
Step 7. Now you need to remove the stabilizer link. Before unscrewing the nuts, you also need to clean them with a wire brush. Then unscrew the fastening nuts.
Removing the stabilizer link
Step 8. Unscrew the bottom nut first and then the top (or vice versa).
Unscrewing the strut mounting nut
Step 9: Unscrew the ball joint. If the nut does not budge, treat it with special means, for example, WD-40.
Unscrewing the ball joint
Step 10. After unscrewing all the fasteners, lightly press the ball joint using a regular pry bar.
Removing the ball joint using a pry bar
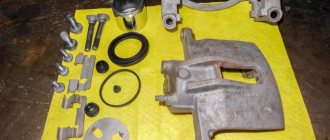
Step 11 : Check the condition of the ball joint. In this case, it should also be changed (see Replacing ball joints).
Inspection of the ball condition
Step 12: Prepare a new replacement part.
New replacement parts
Step 13. Unscrew the ball nut and then unpin it using pliers.
Unscrewing the ball joint nut
Step 14: After also removing the lower nut, remove the trailing arm.
Removing the trailing arm
In most cases, to replace the outer and inner boot it is necessary to remove the grenade. But in the case of the Kia Rio, you can skip this point. The internal grenade is collapsible, so you can replace the casing by pulling the shaft out of it. First, the outer boot is changed, and then the inner one.
Step 15. Remove the clamps from the outer and inner boot.
Removing clamps from anthers
Step 16: Carefully remove the inner boot.
Removing the inner boot
Step 17. Here we see a lot of strange grease that definitely needs to be removed.
Removing old grease
Step 18. In this position, remove the inner grenade bearings and wash them.
Removing the bearings of the internal grenade
Step 19: Pull the inner boot off the shaft.
Removing the inner boot
Step 20. Simply cut off the outer boot so as not to drag all the remaining grease along the shaft.
The outer boot is cut off
Step 21. Install a new outer boot, first applying a large amount of lubricant to the CV joint.
Installing a new boot on the outside
Step 22. Secure the boot with clamps. You can use plastic clamps or iron clamps.
Fixing the casing with clamps
Step 23: Install the inner boot.
Installing the inner boot
Step 24. Install the previously cleaned bearings onto the shaft.
Mounting bearings on the shaft
Step 25. Insert the shaft and bearings into place, generously lubricating the contact area.
Installation of shaft with bearings
Step 26: Don't forget to put the retaining ring on the inner grenade.
Internal grenade retaining ring
Step 27. For now, secure only the large ring on the inner boot with a clamp.
Fixing the boot with a clamp
The fact is that when it takes its position, the air will need to be bleed from the boot. The internal grenade has a backlash, so it will not be known in what position the boot will be. If the air is not vented, the new boot will not last long enough.
Step 28. Before tightening, lubricate all fasteners with a special lubricant to make future repair work much easier.
Applying lubricant to bolts
Step 29: Install the ball joint and secure it. There is no need to tighten the bolts too much - do this after lowering the car.
Fixing the ball joint
Step 30. Also put the stabilizer link in place and tighten it.
Stabilizer link mounting
Step 31: Attach the tie rod end. There is no need to tighten it too much, since the finger is conical and can be pulled for a very long time.
Installing the tie rod end
Step 32. Put the front wheel in place, but do not tighten the bolts completely.
Tightening the front wheel studs
Step 33: Remove the support and lower the machine.
Removing the machine from the supports
Step 34: Tighten the wheel studs.
Retightening the wheel studs
Step 35: Reach under the car and tighten the strut extension nut.
Tightening the strut extension nut
Step 36. Bleed any remaining air from the inner boot. To do this, simply squeeze it with your fingers.
Squeezing air out of the inner boot
Step 37. Secure the opposite side of the inner boot with a clamp.
Fixing the inner boot with a clamp
We are done with replacing the inner and outer boot. Now you need to repeat all these procedures on the other side.
Disassembly algorithm
When a decision is made to dismantle the outer CV joint for replacement, proceed according to the following scheme:
- Using a gate extension, the wheel bolts are torn off and the hub nut is unscrewed.
- The car is lifted off the floor with a jack.
- The wheel is dismantled.
- The fastener of the ball joint is unscrewed.
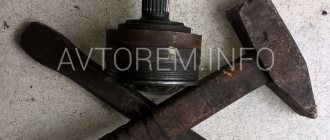
- Having turned the steering wheel as much as possible, you need to press the steering knuckle and remove the hub with the hinge. In this case, you can help yourself a little with a hammer.
- The damaged protective cover and clamps are removed from the grenade.
- To dismantle the CV joint, special equipment is used. If it is missing, the hinge can be knocked down with gentle blows of a hammer.
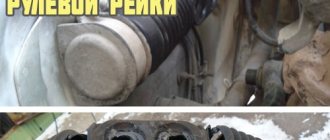
If the boot breaks on the road
As a rule, the driver is found out about damage to the anthers by accident, especially if it happened on the road. But if the car service is far away, then the problem that has arisen can be eliminated on your own using improvised means. To do this, you need a piece of wire or rope, rags, CV joint grease and a plastic bag.
The CV joint boot is torn: what to do?
“Repairing” the boot on the road looks like this:
- Wheel chocks are installed under the car wheels;
- the wheel is jacked up to a suspended state;
- all leaked grease is carefully removed with a rag;
- then lubricant is filled into the casing through the cracks or holes formed;
- the entire assembly is tightly wrapped in a plastic bag, always in several layers;
- Each furrow of the anther is tied tightly with rope or wire.
Cellophane instead of a grenade boot
Note! You can replace the bag with regular tape. With its help, the CV joint will confidently work for several thousand more kilometers.
This type of repair is only a temporary solution, so the boot will need to be replaced as soon as possible. Experts recommend replacing the inner and outer boots at once, so that you don’t have to crawl under the car and disassemble the components so often. It is worth noting that regularly checking the protective casings will prolong the life of grenades. Neither a nail nor a rod, dear motorists!
Preventing grenade malfunction
Under normal conditions, these joints travel over 300 thousand km. Having a reliable design, the CV joint is able to withstand serious loads, but not in the presence of sand and dust. It is enough to burst the rubber of the protective cover, and the lubricant, mixed with dirt, will turn into a thick abrasive paste, which will inevitably undermine the health of the mechanism. Thus, it is necessary to periodically carry out external inspection of grenades in order to promptly detect damage to the anthers. At the first hint of a leak in the seal, repair and replacement should be carried out.
With torn rubber, a grenade can certainly drive for some time, but the longer repairs are delayed, the more expensive it will have to pay. Even if you change the grenade yourself, the cost of repairs will reach 3 thousand rubles, and there are several such units on the car.