2 years ago I became the owner of a Chevrolet Lacetti. At that time, I didn’t know much about cars and this was my first car to drive. During this time, I did a lot with it, I even learned how to replace the valve cover gasket on a Lacetti 1.8 . I’ve been wanting to start this column for a long time, but I never got around to it, there were quite a lot of breakdowns about which I found practically no information, or I looked for it for a very long time. And in general, not all the information agrees with what I found on the Internet.
You can find a huge number of articles on this procedure on the Internet, BUT!!! You will hardly find manuals for the T18SED
. Yes, this is a feature that, if you are not a car enthusiast and do not understand cars, you will learn after a long time by reading the information and being smart. I determined this a year later by looking at the engine cover.
Identifying the problem
We've covered the background, now let's get down to business. At the time of purchase, I had no obvious problems, and there were no leaks anywhere. Six months later, I didn’t like the engine’s performance and I looked under the hood and randomly saw an oily surface. The whole engine was covered in oil, which is not good news. The verdict was - the valve cover gasket, also my engine was leaking from below, so it was decided to replace the gasket and repack the bottom. This was such a beauty under the hood.
First replacement
I won’t tell you that the service man did this procedure for me for half a day and the next day I saw an unscrewed bolt after his work, I will only say that the gasket took me literally 300 km. Immediately after a few days the engine started leaking again. It's possible that this old oil gets shiny again when it warms up, so after a few months I washed the engine and within a few days it was back in oil.
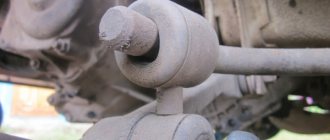
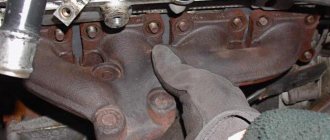
I didn’t change it again, because it was nonsense, I just installed a new one and changed it again? Everywhere they write that this is a Lacetti sore, but not in a couple of days? Everyone writes about some 5000 km, what? I don't even get 500 km. Well, okay, I scored. By the way, another friend who didn’t tighten the bolts enough came to the conclusion that it was leaking from under the HEAD! The photo shows that the darkest part is somewhere in that area. In fact, there are no leaks there, read on. But, in fact, I could get a job for 7 thousand rubles. for completely disassembling the engine and grinding the cylinder head, simply because this Vasya is sure that the leak is coming from there. I went to another service station - they told me that everything was ambiguous here, I needed to wash it, degrease it and drive another 5 thousand km and observe. Now, that's a different conversation! I think all car enthusiasts hate service stations because of specialists like these.
What does the cap do and why does it leak?
By and large, the valve cover in any engine simply should not allow oil to splash while the engine is running, since in most cases it does not receive load from internal pressure. More precisely, it should not receive it.
Crankcase gases
In fact, the cause of an oil leak may be crankcase gases that create excess pressure above the gas distribution mechanism.
A leak from under the valve cover gasket is a problem for the Chevrolet Lacetti.
In the Chevrolet Lacetti, the crankcase ventilation valve is also responsible for the circulation of crankcase gases. If it is clogged, the pressure under the cap will increase, gases will begin to squeeze out the oil, and the first weak link in their path will be the gasket. In this case, the gasket, no matter how high-quality it is, will not last even five thousand miles. Therefore, if we notice oil leaking from under the Lacetti valve cover, it is worth unscrewing and checking the condition of the crankcase ventilation valve. This can be done in a few minutes with any aerosol carburetor cleaner.
Good and bad lids. Version two
As you know, the Chevy Lacetti has a plastic valve cover. Naturally, the engineers took this step in order to reduce the cost and lighten the engine. This affected the rigidity of the lid. In addition, plastic, even the best one, does not resist thermal deformation as actively as aluminum alloy. Once the engine is thoroughly overheated, the valve covers will begin to move, then there is no need to talk about tightness, the oil will penetrate under the gasket.
To check this version, remove the cover and install it on a flat steel plate (or on glass in extreme cases). If there is a gap of at least a millimeter between the stove and the lid, there is a chance that the gasket will leak. Planning the lid (drawing out the mating plane) is a waste of time, because the plastic is thin and by removing some of the material we will only make it worse, the lid will become even less rigid. The best solution in this situation is to replace the cover.
Version three: gaskets and rings
If we know for sure that the surface of the lid is perfectly flat, the vent valve is clean, but the gaskets are still leaking, the problem is most likely in the gaskets themselves. In addition, some people underestimate the role of the O-rings that are installed under the bolt heads. When replacing the gasket, it is imperative to change these rings. Branded GM seals harden very quickly and begin to leak oil, while rings from Kamaz that are almost the same size (they are white and cost an order of magnitude cheaper) can withstand high temperatures and completely retain elasticity for the entire service life of the gasket.
O-rings for bolts from Kamaz fit perfectly on the Lacetti
But gaskets also come in different quality. The frequency of replacement mainly depends on their quality. Some people prefer to use expensive German ones, while others prefer cheaper domestic ones, but having saved on gaskets, we often replace them. For example, a branded gasket GM96 353 002 costs about 450 rubles, but its service life does not please many. In addition, the material profile is simple square. The Parts Mall96 353 002 gasket performs a little better, but the Victor Reinz gasket with catalog number 155345601 received the best reviews. It has a T-shaped profile, and due to this there is a large area of overlap of the plane of the block head.
Fourth version: bolts, sealants and hands
The gasket, even the highest quality one, must be installed with sealant. It must withstand high temperatures and not harm the catalyst. Many companies produce similar products in huge quantities, but sealant is different from sealant - only one that says “sensor-save” and “High-Temp” on the packaging is suitable for the valve cover. If the manufacturer has indicated these two important properties, then the composition of the sealant should already interest us. If applied correctly it will work great.
The 15 bolts that hold the valve cover to the head plane can stretch over time, causing the metal to fatigue and the threads to become loose. Therefore, many people advise changing the bolts with each replacement. Moreover, when tightening, old bolts have a habit of breaking. One bolt costs about 20 rubles (cat. No. 94 500 909), which won’t hurt your pocket too much.
Second substitution
After driving for another six months, this issue began to bother me again, I bought a gasket again and went to another service station. The guy changed everything and everything is great! A couple of days later I started leaking again! Are you kidding me? How did it happen? On DRIVE they write that they don’t leak after 40 thousand km after their work, and others complain that after 5 thousand km it leaks, but for me literally the next day, well, it shouldn’t be like that?! And at all service stations they keep repeating - yes, this is their sore!
Guys, if they tell you this at a service station, send them to hell! In general, this time I washed the engine and didn’t bother with it anymore, because I had enough, I didn’t trust the service station anymore and decided to figure it out myself. Having read, I armed myself with a gasket, rings, a key and sealant. All this cost me an enormous amount. For this amount, I could probably change the gasket at a service station 5-10 times. But! It was worth it. One torque wrench cost about 2000 rubles, the sealant, which I didn’t need, cost 500 rubles, and this time I took an expensive gasket; I had to look for rings around the city.
How to Replace a Valve Cover Gasket
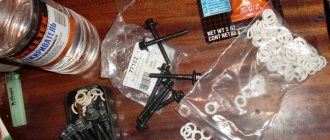
I won’t describe the detailed process, because a year has already passed since that moment, but I think the information is relevant for everyone. I will describe the main points. What was purchased:
— Victor Reinz gasket (900 rub.)
— valve cover rings (300 rub.)
— Victor Reinz sealant (500 rub.)
— Intertool torque wrench (RUB 1,500+delivery)
The amount is not shabby to replace a regular gasket, but when it leaks every other day, there simply could not be another solution.
Everywhere, in absolutely all their manuals, car enthusiasts describe replacement with sealant. But a friend asked me - why is there a sealant if you have a plastic lid? All previous “masters of their craft” at the service station installed a gasket on the sealant, so after the purchase it was decided NOT to use the sealant! Because, logically, it violates the integrity of the gasket and it is not provided there from the factory; it was the home-made people who came up with the idea of adding it there during installation. I decided not to engage in such homemade work and do everything according to the rules, in any case, there is a key, I can change it myself (I thought).
When replacing, there are banal steps - unscrew the bolts, remove the cover, clean it, remove the stuck rings from the grooves, or rather, what is left of them. We clean the adjacent surface on the engine from previous specialists who coated everything with sealant and install it in the reverse order. The difficult part may be installing the cover without sealant; usually it is smeared a little so that it does not fall out of the plastic grooves, but the Victor Reinz
from the “deshman” one in that it has bosses that allow it to fit tightly into the groove and be held in it.
Sequencing
- Using a 10-mm open-end wrench, unscrew the bolt on the negative terminal of the battery and remove the cable from it.
- Using the same wrench, we unscrew all the screws and nuts located on the engine casing.
- Remove and remove the casing.
- Using pliers and a screwdriver, loosen the clamps on the air hoses (one ventilation hose and one hose for the breather, all of this is located in the left corner of the valve cover).
- Remove the loose hoses from the cover.
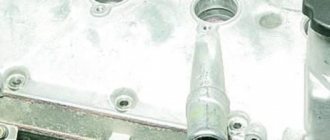
- Using a screwdriver, loosen the oil hose clamp (located in the right corner of the valve cover).
- Remove the oil hose from the cover.
- We remove the connector with the camshaft sensor wiring from the cover.
- We remove all the wires from the spark plugs and move them to the side.
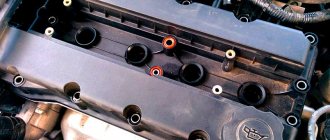
- Using a 12mm socket wrench, unscrew all 15 bolts securing the valve cover.
Bolts are unscrewed
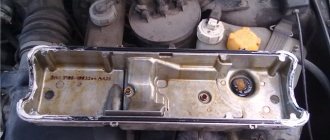
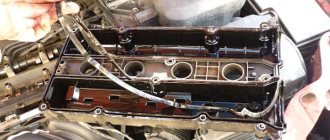
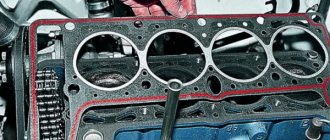
- Remove the valve cover.
Cover removed
- Remove the gasket from the cover.
- We install a new gasket in the groove and reassemble it.
Applying sealant to the lid
Sequence of tightening the mounting bolts