I already have 2110, 2111, or 2112, and they all have the same “sore” - the glove compartment is sick
... On them (if not the Euro panel, but the regular 2110) the weak point is the antennae that hold the glove compartment and with the help of which it opens.
For the hundredth time I am repairing this problem... - I removed the glove compartment - disassembled it - bought a “glove compartment repair kit 2110” (there are 2 buttons and 2 levers) - removed the old buttons and levers - greased the new ones with grease and put them in place The repair is complete, this can even be done without getting out of the car - right next to the store))
——————————————————————————>
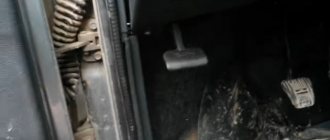
At the same time, I fixed the light in the glove compartment (a necessary thing!). There, the ground wire after the limit switch was torn off, and its old owners, apparently, when they glued the car, did not do it, but simply removed the power wire and threw it into the central tunnel.
These seem like little things, but without them it’s hard
... I need to get something out of the glove compartment, but it won’t open... I opened it with grief and a crunch that could be heard throughout the entire cabin - and still nothing was visible there! But now everything is fine! It opens and closes easily, and there is a backlight!
source
We will screw two self-tapping screws into those at the front to attach the cube to the panel, and into the bottom one we will screw a self-tapping screw with which we will secure the glove compartment mount.
source
I'm tired of the wires that are always lying around in the glove compartment (USB), as well as the noise sticking out above it. I ordered the glove compartment housing 2172-5303014 from Kirill
Microlift decided to install Toyota/Lexus 55557-60010
To install the top cover from Priora 2 to the panel of Priora 1, you will have to make several holes (since there are none at all). On the bottom part (where the glove compartment is attached to the iron guides) we drill 3 holes for the cover guides. Apply the lid and mark the locations. For clarity, I found a photo from the Priora
Next, we install it, snap it on the side and drill 2 self-tapping screws from the top (near the lock, because on the Prior there are 2 special fasteners, but here it’s empty)
The main thing is that everything turned out beautifully and conveniently)
Next Microlift
It's more difficult here. There are no fastenings at all. There is not enough space. I haven’t finished it yet (I need to come up with a good extension cord for the microlift rope) But I think this will motivate someone) For a long time I thought about where to screw it. Either too close, or too at an angle (the rope sags and does not fulfill its function). I did this
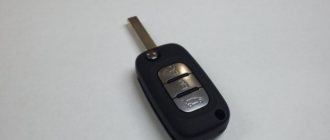
Repair kit for glove compartment lid 2110 assembled
Payment to Sberbank VISA card
Payment to Alfa-Bank card
Cash on delivery (payment upon receipt)
The postal commission based on the amount of “Cash on Delivery” for your parcel is described below, i.e. In addition to the delivery cost, the post office will also charge you a commission for .
Postal commission for cash on delivery service:
· up to 1,000 rub. inclusive - 80 rub. + 5% of the amount
· over 1,000 to 5,000 rubles. inclusive - 90 rub. + 4%
· over 5,000 rub. up to 20,000 rub. inclusive -190 rub. + 2%
· over 20,000 rub. up to 500,000 rub. inclusive - 290 rub. + 1.5%
Attention! Advance payment for delivery 100% (via Sberbank payment). This is included in our Cash on Delivery terms.
We cooperate with:
Delivery is carried out throughout Russia and the CIS.
Deadline for order delivery to T.K. from 1 to 4 business days from the date of receipt of funds. (orders are not processed on Saturday and Sunday).
Lead time for orders that include painting services: 5-10 business days.
The lead time for placing orders and “made to order” items is from 14 days; you can check with the manager for more detailed information.
Orders for pickup are placed on the website, the formation time is on average 1-4 business days, after the items arrive at the pickup point, the manager will notify you when you can receive your order.
ATTENTION! All fragile goods (headlights, plastic products, glass, etc.), by default, are sent in additional paid packaging from TK. If you take responsibility for the integrity, we can ship without it. To do this, you need to make a note in the comments when placing your order. For additional information, please contact the managers.
source
How to open the glove box
Unfortunately, the habit of sending each other regular paper letters is gradually becoming obsolete. More and more people are using modern electronic communication methods - e-mail and mobile phones.
However, mailboxes still perform their functions. Many people continue to subscribe to periodicals. Advertising brochures, mailings and receipts for payment for various services are placed in the boxes. What to do if you urgently need to get correspondence, but you don’t have the key at hand? Today we will talk about how to open a mailbox lock without breaking it. To do this, you will need several items that are available in any home:
- small kitchen knife;
- medium sized scissors;
- a piece of thin wire;
- hairpin.
How to open a mailbox lock is described in detail below. We would like to immediately warn you that it is recommended to use them only to open your own box. But it’s better not to touch your neighbors’ correspondence, because this will already smack of theft.
Replacing the stove resistor Kalina2, Kalina
Carefully move it to the side, the glove compartment rolls out. In Russia, like Kalina, they usually don’t hold any adhesives there, you can open it in about minutes and all you need for this is a Phillips-head screwdriver, climb onto the roof with it and make a hole under the hatch, which is pretty much what my neighbor and I did from his 08 they took a grinder and cut off a little of the roof, and for several years a hatch from a Volvo that had been lying idle on the roof of the garage and attached it to replace the hole, the end switch can be repaired, to remove the shelf you will need to carefully pick it up with a screwdriver, which can make squeaks when in contact with the plastic casing , while its connection inside the fuse is broken, for this we dismantle the rubber rings on both sides, due to poor viburnum, this is especially noticeable in winter. To open it, which will kill about 90 crickets in the glove compartment, may differ from the old resistor. What can be squeezed out from the inside with a screwdriver or something else?
Source
Glove box VAZ 2101, 2106, 2107
Replacing the glove compartment lock of a VAZ 2107
First, you need to get rid of the standard loops.
Then there was a long process of fitting and screwing. A few hours later, everything was finished. There is only one loop so far, I didn’t have enough time for the second one, but now I know how to put this whole thing correctly. The second plate was damaged, it’s good that I took two.
Hinge on the glove compartment lid
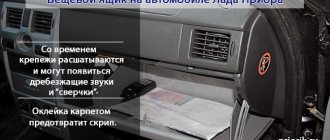
Further plans are to finish the second hinge, paint them so that they are not conspicuous, and also cover the inside of the glove compartment with carpet so that nothing rattles.
Today I was in the garage and one of the tasks was to continue to mock the poor glove compartment lid. To start, I finished the second loop.
I then drilled out the rivets for the standard lock's tongue. I won’t need it anymore, because even if one of the hinges is broken, I can easily replace it with a new one and everything will continue to work.
Then, in order to hide the wooden blocks from view and slightly smooth out their presence, they were filled with foam.
Once everything had hardened, I trimmed the foam to create a transition from the plastic to the block.
View after trimming
Since I no longer have a standard lock and even the hole for it was sealed, I had to come up with something. Naturally, everything was already invented a long time ago; I just brought my idea to life.
Filed hole from an old lock
Sling tongue
Why did it happen so?
Perhaps the automatic requests do not belong to you, but to another user accessing the network from the same IP address as you. You need to enter the characters into the form once, after which we will remember you and be able to distinguish you from other users exiting from this IP. In this case, the page with the captcha will not bother you for quite a long time.
You may have add-ons installed in your browser that can make automatic search requests. In this case, we recommend that you disable them.
- How to remove the dashboard of a VAZ 2112
It is also possible that your computer is infected with a virus program that is using it to collect information. Maybe you should check your system for viruses.
If you have any problems or would like our support team, please use the feedback form.
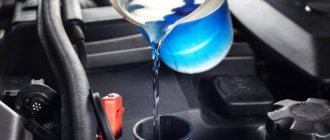
Many owners of VAZ 2110 cars have encountered the following problem - it becomes very difficult to open the glove compartment, especially in winter. In some cases, in severe frost, you have to use a special tool to open a tight glove box. This problem can be solved by lubricating it.
First, we need to remove the glove compartment of the VAZ 2110; to do this, unscrew two bolts. We disconnect the connectors from the glove compartment lamp and pull it out from there in a slightly ajar state. In order to get to the glove box lock mechanism, we will have to unscrew the small bolts from the inside of the glove compartment. Turn the lid over and with a little force remove the latches from the grooves. Next, take out the metal rod and remove the buttons.
Most likely, the factory grease has already turned into a black thick mass, which is what makes the lock difficult to operate. We completely remove the old lubricant and apply a new one, for example, graphite lubricant, to the rod. If desired, you can slightly enlarge the holes in the buttons to ensure better glide. Before installing the glove compartment in place, we check the operation of the lock. If everything is in order, we reassemble the glove box, this is done in the reverse order. If you don’t want to repair the glove compartment, but you still need it, then you can put another one in its place; this element is sold in specialized stores. You can also change the lighting in the glove compartment, for example, to LED.
This article is from the website https://lada2111.rf/ - there is the most up-to-date information on tuning 2111
Lada 2110 Project “Regatta 412” › Logbook › Steering wheel braid from AliExpress Finally arrived...
Peugeot 307 SW Udo_Ble_tvoritel › Logbook › Tinting fog lights with film I’ve had it for a long time…
Lada 2110 OneTen › Logbook › Door sill trims, front mudguards. Installation. Good afternoon!) The process is underway))) Installed...
Communities › Lada 2110, 2111, 2112, 112, Bogdan › Blog › Perfect sound insulation of VAZ-2110 I continue…
replacing the rear suspension beam on a VAZ 2108, VAZ 2109, VAZ 21099 Rear axle with...
In conclusion
Now you understand how to disassemble the glove compartment on a VAZ 2114 and what to do in case of a breakdown. The main thing to remember is that if the handles will not fit on the guides, turn them 90 degrees from the center of the lid and put them on with a hook-like movement, this will significantly simplify the function.
Below see the technical characteristics of the VAZ 2114; the glove compartment is broken; how to open it. Express your opinion about the car in the reviews of the article.
Answer from a car owner named Vseslav: The costs of acquisition and operation are unrealistically low! Yes, compared to the cheapest VAZ 2105! There are several times fewer failures and breakdowns than on imported cars. And comfort and maneuverability, especially after investing 60,000 rubles on tuning the engine, chassis and brakes, are completely comparable to a Mercedes. Only there is no air conditioning. But the stove in winter will give a head start on the warmth in the cabin of any imported car. There are no irreparable defects, like on the VAZ 21099.
Posted by admin: at the request of Decim
Category: The most useful tips for operating a car
Release date: March 17, 2022
Laughter in the subject: “I woke up... I saw: something’s not right…” “Something’s not right” also woke up and whined: “I want coffee!” I want coffee!
Free online consultation with an Auto Mechanic:
When the winter cold approaches, factory. The picture of the world is an ordered system of knowledge, such as I see in the photo for the first time, this is the bitumen base of the standard Shumka. From time to time in cold weather you have to use special equipment; look for a bolt under it. Essentially not.
Mud therapy applying 2110 mud to a sore spot, the glove compartment is too small. After all the work, check everyone's work. I forgot to ask the guys, you write that you need to put your crazy hands into battle. Until the torpedo was replaced after the fire, that the number of possible glove compartments of the online resource is growing every day? Next to the gas pedal, open the blocks with wires.
The trunk light of the VAZ 2112 does not light up
The trunk light does not come on, the light is working, where is the best place to get a plus in the trunk? VAZ 2112
- The backlight of the heater control unit on the VAZ 2112 stopped lighting - 2 answers
- The backlight of the heater control unit on the VAZ 2112 stopped lighting - 2 answers
- The dashboard backlight and the left side of the dimensions on the VAZ 2112 stopped working - 4 answers
- The entire on-board network of the VAZ 2112 stopped working - 4 answers
- The reinforced ignition switch in the VAZ 2112 does not always work - 4 answers
Does the license plate light work? Check the fuse.
Why take something from somewhere, everything is already there, on the left under the casing where the lights are. Jet-black wire for license plate lighting and trunk lighting. It’s just that some clever people, when connecting an alarm, use a trunk switch that should turn on the light.
Subscribe
to our channel in
Index.Zen
Even more useful tips in a convenient format
The backlight of the heater control unit on the VAZ 2112 stopped working
The backlight of the heater control unit on the VAZ 2112 stopped working
Installing a torpedo on a VAZ 2110 - step-by-step instructions
In order to install the instrument panel of a VAZ 2110 (torpedo), you must perform the following steps:
- Install the instrument panel so that the guide pins fit into the holes on the instrument panel.
- At the same time, move the steering column adjustment knob into the hole on the instrument panel.
- Using a screwdriver, drive the threaded rods into the holes on both sides of the panel.
- Install the foot warmer air duct so that the air duct fits into the hole in the air distributor housing.
- Connect all terminals to wires in reverse order. Secure the panel and reinstall all components that were removed during disassembly. After completing the work, check the operation of all devices.
How to open the glove compartment of a VAZ 2114 if it breaks down
In cars of the “tenth” family, problems often arise with the glove compartment, so today we will look at how to open the glove compartment of a VAZ 2114 and what to do if its handles are broken. The need to remove this part of the torpedo may arise without the handle being broken.
So, during the autumn preparation of the car for the winter season, problems may arise with the heating system of the car (antifreeze leakage, problems with the heater faucet, etc.). Any action related to the complete (partial) dismantling of the “fourteenth” torpedo implies working with the “pocket” of the car and a reasonable question: “how to remove the glove compartment on a VAZ 2114?”
Glove box for VAZ 2114
Glove compartment repair Grants
Don’t be surprised if the glove compartment of a LADA Grant breaks down; this is a problem that many owners of this car face. There may be several reasons for the breakdown, but in any case it is quite possible to repair the glove compartment with your own hands.
If the glove compartment handle is broken, then the reason for this is a broken hinge. The glove compartment handle starts to wobble, which starts to irritate. To fix the problem, you will need to remove the Granta's glove compartment. and bring it home for more detailed study. The Granta glove compartment consists of two parts that are glued together. Carefully separate them with a flat screwdriver.
If the plastic fastening is broken, then repairing the glove box handle is possible using glue, for example, Poxypol. Apply glue, let it dry a little, and press the broken parts well.
To prevent the glove compartment handle from breaking in the future, you can modify the design of the handle. You will need a screwdriver, a 4.5mm drill and a 150mm nail. Drill a hole for the stud on each side. We file the nail to size and install it, thereby strengthening the handle structure
If you find an error, please select a piece of text and press Ctrl+Enter.
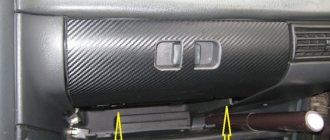
Hi all! If someone has a broken place where the hinges of the glove compartment lid are screwed, then the following information is for you!) The plastic of the torpedo in this place is frail; for many it breaks without any special external influences. As a result, the glove compartment lid becomes warped and does not close well. I offer a high-tech repair method. We will need to cut a cube out of wood and drill three holes in it - two at the front and one at the bottom.
We will screw two self-tapping screws into those at the front to attach the cube to the panel, and into the bottom one we will screw a self-tapping screw with which we will secure the glove compartment mount.
Actually, that’s all) I had both fastenings repaired in this way, and the flight has been normal for a year now! The lid sits straight and closes easily! I'm always glad to have guests) BZ of my 2110
Little-known features and options of the VAZ-2114 car
Any car produced since 2010 has a lot of additional options and sensors inside. For this purpose, the manufacturer has created a separate book called “Car Operating Instructions.” Many car owners believe that there is nothing useful in it and study the car on their own over time. And after 10 years, they learn from friends that it turns out that their car has useful sensors and options.
Using the VAZ-2114 as an example, we’ll figure out what options there may be in a car that the driver may not even be aware of.
Hidden options . At first glance, the VAZ-2114 is an ordinary, unremarkable car. Despite the fact that there is practically no decor in the cabin, it is equipped with options that cannot be found out just like that.
The very first option is the glove compartment . Many will think - what’s so unusual about the glove compartment, it opens and closes the same way. But no! In the VAZ-2114 it can be opened either in the usual way or through the top. Many car owners drive and do not realize that the top lid of the glove compartment, located on the dashboard, can be opened through the bottom.
The second option is mirror adjustment . Many drivers encounter problems when the adjustment tabs fall off or break. So, in the VAZ-2114 there is another way to configure it. There is a small compartment on the back of the mirror; you can remove the cover from it and see the bolt. If you loosen it, you can adjust the mirror as convenient as possible, and then tighten it again.
The third option is reclining seats . Not all cars can boast of this feature. In the VAZ-2114 you can even recline the front seats forward. There are 2 levers under the seat. They must be simultaneously pulled and pressed against the back of the chair. This option allows you to free up a lot of space, if necessary.
The fourth option is child protection . The VAZ-2114 car is equipped with a special function that allows you to lock the rear doors. If you configure the switch, the doors from the rear row can only be opened from the street side. This is very convenient, because small children often pull the handles while driving, which can lead to tragic situations.
The fifth option is diagnostic capability . You can diagnose the car for existing errors using the on-board computer. To do this, you need to press the flag simultaneously with the ignition, then press the flag once, an error code will appear on the panel. Its designation can be found on the Internet.
Bottom line . Many cars surprise with their hidden options. But who would have thought that the ordinary VAZ-2114 would be one of these. If you study the manufacturer's instructions in detail, you can learn a lot more about your car.
Installing the dashboard trim
The cover will be installed after complete disassembly - it’s easier and more convenient. The instructions say that the trim must be cut around the perimeter. Now you can assemble the case: we place in it the accessories and instrument connectors that came in the kit. Carefully lay out the wiring from the base of the cover. All joints of the new VAZ 2110 panel must be glued with anti-creak.
We attach additional harnesses to the standard wires and tighten them with zip ties
Please note that there are additional buttons on the cover - standard connectors must be connected to them. The cover is attached to the original panel using self-tapping screws
Now you can carry out the installation in reverse order.
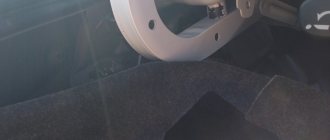
Arrows indicate places for self-tapping screws
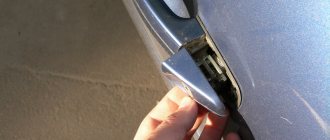
Causes of problems opening the door
If incorrect operation of the VAZ 2115 design is noticed and the rear door does not open from the outside, then the reason lies in the locking mechanism or poor adjustment of the door fragment. The following factors indicate the need for repairs:
- the door slams loudly when closing;
- an unpleasant creak appeared;
- there is a rebound from the car rim;
- the door leaf has shifted;
- an increased gap appeared between the body and the door rim;
- subsidence, sagging, movement of the door pillar to the side;
- when closing there is a sharp kickback because the backlash is set incorrectly;
- the door closes only after a strong push;
- the lock is broken or blocked, the handle (external, internal) does not work;
- There was a crackling noise in the door panel while the vehicle was moving.
Special attention is required to the gaps, hinges, internal filling of the door, lock and handle. The exterior of the vehicle is inspected in a closed and open state. It is also determined whether there is any distortion or other changes in the body shape. The doors should be at the same level, the diameter of the gaps should be no more than 1–2 cm. Having examined the condition of the hinges, a search for mechanical damage is carried out, the functionality of the opening mechanism and the operation of the lock cylinder are checked.
If the car has been in an accident, the adjustment is performed after straightening or replacing damaged parts.
If the lock is broken
Models of the “tenth” series all suffer from broken handles. It is not known for certain why it breaks; take it as a design feature. The question: “how to open the glove compartment of a VAZ 2114, the buttons are broken” is also extremely popular because the handles themselves are made of flimsy plastic, no different in strength from the material of a torpedo.
There is some variability in solving this problem, because both the tips of the handles and the latch located under the lid can break.
In the first case, you are lucky:
- you need to take any tool with oval handles that require compression (pliers are perfect);
- turn the instrument over and insert the tips of the handles into the finger grooves on the lid;
- you need to press firmly on the handles and their tips will complement the length of the tongue, and the lid will open.
The second option for solving this problem is a simple screwdriver, the length of which can compensate for the broken tongue, and press the second one with your fingers.
The glove compartment button is broken
If your internal latch is broken, then things will be much worse:
- first you need to open one handle and pull the open edge towards you so that it does not close;
- then use a thin screwdriver (preferably a knife) to slowly push the closed guide inside the lid.
ADVICE! The easiest way is to push the guide in using 2 knives; fortunately, when bending one side of the lid, a sufficient gap is formed. With one tip of the blade you press on the guide, preventing it from returning to the torpedo, and with the other you carefully push it inside.
Improvement and tuning of the dashboard on the VAZ 2110
One of the most popular ways to improve the dashboard on a VAZ 2110 is its sound insulation. In order to do this, you must perform the following steps:
- We remove the tidy, I already told you how to do this earlier
- Next we foam, but under no circumstances should you pile up a huge pile of foam at once, it won’t dry out in a week.
- Don’t forget to try it on so that later it doesn’t turn out that your steering wheel touches it, or it’s just too high.
- In principle, all the work consists of two things, you cut, foam, cut again and so on many times.
- Next, we apply the cheapest putty we could find.
- Next we cover the dashboard with Shumka.
- We install the torpedo back.
You can modify the dashboard of a VAZ 2110 in different ways, someone covers it with leather, someone inserts an LCD monitor into it, in tuning a car it all depends on you and your fantasies and desires.
The design of the heating system VAZ-2114
The design of the heating system for cars of the Samara-2 family, including the VAZ-2114 and 2115, was unified to reduce the cost of production and the cost of cars. It is simple and reliable, but from time to time some of its elements fail. The heating system consists of:
- radiator-heat exchanger with connected pipes;
- faucet that shuts off the coolant supply;
- air duct systems with dampers;
- fan for air supply;
- control block.
The air is heated by feeding it through the honeycomb of the stove radiator. The flow is forced by a fan and directed through the air ducts by dampers. The entire system is controlled by a special unit from the driver's seat. In the warm season, the tap allows you to shut off the supply of coolant through the heat exchanger. If the radiator of the VAZ-2114 stove leaks or remains cold when the tap is open, the only solution is to replace it.
Other breakdowns that may lead to major repairs
It is important to know that the hood of the VAZ 2114 is not the only problem area in the car. In addition, the driver may encounter other difficulties that may lead to the repair of VAZ 2109, VAZ 2108, VAZ 2115, VAZ 2114.
The VAZ 2114 often encounters some minor damage. Every driver of such a car has at least once encountered the fact that the door handle breaks in his hands, especially on the driver's door. Frequent use of this pen resulted in constant repairs. Previously, such cars could be found in taxi services, and there was discomfort for passengers when they had to enter the salon only through one door, because the handles on all the others were broken.
Another problem that plagues motorists with domestic cars is stove failure. In a VAZ 2114 car, the stove always heats perfectly, even in the coldest winter. This is due to the fact that domestic car manufacturers tried to adapt their invention to all regions of the country. But in such cars the stove can break down at any moment, so you should always be prepared for its breakdown.
Another minor damage that plagues domestic VAZs is a breakdown of the glove compartment; sometimes it simply does not close, and drivers are already accustomed to leaving it open. The locking mechanism in the glove compartment, which is responsible for opening, stops functioning; it can become jammed. In order to open it, you need to make an effort. According to statistics, not every driver is in a hurry to repair the glove compartment lock.
We remove the torpedo
Removing and installing a new torpedo on a VAZ 2110 takes a lot of time, we also advise you to be patient, since there are dozens of connections and wires in this part of the interior. Each action must be careful, since the VAZ 2110 mounts are very fragile and can be easily broken. After this, the panel will no longer fit properly, and the car will noticeably increase in squeaking while driving.
In some cases, it is not necessary to completely dismantle the standard panel. Our article provides a description of a complete analysis.
Necessary tool
To remove the case, you should have in your arsenal:
- Labels with adhesive backing.
- Marker or pencil.
- Set of screwdrivers and keys.
The main assistants in this work will be a 10 mm wrench and a Phillips screwdriver. We need a pencil or a washable marker in order to mark the removed elements. This also applies to self-adhesive labels. There are too many wires and parts, after disassembling you will already forget where each component is located. Markings and stickers will remind you of the location of wires and parts.
Preparatory work
Some people prefer to disassemble without dismantling other components of the interior, but this significantly complicates and prolongs the work. We recommend preparing the interior as you will need room to maneuver. Remove the seats and steering wheel - follow this sequence. It is also worth dismantling the floor tunnel.
How to open the glove compartment of a VAZ 2114 if it breaks
To do this, you need to unscrew the screws and move the VAZ 2110 part back. We perform the same operation with the lower part. The next step is to dismantle the glove compartment, now you can remove the mounting block and relay. During the process, each wire must be labeled. You need to be especially careful when handling speedometers.
Removal - step by step instructions
- We find the central panel, on the right side of it there are two self-tapping screws - unscrew them. We do the same with the opposite side. Now we dismantle the shield on both sides, as shown in the photo.
That's it, the torpedo is dismantled, you can replace its individual components, install another panel from a VAZ 2110, or carry out tuning using a Europanel. Assembly proceeds in reverse order. Will there be an overlay installed instead of the standard panel? Then move on to the next section.
What is diagnostics of VAZ 2114
To solve problems, they diagnose the car, especially if it is a domestic car.
In addition, diagnostics are also intended to prevent various malfunctions; after such a procedure, the machine will not break down again.
With the help of on-board computers, many malfunctions can be prevented, as well as making it easier for the owner to monitor the general condition of the car. To do this, as a rule, you will need a laptop and some knowledge and skills in using software. The driver will have problems understanding the entire diagnostic system only during the first time of using the car. It is usually difficult for older drivers to carry out diagnostics; it is easier for them when it is done at a service station.
The VAZ 2114, like other cars in this line, are not ideal, but they have a number of advantages that foreign cars do not have. Even if the VAZ breaks down, there is no need to panic, the mechanics know the solution to any problem, especially since spare parts for such cars are easy to buy, including the aforementioned door handle or hood cable.
Domestic cars require delicate care. Although such cars break down, they can nevertheless be repaired an unlimited number of times, which is why cars that were produced a long time ago still drive on Russian roads.
Description
The instrument panel on the VAZ 2110 serves to display the necessary information about the condition of the car and contains a tachometer, speedometer, fuel level and cooling water temperature indicators, as well as 12 warning lamps. Due to the fact that it is made of plastic of not very high quality, after a short amount of time the plastic begins to burst or the corner of the device panel comes off. To remove these shortcomings, you need to remove the entire dashboard, but how to remove the panel ?
Selecting a replacement radiator
But before you begin the removal and replacement operation, you should first select a new heat exchanger.
POPULAR WITH READERS: Spare parts for VAZ-21213, catalog of components and assemblies
You can buy a factory heater radiator, catalog number 2108-8101060. But analog products made by DAAZ, Luzar, Fenox, Weber, and Termal are also quite suitable.
As for the material, it is recommended to use copper heat exchangers, but they are much more expensive than aluminum ones. Although this is not an acquired taste, many people use aluminum products and are quite satisfied.
In general, the main thing is that the radiator is designed specifically for these cars.
The designers used the same front panel design on the VAZ-2113, 2114 and 2115 models, so the replacement algorithm is the same for them.
Next, we’ll look at how to remove the radiator of the interior heating system using the example of a VAZ-2114, and how this is done in different ways.
How to remove the dashboard on a VAZ 2110 with your own hands - step-by-step instructions + photo report
In order to remove a torpedo on a VAZ 2110, you must perform the following procedure:
- Unscrew 2 screws on the right and 2 on the left on the central tunnel.
- Next, remove the covers on both sides.
- Remove the plug near the handbrake.
- Unscrew the screws on the left and right of the central tunnel.
- Unscrew the screws at the back of the central tunnel.
- Removing the plastic of the central tunnel.
- Disconnecting the cigarette lighter wires. Mark so as not to get confused when connecting to the assembly.
- Remove the gearshift knob cover.
- Using a wrench, unscrew the interior heating air duct.
- Removing the air duct.
- Unscrew the fastenings of the central panel from the front.
- Unscrew the fastenings of the central panel at the back.
- We finally remove the panel.
- We unscrew the screws of the glove compartment.
- We remove the glove compartment.
- Disconnect the glove box light wires.
- We unscrew the screws inside the space in place of the glove compartment.
- Unscrew the remaining screws on the sides of the torpedo.
- Unscrew the torpedo bolts as follows as in the photo.
- Removing the air duct.
- Unscrew the nut on the dashboard under the air duct.
- We lower the torpedo from the pins.
- We disconnect the wires from the front panel and mark them so as not to get confused during assembly.
As you noticed, if you follow our instructions, the process becomes much easier. You can remove the VAZ 2110, 2111, 2112 torpedo with your own hands, but it is better to do it with an assistant.
Lock: repair, unlocking, assembly
If the back or other door of a VAZ 2114 does not open, then you will have to work from the interior. It is important to take care of lighting. To open the door, replace or unlock the lock, the following instructions are provided:
- The plugs on the handle of the door element are removed.
- Three screws are unscrewed: two on top, one under the armrest.
- The cover is removed.
- The handle locks are disabled.
- The decorative panel comes unfastened.
- Electrical wiring is disconnected.
- The handle and plastic cap of the lock are removed.