01/25/2022 1,704 Alarms
Author: Victor
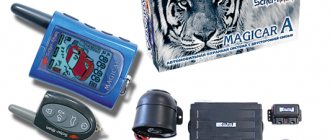
Alarm system with auto start Sheriff is a product specially developed by engineers of the American company Progressive Innovative Technology (PIT) for use in Russia and the CIS. The range of security systems is represented by five options, the basis for which was the budget complex Sheriff ZX-700. Each version provides: a feedback option, improved electronic mechanisms and dynamic encoding technology for signals transmitted between the transceiver and the key fob.
[Hide]
Basic characteristics of the Sheriff alarm
Overview of the main parameters and characteristics of the Sheriff car security system:
- The supply voltage in the car's electrical network should be from 9 to 15 Volts, so it is possible to potentially install the “alarm” on motorcycle equipment;
- when the security mode is turned on, the current consumption of the anti-theft complex will be no more than 20 mA;
- the presence of five programmable channels for controlling additional electrical equipment;
- the optimal air temperature for the microprocessor after installation on the machine should be from -40 to +85 degrees;
- operating range of communicators (pagers) with feedback - no more than 700 meters;
- for an additional key fob without a display, the operating range will be 20 m;
- the radius of transmission of an emergency signal from the transceiver can be up to 1.6 km;
- The operating frequency for sending and receiving signals over the radio channel is 434 MHz.
Weather conditions and the architecture of the area with dense buildings in the city can reduce the range of the Sheriff key fob several times.
How to find out the alarm model
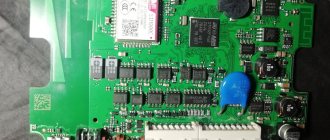
Having learned the model of the security system, the user will be able to purchase a suitable spare part or replace the communicator. You can identify the alarm using the key fob by opening this device. It is necessary to pry the latches and remove the top cover. The alarm model is recognized by markings on the board. The detected combination of characters is entered into the search bar of the browser and the types of security systems are determined. To find out the alarm model, you need to find the markings in the area of the antenna unit.
Equipment
Description of the elements included in the delivery set of Sheriff car alarm models with automatic engine start:
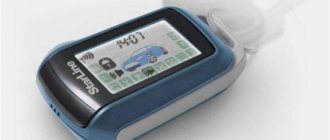
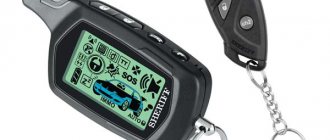
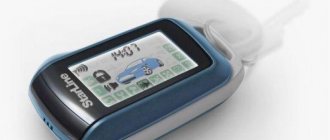
- Two-way communicator. The device is equipped with a liquid crystal screen. It displays information regarding the operation of the system in the form of indicators.
- Spare pager. Since it does not have a display, there is also no feedback in the device.
- Alarm control unit equipped with a microprocessor device and a relay module.
- A transceiver equipped with an antenna and an LED indicator.
- Dual zone sensitivity and shock controller. Designed to determine any physical impacts on the vehicle body.
- Temperature controller. Depending on the model, it may not be included in the package.
- Button for controlling the system in the “Valet” service mode.
- Limit switch (trigger) for installation on the hood or trunk.
- A set of wires, cables and mounting elements that allow you to install and connect all components of the system.
- Service user manual. The manual indicates all the nuances that allow you to connect and start the alarm, as well as configure the basic parameters of the system.
The siren is included in the delivery package of Sheriff car alarms at the request of the manufacturer. If necessary, this device, as well as door triggers, can be purchased additionally.
Video: description of the elements included in the delivery of the Sheriff ZX-1070 security complex
The Arnage channel in its video talked about the configuration of Sheriff alarm systems using the 1070 model as an example.
“Sheriff” with auto start and connection to Mitsubishi
Sheriff car alarms (the term “security systems” is of little use to them by modern standards) is a classic example of budget devices in the lower price segment, which are purchased solely on the principle “so that the doors open and the LED blinks, maybe they won’t get in”). Frankly outdated models continue to be supplied under this brand: for example, the Sheriff APS-2500 alarm system still uses the Keeloq algorithm, which did not protect against code grabbers even ten years ago. In more “fresh” and complex systems, instead of real technical improvement, cheap marketing tricks are used, misleading the average buyer.
As an example, the instructions for the “Sheriff ZX-1090 PRO” alarm system indicate the use of a certain DISARM DIALOG code in it. From the buyer's point of view, it is logical to assume that we are talking about dialog code, which is now considered to be maximally protected from intellectual hacking. In fact, the dialogue code (of dubious complexity) is used here only in the main key fob: for normal use of the entire set it has to be turned off (!), otherwise the additional key fob will not disarm the car.
It is impossible to talk about a full-fledged dialogue code at the level of StarLine systems (in the design of Sheriff key fobs there is obvious mimicry with the second generation StarLine systems) or Pandora.
Only the latest Sheriff models like the ZX-1095, which provide for working with a CAN bus and validating a transponder tag, can be called more or less meeting modern requirements. However, it is still equipped with an additional key fob without dialog code support, and to fully use both key fobs you have to switch to a primitive dynamic code. Thus, Sheriff cannot provide any significant competition in the middle price range, and in fact, the main sales of this brand fall on the most budget lines.
Key Features
Description of the main functions for setting up and capabilities of Sheriff alarms:
- The “Anti-scattering” option is designed to automatically turn on the security mode if it is accidentally turned off. If the user presses the communicator buttons in his pocket and the pager deactivates the car's security, the system will be able to determine this by the doors that do not open. As a result, the security mode will be activated automatically.
- Possibility to disable the protection function in two stages. First, the user turns off the door lock using the remote control, and then enters a personal code to deactivate it.
- Ability to turn on security on a car with the engine running.
- The presence of an engine blocker that allows you to break the electrical circuit of the ignition system when you try to start it unauthorized.
- Remote control of the Panic function. Its essence lies in the forced activation of the alarm mode, as well as external lighting devices. This makes it possible to scare away car thieves, as well as designate the vehicle as protected.
- The presence of eight security zones operating independently from each other. The system provides protection for the body, engine compartment, trunk, engine, ignition, etc.
- Possibility of automatic activation of alarm mode in case of accidental power failure.
- Option to call the car owner from inside the car.
- Availability of “Anti-robbery” mode. The essence of this function is to block the power unit if a robbery occurs on the vehicle. The engine stops after a certain time (usually 30 to 60 seconds, user configurable). This algorithm is implemented to ensure that the criminal drives to a safe distance for the car owner, but is unable to leave the crime scene.
- Availability of system trigger memory. If, when the security mode is on, an alarm is activated and the user is outside the range of the antenna, data about this will be saved. When the car owner enters the transceiver operating area, messages about the siren activation will be sent to the communicator.
- Ability to bypass a faulty alarm zone. When turning the security mode on and off, the system monitors all components. If one of the faulty devices is detected, the alarm will warn the car owner by sending a message to the pager.
- Availability of the “Polite backlight” function. Its essence lies in the temporary delay in turning off the lighting system in the cabin.
- Ability to control standard vehicle lighting devices.
Video: review of the Sheriff ZX-1095 car alarm
User Andrey Tarakanov, in his video, briefly spoke about the capabilities of the Sheriff anti-theft systems using the 1095 model as an example.
The alarm must be used correctly
Alarm units belonging to the Sheriff brand and equipped with auto start have a gearbox selection loop. It is easy to notice that the statement is not true for all devices of the family in question - sometimes software settings are used. In a car with a manual transmission, the owner must perform certain actions, and only then will autostart be allowed. All connections, moreover, are made according to the basic diagram, which is true for any car.
Key fobs ZX-1070, main and additional
We hope everything is clear here.
Each Sheriff alarm key fob is equipped with a key that allows you to immediately perform a remote start. For most models, this will be the Ch2 key, which is pressed twice. By the way, the sequence discussed above is suitable for a car with a manual transmission. But a car with an automatic transmission can also be equipped with autostart. The Sheriff 1000 car alarm, for example, in the options table has a special setting SF14, which allows you to select the type of gearbox. Initially, the value is set to “1”, that is, “Manual gearbox”.
The owner of a car with an automatic transmission is required to perform the same actions as listed in the text above. But at the same time, as stated in the instructions, the engine stops immediately, and you can leave the cabin at any time.
Advantages and disadvantages
Advantages of Sheriff anti-theft systems:
- reliable vehicle protection;
- price affordable for most consumers;
- Great functionality, which is typical for full-fledged anti-theft systems.
Disadvantages characteristic of these alarms:
- Lack of a protective case for the communicator in the package.
- Quiet pager warning tones. When an alarm is triggered or messages are sent to the remote control, the user may not hear the warning.
- False alarms of the system. This problem is usually due to the shock and sensitivity controller being set incorrectly.
One-way models
Simple models that do not have feedback have a minimal set of functions. 2 communicators are used for control.
Sheriff APS-2625 and 2400
Sheriff APS-2400 has the following features:
- dynamic coding (the system has minimal resistance to hacking);
- the presence of two-level sensors in the kit that quickly respond to an attempt to open or damage the vehicle;
- the presence of a service button (this element is used to deactivate the alarm if the key fob breaks down);
- the need to link each remote control to the head unit;
- low price (a system with a basic set of functions costs no more than 3,000 rubles).
The Sheriff APS-2625 alarm system is equipped with the following options:
- manual activation of protective mode;
- manual disabling of security functions;
- two-stage deactivation of protective mode.
If the key fob malfunctions or is lost, the system will have to be controlled manually. If necessary, the user can link up to 4 communicators to the main unit. The emergency mode is activated by pressing the emergency button. Impact controllers have 2 sensitivity zones.
Sheriff APS-2500 and 35 Pro
Sheriff APS-2500 is distinguished by the following features:
- remote control of the alarm function regardless of the system operating mode;
- accompaniment of pressing the service button with a sound notification;
- protection of all parts of the car equipped with controllers (if the sensor does not work, the alarm system bypasses it).
The APS-35 Pro model is equipped with 2 auxiliary channels, which are used to connect adjustable interior and body parts. One connector is a power connector, which is rare among budget anti-theft systems. The set includes 2 keychains with shock-resistant housings. The functionality includes the following options and modes:
- quiet and passive security modes;
- Anti-robbery function;
- two-level disabling of the security mode;
- remote control of the “Alarm” option;
- turbo timer;
- separate opening of the driver's and passenger doors.
Types and models
Versions of Sheriff car alarms that can be found on sale:
- Sheriff ZX-925. The anti-theft system with a feedback option is equipped with a programmable engine blocker and can protect a car with the engine running. There is a memory for storing alarms, as well as the ability to control the doors from the ignition switch. The actual range of the key fob under ideal terrain conditions will be about 800 meters. The system uses dynamic communication encoding.
- Sheriff ZX-757 is an interactive alarm model with feedback and interactive command encryption with a key fob range of about 2 km. The main feature of this version is the ability to connect the system via a digital CAN interface. There is a silent mode for car protection, as well as protection for a vehicle with the engine running.
- Sheriff ZX-945PRO is a budget alarm system with feedback and dynamic signal encoding. It is possible to sequentially unlock the door locks in the car, as well as close them again when the ignition is turned off with the Turbo Timer turned on. In addition, the system can determine the voltage in the vehicle's electrical network and calculate the discharge of the battery. A personal access code can be used for emergency alarm control. There is a passive engine blocking mode using the LDT-920S card.
- Sheriff ZX-1070PRO is a model with remote engine start and extensive functionality. The user can start the car engine according to a timer, at a certain time, and also when the temperature value drops to a specified threshold. To register all events that occurred with the alarm, the “Anti-theft” option is used.
- Sheriff ZX-750PRO is a budget version of the alarm system with auto engine start. There is a “Pipe Timer” option, thanks to which the user can prevent rapid wear of the power unit running on diesel fuel. It is possible to control the electric windows when the security mode is turned on. The Anti-Robbery function will prevent the theft of a vehicle in the event of a violent seizure of the car.
How to connect
According to the installation instructions, to connect the components of the anti-theft system, you need to perform the following steps:
- mount all the elements (the head unit and service button are installed in a hidden place, the antenna complex is placed on the rear window, the siren must be connected under the hood);
- stretch the wire going from the ignition switch to the head unit (a cable is used that receives voltage when the engine starts);
- extend the wires of the limit switches and siren to the processor unit;
- connect the ground cable (according to the car alarm connection diagram, a standard nut located on the body is used for this);
- cut the standard cables used to control the door locks (such wires are laid from the unlocking switch to the locks);
- connect the main switch wire to the green cable;
- protect the wiring with electrical tape and corrugated tubes;
- connect the antenna unit (the cable of this element cannot be inserted into the wiring harnesses that provide power supply).
Connecting the device
Before installing the system, it is necessary to disconnect the battery in order to de-energize the on-board network. To do this, under the hood of the battery, you need to disconnect the terminal clamp from the negative terminal.
Connection procedure
The alarm connection is made as follows:
- First, the microprocessor module is installed, the device is placed in the cabin as discreetly as possible. It can be installed behind the instrument cluster to ensure a minimum length of wires when connecting.
- The siren is located in the engine compartment, in a place that is as hidden as possible and protected from moisture and high temperatures. The bracket that will fix it is first installed. The device is placed with the socket down to eliminate the possibility of moisture accumulation inside.
- Limit switches are installed on the doors, hood and luggage compartment. Triggers are not permitted in gutters.
- The sensitivity controller will be installed on a flat surface in the central part of the body. For installation, you should select a partition that separates the engine compartment from the passenger compartment.
- The transceiver with antenna is placed on the car window. There should be no metal products or body parts within 50 mm of the device to prevent a decrease in signal quality. The wire from the transceiver must not be twisted into a coil, otherwise interference may occur during signal transmission.
- The service button is placed secretly in the car interior.
Connection diagram
General connection map of the microprocessor alarm module:
Wiring diagram for connecting the Sheriff control unit
Table: features of connecting a 6-pin connector to implement engine autostart
| Color | Description |
| Blue | Contact IGN1, power output for connecting a relay. The electrical connection circuit must be protected with a 30 ampere safety device. The contact is designed to control the ignition line of the machine. |
| Red | Power output for power supply of electrical switching circuits IGN1. The electrical circuit is protected by a 30 amp fuse. |
| Yellow | Output for controlling the starting system of the car's starter mechanism. Can be used to configure engine start on machines equipped with a Start/Stop button. |
| Green | Power relay contact for controlling additional equipment via the ignition system |
| Red with blue stripe | Power supply input on the switching line of the built-in light signaling relays |
| Violet | Power relay output for controlling an additional electrical circuit of the ignition system. Used to work with machine auxiliary equipment. |
Typical user mistakes
To identify errors and difficulties in the operation of the security device, you need to perform the following steps:
- Enters the options settings menu.
- Using the control buttons, function SF1 is selected.
- The first button on the pager is pressed.
- The alarm will be triggered by a siren and external lighting devices, this will be an error code. Then the pulses generated by the system are deciphered.
Table: correspondence of errors and signals of the anti-theft system
| Pulse type | Cause of the problem |
| 1 long | No errors in alarm operation |
| 1 short | The signal from the engine speed sensor is not programmed |
| 2 short | No communication with parking brake position sensor |
| 2 short | Manual transmission selector is not in neutral position |
| 4 short | Manual transmission mode reserved for engine autostart |
| 5 short | There is no signal from the trigger installed on the hood of the car |
| 6 short | There is no connection with the limit switch located on the brake pedal |
| 1 long and 1 short | No battery charge signal for 60 seconds |
| 1 long and 2 short | No connection to tachometer |
| 1 long and 3 short | There is no communication signal with the generator device in the car |
| 1 long and 4 short | The power unit stopped due to the lack of pulses from the engine speed control sensor |
| 1 long and 5 short | Engine speed at idle exceeded the threshold of 4 thousand per minute |
| 1 long and 6 short | The voltage in the car's electrical network has become more than 16 volts |
| 1 long and 7 short | The alarm mode was activated when the car security was activated |
Why doesn't autorun work?
Knowing how to enable and disable auto-start on the Sheriff alarm system, malfunctions in the operation of the security system may occur. Let's consider several typical situations.
The engine cannot be turned on, or it starts and then immediately turns off
Make sure all startup conditions are met. If for some reason the engine does not start or starts but stalls within five minutes, the Sheriff alarm tries to turn on the engine again. In this case, four attempts are made. If they are unsuccessful, the system records errors and waits for the next command. After this, four attempts are made again.
The engine does not start
Most often this occurs due to failure to fulfill any neutral condition. In this case, the security device immediately notifies about the problem by flashing light or sounding, and the corresponding data is recorded in the device.
Additionally, make sure that the Sheriff alarm is configured correctly and the temperature/time parameters are set correctly. For details, please refer to the user manual.
Please note that some security systems do not support this option. For example, the question often asked on the Internet is how to enable auto-start on the Sheriff ZX 930 alarm system. Note that in this model the automatic start device is not built-in, but it is possible to connect external control systems.
Knowing how to enable and configure autostart on the Sheriff alarm system, you will be able to use the option and not worry about accidental failure of the device. In the comments, tell us if you encountered any difficulties in setting up and how you managed to solve them.
Instructions for the Sheriff car alarm
According to the operating instructions, before using the automatic alarm Sheriff APS95LCD or another model, you need to install a working battery in the control panel. The battery is inserted into a special compartment located behind the back cover.
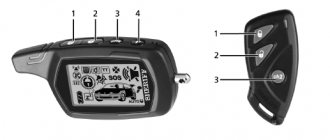
Control key fob
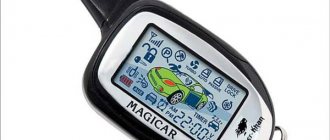
Indication of icons on the key fob screen
Description of icons on the alarm pager display:
- The alarm is on.
- Timer for autostarting the engine.
- Indication of the connection between the transceiver and the communicator.
- No signal with key fob.
- Security mode is activated.
- Indicator of locked door locks.
- Vehicle security is disabled.
- Bypassing the main kick controller area.
- The sensitivity sensor has tripped.
- The alarm mode was activated as a result of activation of the shock controller. If the icon is flashing, then protection is enabled, bypassing the faulty regulator.
- “Anti-robbery” or “Anti-grab” mode.
- The alarm mode is activated as a result of activation of the limit switch installed in the door. The indicator may indicate activation of security when bypassing a faulty door zone.
- Vibration mode for alerting the user is enabled.
- Setting or disabling timer options.
- Low battery charge in the key fob.
- The remote control battery is faulty and needs to be replaced.
- Calling a pager.
- The battery energy saving mode in the key fob is turned on.
- Indication of a running engine or turning on of the power unit.
- Temperature sensor icon. Turns on when temperature trigger is activated.
- Tailgate open symbol.
- The anti-theft system service mode is activated.
- Car security with sound.
- Enabled vehicle protection when the siren is turned off. The indicator should be crossed out.
- Night alarm mode.
- The siren turns on when the ignition is activated.
- The car hood or trunk is not locked.
- The external lighting devices of the car are turned on.
- Display for setting the current time.
Numbers of control elements on communicators
Programming a new key fob
To bind a new communicator to the alarm control unit, perform the following steps:
- In the car, the ignition system turns on, turns off, and then turns on again.
- The button to enter the service mode of servicing the system is pressed three times. The siren will play one extended signal.
- The first control button on the pager is pressed. A siren will sound to confirm that the code has been recorded.
- Then press key 1 on the second programmable remote control. These steps are repeated for each linked communicator.
- Transponder power is activated. The successful binding of the key fobs will be indicated by siren signals.
To exit the setup menu, you must turn off the ignition or do not take any programming action for eight seconds.
Changing your personal code
To change the password, perform the following steps:
- The vehicle security mode is turned off.
- The ignition in the car turns on, turns off, and then turns on again.
- Within ten seconds, the button to enter the service mode is pressed several times in accordance with the current code. This must be done within the next ten seconds. If the factory code has not been changed, then the key is pressed once.
- The ignition in the car turns off and on.
- Over the next 10 seconds, the next password character is entered. If it is standard, then the key is pressed once.
- The ignition in the car turns off and on. If the current password is entered correctly, the siren will sound with one sound.
- Within five seconds the ignition is turned off and a new code is immediately indicated. The Jack button is pressed five times. If the system is ready to accept a new password, one extended siren signal will sound.
- Within 5 seconds, press the first key of the communicator to set the code. The siren will emit one signal.
- The button to enter the service mode is pressed several times. The number of “clicks” must correspond to the first digit of the password. According to its meaning, the siren will play several sound signals.
- Within the next ten seconds, the second button on the pager is pressed. This is required in order to enter the menu for assigning the second digit of the code.
- The Valet button is pressed several times to enter the next password value.
- Then the car's ignition is turned on.
Emergency disabling of security
Emergency deactivation of the security mode is carried out using a personal password as follows:
- The car door opens with a key. This will activate the alarm mode.
- The ignition in the car turns on, turns off and turns on again.
- Over the next ten seconds, use the service mode entry button to enter the first character of the password. The number of clicks must correspond to the value.
- The ignition turns off and on.
- The second digit of the code is entered in the same way.
- The ignition system in the car is turned off and activated. The security mode should be disabled.
Autostart
Before starting the engine remotely, you need to prepare the vehicle for this:
- The gear lever on a car with the engine running is moved to the neutral position.
- The handbrake is raised.
- The ignition system is turned off and the key is removed from the lock.
- The power unit must operate for a certain time programmed by the user. The car owner must leave the vehicle and lock all door locks.
In order for the engine to turn on on command, you need to press the third key of the communicator twice. Autostart will occur within two seconds. The key fob display will show a running engine indicator.
To stop the motor, button 3 is pressed twice again.
At time intervals and by temperature
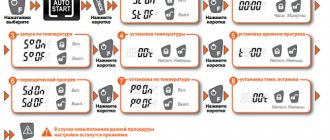
Setting up autorun by timer is as follows:
- The car security mode is disabled using the service button or pager.
- The car's ignition system turns on.
- Within five seconds, press the button to enter the emergency service mode three times. One siren sound will sound. Then the key is “clicked” once.
- Within five seconds, turn off and turn on the ignition system. The alarm status LED will switch to blinking mode with single flashes.
- To enter the timer autorun setup menu, press the service button six times. If you want to turn an option off or on, button 1 on the communicator is pressed once. To enter the autorun settings menu based on air temperature, press the service key four times.
Programming engine idle speed
The idle speed adjustment procedure is as follows:
- The vehicle's parking brake lever is raised. Security mode must be disabled.
- The ignition is activated and the power unit starts.
- Over the next ten seconds, the button to enter the service mode is pressed five times.
- The brake pedal is pressed and held. The external lighting devices of the car will begin to flash, which indicates that the speed value can be programmed.
- The brake pedal is released within one minute. As confirmation, the siren will sound and the warning lights will blink.
Software system setup
To programmatically configure the security system, perform the following steps:
- Vehicle protection mode is disabled.
- The key is inserted into the lock and turned to turn on the ignition system.
- The button to enter the service mode is pressed for five seconds.
- The siren will sound. After this, the key is “clicked” once.
- The ignition in the car turns off.
About connection and programming
Let's look at the part of the diagram where the “power connector” is shown:
The “red-blue” cord receives power for the “dimensions”, and then it is switched inside the main unit. And the current flowing through the “red” wire is switched by 4 built-in relays (see figure). The standard circuit protection with the “red” wire should be rated at 30 Amps or less. Everyone knows how to connect every cable except the “purple” one. But it is useless to connect the “purple cord” to the “15/2” terminal, if we talk about standard locks. Options for its connection are discussed below.
Let's understand the purpose of the 6th contact
The text of the instructions indicates that the “IGN3” contact can either duplicate the “IGN1” terminal, or it is used to control additional equipment. The latter in this case includes:
- Starter protection line: current enters it after the engine starts, and the line breaks simultaneously with the ignition being turned off. Note that when starting from the key, the line remains open.
- From the “IGN3” terminal you can remove the voltage used to emulate pressing the brake or clutch. The option is in demand if installations with a “START/STOP” button are equipped with autostart.
- The “IGN3” wire can receive a pulse that coincides in time with the end of the motor operation in the security mode. The pulse duration is controlled by software.
You will need to choose one from several algorithms. What is done even before connecting the wire itself, but after installing the signaling in the car.
If there is a terminal that duplicates the “IGN1” contact, it must be used to control the crawler, which allows you to “deceive” the standard immobilizer and start the engine. This statement is common, but in this case it is not true. The ZX-1070 alarm, for example, is equipped with a separate output, indicated in the first diagram by the abbreviation “Immo”. By the way, the algorithm can be configured in different ways, and in the instructions it is designated as “CH4”.
For anyone who doubts what was said above, here is a screenshot of the basic guide.
Let us note once again: in the diagram, the crawler’s output is indicated by the abbreviation “Immo”. In the table, the same wire is called the “CH4 line”.
Typical user mistakes
The design of the Sheriff system, equipped with auto-start, provides for the following protection: if the engine was started automatically, then switching to alarm mode will result in its shutdown. Everything looks logical here, but now let’s look at another situation when theft protection is not active. In the “disarmed” mode, the engine can be started at any time. But if you open the door when the engine is already turned off by the system, this feature will be canceled. The latter is true for cars with a manual transmission, and bypassing this protection is easy:
- After unlocking the door, the engine is started “with the key”;
- The ignition is turned off, the “correct exit” procedure is repeated again (see above).
This is what the features of Sheriff brand alarms look like.
The system stores error codes caused by the owner and related to autostart in its memory. The decoding of all codes is given in the basic instructions:
To find out what the last error code is, you need to switch the system to programming mode. We are talking about programming options related only to autorun and not related to protection functions. How to enable this mode is described in the manufacturer's instructions. Here you should read the next chapter.
Software system setup
So, let all connections be made according to the basic diagram. Cord “6” coming out of the “power terminal block” can remain free. Let's open the instructions and see how to program options related to autorun:
- The system is disarmed and the ignition is turned on;
- Within 5 seconds, the Valet service button is pressed 3 times;
- After the sound signal, the Valet button is pressed again;
- The ignition is turned off within 5 seconds, and after the sound signals are turned on again.
What is the price
Approximate prices for the purchase of Sheriff anti-theft systems:
| Name | price, rub. |
| Sheriff ZX-925 | 6500-7000 |
| Sheriff ZX-757 | 8500-9000 |
| Sheriff ZX-945PRO | 5000-5500 |
| Sheriff ZX-1070PRO | 9500-10500 |
| Sheriff APS-2400 | 4000-4500 |
| Sheriff ZX-750PRO | 7000-8000 |
| The price is valid for three regions: Moscow, Chelyabinsk, Krasnodar. | |
Possible problems and their solutions
If Sheriff alarms do not respond to commands sent from the key fob, you need to make sure that the antenna is installed correctly. It must be mounted at a sufficient distance from metal parts. An equally common problem is the false alarm of the siren. In this case, the sensitivity of the sensors is adjusted in accordance with the parameters specified in the instructions. If the doors do not lock when the security mode is turned on, check the condition of the wiring. Damaged cables are replaced.
- How to attach a key fob to a Sheriff alarm system
- Sheriff ZX 925 manual
- Sheriff ZX 970
- Alarm Sheriff APS95LCD B4 instructions
Video: operation of the automatic start of the Sheriff alarm using the example of a VAZ 2108
User Ramil Islamgaziev showed in his video how the automatic start of the Sheriff alarm works on a VAZ 2108.
Do you have any questions? Specialists and readers of the AUTODVIG website will help you ask a question
Was this article helpful?
Thank you for your opinion!
The article was useful. Please share the information with your friends.
Yes (66.67%)
No (33.33%)
X
Please write what is wrong and leave recommendations on the article
Cancel reply
Rate this article: ( 3 votes, average: 4.67 out of 5)
Discuss the article:
Description
An alarm system with auto start is a system that not only provides security, but also warms up the engine. The latter is activated through autostart of the car from the key fob. The price varies between 3,000-70,000 rubles, depending on the availability of various additional settings.
The main components of the system are similar for all manufacturers, but there are undoubtedly differences. Therefore, the choice of alarm system should be approached carefully, weighing all the pros and cons. For example, the Starline car alarm kit includes:
- Two remote control key fobs.
- Central block.
- Paging decoder.
- Shock sensor.
- Led indicator.
- Service button.
- Remote controlled relay that blocks the engine.
Operating instructions for manual transmission
There are several sequential steps in which autorun will work correctly without unexpected circumstances arising. How to start a car using the key fob? There is no general algorithm for cars with automatic and manual transmission.
Algorithm for mechanical:
- Move the gearbox lever to neutral gear.
- Put the car on the handbrake.
- Leave the vehicle and close the doors.
- Activate the alarm, turn on the engine autostart.
A nuance that car enthusiasts will have to get used to after installing autostart is the habit of putting the vehicle in neutral gear. If you leave the car in gear and then try to use autostart, it simply will not work.
Autostart at time intervals or at specified temperature
If you want to configure the engine to start at certain time intervals, you need to:
- Press F twice;
- Go to the indicator flashing mode;
- After you click on the same button again, only the selected indicator will remain;
- The frequency of its flickering indicates a previously established cycle:
- No blinking indicates that the function is disabled;
- Uniform flashing – the cycle lasts an hour;
- Two flashes and a pause - a two-hour cycle;
- Three flashes and a pause - four hours;
- Four flashes and a pause - twelve hours is set.
Using the door lock button, you can turn on this function and, while continuing to press, adjust the time interval. You can use the door open button to disable the option, which will be indicated by the indicator stopping blinking. To make the selected status active, press F. Successful programming of the mode will be reflected by the constant presence of the indicator icon. You can enable or disable the option in any state - ARM or DISARM.
Temperature autostart has an absolutely identical algorithm, the only difference is that the cycle corresponds to +5, 0, -5, -10, -15 and -20 degrees Celsius. As with the temporary autorun option, the system state has no effect.
Engine starting options
Previously, the security system only had the function of remotely starting the car engine. Today it is possible to configure and combine various car alarm capabilities, which brings maximum comfort to the life of the vehicle owner.
Depending on the purpose, starting a car is divided into types:
- Remote. This type of start is used to warm up the engine in advance before driving.
- An automatic type of start is a short-term start of the car engine when a certain temperature in the environment is reached or after a period of time. The parameters under which autorun will be triggered are specified in advance in the settings.
Functions
The main functions that an installed alarm system with auto start has include:
- Car security. Every part of the vehicle is protected. Engine - from start. Wheels, windows and body react to impacts and shocks. Ignition - by switching on. The doors, trunk and hood are protected from opening.
- Vehicle protection. A car alarm gives a visual or audible signal when there is an attempt at robbery, theft, and so on.
- Alarm protection. The car alarm itself is protected from the selection of codes for hacking.
- Self-diagnosis. The car alarm automatically diagnoses security sensors and reports the status.
- Service functions (at the request of the car owner, various operations can be configured - searching for a vehicle, locking the door locks after a certain time, and so on).
Operating instructions for automatic transmission
The sequence of actions after which the car is started by autostart from the key fob on an automatic transmission is partially similar to a manual transmission.
Algorithm for automatic:
- Move the automatic transmission lever to Parking mode.
- Leave the vehicle and close the doors.
- Activate the alarm, turn on autostart.
The algorithm must be executed strictly in the given sequence. If you skip any of the steps, the auto engine start for the cars will not work.
