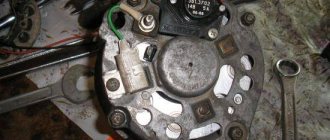
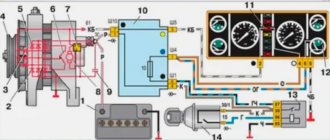
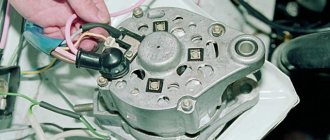
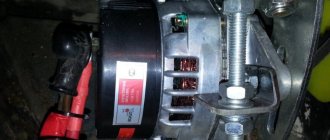
This article will discuss the VAZ-2106 generator. Its connection diagram is below, but at the very beginning we will talk about the general design of this device. With its help, mechanical energy is converted into electricity. The main function of a car generator is to recharge the battery. It also helps provide power to all equipment located in the car, including the engine. On all machines, generators produce alternating current. Only after some transformations does it stabilize and become permanent.
Which generator is better to install on a VAZ 2106 - Lada master
The generator of any car, even a diesel one, is the gray eminence under the hood. Without it, the car won't even take a step. It can be annoying when the engine is tuned well and runs within decency, but for some reason the electrical equipment refuses to work properly. If we are talking about our VAZ 2106, then with a high degree of probability the whole problem lies in the G 221 generator, which was installed on the descendants of the Fiat 124.
Electrical diagram of VAZ 2106
As a matter of fact, if we look at the electrical circuit of the VAZ 2106, which we have given below just in case, it turns out that it differs from the 2101 circuit only in the presence of additional electrical appliances, which entailed some changes. And the generator in the base of the six is the same as in the 2101, its name is G 221.
There can be no complaints against it as long as it works. But the fact is that the design of an electric machine is not at all designed to use such a number of consumers. As a result, insufficient current is supplied to the relay regulator, which in turn leads to undercharging and slow death of the battery. Disorder.
How to connect a standard generator G221
This is expressed quite clearly. Especially if the owner installs additional, non-standard consumers in the car that work almost constantly. It can be:
- fog lights;
- powerful audio system;
- preheater;
- refrigerator, TV, additional heater.
In short, any step that leads to an increase in electrical energy consumption threatens premature battery discharge, even on the road, with the engine running and at high speeds. That’s why it’s worth understanding how the VAZ 2106 generator connection diagram works and what alternatives there are.
Replacing a VAZ 2106 generator with a G222
The easiest option is to replace the standard generator. On new. It makes no sense to talk about the generator design as an electric three-phase synchronous machine. Not about that now. We are faced with the problem of connecting the standard G 221 generator in order to avoid mistakes when installing another, more powerful and stable G 222 generator, which was already installed on the VAZ 2105.
How is it better than the standard six? Actually nothing. With the exception of a few nuances that can be decisive when the load on the on-board electrical circuit increases. It can be installed on a VAZ 2106 engine using one of two methods:
- Install a generator with a built-in relay instead of the standard one.
- Install the modernized G 222 generator.
Actually, it’s much easier not to complicate life by altering the wiring, albeit minor, but to take the simple path.
Modification of the G222 generator for the VAZ 2106
Relatively simple. Make some adjustments to the design of the 222nd generator. Externally, these two units are almost identical. They are distinguished only by a built-in battery charging relay. It is installed in the 222nd generator along with the brush block and it is clearly visible from the back, even if you don’t read the markings.
The difficulty of installing a 222 generator is that you need to thoroughly know the connection diagram. After studying all the nuances of the circuit, you can simply connect the standard remote battery charging relay to the new generator without making any changes to the circuit. This is the simplest and most rational way.
The difference in these two generators is not only the presence of an integrated charging relay. The fact is that the G221 operates with an output of 42 A, and the generator from the 2105 G222 produces 50 amperes. The increase in power was achieved by increasing the cross-section of the rotor winding, and structurally, this is the same generator that was installed on all Zhiguli classics.
Checking the functionality of the 2106 power system
In order for the G 222 generator to be installed without making changes to the connection diagram, it is enough to install the brush block from the six generator. It installs instead of the integrated one without any problems. At the same time, it is better to replace the remote charging relay.
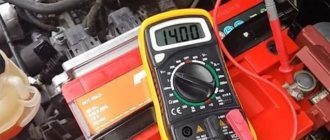
After replacing the generator and connecting it according to one of the provided diagrams, it is enough to check the functionality of the system as a whole. To do this, it is necessary, with minimal current consumption by third-party electrical appliances, to check the voltage at the battery terminals at medium engine speeds. This is approximately 2.5 thousand revolutions per minute. The voltage at the battery terminals at these speeds should be 14 V.
Thus, you can solve the problem of insufficient power of the standard generator and replace it with a more powerful G222 from the VAZ 2105 engine. Good luck to everyone!
ladamaster.com
The battery is dead.
Perhaps you forgot to turn off your headlights while parking. If the battery is discharged in the morning, you need to start the car with another battery. Check the voltage on the battery, if it is normal 13.8 - 14 Volts, then charging is in progress and that means your battery needs to be changed. Just in case, it needs to be charged with a charger, if the battery is not old, perhaps it will still work. If, after starting with another battery, the test shows that the voltage remains 12 Volts, this means that the generator is not working, you need to check the belt tension and if it is normal, then you need to repair the generator.
Connection diagram for the VAZ 2106 generator
Relay regulator.
In such cases, the easiest way is to replace the entire rectifier unit.
This is interesting: Power steering hums when cold or constantly: causes and repair of power steering
Keep an eye on the warning lights, and good luck on the roads! In this case, an electric current will flow through the armature winding.
When the voltage value is about 7.5V, the magnetic flux force of the electromagnet will be sufficient to attract the armature and open the contacts. To repair a VAZ generator, follow these steps: First, you need to disconnect the plug from output 67 on the unit. Voltage regulator and brush assembly But the problem is that the generator produces electricity unstably.
The nominal voltage G corresponds to the voltage of a typical VAZ battery - 12 volts. The field winding, which is located on the rotor itself, is powered through a voltage regulator. In this case, the relay contacts remain closed, which leads to the warning lamp on the instrument panel lighting up. It is also possible that the lamp itself may fail, but this can be easily checked by setting the charging current level using an on-board ammeter.
Having achieved the required tension, tighten the fastening nut to the adjustment bar. Each winding consists of six coils connected in series. The voltage in the on-board network is below 13.6 V is checked by an autotester. The alternator belt is poorly tensioned. Tighten the belt. Too many powerful electrical consumers are turned on, especially at low engine speeds.
If this is difficult to do, then unscrew the lower mounting bolt
Please note that there must be a certain resistance in the stator, depending on the generator model. The brush holder is secured with a screw on the back cover of the generator
But the fact is that the design of an electric machine is not at all designed to use such a number of consumers. Correct connection of the VAZ generator guarantees trouble-free and reliable operation of this electrical unit of the vehicle. Connect the VAZ-2107(08) generator to 2101…2106.
Replacing a VAZ 2106 generator with a G222
The easiest option is to replace the standard generator. On new. It makes no sense to talk about the generator design as an electric three-phase synchronous machine. Not about that now. We are faced with the problem of connecting the standard G 221 generator in order to avoid mistakes when installing another, more powerful and stable G 222 generator, which was already installed on the VAZ 2105.
How is it better than the standard six? Actually nothing. With the exception of a few nuances that can be decisive when the load on the on-board electrical circuit increases. It can be installed on a VAZ 2106 engine using one of two methods:
- Install a generator with a built-in relay instead of the standard one.
- Install the modernized G 222 generator.
Actually, it’s much easier not to complicate life by altering the wiring, albeit minor, but to take the simple path.
Modification of the G222 generator for the VAZ 2106
Relatively simple. Make some adjustments to the design of the 222nd generator. Externally, these two units are almost identical. They are distinguished only by a built-in battery charging relay. It is installed in the 222nd generator along with the brush block and it is clearly visible from the back, even if you don’t read the markings.
The difficulty of installing a 222 generator is that you need to thoroughly know the connection diagram. After studying all the nuances of the circuit, you can simply connect the standard remote battery charging relay to the new generator without making any changes to the circuit. This is the simplest and most rational way.
This is interesting: How to completely disable the alarm on a car: disabling a car alarm with or without your own hands with or without a key fob
The difference in these two generators is not only the presence of an integrated charging relay. The fact is that the G221 operates with an output of 42 A, and the generator from the 2105 G222 produces 50 amperes. The increase in power was achieved by increasing the cross-section of the rotor winding, and structurally, this is the same generator that was installed on all Zhiguli classics.
What is needed for maintenance
Very often a malfunction occurs such as excessive wear of bearings. As a rule, the one located in the front cover fails. You can even detect a breakdown by hearing. A loud whistle indicates its failure. The reason that it is in the front cover that the bearing fails is that it is subjected to a very large load. After all, it is on this side that the belt is located.
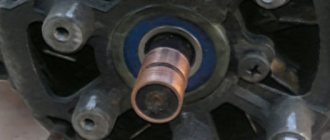
The 2106 generator's brushes, made of graphite, are in constant contact with the rotor. Their strength is quite high, but despite this, the effect of friction makes itself felt. Therefore, they need to be replaced with new ones from time to time. If this is not done, the field winding will not work.
No power is supplied to it, and the magnetic field that is necessary to generate electricity is not created. It happens that the excitation winding, or one of the stator windings, begins to “short” to ground. To verify this, it is necessary to completely disassemble the VAZ 2106 generator, and then use a multimeter to test all windings without exception.
You should have at least an idea of how to check the windings for breakdown. Please note that there must be a certain resistance in the stator, depending on the generator model. If there is no resistance, there is a short circuit to the device body.
Choose your own way out of this situation. You can either rewind the stator winding, replace it completely, or install a new power source. The price of a new one, of course, is rather high - about 3000-3500 rubles. You can buy it at a dealership for three times the price, but will it work properly?
Injection engines
On injection engines, generator sets 5142.3771 or similar are used. They have increased energy, the maximum current is about 80-90 A, it all depends on the design option. Cars of the seventh series and similar models are good because they are like a designer set. You can install almost any generator on them, similar in design to the “native” one.
For tuning, installations with an output current of 100 amperes and higher are used. But the use of such devices is justified only if many powerful consumers are connected to the electrical equipment. Regardless of the design, the generators produce alternating current; a voltage regulator, capacitor and diode block are installed in the housing.
Selecting a generator for VAZ 2101
The manufacturer equipped the VAZ 2101 with generators of the G-221 model. The maximum current of 52 A was enough to operate all standard electrical appliances. However, the installation of additional equipment by car owners (powerful acoustics, navigator, additional headlights, etc.) led to the fact that the G-221 could no longer cope with increased loads. There was a need to replace the generator with a more powerful one.
Without any problems, you can install the following devices on the VAZ 2101:
- A generator from a VAZ 2105 with a maximum current of 55 A. The power is enough to operate a conventional speaker system and, for example, an additional LED strip for lighting. It is installed on standard mounts for the VAZ 2101 generator. The only differences are that the regulator relay is built into the generator housing, while on the G-221 it is located separately.
- Generator from VAZ 2106 with a maximum current of 55 A. Withstands slight overloads. Installed on standard G-221 mounts.
- Generator from VAZ 21074 with a maximum current of 73 A. Its power is sufficient to operate any additional electrical equipment. It is installed on standard VAZ 2101 mounts, but the connection diagram is slightly different.
- Generator from VAZ 2121 Niva with a maximum current of 80 A. The most powerful among its analogues. However, its installation on the VAZ 2101 will require significant modifications.
- Generators from foreign cars. The best option is generators from Fiat. Installing such a device on a VAZ 2101 will require noticeable changes in the design of the generator mounting and its connection diagram without guarantees of high-quality operation.
The battery drains quickly.
If the battery is good and fully charged, then the car, left for several months, will start normally.
With the engine running, you need to check the voltage on the battery, it should be 13.8-14.2 Volts. Turn on the headlights and heater, the voltage should remain at 13.5 Volts. If it drops to 12 volts, the alternator is faulty and cannot keep the battery charged.
If the generator is working normally, then rapid discharge of the battery indicates that it has lost capacity, perhaps it is very old
The low battery light is blinking
The brushes and, possibly, the slip rings themselves on the rotor are worn out. In the first case, the brushes must be replaced (the generator will have to be removed). In the second case, it is better to replace the generator.
Noisy generator operation. This is almost always bearing wear. It is necessary to remove the generator and change the bearings. If the generator is very old, then the right thing to do is change the generator.
Source
The procedure for replacing the generator on a VAZ 2106
Before attempting this repair, disconnect the negative battery terminal. Then you need to disconnect all power wires from the generator itself. First you need to unscrew the terminal securing nut:
Now you can pull out all the other wires and plugs, just pull them to the side with a little effort:
Then we tear off the upper mount of the generator with an ordinary open-end wrench 17, and after that we throw on the head with an extension and a cardan joint to unscrew this nut quickly and without unnecessary effort:
Next, you need to crawl under the car from below and tear off the nut with a spanner wrench and unscrew it completely using the ratchet handle:
After the nut is completely unscrewed, you need to knock the bolt out. To do this, you can use a wooden block, pointing it at the bolt and hitting it several times with a hammer. The photo shows it without a block, but keep in mind that the backing must be present so as not to damage the thread:
After which the bolt can be pulled out by hand. If it is difficult to move, you can resort to penetrating lubricant, spraying it a little in the right place.
Then you can remove the generator from below, as this is more convenient. If it doesn’t give in right away, you can turn it a little in the right direction so that nothing gets in the way when removing it. This is roughly what it looks like in practice, as shown in the photo below:
The price of a new generator for a VAZ 2106 varies from 2,500 rubles and above, it all depends on your wallet. The replacement process is not complicated and installation occurs in the reverse order of removal.
Dismantling of the generator will be required only after it has been checked for functionality. If problems are identified in its system, it will need to be replaced with a new one or repaired.
For repairs, arm yourself with the following tools: wrenches “10”, “19” and “17”, as well as a mounting spatula. So let's get started:
Loosen the lower mounting nut on the alternator slightly, and then loosen the nut securing the alternator to the tension bar. Be careful not to lose the washer when removing the nut.
- Move the generator forward slightly, closer to the engine, and remove the belt from the pump pulley and the crankshaft.
- The protective rubber cap also needs to be removed, then unscrew the fastening nut and disconnect it from the wire terminal.
The wires from the central winding plug and the wires from the brush holder output should also be disconnected. Be sure to mark all the wires so that there are no problems when reinstalling them in place.
Now you can safely unscrew the lower mounting nut of the generator and remove the bolt. After this, move the generator slightly to the side and remove it from the car.
The generator should be installed in the reverse order of dismantling.
A car generator is necessary to generate energy after the ignition is supplied to the engine. The principle of operation of the generator is to convert the mechanical energy of the motor into electricity by rotating the electric motor through the drive belt.
It is the operating conditions of the generator that determine its service life - for example, on a VAZ 2106, the service life of the device does not exceed 50,000 km, after which the unit, as a rule, needs to be repaired.
Operating principle of electrical equipment
The ignition switch on 21063, in accordance with the diagram, has four modes, when each of them is turned on, certain equipment is activated:
- In mode 0, the pulse from the battery is supplied to only two connectors - 30 and 30/1, the remaining connectors are de-energized.
- In mode 1, the pulse begins to be supplied to other connectors, as a result of which the side lights, windshield wipers, fan, and also the rear window heating device can work.
- In mode 2, the circuit turns on the ignition system, sensors on the dashboard, turning lights, and the starter.
- In mode 3, only the side lights, steering horn, and window wipers work.
The device of the VAZ 2101 generator
For its time, the design of the G-221 generator turned out to be quite successful. It was installed without modifications on subsequent models of the plant - VAZ 2102 and VAZ 2103. With proper maintenance and timely replacement of failed elements, it could be used for many years.
Structurally, the G-221 generator consists of the following main elements:
- rotor;
- stator;
- regulator relay;
- semiconductor bridge;
- brushes;
- pulley.
The bracket firmly fixes the generator even when driving on uneven roads
Rotor
The rotor is the moving part of the generator. It consists of a shaft, onto the corrugated surface of which a steel sleeve and beak-shaped poles are pressed. This design serves as the core of an electromagnet rotating in two ball bearings. Bearings must be closed type. Otherwise, due to lack of lubrication, they will quickly fail.
The rotor (armature) is the moving part of the generator
Pulley
The pulley can be considered either part of the generator or a separate element. It is installed on the rotor shaft and can be easily removed if necessary. When the engine is running, the pulley rotates by the crankshaft through the belt and transmits torque to the rotor. To prevent the pulley from overheating, there are special blades on its surface that provide natural ventilation.
The generator pulley is driven by the crankshaft through a belt.
Stator with windings
The stator consists of a number of special plates made of electrical steel. To increase resistance to loads in four places on the outer surface, these plates are connected by welding. A winding of copper wire is laid on them in special grooves. In total, the stator contains three windings, each of which consists of two coils. Thus, six coils are used to generate electricity by the generator.
The stator consists of plates made of electrical steel, on which a winding of copper wire is laid
Regulator relay
The regulator relay is a small plate with an electrical circuit inside, designed to control the voltage at the output of the generator. On the VAZ 2101, the relay is located outside the generator and is mounted on the rear cover from the outside.
The regulator relay is designed to control the voltage at the generator output
Brushes
Generating electricity from a generator is impossible without brushes. They are located in the brush holder and attached to the stator.
Only two brushes are fixed in the brush holder of the G-221 generator
Diode bridge
The rectifier (or diode bridge) is a horseshoe-shaped plate with built-in six diodes that converts alternating current to direct current.
It is important that all diodes are in good working order - otherwise the generator will not be able to provide power to all electrical appliances
The diode bridge is a horseshoe-shaped plate
Voltage regulator
Using a voltage regulator, a certain value is maintained on the excitation winding. Today, most generators are equipped with an integrated relay-regulator. It is worth noting that there can be two designs of relay regulators: a hybrid one, in which radio-electronic components are used, such as zener diodes, resistors, capacitors, and an integral design, in which all the elements included in the relay regulator are made on one semiconductor wafer . This is the main element that makes up the VAZ-2106 generator. The semiconductor connection diagram is given in the article.
Connecting a generator to a VAZ 2107
The power supply system of the VAZ 2107 vehicle receives power from the battery, which in turn is charged from the generator. In VAZ 2107 cars of different years of production and configurations, it is possible to install two types of generator: 372.3701 or 9412.3701. they have a number of design features, but in general their installation and operation are no different.
The mechanical layout of the VAZ 2107 is extremely simple and does not require any special comments.
Externally, the differences between the models are expressed in the fact that in 9412.3701 the rotor impeller is located inside the housing, and the voltage regulator is mounted in the back cover. Otherwise, both models have no differences. The figure above shows the main elements:
The rotor receives drive from the engine crankshaft using a belt drive. The generator is installed on the engine block using two bolts with nuts 17 and 19. One bolt secures the housing to the engine, the second secures it to the adjusting plate.
The electrical connection diagram for different generator models has certain differences caused by their design features, in particular the location and marking of the contacts and the location of the rectifier unit. First of all, let's look at what the connection diagram for model 372.3701 looks like.
Here numbers from 1 to 6 indicate the main elements of the power supply system:
For 9412.3701, the electrical connection diagram looks almost the same, except perhaps for the designation of the contacts. There are no differences at all in the mechanical part.
The principle of operation of the generator is to convert mechanical energy into electrical energy. Accordingly, for its effective operation it is necessary to ensure continuous transmission of torque from the VAZ 2107 engine to the generator. This is achieved by correctly adjusting the tension of the drive belt, since insufficient tension will lead to the belt slipping and loss of battery charge. This is especially critical when driving at night, when the power consumption of all systems of the VAZ 2107 car is at its maximum.
To adjust, you need to loosen both generator mounting bolts, use a pry bar to tighten the belt and secure its position with a nut on the plate. After this, we check the degree of tension: when pressing on the belt between the two pulleys, the deflection should be 10-17 mm. The adjustment procedure is repeated until the specified value is reached. After the adjustment is completed, the fastening nut to the engine housing is tightened. At this point, the installation of the generator on the VAZ 2107 is considered complete.
Source
Replacing the VAZ 2101 – 2106 generator
The need to replace the generator on a VAZ car may occur when its windings burn out, an interturn short circuit occurs, the case breaks, and other reasons. But today, I would like to talk about replacing the VAZ generator in the case when its power is no longer sufficient...
Imagine the situation - you are the owner of a VAZ 2101 - 2106, you bought and installed a powerful amplifier, installed fog lights of 50 W each. A standard generator that produces a maximum current of 42A cannot cope with such a load.
And if all additional equipment is turned on, then there will be nothing left to charge the battery.
It’s these types of cases of replacing a VAZ generator that I want to talk about. Let's consider which generators can replace our long-suffering G-221.
Generators that replace G - 221
What models of generators are suitable for replacement in a VAZ 2101 - 2106 car?
- The first option is a generator from a VAZ 2105; it produces a maximum current of 55A. Not much, but if you don’t use a lot of additional equipment, then this is an ideal option. This generator replaces the G-221 generator without any modifications to the mounting. There are only minor changes in the connection to the electrical wiring; they are due to the fact that in the connection diagram of the G-221 generator the relay-regulator is placed separately, while in the five-wheel generator the relay regulator is combined with the design of the brushes.
- The next option for installing a chisel generator on a VAZ 2101 - 2106. It produces 55A, which is quite acceptable for a small amount of additional equipment.
- The third option for replacing a standard VAZ generator is a generator from a VAZ 21074, its marking is 372.3701-03. It is capable of delivering about 73A of current, which will be sufficient for the average motorist. The installation is practically no different from the previous one.
- The fourth option is to install a generator from an injection Niva. It produces about 80A, which will satisfy the requirements even if a large number of additional light bulbs and amplifiers are installed. It will not let the light go out at idle. But the installation does not require very big changes.
- The fifth and final option is to replace the standard G - 221 with a generator from a VAZ 2110, which produces 105 - 110A (depending on the specific model).
- There are other options (foreign cars, Chinese, our semi-underground companies), but you can consider them here endlessly.
We have listed the most realistic and easiest ways to replace a generator in a VAZ 2106 car. Next we will look at how to practically implement the installation of a generator from a VAZ 21074.
Installation of a generator from a VAZ 21074i to a VAZ 2106 (2101)
Information found on the six forum. First, it’s worth noting (as far as I understand), there are different models that fit these parameters, they recommend taking 2107-3701010.
If you chose 2107-3701010, then now I will quote the installation on the VAZ 2106. It is also much easier to find spare parts for the first generator.
Photo from the back:
A little about the relay regulator. I have already read more than one negative review about the K1216EN1 relay regulator. In particular, thermal compensation is poorly implemented in it, that is, the charge voltage does not change depending on the ambient temperature.
So the author almost immediately replaced the standard RR with a 67.3702-01 regulator.
Installing a new generator instead of an old one is not difficult; everything fits into a standard mount. Now let's look at the connection.
The very first thing you need to do is disconnect and insulate the wires from the relay regulator. As for the connection on the generator itself, everything is almost the same as in the old one. Wires with a terminal in the form of a ring - in the old place, a bolt that was also on the old generator. The gray wire is isolated and not connected anywhere, the yellow wire is connected to the terminal.
In the form of a control lamp, a lamp from a repeater with a power of 3 W is used. To connect it, two wires are used - double orange and yellow.
The author is delighted with the new generator. Charging is maintained reliably even at 1500 rpm. And all those shortcomings that were there are gone...
Remote controller
ATTENTION! A completely simple way to reduce fuel consumption has been found! Don't believe me? An auto mechanic with 15 years of experience also didn’t believe it until he tried it. And now he saves 35,000 rubles a year on gasoline! Read more"
This often happens to drivers. The brushes of the generating device burn out. The regulator is built in along with the brushes. We have to change everything together. And here’s some advice from experts: it’s better to install an external regulator than a built-in one. The models released recently have not been praised very much.
Okay, do you think I’ll install an external one, but how do I connect it? It turns out that there is a convenient scheme that makes it easy to carry out all this modernization.
Some important points:
- do not confuse the chips on the regulator numbered 67 and 15 (the first should be connected to the generating device, and the second should go to the fuses);
This is what the connection diagram looks like
In the lower photo we see a diagram that shows the connection of the already built-in regulator relay.
It is suitable for connecting to “fives”, “sevens”, VAZ 2104, if the PG is installed from a VAZ “kopek”. As you can see, the remote-type regulator relay is connected via two terminals. Pin 15 goes to the fuse.
The second pin 67 is connected to the generator. The wire is connected to the brush chip.
Also, the remote-type relay must be connected to ground - any part of the body.
A relay is nothing more than a switch that serves to close and disconnect individual zones of an electrical circuit that occur at specific electrical values. A machine relay is otherwise called a load voltage switch, and this is 100 percent true. When the power supply unit, fan or starter consumes more current than necessary, the relay trips.
The relay consists of an electric type magnet, an armature and a switch. In this case, the electromagnet is a cable twisted around an inductor with a magnetic rod, and the armature is a special plate that controls the contacts.
As soon as electrical voltage passes through the magnet winding, an electric field is created. A special pusher presses the armature against the core and, thereby, the contacts switch.
Attention. There are two types of relays used on VAZ cars. This is a non-contact relay-regulator and MER (electric). It is the diagram of the last relay that is shown in the picture below.
The non-contact relay or NERR is a fairly new unit that does not require any additional adjustments or regulation. As for the MED, this is an old-style device, the production of which has currently been suspended.
So, the BRN or built-in regulator is a device consisting of a microcircuit, a transistor and a housing with brushes. If the built-in regulator fails, it is replaced with a new one, or an external one is installed.
The external regulator is easy to install if you strictly follow the instructions.
Modernization involves dismantling and disassembling the generating device.
