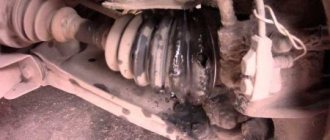
Brake hoses have to be changed quite often; according to the “garage guys”, this consumable part often does not last even six months. But, if you use the car carefully, it will require replacement in a year, or even two.
To extend their service life, wipe them with special additives, for example, Roil Platinum™ and wrap them with textile tape. At the same time, you need to remember that from time to time you need to check the condition under the electrical tape.
The worst thing is when the hose breaks on the road. The first sign of a breakdown is that the pedal “goes to the floor.” At the same time, it is impossible to brake quickly. In this case, you need to plug the torn end, for example, with a bolt. When one of the circuits does not work, the ABS also stops working, and during sharp braking the car turns around. The following is step-by-step instructions for replacing them with new ones.
How to change the brake hose on a VAZ 2109-2115?
1. The first thing to do is disconnect the negative (-) cable from the battery terminal.
2. Next, you need to remove the wheel whose brake hose needs to be replaced.
3. Then remove the wire connecting the block and the wear sensor.
4. With a sharp movement, push the tip of the wire out of the block on the other side.
6. Holding the tip of the tube with a “10” wrench, unscrew the hose from the brake pipe. At the same time, use the “15” key to hold the tip. If the nuts have “soured” in the tube mount, it should be cut in half and the tip removed from the tube.
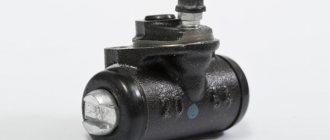
7. Remove the tip and seal from the bracket on the rack and body. Using a 15mm wrench, unscrew the tip from the wheel cylinder... remove the hose.
When and why to change pads
Why, of course, is a rhetorical question. No motorist wants to be left without brakes.
Possible complications will only lead to higher repair costs:
- one of the wheels will jam while driving;
- due to extreme wear, brake fluid will leak;
- the caliper will break.
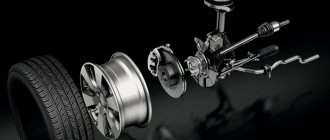
1. Brake pads; 2. Pad preload spring; 3. Bolts securing the cylinder to the guide pins; 4. Bolts connecting the cylinder to the caliper; 5. Cylinder; 6. Piston: 7. O-ring; 8. Guide finger; 9. Protective cover for finger; 10. Pad cover; 11. Pad guide; 12. Protective cover; 13. Brake disc; 14. Caliper; 15. Front wheel hub; 16. Brake cylinder hose: 17. Guide pins; 18. Piston protective cover; 19. Bolts securing the brake mechanism to the steering knuckle; 20. Fitting for bleeding the brake drive; 21. Brake block; 22. Pad guide spring; 23. Expansion bar; 24. Upper tension spring of pads; 25. Wheel cylinder protective cap; 26. Thrust screw; 27. Fitting for bleeding the brake mechanism; 28. Brake shield; 29. Crackers; 30. Thrust ring: 31. Spring; 32. Fluid supply tube fitting; 33. Support cup; 34. Seal; 35. Wheel cylinder piston; 36. Pad stop; 37. Finger of the lever for manual drive of the pads; 38. Lever for manual drive of brake pads; 39. Parking brake cable; 40. Cable spring; 41. Cable end; 42. Lower tension spring of pads; 43. Pad support plate; 44. Pad guide plate; 45. Rivets for fastening plates.
Front wheel brake mechanism: 1 – brake disc; 2 – pad guide; 3 – caliper; 4 – brake pads; 5 – cylinder; 6 – piston; 7 – sealing ring; 8 – protective cover of the guide pin; 9 – guide pin; 10 – protective casing
How does driving style and pad quality affect ? There are average indicators: for the front axle - 15-20 thousand km, for the rear axle (drum) - up to 100 thousand km. But this does not exempt you from regular checks.
Required tools and replacement
- Using a jack, lift the front wheel and remove it. Don't forget that the wheel bolts can also become stuck. To make them easily unscrew, spray WD-40 from a can several times and wait about 10 minutes. If the bolts are unscrewed but the wheel cannot be removed, there is also a “folk” method. For these purposes, some drivers carry a piece of board and a small sledgehammer in the trunk. We place the board next to the wheel and hit it with a sledgehammer several times. The wheel should come off;
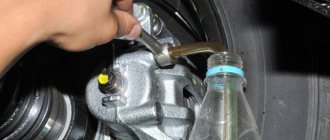
- Hold the tip on the brake hose with a “15” wrench. At the same time, turn the fitting on the tube with a “ten”;
- To prevent brake fluid from leaking, put on a protective cap. If the nut is stuck, use VD. We wait 10-15 minutes, unscrew;
- Next, you need to remove the sensor wires from the rubber holders based on pad wear;
- The hose coupling must be removed from the shock absorber strut holder;
- Unscrew the “15” hose fitting from the cylinder. The copper seal ring also needs to be replaced. Usually seals are sold as a set;
- Install the new hose, carefully tightening the nuts;
- We repeat the procedure in a similar way on the other front wheel (since, we remind you, it is best to change the hoses at least in pairs);
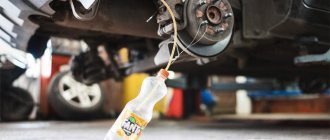
- After everything, we bleed the brake system, checking the presence of fluid in the reservoir (by level). If necessary, top up!
Basic faults and brake repair options
The best fix is prevention. When operating the VAZ 2108, it is necessary to strictly adhere to the scheduled maintenance periods for the brake system. This applies to the friction linings of the front disc and rear drum brakes. Complete wear of the friction linings threatens unexpected brake failure in an extreme situation. Periodically check the condition of the linings, monitor their level of wear, and replace if necessary.
Carefully monitor the brakes of the VAZ 2108 in terms of fluid leakage through worn gaskets and seals. Excessive wear of the sealing elements is fraught with the risk of insufficient force in the brake cylinders, failure of the pedal when driving the VAZ 2108, and an increase in the braking distance. All this creates very serious risks. Brakes are a critical safety system for drivers, passengers and other road users.
Replacing the rear brake hose
- We unscrew the fitting using two keys: 10 and 15;
- Remove the hose from the eyelet securing the rear beam to the body;
- We put a protective cap on the end of the tube;
- Using two wrenches, disconnect the hose and tube. Remove the brake hose. When replacing it, do not forget about the seals;
- We put everything back in reverse order. We perform the same procedure on the other rear wheel. We pump the hydraulic drive (brake).
Thus, you are convinced that replacing brake hoses on VAZ 2109 and 2110 is not such a difficult matter. And with your own hands, if you have certain skills, it’s quite possible!
Diagram of the VAZ 2108 brake system and its features
The VAZ 2108 has two brake systems:
- working;
- parking
The working one ensures that the car slows down and stops when moving, and the parking one fixes the VAZ 2108 in the parking lot. The VAZ 2108 uses a dual-circuit brake system as a working brake system. One circuit provides braking for the left front and right rear wheels. The other stops the right front and left rear wheels. This ensures increased directional stability of the VAZ 2108 even if one of the circuits fails. Neither side of the car is left without a braking wheel. This is a very important factor in ensuring the safe operation of the VAZ 2108.
The brake system of the VAZ 2108 demonstrates high continuity with the brakes of rear-wheel drive models. They have proven themselves well when used in Russian conditions. It was considered justified to replace the rear disc brakes of the Italian prototype Fiat 124 with drum brakes, more adapted to domestic conditions. Unlike the first generation of rear-wheel drive models, the VAZ 2108 brakes have a vacuum booster and a pressure regulator in the rear wheel cylinders.
The VAZ 2108 brakes work like this:
- To stop the car, the driver presses the pedal with his right foot.
- The lever system transmits the action to the vacuum booster.
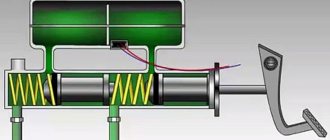
- He, using a connection with rarefied air in the engine crankcase, transmits force to the main brake cylinder.
- In turn, this unit distributes pressure between two diagonal hydraulic circuits of the system.
In each of the diagonal circuits, pressure is transmitted through pipelines to the front disc and rear drum brakes. The pressure on the rear brakes is transmitted through a dual-circuit pressure regulator, which ensures an increase in braking force as the load on the rear axle increases.
The parking brake of the VAZ 2108 has a cable drive and is connected to the brakes of the rear wheels. It is activated using a lever with a locking ratchet located under the driver’s right arm, next to his seat.
everything useful is here
Removing the rear brake hose
We carry out the work on an inspection ditch or a lift.
Holding the tip of the flexible hose with a 15 wrench, use a 10 wrench to unscrew the brake pipe fitting.
We remove the hose from the eye of the bracket securing the rear suspension beam to the body.
To reduce brake fluid losses, we put a protective cap on the end of the tube for the wheel cylinder bleeder fitting.
Using the “10” and “15” wrenches, we disconnect the hose and brake pipe secured in the eye of the rear suspension beam.
Remove the flexible hose.
After installing the hose, it is necessary to bleed the hydraulic brakes.
Installing rear disc brakes
Since the time of the VAZ 2101 “kopek”, the front brakes of Zhiguli have been disc, and the rear have been drum. The decision to use such a combination is explained by the peculiarities of domestic roads and off-road conditions. Drum brakes, more familiar to our car enthusiasts, in the second half of the sixties, when the first Zhiguli models were being developed, demonstrated significantly higher mileage than the disc brakes adopted in Europe. Since then, technology has come a long way, and the service life of disc brakes has increased significantly. But they still retain the advantages in braking efficiency. If you are not embarrassed by the prospect of changing friction linings and brake discs more often, tuning the VAZ 2108 brakes, which consists of replacing drums with discs, makes sense.
If you have the proper experience and appropriate equipment, you can perform such a replacement yourself at your own risk. Keep in mind that you will not be able to pass the inspection without a bribe. Such modernization is not provided for by the design of the VAZ 2108 and, accordingly, is prohibited. What is not allowed is not allowed - this is a matter of safety, and not only yours.
If you decide to replace, keep in mind that the diameter of the rear brake discs should be 2–3 cm smaller than the diameter of the front ones. If the front brakes have a 13-inch diameter disc, then the rear brakes should use a 12-inch diameter disc. Otherwise, the VAZ 2108 becomes prone to skidding when braking, even on a dry, hard-surfaced road. Especially with a lightly loaded rear axle.
Do not attempt to grind a brake rotor yourself. Even if you are a lathe operator, you will not find professional non-destructive testing equipment in a private garage. This is about safety, better not take risks. In automobile stores you can buy ready-to-install disc sets for the VAZ 2108, including a new flange and a special spacer to match the dimensions of the hub and caliper disc.
Dismantling the drum brake is carried out with the wheel removed.
| Procedure | Subtleties |
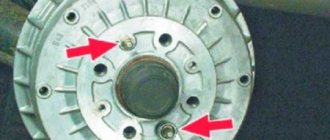
| Unscrew the nut securing the parking brake cable, remove the drum mounting bolts. | If the drum is stuck and cannot be removed, tap it with light blows from all sides and remove. |
| Disconnect two guides and one tension spring. Remove the pads and body of the old brake, then the hose and plug it. Remove the brake cylinder. Remove the hub and flange of the suspension arm. | The flange should not be reused. If it was not supplied with disc brakes, please purchase it separately. |
| To install VAZ 2108 disc brakes, start by installing the hub with the disc on the flange. | To do this you will need bolts 5mm longer than before. |
Install the brake pads. Remove the plug and connect the hydraulic drive hose. Secure the parking brake cable to the appropriate bracket.
After completing the installation of the brakes on both rear wheels, bleed the brake system to remove air introduced into it during work.
Additional recommendations
- If you cannot depress the brake cylinders, open the cap of the brake fluid reservoir to reduce the pressure.
- If the pads wear unevenly, pay attention to the caliper. Most likely it will need repairs.
- When replacing the rear pads, change all the springs as well. They are inexpensive, but they will protect you from possible failures until the next replacement.
- The front caliper guides can be lubricated with graphite grease for smoother operation.
Replacing the pads on the front axle will not cause problems even for “dummies” of automotive repair. But from the back it’s not so simple. Assess your strengths and capabilities in advance: can you reach the handbrake cable and cope with a stuck brake drum? If yes, then everything will definitely work out.
If you find an error, please select a piece of text and press Ctrl+Enter.
Why do you need to change?
Why is it necessary to periodically inspect the brake system, in particular the hoses? One of my friends on the highway, at a speed of 100 kilometers per hour, when pressing the pedal, suddenly “lost the brakes.” The pedal simply went to the floor, and the car continued to rush towards the accident. It’s good that he knew how to slow down the car by changing gears, so to speak, “with the engine.” Gradually slowing down, he stopped on the side of the road and, wiping sweat from his forehead, opened the hood.
As it turned out, the brake fluid was “gone”, and at the nearest service station they discovered a break in the rear right brake hose, and all the others had such a degree of wear that they could “shoot” at any moment.
Do-it-yourself replacement of front pads
Compared to the previous procedure, replacing the front pads will seem very easy. The wheel, of course, will also have to be removed. After which you can verify the need for repairs through a special “window”. The thickness of the friction material should not be less than 2 mm, otherwise you risk being left without brakes at any time.
- There is a single bolt at the top of the caliper, held in place by a lock washer. It is necessary to straighten it using a flat screwdriver. If it resists, use a hammer. The bolt should be unscrewed while holding the guide with another wrench.
- The brake hose must be released from its mounting. Now you can “open” the caliper by moving it to the side. Remove the old pads.
- To ensure that the new linings fit neatly into place, it is better to thoroughly clean all points of contact.
- Naturally, the new clutches are thicker than the old ones and it will not be possible to put the caliper back. Therefore, it is necessary to depress the brake cylinder. To do this you will need a large screwdriver. Close the brake mechanism without pads and press the screwdriver, like a lever, against the cylinder. It will take some effort, so be careful not to let the screwdriver come off. Then install new linings, close the caliper and tighten the mounting bolt.
