The brake system of the car is equipped with a hydraulic drive that operates under pressure. If the amount of brake fluid decreases, the sensor turns on and a light comes on, indicating that there is a problem with the brakes. Often partial topping up does not solve the problem. From here it is necessary to bleed the brakes in the Kia Rio 3 2013 or completely change the vehicle, which is easy to do with your own hands.
Replacing the brake fluid of the Kia Rio 3 2012 is a prerequisite before preparing the car for technical inspection.
The Kia Rio 3 maintenance schedule with consumables articles is described in detail in this material.
Choosing brake fluid for Kia Rio 3
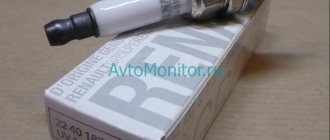
According to official recommendations, the brake circuit of the Kia Rio 3 should be filled with the original Hyundai Brake Fluid. The price for branded consumables starts from 380 rubles. The volume of the canister is one liter. The first generation of machines uses DOT-3 fluid. On later versions of the car, exclusively TJ DOT-4 is used. In this case, it is possible to transfer a vehicle from DOT-3 to DOT-4.
On the Kia Rio 3, the use of TZ from third-party manufacturers is allowed. It is important to check whether the brake fluid is DOT-4. The table below presents a list of brands whose technical characteristics perform well during operation on the Kia Rio 3.
Table - Good brake fluids for Kia Rio 3
| Brand | vendor code | Estimated cost, ruble |
| Mann-Filter | C21014 | 500-550 |
| Bosch | 1987479106 | 160-220 |
| Peugeot/Citroen | 469934 | 500-810 |
| Castrol | 155BD0 | 290-300 |
| Opel | 1942058 | 500-620 |
| Filtron | AP1397 | 280-340 |
| General Motors | 93160363 | 400-600 |
| Purflux | A1011 | 410-520 |
| TRW | PFB450 | 190-250 |
| Motul | 100950 | 250-330 |
2272-6-12-02-03
We pump, as described above, the brake mechanism of the left front wheel.
Similarly, we bleed the brake mechanisms of the other circuit.
When pumping, you need to monitor the fluid level in the tank and add fluid.
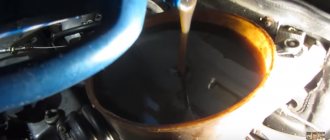
We pump the hydraulic drive of the brake system until new fluid (lighter than the old) begins to come out of the bleeding fittings of all working cylinders. After pumping, bring the fluid level in the hydraulic brake reservoir to normal.
There is an even simpler option for replacing brake fluid. This method does not require the presence of an assistant. With this method, a certain supply of brake fluid is desirable (at least 1 liter).
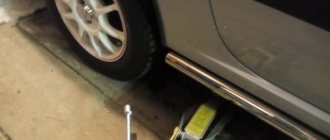
We place the car on an inspection ditch or overpass and ensure free movement between the brake fluid reservoir in the engine compartment and the brake cylinders of all four wheels.
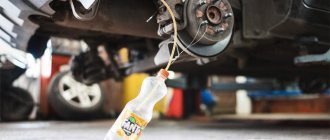
Use a rubber bulb or syringe to pump out the brake fluid from the reservoir. Add new fluid to the top edge. To speed up the process (to release fluid from all cylinders at once), it is advisable to select four pieces of tubes that fit tightly onto the bleeder fittings of all cylinders. We lower the free ends of the tubes into small transparent bottles.
We unscrew the fittings of all brake cylinders. We make sure that the liquid has flowed through all four tubes. We control the decrease in fluid from the reservoir located on the brake cylinder and immediately replenish the reservoir. We observe an increase in the level of liquid in bottles located near the wheel brake cylinders.
It is necessary to move several times from the position of observing the flow of fluid from the brake cylinder fittings to a position where you can check and replenish the fluid level in the reservoir located on the brake cylinder in order to prevent the reservoir from drying out.
Usually the level rises most quickly in the bottle into which the hose coming from the brake cylinder of the front left wheel is lowered. As soon as there is about 200 ml of liquid in the bottle of the front left wheel, wrap and tighten the fitting of this cylinder. Next, we wait for the same result for the front right wheel cylinder and tighten its bleeder fitting in the same way. The process can be completed after 200–250 ml of liquid comes out through the fitting of each rear wheel.
We make sure that all fittings are tightly tightened. We put on protective caps. Check the fluid level in the master cylinder reservoir.
Replacing the working fluid in the hydraulic brake system of Kia Rio
Replacement frequency
According to the official maintenance frequency regulations, brake fluid replacement is required every 50 thousand km. At the same time, car owners recommend reducing the interval to 30 thousand km. You will also have to fill in a fresh fuel oil if more than two years have passed since the previous replacement.
During operation of the Kia Rio 3, an unscheduled replacement of the brake fluid may be required. The reasons for this may be the following:
- any technical liquid or water has entered the circuit;
- there is no accurate information about how far the car has traveled since the previous replacement;
- The fuel fluid significantly leaves the circuit and it fills with air;
- there is a burning smell coming from the brake fluid reservoir;
- TJ has significantly changed its color;
- deposits appeared on the walls of the tank;
- brake fluid periodically boils;
- there are mechanical damages on the tank or other circuit elements;
- checking the brake fluid showed its unsuitability due to its high moisture content.
If you do not replace the brake fluid in a timely manner, you may end up in a number of unpleasant situations, the main of which are:
- dependence of braking intensity on ambient temperature;
- boiling of the brake fluid and loss of the ability to stop the vehicle;
- the appearance of corrosion on the metal surfaces of the brake circuit;
- pistons getting stuck in the brake mechanisms.
2272-4-13-03
After pumping out the old brake fluid, pour new brake fluid into the reservoir.
We carry out the replacement with the engine not running, first in one circuit, and then in the other in the following sequence:
- brake mechanism of the right rear wheel.
- brake mechanism of the left front wheel.
- left rear wheel brake.
- brake mechanism of the right front wheel.
We clean the bleeder fitting of the brake mechanism of the right rear wheel from dirt.
Rules for replacing brake fluid
Brake fluid is highly hygroscopic. By absorbing moisture, it lowers its boiling threshold. Therefore, it is prohibited to use liquid fuel that was stored in an open container for filling.
Due to hygroscopicity, it is prohibited to reuse drained fuel fluid, even if it is relatively fresh. For refilling, it is allowed to use only liquid from a hermetically sealed container. Otherwise, the behavior of the braking system may become unpredictable.
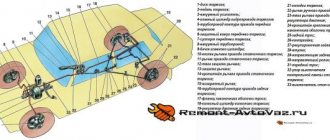
When replacing the TJ, it is important to follow the sequence of bleeding the wheels. Otherwise, it is possible to mix old and new fuel fluid, which is unacceptable. The image below shows the correct pumping sequence for the Kia Rio 3.
Brake fluid is aggressive to the paintwork of the Kia Rio 3 body. Therefore, if it gets on the surface, you should wipe it off as quickly as possible with a rag. After this, it is advisable to rinse the area with water.
TJ has an aggressive effect not only on paintwork, but also on the environment, as it is toxic. Therefore, it is forbidden to dump slurry and fresh brake fluid onto the ground, into a river or lake. It is not advisable to pour TJ down the toilet. For proper disposal, it is recommended to take brake fluid to special collection points for toxic and toxic substances. In addition to hygroscopicity, another property of TJ is its reaction with oil. Therefore, when carrying out work to replace the fuel fluid, its contact with rags containing traces of lubricant should be avoided.
2272-6-12-02-02
Using a 10mm wrench, unscrew the bleeder fitting 1/2–3/4 turn.
In this case, liquid with air bubbles will flow out of the hose, and the brake pedal will move forward.
As soon as the liquid stops flowing out of the hose (the pedal should go all the way), tighten the fitting, and only after that can the assistant release the pedal.
We repeat pumping until the liquid coming out of the hose becomes light-colored. We remove the hose, wipe the bleeder fitting dry and put a protective cap on it.
Required Tools
The table below presents the tools for replacing the TJ on a Kia Rio 3.
Table - List of tools required to change brake fluid
| Tools and materials | Note |
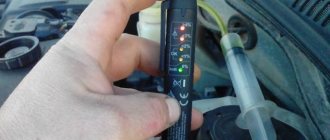
| Tester | To check the quality of the filled fuel fluid |
| Key | "on 10" |
| tube | Transparent |
| Tara | Volume up to 2 liters |
| Syringe | Extension hose |
| Wire brush and rags | To clean the fitting from contamination |
Shift interval and volume
A large number of motorists want to know when to change the brake fluid in the 2014 Kia Rio.
Experts advise changing the TZ in a vehicle every two years or upon reaching thirty thousand mileage.
It is important to adjust the periods based on the conditions of use (this may include using the brake too often when in long traffic jams).
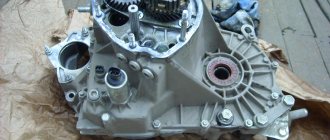
How much to fill the TJ in the Kia Rio? The volume of the hydraulic drive is eight hundred grams, if you change it, then one liter will be enough.
Replacing brake fluid on Kia Rio 3
Instructions for replacing brake fluid on a Kia Rio 3 are given below.
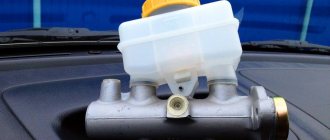
- Open the hood.
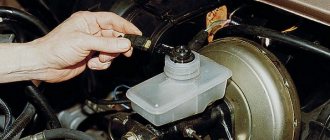
- Unscrew the cap from the brake fluid reservoir.
- Remove the mesh.
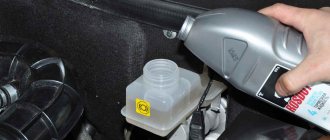
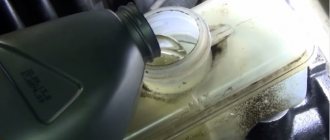
- Pump out the TJ.
- Place a mesh.
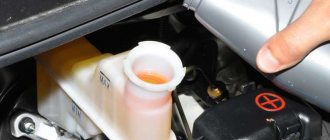
- Pour fresh TJ into the cap.
- Check the filled fuel fluid using a tester.
- Pour TJ into the tank.
- Remove the rubber cap from the fitting.
- Put on the hose.
- Unscrew the fitting.
- Place the other end of the tube into the bottle.
- Press the brake pedal all the way and then tighten the fitting.
- Release the brake pedal.
- Bleed until fresh brake fluid comes out.
- Put on the cap.
- Perform similar steps for other wheels.
- Filled with TJ.
- Screw on the lid.
Bleeding the brakes
To bleed the brakes in the Kia Rio 3 2016, you need to perform a number of simple manipulations. Additionally, you will need help.
First of all, it is necessary to replace the old hydraulic fluid in the reservoir ; we use a special bulb for rejection. Then add new fluid to the reservoir.
All work occurs with the motor turned off, initially in one circuit, then in the next. Bleeding sequence: right rear wheel, then left front, left rear and right front .
Link to photo source
the fitting of the right rear wheel from the dirt . Use a ten-socket wrench to loosen the tightening . Now you need to put a small hose on the fitting, put the other end in the bottle.
The assistant presses the brake pedal all the way with vigorous movements , four to five times will be enough. Liquid with air bubbles will begin to flow out of the hose; in this case, the pedal remains pressed. If you are pumping a Kia Rio 3 vehicle, then you can complete the work with the circuit when bubbles stop appearing . If you change it, the update signal will be the new incoming hydraulic fluid.
Link
Now we wipe everything and put on the cap.
We repeat the same steps for the remaining contours. During operation, it is necessary to monitor the level and add new fluid to the tank, not allowing it to drop below the minimum mark.
The hydraulic drive must be pumped until clear hydraulic fluid flows from all cylinders.
Link
Bleeding the brakes without an assistant
There is an easier method for bleeding the brakes in the Kia Rio 3 2012. You can do it yourself without an assistant. It is important to have a small amount of TJ in stock, a liter is enough.
We place the vehicle on the inspection hole; we need full access to the tank under the hood and 4 wheels.
We take a rubber bulb and pump out the fuel fluid from the tank. We pour new fuel oil up to the upper limit. To speed up the work process, you can find 4 tubes; we put the latter tightly on the cylinder fittings. Place the other end of the tubes in small containers.
Link
Now let's unscrew the cylinder fittings. The fuel fluid should flow through 4 tubes. Working the brake pedal all the way, we observe the replenishment in the bottles that stand next to the wheels.
We don’t get too carried away with pumping; the brake fluid level of the Kia Rio 3 should not fall below the minimum level.
The bottle will fill faster , where we lowered the hose coming from the TC (brake cylinder) of the front wheel on the left. When filling the bottle of this wheel with two hundred milliliters of TJ, you need to tighten the fitting . Then we wait for a similar filling at the other wheel and also tighten the fitting. It will be possible to finish the work only when about two hundred to two hundred and fifty milliliters of TJ have been drained through the fitting of the four wheels.
Link
Check that the four fittings are tightened. Next you need to put on caps for protection. The work is done!