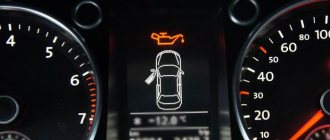
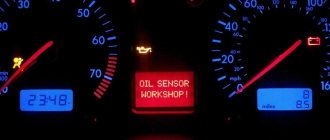
One of the parameters of engine operation is oil pressure. To ensure uninterrupted and high-quality functionality of the power unit, each driver must constantly monitor the maintenance of the required oil level in the engine. If the oil pressure light comes on on the dashboard of a VAZ 2114/2115, you must immediately take some action. The indicator will light up in cases where there are certain problems with the oil pressure in the engine unit system.
Let us list the reasons why a lamp may light up
1. Low oil level in the pan is perhaps one of the most common reasons why the oil pressure indicator lights up.
During regular operation of the vehicle, it is necessary to constantly monitor the oil level, as well as the absence of any leaks on the engine housing. Any oil stains, even minor ones, where your car is permanently parked should cause you concern. However, one should not overlook the fact that a drop in oil level can also occur on a car that is in completely good condition. 2. The second possible reason why the oil pressure lamp may light up could be the use of low-quality or non-original oil filters. A certain amount of oil must remain in the oil filter even after the engine has stopped completely. This is necessary so as not to create the so-called “motor oil starvation” effect. It is precisely this unpleasant and dangerous feature that low-quality oil filters have, since they do not implement the function of retaining oil inside the filter itself, so it flows freely into the crankcase.
3. Faulty oil pressure sensor wiring may cause the oil pressure warning light to come on. The light, which is located on the instrument panel, depends on the oil pressure sensor and is activated when there is something wrong with the pressure in the oil system. They are connected by one wire. If the oil pressure is below the established norm, the sensor shorts the light bulb to ground. After the pressure returns to normal or rises to the set level, the sensor contacts open and the lamp itself goes out. However, if the oil pressure sensor itself is faulty, the light will not go out, or will only light up when the pressure changes, for example, when changing gas.
4. The oil pressure lamp may also start to glow after the pressure relief valve fails. When the oil level in the system is very low, a working pressure relief valve should be in the closed position. If the valve hangs or jams in the open position, the required pressure cannot be generated in the system, as a result of which the oil pressure light comes on.
5. If the oil pump strainer is clogged, the sensor will indicate low pressure. Using an oil intake grid, the oil pump and the engine itself are protected from large particles getting onto the working surfaces. Dirt, metal shavings and other unwanted elements act as a rough abrasive on the surface of all parts. If the oil is clean, without any contaminants, it passes freely through the mesh, while the oil pressure sensor is “in a calm state,” symbolizing the normal operation of the engine. But when the oil is contaminated and does not pass through the filter well, the system is not able to create the necessary pressure for normal operation. After the engine warms up, the oil thins out and passes through the mesh much easier. This type of malfunction can only be determined by removing the oil pan.
6. The oil pressure sensor will diagnose the malfunction with a warning light if the oil pump fails. If the oil pump is not able to provide the pressure necessary for normal lubrication, the contacts of the oil pressure sensor close and the oil pressure light on the dashboard indicates a malfunction. Once the oil pressure check is completed, the oil pump can be checked. To do this you will have to remove the oil pan.
That's all for today. I hope the article was useful to you and will help you diagnose the problem yourself if the oil pressure sensor light comes on.
Relevant: Video instructions for changing engine oil
Text: AutoPulsar
Useful tips
To prevent problems associated with a drop in oil pressure, the following recommendations should be followed:
- Fill the engine with oil recommended by the car manufacturer, paying attention to the viscosity grade.
- Change the oil and oil filter in a timely manner.
- Do not use non-original spare parts for repairs.
- At least once a quarter, carry out diagnostics of the lubrication system with mandatory pressure measurement.
- If the pressure indicator light comes on, do not operate the vehicle until a complete diagnosis has been carried out.
Ignoring the oil pressure indicator signals can have serious consequences for the car engine. Any malfunction of the lubrication system can lead to a major overhaul of the power unit. Try to keep it in working condition and pay attention to all signals given by the indicator light.
Replacing the coolant temperature sensor
The VAZ-2114 antifreeze temperature sensor itself is a thermistor (resistor) with variable resistance.
Its indicators change depending on the temperature:
- 0 degrees – 9420 Ohm;
- 20 – 2868;
- 25 – 2796;
- 30 – 1350-1880;
- 50 – 585-820;
- 70 – 280-390;
- 90 – 155-196;
- 100 – 177;
- 110 – 87-109.
It may fail for one of the following reasons:
- failure of electrical contact inside the controller;
- broken wires near the sensor;
- insulation violation.
- Cool the engine after driving and store the car in the garage. Prepare a set of tools and containers for the coolant; you will have to replace it. Ask a friend to help you to make your work more convenient and faster - you will need to drain the antifreeze from two units.
- Remove the engine protection and remove the radiator mounts.
- Turn the heater to maximum, open the expansion tank cap and the heater tap.
- Place a container under the radiator and slowly begin to unscrew the plug to drain the antifreeze. If you move too quickly, excessive pressure will build up, which will force coolant out of the expansion tank.
- It will take you about 10 minutes to remove all the liquid. While this process is taking place, place the container under the engine and find the plug on the cylinder block, it is located next to the ignition module. Also wait 10 minutes.
- Find the sensor between the cylinder head and the thermostat; it looks like a hexagon. Remember its position or mark it so that you can install the new one as well. Unscrew the sensor with a 21 key.
Before installing a new sensor, apply a small amount of heat sealant to the threads.
Install the new controller in place of the old one so that it stands on the same marks, pay attention to the position of the marking of this element. After this, you need to tighten the plugs and pour new coolant into the cylinder block and expansion tank
Operating principle of the lubrication system
Lubrication of moving engine components occurs according to the following principle: oil gradually flows into a recess located in the sump, after which it is sucked in by an oil pump, passed through an oil filter and again supplied to the loaded components.
The latter include:
- crankshaft plain bearings;
- cylinder walls;
- cylinder head;
- all gear mechanisms.
A sensor that monitors oil pressure is installed at the top of the cylinder head, at the point where the lubricant passages end. Thanks to this, the sensor monitors the oil at all stages of its movement, starting from the oil pump and ending with the camshaft.
The design of the ODM itself (oil pressure sensor) includes only three main parts - its housing, electronic contacts for signal transmission and a sensitive membrane. Depending on the oil pressure, it either closes the electrical circuit or opens it. If the pressure is less than the permissible threshold (0.65 Bar), then the sensor is triggered and the oil light for VAZ 2114 lights up on the panel.
As soon as the light comes on, you should stop driving as quickly as possible and search for possible faults. Operating a vehicle with an inoperative oil supply system can lead to rapid wear of moving parts and even engine failure.
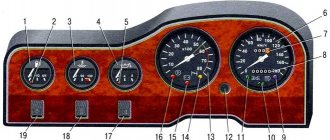
Error codes for the VDO combination on the instrument panel of the VAZ 2110
- If 0 remains, then there are no errors
- When 1 appears, it indicates a microprocessor malfunction
- Open circuit of the fuel level indicator sensor
- Error 4 - increased supply voltage of the on-board network over 16 Volts
- Error 8 - low voltage, less than 8 Volts
- In case of several malfunctions, a number may be issued simultaneously, which will be the sum of the above codes, for example 6 (2+4), 10 (2+8), 12 (4+8) or 14 (2+4+8)
To be honest, these fault codes are not particularly useful. If we compare it with the readings of special on-board computers, such as STAT, then there is, of course, tens of times more useful information and various data. But we’ll talk about this sometime in future articles.
My devices also turn off when you drive and there is some kind of sound, the fuel level also floats, they blow me exactly the same, nothing helped and I looked at the mass on the handbrake, also zero
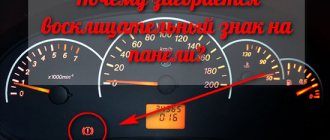
On my instruments it shows 3456 on top and 78 on the bottom, what does this mean, please tell me
Engine 21124 16 valve
Hello ! Help with the problem, I came to the car yesterday, everything worked, before that I cleaned the injectors. The next day the car started up, but after running for 3-5 seconds it stalled and no more spark, no steering wheel sensor, changed it, then I relieve the pressure in the ramp and try to start it, it starts for 4 seconds and stalls. Where to dig?
Please tell me. I'm getting error 78. VAZ 21124 16v europanel 2007
Hello, my VAZ 10, 8 valves had error 14, I cleared it, do I need to go for diagnostics?
Hello, My VAZ 2110 car will not start. I barely started it with a tugboat, the idle doesn’t work and the throttle doesn’t work, but I need to rev it up, what should I do? Tell me. And error 8 shows how to find this malfunction.
VAZ 2112 16-valve, during self-diagnosis it displays error 818.2... help save what is being done)
Hello, the VAZ 2112 stopped starting, the on-board computer shows error 43210
Who can tell me what error number 8 is?
1 Microprocessor error 2 Fuel gauge sensor circuit error 4 High voltage 8 Low voltage 12 Indicator lamp diagnostic circuit faulty 13 No oxygen sensor/LAMDA probe signal 14 Coolant temperature sensor signal high 15 Coolant temperature sensor signal low 16 On-board voltage too high network 17 Low voltage on-board network 19 Incorrect crankshaft position sensor signal 21 High signal level of the throttle position sensor 22 Low level of the throttle position sensor signal 23 High level of the intake air temperature sensor signal 24 No signal from the vehicle speed sensor 25 Low level of the intake temperature sensor signal air 27 High signal level of the CO potentiometer 28 Low signal level of the CO potentiometer 33 High signal level of the mass air flow sensor For GM NIVA: High signal level of the absolute pressure sensor 34 Low signal level of the mass air flow sensor For GM NIVA: Low signal level of the absolute sensor pressure 35 Idle speed deviation 41 Incorrect phase sensor signal 42 Malfunction of the electronic ignition control circuit 43 Incorrect knock sensor signal 44 Lean mixture 45 Rich mixture 49 Vacuum loss diagnostics 51 EPROM error 52 RAM error 53 No CO potentiometer sensor signal For GM NIVA : increased voltage 54 No signal from the octane corrector sensor 55 Depletion at high engine load For GM NIVA: error in the electronic control unit 61 Degradation of the oxygen sensor/LAMDA probe
Errors persist until they are reset manually! Also mistakes add up! Those. If you have errors 8 and 14, the display will show error 22.
Please help, I stood there warming up for about five minutes, suddenly the car stalled, it started on its own, then, too, at first Troila played with rpms of 1000-1500 and stalled again, and as soon as you press the gas it immediately stalls
The crankshaft sensor or the crankshaft itself may also be the crankshaft gear
Hi, I do everything as in the video, but the diagnostics are not performed, it just switches the mileage to daily and that’s it.
Sergey, press this button on the panel and hold it while turning the ignition key, everything will show there
Mass fuel flow sensor
Mass air flow sensor is a very important element of any injection engine. It is a plastic structure with a platinum thread inside. When the ignition is turned on, a small voltage is applied to it, which increases the temperature due to the high resistance. When the engine starts, the incoming air cools it, which causes the resistance to change, and according to Ohm's law, this affects the voltage. All this data is collected by the controller and processed, making a conclusion about how much air passes through the mass air flow sensor.
If the sensor malfunctions, important readings stop coming or are given in an incorrect form, which is why the engine control unit switches it to emergency mode. In addition, there are a number of signs that indicate a malfunction:
- Poor dynamics;
- Long engine start;
- Increased fuel consumption;
- Unstable or “floating” speed;
What to do if the light comes on after replacing the DADM?
When the engine starts at number fourteen, the oil pump pumps lubricating fluid from the crankcase into the oil line, while it passes through the oil filter, which removes all mechanical impurities from the lubricant.
If a lot of sediment has accumulated at the bottom of the crankcase (carbon deposits that are washed off by the oil from the inside of the engine and enter the crankcase), they can clog the filter mesh, as a result of which even a properly functioning oil pump will not provide the required lubricating fluid pressure.
In such a situation, it is necessary to drain all the oil from the crankcase and, if it is very dirty, replace it with new one. You also need to clean or replace the oil filter.
Pinout of the VAZ-2114 window lifter button
If you look at both halves, into which the VAZ-2114 window lift button was disassembled, then two rows of contacts and sockets for them clearly appear. One has four elements, the other three. This missing contact is considered the starting point for the subsequent pinout of the VAZ-2114 window lifter button.
With half of the body facing towards you, the contacts are numbered. Each “tooth” corresponds to a wire of a different color.
- Yellow. It connects to the dimensions and serves as a “plus”.
- Black. You can connect it to the negative side of the battery or connect it to ground.
- Red. This is a nutritional plus. Can be connected to a battery. Then the VAZ-2114 window lifter will work both with the ignition on and not. If the driver wants to get a working mechanism only when the engine is started, it should be connected to a similar plus of another unit.
- Green. Output to window lift motor.
- Blue. Output to window lift motor. If the 4th and 5th nodes are swapped, the device will work. But instead of an up arrow, the glass will go down. And vice versa.
- The sixth and seventh ones are automatically connected by “mice” to black, that is, to ground. But some recommendations suggest that this action is not advisable. It is better to connect to the battery.
The fundamental difference between whether the contact is connected to a battery or to another source is that in the first option the mechanism will work even when the ignition is turned off. And the pinout in these cases is relative.
Why troubleshooting should be done as soon as possible
If while driving the oil pressure in the VAZ 2114 engine suddenly drops and the light comes on, then you cannot continue the trip. You should stop and try to find out in the field the possible cause of the breakdown.
Continuing to drive with a faulty oil system can lead to a number of negative consequences for the car, including:
- Running the moving parts of the engine dry, which will ultimately lead to severe wear and overheating. The longer the engine runs without oil, the greater the damage to it and adjacent components will be (ultimately, all this can lead to crankshaft jamming and engine failure).
- Camshaft wear.
- Clogging of the pressure relief valve with metal particles formed during dry operation and damage to the oil pump. In addition, such particles can clog the lubrication channels in the engine, which can only be cleaned during a major overhaul.
Crankshaft VAZ 2114
The battery does not hold a charge
If the voltage at the terminals is less than 12.5 Volts, remove the battery for charging. After charging the battery to 12.7 V, leave it unused for 12-24 hours. Then check the voltage at the terminals or the density of the electrolyte. A working battery will not be discharged during such a period. The cause of the discharge could lie in overloading of power supplies by consumers, frequent short trips, or frost. There is a possibility that the generator is malfunctioning.
Find out the charging time of your battery
Buying a new battery before you are sure that the old one is unsuitable is irrational. But if you have a spare one and the ability to use a battery from another car, you can install it in place of yours while it is charging, and try to start the car and drive it for several kilometers.
If the light on the VAZ panel no longer lights up, the problem was a discharged battery. We are waiting for ours to charge. If it does not hold a charge, we buy a new one or, if we have the time, desire, and abilities, we restore the old one.
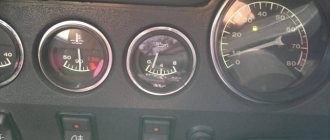
About the block
The unit is a device with several indicators that light up when there is a malfunction or improper operation of the internal combustion engine. Each indicator has its own lamp, and if there is an error in a specific module or location, the lamp lights up, after which it is recommended to check the equipment to which the indicator refers.
The unit itself can be considered a simple on-board computer that monitors the condition of the car in real time. The unit is located on the center console. The location for this device was not chosen by chance in this particular location; it is perfectly readable and is always under the driver’s eyes, which will allow you to quickly notice errors in the car.
Lack of oil in the crankcase
The first reason that suggests itself is a low level in the engine crankcase. Because you haven't watched it for a long time. When was the last time you checked the level in the engine?
Every second driver will have a low level of lubricant, top it up and everything goes away. However, I constantly monitor the lubricant, and the level is normal, but the lamp comes on. What to do? Of course, look for the problem.
If the pressure lamp flashes when driving downhill, uphill or on turns, then simply add a little lubricant to the engine. It splashes and in such modes the pump cannot reach it. On a flat surface the level will be within acceptable standards.
I do not consider grease waste and leakage, since this does not apply to our case. As you remember, I explain the reasons for the lamp burning when everything seems to be enough.
The dashboard of the VAZ 2114 is blinking
Hello! This is the problem at idle: the panel backlight blinks and, in general, all the backlight in the car, if I give more gas, it stops blinking and blinks when driving, sometimes it stops blinking for 30 seconds, what could be the problem? where to climb? generator new eldix 135a maybe the tablet is just unscrewed? charging at full load 14.0 Check the chocolate bar, as a rule, blinking dimensions indicate a malfunction of the chocolate bar...
I have the same issue. The electrician measured the voltage from the generator (13.8V) and says everything is fine, don’t worry o_O If you solve the problem, write how.
Check the chocolate bar, as a rule, blinking dimensions indicate a malfunction of the chocolate bar...
I took off the generator and wanted to install the old drain (((here I thought, let me take it apart, I removed the new casing, I see everything is clearly shining)) I unscrew the voltage regulator and immediately the wire flies off it! That’s when I realized what my problem is))) bad contact on the regulator with I pressed it with brushes and pulled everything back)) I started the problem with the backlight flickering, solved)) at idle, charging with the fogs on, heater 3rd position, heated rear window, music for the whole daylight in the cabin on panel 13.8 on battery terminal 14.0
Why does my right green light blink and sometimes not chirp? Explain the reason?
- The instrument panel in the VAZ 2114 failed - 3 answers
- Speedometer needle freezes in VAZ 2114 - 2 answers
- Speedometer needle freezes - 2 answers
- Is there an exclamation mark in the circle of the VAZ 2115? – 2 answers
- VAZ 2114 shows fuel level incorrectly - 1 answer
The contact is bad, so it blinks and clatters. Maybe it's loose in the panel or fuse box. You can also check in the headlights.
The light switch is acting up. You can ask a friend for a replacement. For check.
Subscribe
to our channel in Yandex.Zen
Even more useful tips in a convenient format
To post a reply you must log in or register.
Reasons for error 12
The appearance of this error is caused not by one malfunction, but by many different breakdowns. Among them there are both quite rare and very common. Most often the code appears for the following reasons:
- The “Check” indicator lamp has burned out;
- The Check Engine light connector is oxidized, dirty, or otherwise defective;
- Damage to the wiring on the dashboard;
- Incorrect connection of the indicator;
- Generator malfunction;
- Oxidation or damage to contacts;
- ECU failure.
The code may be displayed for other reasons. Sometimes identifying them requires not self-diagnosis, but checking the car using a diagnostic scanner. In some cases, to identify a breakdown, it is necessary to contact a specialist.
Breaks in the winding
If there is a break in the excitation winding, then the generator does not charge. This is determined simply. It is enough to touch the generator with your hand. If the winding breaks, the device will heat up. To diagnose more accurately, the end of the excitation winding is disconnected from the brush and connected to a terminal on the generator. The measurement is carried out using a multimeter from the battery.
If there are breaks, the multimeter will not show anything. If a signal lamp is used instead of the device, it will not light up. In order to find the problematic coil, wires from the battery are connected to each of them in turn. If the break is inside, the coil is replaced. External breaks are removed using a soldering iron.
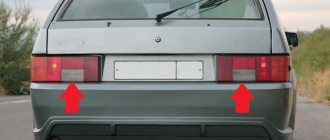
The light in the interior of the VAZ-2115 does not work: possible reasons
Lighting in the VAZ-2115 is one of the most important components of comfortable movement by car at night. If the interior light does not work, the driver faces a lot of inconvenience.
The light emitted by street lamps will not help you find the desired item in the glove compartment, therefore, it is best for the driver to take care in advance that all the light bulbs and other components of the car’s electrical equipment work stably and reliably. But what to do in a situation if the lighting fixtures in the interior of a VAZ-2115 for some reason refuse to fulfill their duties?
The main reasons for the lack of lighting in the cabin
Inside the VAZ-2115, the manufacturer often installs one lamp located directly on the ceiling and individual lamps. It is attached using fasteners and is activated when the doors are opened. Drivers have been familiar with this principle of operation of a lighting device since the “classic” times. The lamp can also be turned on and off manually using a switch located on its body.
The lampshade and other lighting fixtures are part of the electrical system, therefore, if any malfunctions occur with the light, you should start looking for the problem from the electrical circuit diagram. Most drivers prefer to have their car electrically repaired, but such a nuisance can be fixed on your own. To do this, you need to arm yourself with a minimum set of tools and the circuit itself.
The main reasons for the lack of lighting inside the car are:
- Burnt out light bulbs;
- Breakage inside the lampshade;
- Relay or fuse problem;
- Breakdowns in the wiring.
When the reason why the lighting fixtures have stopped functioning properly has been determined, you can safely move on to fixing the problem yourself. As a rule, such work does not cause any particular difficulties for novice drivers. All you need is basic knowledge of how automotive electrical equipment works.
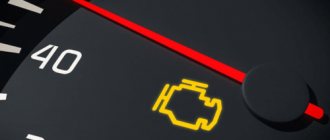
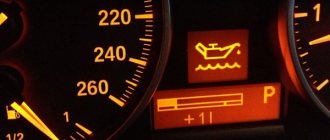
The system failure indicator is on
Almost every car owner has encountered a situation where the red lubricant pressure lamp on the instrument panel lights up. But not all drivers know what to do in such a case.
After all, the situation can occur at any moment - both while the vehicle is moving and at idle speed. Definitely, if this problem occurs, the car requires repair work.
There are many reasons for the occurrence of an indicator signal. The driver is recommended to adhere to a certain rule: you cannot continue driving if the indicator lights up.
Neglecting the recommendation can lead to irreversible consequences, namely major damage to the car. The optimal solution in this situation is to call a tow truck and go to a car service center to diagnose the control system.
Motor oil, in addition to its main function of lubrication, acts as a cooling agent. If the pressure in the power unit decreases, then, consequently, the temperature of the mating elements increases.
The motor begins to wear out, that is, under extreme operating conditions. It is worth noting that hot oil loses its positive properties and loses its function of creating a special film on engine parts and mechanisms.
Decoding codes
Next, we will look at the most common codes encountered during diagnostics of on-board computers of VAZ 2114 cars. Of course, on-board computers are also electronics, and they can cause certain failures, such is the specificity of their operation. However, often the fault codes displayed by the on-board computer are still true.
Description of the error
We will not consider all codes without exception, but especially for our readers we have selected errors that occur most often when diagnosing VAZs.
| Codes | Description |
| 0102, 0103 | Incorrect signal level of the mass air flow control indicator. |
| 0112, 0113 | Incorrect signal from the intake air temperature indicator - the element needs to be replaced. |
| 0115 — 0118 | Incorrect signal from the antifreeze temperature measuring element - the indicator needs to be replaced. |
| 0122, 0123 | Interference or incorrect signal from the throttle position control indicator - it is advisable to replace the element. |
| 0130, 0131 | The oxygen sensor is faulty. |
| 0135 — 0138 | The oxygen sensor heating device has failed - the component must be replaced. |
| 0030 | Failures in operation or a break in the circuit of the oxygen sensor heater to the converter were detected. |
| 0201 — 0204 | An open circuit was detected in the injector control circuit. |
| 0300 | The on-board computer (BC) has detected random or multiple misfires - in this case, the car may not start immediately. |
| 0301 — 0304 | Misfires were detected in the engine cylinders. |
| 0325 | The on-board computer detected an open circuit in the detonation device. |
| 0327, 0328 | The knock sensor is malfunctioning—the device needs to be replaced. |
| 0335, 0336 | A breakdown in the functioning of the crankshaft position sensor has been detected - it needs to be replaced. |
| 0342, 0343 | The car's BC has detected a failure of the phase sensor - the device needs to be replaced for optimal operation. |
| 0422 | The neutralizer device does not work. |
| 0443 — 0445 | The canister purge valve has stopped working - it needs to be replaced. |
| 0480 | The cooling fan has stopped working - the element needs to be replaced. |
| 0500, 0501 , 0503, 0504 | The car's BC has detected a malfunction in the speed sensor - the indicator needs to be changed. |
| 0505 — 0507 | There are malfunctions in the functioning of the idle speed controller, which affect the number of revolutions (lower or higher). If this code occurs, the regulators must be replaced. |
| 0560, 0562, 0563 | During diagnostics, the BC detected failures in the supply of mains voltage. A more thorough diagnosis is needed that will identify the exact areas in the circuit that need to be replaced. |
| 0607 | The detonation channel is not functioning. |
| 1115 | Failures in the operation of the oxygen sensor heating circuit were detected. |
| 1135 | An open circuit was observed in the heating circuit of the oxygen sensor; a short circuit may have occurred. It is better to replace the sensor. |
| 1171, 1172 | Incorrect potentiometer gas level. |
| 1500 | The BC detected an open circuit in the fuel pump device. |
| 1509 | The electrical control circuit for the idle control element is overloaded. |
| 1513, 1514 | The on-board computer detected an open circuit in the idle speed device. |
| 1541 | When this code appears, there is an open circuit in the fuel pump relay adjustment circuit. |
| 1570 | A break was detected in the traction control system. |
| 1600 | The BC reports that communication with the traction control system has been lost. |
| 1602 | It is one of the most common codes when diagnosing fault codes. Indicates a loss of on-board power supply voltage to the electronic control unit. |
| 1606, 1616, 1617 | During diagnostics, a breakdown of the uneven road surface detection device was identified. |
| 1612 | A fault was detected in the electronic unit reset. |
| 1620 | Problems with the permanent storage device. |
| 1621 | Failure of the random access memory device. |
| 1689 | If this combination of numbers appears during diagnostics, the on-board computer may show incorrect error codes. |
| 0337, 0338 | Errors in the functioning of the crankshaft position control element or an open circuit. |
| 0481 | The second cooling fan has stopped working - it needs to be replaced. |
| 0615 — 0617 | During the diagnostic process, breaks or short circuits in the starter relay circuit were identified. |
| 1141 | The heating device for the first oxygen sensor after the neutralizer has left the working row. |
| 230 | This error code means the fuel pump relay is broken - the device needs to be replaced as soon as possible. |
| 263, 266, 269, 272 | These codes indicate a breakdown of the driver of the first, second, third or fourth injectors - the elements need to be replaced. |
| 640 | This combination indicates an open circuit in the lamp circuit. |
We have presented to your attention the most common combinations of codes found when diagnosing VAZ cars.
Troubleshooting the cigarette lighter and radio
Before starting repairs, you must find the fuse. Open the rectangular hatch to the left of the steering column of vehicles of the indicated models. Inside it there is a block of all fuse links of automotive electrical wiring. The element in the socket marked F4 is responsible for the operation of the cigarette lighter and radio on the VAZ-2114.
If the fuse looks normal externally, you can determine the open circuit in this place with a simple screwdriver tester. The light on the probe lights up when the element is working. Otherwise, you need to find a new 20 A insert in the repair kit, remove the faulty part from the socket and insert a new one. In most cases the problem is resolved.
If the safety element is working or has been replaced, but the cigarette lighter and radio do not work on the VAZ-2114, do the following:
- Check the radio's own fuse. It turns off only the player, so the inspection is carried out in the case when, after replacing the element in the block, only the cigarette lighter and electrical equipment for heating work (general: body and heating system), but the tape recorder is silent. The burnout of its safety element may indicate a breakdown in the music console, so it is recommended to have it checked in a workshop.
- Inspect and check the contacts of the fuse socket in the block. This is done if, after replacing the insert, the functionality of all devices is not restored. Tighten loose contacts and clean them from carbon deposits.
- Inspect the cigarette lighter and check it with a tester. The peculiarity of the backlight lamp is its serial connection into the electrical circuit. Its burnout causes a break in the circuit of the entire device, and additional electrical appliances connected to the socket (for example, charging a phone) do not work. A working cigarette lighter will work after replacing the lamp.
- Burnout of the heating coil is determined with a tester by applying its probes to the cigarette lighter contacts. In a faulty device, the resistance scale (Ohm) will display the value 0 (short circuit) or 1 (burnout). Indirect evidence of a malfunction is the additional devices connected to the socket: if the coil of the cigarette lighter itself burns out, then its socket remains operational and the phone will charge normally. The malfunction can only be eliminated by replacing the device. When purchasing a new one, it is advisable to immediately check its performance.
Sometimes devices stop working due to a break in the wires running from the fuse block to the cigarette lighter or radio. But in this case, only 1 device is always turned off, and the rest, connected through the same element, operate normally.
Methods for checking the oil pressure sensor
Replacing the oil pressure sensor on a VAZ 2114 or the oil level sensor is carried out only after a thorough check. In order to find out everything accurately, you should perform the following operation:
- lift the car onto the inspection hole;
- remove engine protection;
Removing the engine protection
- find the oil level sensor under it;
- start the car;
- disconnect the wire going to the sensor;
- take a voltmeter and check the voltage between ground and the connecting block (a working oil level sensor should show a voltage of 12 V).
If there is not enough voltage, then there are several possible causes of the malfunction:
- the display unit itself may be faulty;
- there is poor contact or a wire break in the sensor circuit is possible.
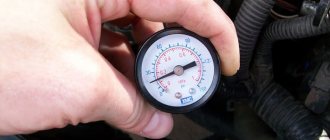
To analyze the operation of the oil pressure sensor, you first need to know what it consists of. This is the housing that houses the measuring membrane and transmission mechanism. This membrane bends and takes one position or another, depending on the oil level. At the same time, the membrane closes and opens the electrical contacts and the surest way to check the sensor is to connect a pressure gauge. Moreover, if at idle the pressure gauge readings are 0.65 kgf/cm2 or higher, then everything is normal. The best way to check the sensor is to remove it and crank the starter without starting the engine. In this way, it will be possible to determine exactly whether the oil pressure sensor is working or not. If oil leaks from the sensor installation location, it means that the part will need to be replaced. If the problems are not resolved and everything leads to the fact that the part is faulty, only replacing the VAZ 2114 oil level sensor will help solve the problem.
VAZ 2114 do-it-yourself oil sensor replacement
New oil pressure sensor
Replacing the VAZ 2114 oil sensor is not a labor-intensive or complicated process. A novice motorist is quite capable of carrying out the replacement on his own, if, of course, he uses the tips given in this article. Let's start the replacement process:
- we lift the car onto an overpass or inspection hole (this is mandatory, since it will not be possible to work under the car any other way);
- turn off the car ignition;
- disconnect the engine ground;
- remove the engine protection (you can read the special instructions that will help you correctly disconnect the pan);
- we find the oil level sensor, which is located near the oil pump;
- disconnect the end of the wire coming from the oil level sensor;
- take a 10mm socket wrench;
- unscrew the nuts securing the sensor;
Oil pressure sensor operation diagram
- remove it completely;
- The new sensor is installed in the reverse order.
Emergency oil pressure sensor
It is often necessary to replace the emergency oil pressure sensor. A sign that this procedure should be carried out is the constant burning of the lamp. To carry out the operation, you should arm yourself with tools such as:
- Disconnect the negative cable from the battery;
- we find the protective rubber cap of the emergency oil pressure sensor and remove it;
Protective rubber cap for emergency oil pressure sensor
- disconnect the end of the wire going to the sensor output;
- take a 21mm socket wrench and unscrew the emergency oil pressure sensor.
Disconnecting the emergency oil pressure sensor
Advice. A special connection sealing washer is installed between the sensor and the adapter. It should definitely be replaced, regardless of whether it is new or not.
install a new emergency oil pressure sensor (everything is done in the reverse order).
This video will help you do everything correctly and avoid making mistakes. The step-by-step article with photos given above is a unique chance for any motorist who finds himself on the road to learn how to change the pressure or oil level sensor independently and without anyone’s help. You can make a better replacement with your own hands, especially if you do everything on your own car. As a result, you can not only safely go on any road several hundred kilometers long, but also save a lot of money, because the price for services of this type today is not encouraging.
Source
Is it possible to drive with error 12?
It is not advisable to drive, especially on long trips, only if there is a suspicion of a malfunction of the generator or the behavior of the car is very different from usual. The car may stall and not start again. And delivering it to your home or to the place of repair may be associated with certain difficulties. But using a car with such a problem does not threaten anything more serious.
Despite the fact that this code in most cases does not pose any danger to the vehicle and its owner, you should not drive with it for too long. You should solve this problem yourself or with the help of a specialist as quickly as possible. Moreover, many reasons do not require significant financial costs.
How to fix problems
Prepare for work a set of screwdrivers (straight and curved), keys 8 and 21, special plastic tweezers for removing fuses and a tester. Next, disassembly should be carried out according to the instructions:
- Disassembly begins with removing the cover. To do this, you need to unscrew 3 screws. There is a protrusion under it that needs to be removed from the body bracket.
- To remove the screen you need to unscrew 5 screws, they are located in the console lining on the right.
- Remove the terminal from the battery (usually the negative terminal is recommended) to disconnect the power to the car. Only after this, disconnect the wiring harness block from the cigarette lighter.
- Remove the handle from the lever. Disconnect the fastening of the electric fan located on the heating unit.
- After this, remove the bolts on the steering block brackets. Remove the light guide, lamp sockets and decorative insert of the instrument panel.
- Using a 21 key, remove the hydraulic corrector illumination lamp.
- Remove the screws from the bottom and top so that you can remove the dashboard.
Test the light bulbs first. If they fail, they must be replaced with new ones; in most cases, this is enough to restore the panel’s functionality. However, do not exclude other causes, for example, check connections and conductors for the presence of oxide. Carbon deposits often form on lamp sockets, which also leads to a lack of panel illumination.
If only the instrument panel stopped working, but all the lamps showed operability during testing, then the reason is hidden in the fuse block. In this case, check each fuse and replace the ones that are broken. When purchasing components, you must be guided by the marking of the failed fuse. You should not replace it with homemade products or components with higher current strength.
If the fault lies in damage to the board itself, which is extremely rare, then you simply need to replace this element.
Elimination methods
Now you can go directly to the elimination methods. First, you need to figure out what tools you may need to complete the process: a 10mm wrench, a multimeter, a set of screwdrivers. Now that everything is collected, you can move directly to solving problems.
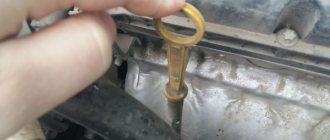
Low oil level on dipstick
The dipstick is used to measure the oil level in the engine.
Also, the cause of oil loss in the engine may be a faulty gasket or a breakdown in the engine crankcase. In order to eliminate oil loss, it was necessary to eliminate the malfunctions that caused the effect, and then add oil to the required level.
To measure the oil level, there is a special tool called an oil dipstick. It is located on the front of the engine. The oil level in the engine should be midway between the minimum and maximum indicators. When the indicator drops below the MIN mark, the oil level indicator lights up on the dashboard.
Sensor malfunction
A sensor malfunction can also cause an oil level indicator to appear on the dashboard. To eliminate the malfunction, you need to check the sensor, and if it is faulty, replace the part.
Old and new oil level sensor The replacement process is quite simple and not complicated. Let's consider the issue in more detail. To complete the operation, you will need a key for 10. So, let’s proceed directly to the sequence of actions aimed at replacing the sensor:
- The car must be installed so that there is access from below. A viewing hole, a lift or an overpass is suitable for this.
- Disconnect the negative terminal on the battery.
Remove the negative terminal from the battery.
If there is, it is necessary to remove the lower engine protection.
Remove the engine crankcase protection.
We dismantle the pallet. You must first drain the oil from the engine through the drain plug.
We dismantle the pallet.
Disconnect the wire block from the sensor. We clean the engine oil level sensor from dirt. Disconnect the block from the wires. Using a wrench or a 10mm socket, unscrew the oil level sensor. We install a new sensor and carry out the necessary assembly.
Contact circuit problem
Diagnostics of the fuel level sensor chip More than once, the cause may be a break in the wires or contact group that goes from the sensor to the electronic control unit. Based on the electrical diagram of the car, we find the corresponding wire that powers the meter. Next, we find exactly the same one in the ECU and call it.
Short circuit inside the instrument panel
More than once, a short circuit inside the dashboard board can be the cause of a light on the dashboard. This may be caused by corrosion damage or a short circuit inside the instrument panel. Thus, the solution to the problem may be to repair the board or replace the instrument cluster.
Checking the contacts of the dashboard board It is quite easy to determine the malfunction: you just have to disassemble the device and look at the contact connections. Also, to be completely sure, you can ring the contacts on the board and directly on the indicator lamp itself, using a tester.
Malfunctions in the VAZ-2114 ECU
The last possible option to look for a fault is the electronic control unit. Errors may occur here that will not only cause the oil level light to light up, but also cause other indicators to malfunction, such as the speedometer, turn signal, and others.
The method of troubleshooting is to connect a laptop or tablet to the “brains” of the car via an OBD cable and a standard test. If errors related to the oil level are detected in the ECU, they must be reset. The procedure for resetting all errors should be done for all indicators that have accumulated in the “brains”. After this, the problem should disappear; if not, then the fault must be looked for elsewhere.