Types and types of abs anti-lock braking systems
Based on the number of control circuits, there are three types of anti-lock braking systems:
- single-channel - when one wheel is blocked, all four are released;
- two-channel - triggering occurs based on data from the best (high-threshold) or worst (low-threshold) wheel;
- four-channel - each wheel is adjusted separately, which ensures maximum braking efficiency.
Important! Modern cars are equipped with four-channel systems.
Depending on the location of components and maintenance features, there are three types of ABS:
- with components (hydraulic module, valves, accumulator and pump) located in a single unit;
- with components spaced in the form of different units;
- with optional SBC and ESP systems.
Despite the complicated design, it is quite possible to replace ABS brake fluid yourself.
To replace you will need:
- The brake fluid itself
- To remove old fluid syringe
- dry rag
- container for old liquid
- rubber hose, the diameter of which should be suitable for the bleed fittings on the wheels
- Special brake wrench 8 by 10 mm
First, we need to pump out the old brake fluid using a syringe, while leaving a small layer of it in the reservoir so that air does not get into the system.
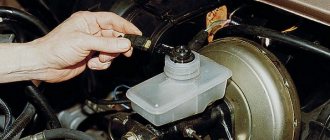
Now fill the new brake fluid into the reservoir to the max level.
Now you need to completely remove the old fluid from the system by pumping it and filling it with new fluid.
How to check the condition of the fluid?
Diagnosis of TG is performed in the following ways:
- Visual. Unscrew the cap of the expansion tank and carefully examine the contents. The color should correspond to the type of liquid poured (transparent yellow or reddish). If you notice cloudy sediment or floating black particles, the material should be changed.
- Using special test strips.
- Electronic device - tester. It is not advisable for an ordinary car enthusiast to buy such a device; such a check is carried out by masters of service stations.
Litmus test strips of the BG9100 type are sold freely and allow you to evaluate the age and degree of contamination of the working environment by the content of tiny copper particles that penetrate into the fluid from contact with system parts. Diagnostics is carried out according to the instructions:
- Remove the indicator strip from the packaging, unscrew and remove the cap of the expansion tank.
- Immerse the litmus in the container and close the stopper.
- After 30–60 seconds, remove the strip and compare it with the samples drawn on the packaging. After reading the description for the colored marker, it’s easy to figure out when it’s time to change the brake fluid.
Replacing brake fluid with abs. list of actions and subtleties
Replacing fluids in all parts of a car is a very important process, and replacing ABS brake fluid is no exception. To be frank, replacing the brake fluid is a priority, since it’s still possible to drive on burnt-out oil, but driving a car without brakes is simply dangerous.
This procedure also has its own frequency. For each brand and each model it is different and this is stated in the instructions for using the car. Average replacement rates are calculated on a regular basis of about 1-3 years, or from 30,000-40,000 km. mileage, but do not forget that all this is generalized. The frequency largely depends on how intensively the car will work, under what conditions, and so on.
Characteristics of engine oil for Priora
Over the years, factories produced cars with various 16 valve engines: 98-horsepower VAZ 21126, 106-horsepower VAZ 21127 and 98-horsepower VAZ 21128.
At the same time, there is no need to talk about any significant differences; in many respects, their design is identical, which allows the use of the same lubricants for the entire line of vehicles.
According to the API specification and AvtoVAZ recommendations, synthetic or semi-synthetic oils of the SJ or SL class should be used for the Priora; they were developed for gasoline engines produced since 1996.
Their features include low volatility, decent cleaning properties (to facilitate the removal of deposits in the unit) and cost-effectiveness associated with an increase in time until the next replacement.
To understand which oil is best to pour into Priora, you need to understand the concept of viscosity, which depends on climatic operating conditions:
- so for areas where the temperature is often below -30 degrees, 0W30 fluids are recommended;
- in southern latitudes, when the cold does not drop below -20 degrees, compositions 10W40 and 15W40 are suitable, where the number in front of the letter W determines the viscosity of the oil;
- for moderate climates, the recommended oil for a 16 valve prior engine is 5W30 or 5W40.
Another tip from experienced specialists is to use W30 in new engines when there is no large gap between the moving parts. Over time, the system will develop and a thicker lubricant will be required for the best operating conditions of the unit.
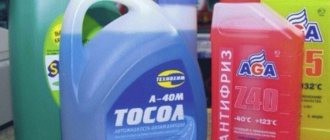
Which brake fluid to choose for Priora
The manufacturer fills it with DOT 4. The most popular brake fluids among buyers are ROSDOT 4 and NEVA-M. The first option is more expensive, the second is cheaper. For cars with and without ABS, it is recommended to use different types of fluids.
- DOT-4 plus - for cars without ABS
- DOT-4 class 6 - designed for modern braking systems (ABS, ESP, VSA)
Depending on the capacity, the cost of the brake fluid indicated above is from 50 to 150 rubles.
You can also add DOT 5.1 fluid. It has a lower viscosity than the above samples, as well as a higher boiling point and, according to manufacturers, changes once every five years.
It is prohibited to mix liquids of different types with each other!
Table of filling volumes
Filling volumes and names of liquids used in the Lada Priora car, according to the instructions of the manufacturer.
| Place for filling the required liquid | Name of infused liquid | Volume of infused liquid (L) |
| Engine crankcase (lubrication system for engine rubbing parts) | Automotive motor oils classified according to SAE 5W-30, 5W-40, 10W-30, 10W-40, 15W-40 | 3,5 |
| Gear box | Automotive transmission oil classified according to SAE 75W-90, 80W-85 | 3,3 |
| Interior heating and engine cooling system | Antifreeze or antifreeze with a freezing point of at least -40 degrees | 7,9 |
| Fuel tank | Gasoline with an octane number of at least AI - 95 | 43 |
| Hydraulic Brake System | DOT-4 brake fluid | 1 |
| Windshield washer reservoir | Special liquid for glass processing that does not freeze in frost (in winter), water (in summer) | 2,2 |
Myths and legends
Replacing brake fluid with ABS often causes an abundance of all kinds of controversy among car enthusiasts. The myths associated with this liquid also add fuel to the fire.
The first is that brake fluid has an eternal life cycle. In fact, over time, the liquid may lose its prescribed qualities, since it is constantly in contact with air, which enters it through the compensation holes.
Second myth
The problem is that many people believe that it is quite common to mix liquids from different manufacturers. In reality, you can't do that. The thing is that for each type of car a composition is produced with its own characteristics and nuances.
Despite the generality of the prescribed recommendations for the production of such liquids. Mixing can be carried out only for a short period of time, and then with the condition that in the future a complete replacement of the brake fluid will be carried out.
New Lada: Technical characteristics of Lada-Kalina (VAZ-1117, 1118, 1119)
The third myth is the most extensive. He says that liquid of the DOT-4 standard can be used for filling into any car. As for the situation in real life, no, this liquid is not universal. And here it’s worth starting only from those species that have been officially recognized by the manufacturers themselves, and not throwing away and endangering everyone and everything.
As you can see, all these things are quite refutable, and if you follow them, then the path to problems is not far.
Do-it-yourself oil change in the Lada Priora engine
Changing the oil in a Priora 16 valve engine with your own hands begins with the preparatory process . At this stage, they buy all the necessary consumables and parts to replace worn and faulty ones.
In addition to the lubricant, you will also need to change the filter, rubber seals and drain plug gasket. If necessary, other connections are also replaced. Some car owners purchase all components in advance so as not to look for them during the replacement process.
To work with the engine you will need a comfortable, level platform. To do this, it is recommended to use a repair pit, a lift or an overpass. If there are none, you can evenly lift the car using a jack and supports.
safety precautions is emphasized . The car must be in a stable position; some people remove the negative lead from the battery as an additional precaution.
Also pay attention to the temperature and toxicity of the oil. To prevent burns, it is recommended to use rubber gloves. As workwear, they usually use things that you don’t mind getting dirty.
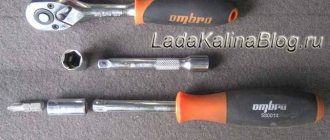
Taking into account the preparation and safety regulations, to change the engine oil you will need the following necessary tools and accessories :
- overalls, gloves, clean lint-free rags or rags;
- a set of keys and screwdrivers, gates with socket heads;
- container for draining waste liquid, the volume is oriented towards containers from 4 liters;
- new consumables: oil, filter, seals and gaskets, other components.
After preparation, they begin to replace the lubricant. The procedure takes 30-40 minutes; more may be required if necessary. The general step-by-step instructions for changing engine oil include the following procedure :
- warm up the engine for better lubricant circulation;
- after the oil has warmed up, uncork the filler neck;
- remove the mudguard and engine protection from below;
- place the container, carefully unscrew the drain plug;
- While the lubricating fluid is draining, begin replacing the filter;
- The filter element casing is unscrewed by hand; if necessary, use a special tool;
- remove the used cartridge, clean the seat and casing;
- install a new cartridge, lubricate the rubber seals with oil;
- screw the filter into place, tightening only by hand;
- when the lubricant finishes draining, clean the drain plug and hole, change the gasket;
- clog the drain, check the tightness of the connections;
- New lubricant is poured into the filler neck and the engine is warmed up;
- after warming up, measure the level of lubricating fluid; it should not go beyond the permissible limits both in the heated and cooled states.
Checking the condition and oil level is repeated after a few days. If the volume has decreased, add the required amount and check the system for leaks. If the color has changed, the problem may be with the quality of the product or in the critical condition of the internal mechanisms.
Is it possible to mix dot-3, dot-4, dot-5 or dot-5.1
Differences between brake fluid classes:
- DOT 3 (glycol base) – for relatively low-speed vehicles with drum brakes or front disc brakes;
- DOT 4 (glycol base) – on modern high-speed cars with predominantly disc brakes on all wheels;
- DOT 5.1 (glycol base) - on road sports cars, where the thermal load on the brakes is significantly higher.
- DOT 5 (silicone) is practically not used on conventional vehicles.
Brake fluids DOT 3, 4, 5.1 (color from light yellow to light brown) are interchangeable, but mixing them is not recommended (it is better to completely replace them), the properties may deteriorate. DOT-5 (dark red) cannot be mixed, it only mixes with itself. In other words, brake fluids can only be mixed by color.
What brake fluid can you recommend? Is it worth changing the usual DOT-4 class for Lada to others, for example, DOT-5.1? Let us remind you that you can easily find any information about your car by its content (Niva, Priora, Kalina, Granta, Largus, Vesta, XRAY).
Keywords: lada xray brakes | Lada Vesta brakes | Lada Largus brakes | Lada Granta brakes | Lada Kalina brakes | Lada Priora brakes | Niva brakes | universal article
Brake fluid Rosdot-4 was developed specifically for cars with disc brakes, taking into account the recommendations of AvtoVAZ specialists. Rosdot-4 is currently one of the best in its class among world analogues. It is recommended to replace the brake fluid after 1.5-2 years.
Brake fluid specifications
| Parameter | Meaning |
| GOST, TU | TU 2451-004-36732629-99 |
| Appearance | transparent homogeneous liquid from light yellow to light brown without mechanical impurities |
| Kinematic viscosity, mm²/sec, at -40°С, no more | 1450 |
| Kinematic viscosity, mm²/sec, at -50°С, not less | 5,0 |
| Kinematic viscosity, mm²/sec, at -100°С, not less | 2,0 |
| Boiling point of dry liquid, °C, not less | 260 |
| Boiling temperature of the moistened liquid, °C, not less | 165 |
| Stability at high temperatures, change in boiling point, °C, no more | 3,0 |
| Hydrogen ion activity indicators (pH), units. pH, within | 9,5-9,0 |
USEFUL TIPS In order to avoid exposing yourself in the future to unforeseen expenses for repairing the brake system, or even the entire Lada Granta car as a whole, promptly replace the brake fluid with fresh one. It is very hygroscopic and absorbs moisture from the air, which, in addition to causing corrosion of brake system parts, lowers the boiling point of the fluid itself, and this can lead to brake failure during frequent heavy braking.
Do not reuse brake fluid that has been drained from the brake system: it is contaminated, saturated with air and moisture. If brake fluid comes into contact with wires, plastic or painted body parts, it can cause damage, so always use a clean wiping cloth when pouring. If liquid gets on these parts, wipe them immediately with a clean cloth.
1. Check the brake fluid level in the master cylinder reservoir. When the plug is removed, it should be located between the “MIN” and “MAX” marks marked on the tank body. With the plug installed, the brake fluid level should be at the lower edge of the filler neck, since the brake fluid is displaced by the level sensor float.
WARNING A gradual decrease in the brake fluid level in the absence of leaks most likely indicates the need to replace the brake pads. Check the condition of the brake pads on your Lada Granta car (see “Checking the degree of wear of brake pads, brake discs and brake drums”). Untimely replacement of brake pads leads to expensive repairs (replacement of brake pads, brake discs and brake drums)!
New Lada: Lada Priora 2008: rim and wheel sizes, bolt pattern, tire pressure, wheel offset, DIA, PCD, drilling, standard tires and tuning
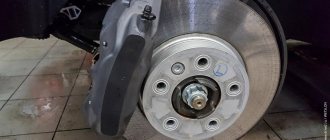
The automobile braking system can be called one of the most important in the operation of a car, because without it more than one vehicle cannot exist. Therefore, for the brakes to function flawlessly, it is necessary that the system elements be reliable. VAZ brake fluid is no exception.
, in this publication we will figure out what kind of fluid is needed and after what period of time it is necessary to replace the brake fluid.
Not every car enthusiast knows that the fluid in the brake system needs to be changed from time to time. Some people believe that it is only necessary to periodically top up the brake fluid so that air particles do not appear in the system, which will impair the performance of the brakes. However, this opinion is not entirely correct, although you should not refuse this operation.
. The presence of moisture in a liquid is no less dangerous than the presence of air in it, since work in this case becomes ineffective and is subject to corrosion. Based on this, it is recommended that the brake fluid be replaced not only according to the manufacturer’s recommendation, but also when moisture and air in it are independently detected.
Where can I buy?
The brake system uses ROSDOT fluid, which meets the criteria of TU 2451-004-36732629. It is produced at the facilities of Tosol-Sintez LLC, which are located in the city of Dzerzhinsk. In general, these are simple brake fluids and can be purchased at any auto store or ordered online.
As practice shows, most Vesta owners choose ROSDOT-4, as it has all the necessary characteristics, high quality, and is also quite cheap.
The most popular platforms where you can place an order are presented in the table.
| Online store | vendor code | Volume (l) | Price, rub.) |
| https://lada-vesta-shop.ru/shop/rashodnye-materialy/zhidkost-tormoznaja-dlja-lada-vesta-i-xray-super-dot-4.html | 88888-1000005-82 | 0.455 | 150 |
| https://ladatorg.ru/avtomaterialy/tormoznye-zhidkosti/tormoznaja-zhidkost-rosdot-4/ | 365 | 0.910 | 240 |
| https://zainskavto.ru/shop/avtokhimiya/zhidkosti-gidravlicheskie/tormoznaya-zhidkost-rosdot-4-455g | 4606532000189 | 0.455 | 110 |
| https://timeturbo.ru/catalog/zhidkost-tormoznaya/zhidkost-tormoznaya-rosdot-4-910g/ | 9497 | 0.910 | 255 |
| https://avsila.ru/catalog/masla-avtokosmetika-avtokhimiya/tormoznaya-zhidkost/zhidkost-tormoznaya-rosdot-4-910-gr-/ | 0.910 | 246 | |
| https://www.niva33.ru/katalog/masla-i-zhidkosti/tormoznaya-zhidkost/zhidkost-tormoznaya-rosdot-4-super-05l/ | 0.5 | 155 |
Is it possible to mix brake fluids?
Theoretically, brake fluids that contain the same component, for example, DOT 3, DOT 4, DOT 5.1 contain glycol, must be mixed, however, due to the presence of a certain set of additives in them, this can only be done in extreme cases, after which a complete replacement of the brake fluid is mandatory.
Key words: brake fluid
, brake fluid replacement, VAZ brake fluid, brake fluid reservoir, what kind of brake fluid, brake fluid dot, brake fluid dot 4, brake fluid dot Carry out preventive maintenance of the brake circuit together with a partner; it is extremely difficult to “bleed” the system alone. To ensure maximum access to the circuit, use an inspection channel or roadside overpass.
A few words about safety precautions
- Be careful when handling brake fluid as it is toxic.
- Avoid contact of TJ with skin and eyes.
- Do not allow brake fluid to come into contact with plastic or rubber products or paint surfaces.
- If liquid gets on any of the above, wipe them immediately using a clean cloth.
Note: Brake fluid is hygroscopic (capable of absorbing moisture and various substances from the air), so reuse or filtering is not permitted. TJ can only be stored in a closed container.
Sequence of actions when replacing fluid yourself
Necessary tools, materials:
- key to “10”, “14”, cylinder to “17”;
- rags;
- additional lighting;
- Pillbox for filling;
- new brake pads as needed.
Algorithm of actions:
- We hang the car with an electric lift.
- Open the hood.
- Unscrew the cap of the brake fluid expansion tank.
- We remove the wheel.
- In the cabin, a partner pumps the brake pedal and fixes it in the lower position. Waiting for commands.
- Clean the surface of the back of the brake caliper, remove dirt, and wipe dry.
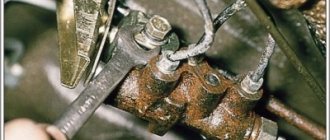
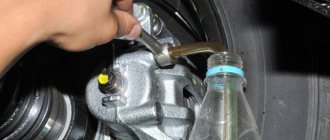
- Using a key set to “10”, unscrew the grease fitting and bleed out the air along with the liquid.
- We tighten it and give a command to our partner to repeat the pumping procedure.
- We repeat the step again.
- We replenish the missing amount of DOT in the expansion tank.
After completing bleeding of one wheel, we immediately proceed to the next one according to the scheme:
- Front left – rear right;
- Front right – rear left.
The algorithm outlined above does not allow the complete replacement of bunkers in the contours. The design of the car is such that it is impossible to “flush” the system without major dismantling.
Many service station mechanics use a channel in the hydraulic drive to replace brake fluid:
- From the front of the engine we find the hydraulic drive fitting.
- Remove the plastic cap from it.
- We put on a hose, one end of which is lowered into a container with liquid.
- We recess the bracket.
- Pull out the plastic tube.
- The system has been depressurized and the bunker leaks out of the hose under pressure.
- As soon as the level in the expansion tank drops below the minimum, we replenish the missing amount.
- We repeat the cleansing procedure until the color of the DOT becomes transparent.
The volume of bunker that is filled into Lada Vesta is 1.5 liters.
Snapshot
Remove the protective cap from the cylinder fitting of the rear right wheel.
Remove the protective cap from the cylinder fitting of the rear right wheel.
Remove the protective cap from the cylinder fitting of the rear right wheel.
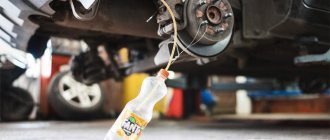
We put a hose on the fitting, and immerse its free end in a container partially filled with working fluid.
An assistant must vigorously press the brake pedal all the way 1-2 times and keep it pressed.
The sequence of removing air from the vehicle
We start pumping the brakes from the front right, and then the left. The procedure takes place with the ignition turned off (position at “0”) and the terminal on the TJ tank removed.
- We put the hose, with the bottle, on the fitting and open it (with an open-end wrench). It is necessary to push the transparent hose so that air bubbles can be seen, and the other end of the hose must be completely placed in the liquid.
- We fully depress the pedal and hold it until all the air comes out.
- Tighten the fitting and release the pedal until liquid flows out without air.
New Lada: Lada Priora will be discontinued in July - Vedomosti
The rear wheels are pumped with the ignition on in key position “2”.
- As when bleeding the front wheels, we put a hose on the bleeding fitting on the caliper.
- Having fully depressed the pedal, turn the ignition key (to start the hydraulic pump). We observe the air coming out and control the level of brake fluid in the reservoir (top up periodically).
To properly bleed the ABS brakes on the rear left wheel, the sequence of actions needs to be slightly changed.
- As in previous cases, we first put the hose on the fitting and do not unscrew it completely, but only 1 turn, and the pedal does not need to be depressed.
- Turn the ignition key to start the hydraulic pump.
- As soon as the air comes out, depress the brake pedal halfway and tighten the bleeder fitting.
- Then we release the brake and wait for the pump to stop.
- Turn off the ignition and connect the removed connector from the tank.
If you need to pump the brakes together with the ABS modulator, then information on this procedure can be found here.
It is imperative that after bleeding the brakes, before driving off, you need to check the tightness of the system and the absence of leaks. Check the brake fluid level.
Summary
You can replace the fluid yourself only on cars with a hydraulic accumulator and valves combined into one unit. List of required equipment:
- syringe with extension tube or bulb;
- transparent containers;
- transparent tube 20-30 cm long;
- open-end wrenches at “8” or “10”.
Briefly about the procedure for replacing brake fluid in a car with ABS on your own:
- replace the composition in the tank with a new one;
- bleed the left and right front brake cylinders;
- bleed the rear right cylinder with the brake pedal depressed and the pump turned on;
- bleed the rear left cylinder with the brake pedal released and the hydraulic pump turned on;
- check the system for leaks.
If there is a drain fitting on the ABS module, you should use the classical method according to the scheme specified by the factory to bleed all 4 brake cylinders, and then “drive” the ABS installation with excess pressure supplied from outside.
Vacuum brake booster
Its main task is to provide driving comfort by reducing pressure on the brake pedal. To check, place the car in a level position and press the brake pedal. Then turn on the engine smoothly.
If the pedal remains in the same position, then there is a problem with the amplifier. when everything is in order, you need to check the connection hose for leaks.