09 February 2015 Lada.Online 275 523 149
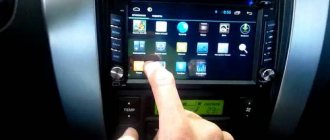
The multimedia system (MMS) of Lada Granta, Kalina 2 and Priora has a 7″ display with TouchScreen, FM, USB, Bluetooth SD card slot and Handsfree. The standard firmware of the radio has a number of disadvantages, for example, there is no way to configure a 3G modem, GPS, and the interface is not functional enough. MMC firmware will help get rid of these shortcomings.
You will need : SD card up to 4 GB formatted in the FAT file system (in the future you can use the exFAT file system), select the firmware for the radio (list of firmwares).
Attention ! Perform all operations on MMS firmware only at your own peril and risk! Which leads to the loss of the manufacturer's warranty on MMC!!! Before flashing the firmware, it is recommended to make a dump (backup).
Firmware for radio Kalina 2/Granta
You will need an SD card up to 4GB formatted in FAT.
In the future, it will be possible to use a card in exFAT format. Attention!
| The author is not responsible for all your actions. In addition, flashing the MMC leads to loss of warranty. |
Procedure: 1. Copy the firmware to an SD card (up to 4GB in FAT). 2. Copy files from the “FirmWare” folder to the root of the memory card. 3. Remove the flash drive from the USB port. 4. Insert the SD card into the radio. 5. Reboot the GU by long (about 15 seconds) pressing the power button (for Lada Kalina 2) or the volume button (for Lada Granta). 6. A flashing will occur (4 status bars will run through) and the radio will reboot itself into the desktop.
7. Without rebooting the radio, press the “Recalibrate” button and calibrate the screen. At the end, during the countdown, click on the screen.8. Reboot the radio with the memory card inserted. The new menu will load.
If, after flashing the radio, the download freezes at the “Lada” logo, then most likely there is a problem with the SD card. Try formatting the memory card to other file systems (FAT32/exFAT/FAT) and flashing it again. You can also try using other SD cards, 4GB or 2GB in size.
How to return to the standard menu of the Kalina 2/Grant radio:
- Click on the “Media” icon in the alternative menu.
- Reboot the radio, first remove the SD card.
Nothing changes in the standard shell, everything remains the same.
Advice for future and current owners of VAZ push-button radios
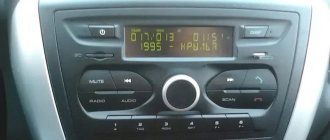
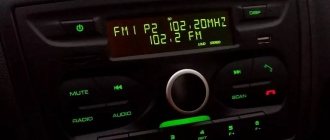
The release of standard VAZ “devices”, devoid of an expensive “sensor”, has been expected for a long time. Back in the first half of the year, we were told that such a unit should appear in the fall. As you can see, VAZ was embarrassed to build a graphic display into the radio, and all information on the screen is displayed in standard symbols. The only available backlight color is emerald (there will be more of these colors in crossovers). The device is a “turn on and listen” device, and in standby mode the display displays the time.
The fact that the manufacturer placed the USB port right on the face of the radio is not bad. Now owners have the opportunity to quickly connect a USB drive, or use the standard port as a power source. It will be easy to connect a smartphone or tablet and place it on the dashboard. This is cool! It is recommended to immediately install a short USB flash drive into the USB port to protect it from dust. And it’s also advisable to occupy the port intended for SD cards with something.
All radios produced by Itelma LLC are well aware of a file system such as FAT32. This means that you need to format flash drives in it, onto which audio files in MP3 and WAV format will then be recorded. The signal to the speakers standardly installed in the doors comes without distortion, and the power of the built-in amplifiers is unlikely to seem insufficient to anyone. Enjoy it for your health.
We can state the fact that the new head unit developed by AvtoVAZ turned out to be more than twice cheaper than the touch media center. So, there is no need to succumb to the persuasion of sellers to buy a 7900010-40 radio for 10, 8 or 6 thousand rubles. However, we will leave the choice to the owner.
In fact, VAZ acted very unusually by releasing another “device” in a non-standard form factor. Car dealers should not have any problems with the availability of one or another radio, since the car plant has been working on pre-orders since September. True, it will be difficult to purchase the “device” in question separately from the car, unlike luxury media. The main thing is that two requirements are now met at once: the owner does not overpay for unnecessary options, and at the same time uses only standard VAZ equipment. It would have been like this a long time ago... Let's say if the radio was 1DIN high, it would be equipped with a removable muzzle, but what's good about that?
What features does the MMC Grant firmware provide?
Firmware that you can do yourself will help to significantly expand the standard options of the multimedia system. Pre-installed options will only allow you to enjoy the standard set of options. The owner will not be able to configure the navigator or rear view camera. Lada Granta radios are great for flashing.
In order to flash MMS, you will need:
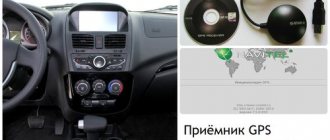
- GPS receiver, preferably Globalsat BU-353S4 model.
- 3G modem Huawei E1750.
According to the manufacturers' promises, these devices provide the ability to use navigation and connect to the Internet. Domestic automakers are not of the opinion that the owner of a Lada Granta may need a navigator and the Internet. In order for the devices to work, you will also need a DNS ATH-08 USB splitter (hub).
Conclusion
The latest version of the firmware we reviewed turned out to be quite convenient. It is impossible not to note from a positive perspective its developers - participants in the Grant Club. Having a convenient interface in MMS, you can comfortably spend time behind the wheel of LADA Granta.
The multimedia system (MMS) of Lada Granta, Kalina 2 and Priora has a 7″ display with TouchScreen, FM, USB, Bluetooth SD card slot and Handsfree. The standard firmware of the radio has a number of disadvantages, for example, there is no way to configure a 3G modem, GPS, and the interface is not functional enough. MMC firmware will help get rid of these shortcomings.
You will need: SD card up to 4 GB formatted in the FAT file system (in the future you can use the exFAT file system), select the firmware for the radio (list of firmwares).
Attention! Perform all operations on MMS firmware only at your own peril and risk! Which leads to the loss of the manufacturer's warranty on the MMC. Before flashing the firmware, it is recommended to make a dump (backup)
How to install 2 din in grant norm or standard
Everything is more complicated here. Need to:
- dismantle the center console trim - unclip the fastenings, move it forward and disconnect the buttons and heater handles;
- cut out a vertical plastic partition that will not allow you to install a 2 din device;
- file the plastic casing of the central air duct;
- try on a new acoustic unit, adjust the fastenings if necessary;
- install adapters from the delivery kit on the wiring (if required);
- install the device;
- if we leave the old center console trim: we cut out the partition, try it on, put it in place with the buttons and handles connected, adjust the decorative frame of the control unit, install it;
- if we install a new trim on the console under a 2 din device: we transfer the heater control unit and buttons from the old trim, install them in place, and put a decorative frame on the control unit.
That's actually the whole process of preparing for the firmware!
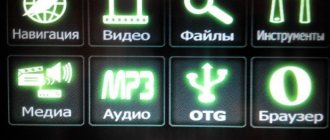
After the firmware on the MMS Lada Granta is completed, a new desktop will appear, and in particular the Wince desktop. It is those four files that were copied separately to the root directory of the SD card that are responsible for displaying the interface of this desktop.
The next step is to configure the new software on the standard multimedia Lada Granta. To do this, you need to click the Start button, and then proceed based on this path: StartSettingControl Panel.
In some cases, at this stage, delays were noticed in opening the control panel, which disappeared after a forced reboot of the mms.
In the panel that opens, click on the Stylus/Calibration icon. Thus, the user of the new software is given the opportunity to calibrate the response accuracy of the touch display.
This procedure is best carried out using a stylus. At the end of calibration, a timer will appear on the monitor; without waiting for the countdown to complete, you must click on the screen.
Now the time has come for the forced reboot mentioned above. Long pressing the volume key (at least 10 seconds) will force the mms to reboot. At the time of reboot, the removable media with the new software must remain in MMS Lada Granta.
After the reboot, the standard menu will be displayed, followed by the altmenu, as it was in the process of preparing for the firmware procedure. You can get to the standard menu by pressing the “standard” key.
The reboot must take place with the Globalsat BU-353S4 GPS receiver connected via the DNS ATH-08 USB splitter. If it is not connected, after the software reboot is complete, the standard menu will load.
User settings, and in particular radio, sound and video settings, are an integral part of any multimedia system. NewMenu V7.391Nitro requires manual installation of the module for setting these parameters, and for this you need:
Direct firmware mms 2190 grant
The firmware process is quite simple! All you need is an SD card
Note! The SD card must be formatted in FAT16. A common problem after flashing the firmware is the Lada logo freezing on the monitor of the standard multimedia system
This problem may occur as a result of:
• Failure to comply with the parameters of the required formatting system; • Old SD card model, different from SDHC.
If a problem of this kind arises, then it is necessary to check compliance with the above two points of the procedure for flashing multimedia firmware on the Lada Granta.
After the flash drive is formatted and the new software has been decided, for example, NewMenu V7.391Nitro, you need to download the new firmware NewMenu V7.391Nitro and unpack it directly onto the SD card itself.
As for the FirmWare folder, the files located in it must be moved to the root of the SD card. The root of the SD card implies placement of files in addition to other moved folders.
The copying process is complete, which means it’s time to remove the flash drive from the computer. It is worth noting the need for mandatory safe removal, which has long been known to all PC users.
Firmware for Lada Granta, Kalina and Priora (luxury) radio
An SD card with files placed on it must be inserted into the mms. After the removable media is inserted into the mms, it must be turned on. After waiting for the device to fully boot, long pressing the volume key will reboot it.
The reboot takes place in four stages, which is shown in the example of four boot lines, upon completion of which, MMS will start in normal mode (standard display menu). Just a few seconds after the standard menu, the radio will go to the altmenu.
Note! If any device is connected to the USB radio, the altmenu will not start. After removing the device, the radio must be rebooted again
The advantage of using the ATH-08 DNS USB splitter, which was mentioned at the beginning of the article, is multi-polarity. A GPS receiver and other USB devices connected to the hub will not interfere with the launch of the altmenu, but will become inactive.
How to flash MMC 2190 Granta firmware
To flash the MMS, you need an SD card.
To flash the MMS, you need an SD card. The firmware procedure is incredibly simple. You will also need an SD card. In order for the card to be used, it will first need to be formatted in the FAT16 system. Sometimes during the firmware a problem arises, which is that the Lada logo freezes. Why is this happening:
- formatting options do not meet system requirements;
- sometimes it could be an outdated SD card.
This is why special attention needs to be paid to formatting. If difficulties arise with the firmware, then you need to check everything. You can select NewMenu V7.391Nitro as the new software. To do this, you need to find and download it on the Internet, and then unpack the archive onto a card.
What modes are optimized when chip tuning a Granta power plant?
The plant periodically makes some warranty adjustments at service stations, but not everyone uses this service, and those who undergo warranty maintenance do not always receive it. As a result, owners continue to operate obviously faulty cars, not suspecting that it is enough to correct the electronic algorithm. The point of changing the ECM software is to optimize the operation of the engine and transmission.
Lada Granta modes that require improvement:
- ignition timing;
- injection time value;
- exhaust emission control systems;
- algorithm for determining the octane number of fuel;
- automatic transmission operation.
How to update the radio firmware to ver.38 (23.0.2.38)
Archive password: club-lada.rf
Features of the assembly with the altmenu:
- The build is based on version 23.02.38.
- Has built-in Russian localization.
- Launching the altmenu without rebooting from the standard menu (by long pressing “Settings”).
- Built-in driver for GPS receiver BU-353s4.
- Initialize sound and time without the participation of the MMC.exe process.
- Display of engine temperature and remaining fuel (provided the CAN bus is entered into the MMC).
- Screen and sound settings.
- There is a radio.
- Support for radio buttons.
Firmware: Unpack the contents of the archive to the root of the SD card:
Next we proceed as described above. This assembly can work without an SD card, or you can delete the Install and Firmware_v38 folders. The Navigation folder must be present on SD or USB, it was created for navigation programs, for example, for Navitel you need to put Navitel in this folder. Now all that remains is to install the navigation program, configure the GPS and GSM modem. In the comments, share your reviews of the firmware and links to them. By the way, do you know how to play most video formats on the standard radio?
Implementations of CAN at the level of electrical signals
The CAN bus can be implemented physically in three ways:
1 ISO11898-2 or CAN-High Speed.
A classic twisted pair cable loaded at both ends with 120 Ohm resistors.
In this case, the levels on the CAN bus look like this:
For such a network implementation, conventional CAN transceivers in an 8-pin package, analogues of PCA82C250, TJA1050 and the like, are usually used. This configuration works at speeds of 500 kbps and higher. (But there may be exceptions).
2 ISO11898-3 or CAN-Low Speed or Faut Tolerant CAN
This option uses the same twisted pair, but the CAN-Low and CAN-High lines are connected to the supply voltage and ground, respectively. Detailed description of FT-CAN at the link
This version of the CAN bus is capable of switching to single-wire mode if one of the lines is damaged.
Operates at speeds up to 250 kbps. Signal levels on the bus differ from High Speed CAN, but the ability to work with the FT-CAN bus using High-Speed CAN transceivers and observing a number of conditions is not lost. Read more in our article about FT-CAN - link .
Fault tolerant CAN is usually used for low-speed exchange between control units belonging to the SalonComfortMultimedia network segment.
IMPORTANT : When connecting to the Faul tolerant CAN bus, it is NOT NECESSARY !
How to eliminate some shortcomings of the multimedia system
Sometimes, in order to start using new media, you need to purchase it. She will certainly be able to cope with tasks that are standard. But you can’t expect more from it without additional modifications. Without this, you will not be able to configure the navigator or connect a rear view camera.
It must be said that many multimedia that modern foreign cars are equipped with are significantly inferior in their capabilities to the MMC Grant. This system is unique and quite competitive. If there are minor problems in the operation of the MMC, then updating the MMC firmware will eliminate them. Let's look at how to make firmware for 2014.
Main functions and appearance features
The infotainment display is very bright and the touchscreen is sensitive to touch.
Multimedia supports three formats. It provides the opportunity to listen to audio, see the cover and artist name. You can adjust the sound quality using the equalizer. MMC Lada Granta has about six programs that perfectly optimize sound quality. Of course, such settings do not allow you to achieve ideal quality, but the music will sound clear and without interference.
MMC 2109 has the ability to view video files
Not all video formats can be viewed using multimedia. For this MMS, only WMV format is available. Therefore, you can only record video files using a converter. Higher file resolution will cause the system to freeze. The processor used in the multimedia system is quite weak. Viewing photos is a little difficult. The better the quality of the photo, the longer it takes to open.
The standard version of the MMC Lada Granta Lux allows you to use the Bluetooth installed in your mobile phone and listen to the recordings that are on it. The multimedia system can “read” flash drives, but their maximum capacity should be no more than 64 GB, as well as SD cards up to 32 GB.
Connecting external devices
Domestic developers made sure that their creation was maximally adapted to work with third-party devices. The 2 din radio allows the use of wireless hands free, mobile phones and external information sources.
In order not to overload the Lada with unnecessary wires and inputs, the connection between the radio and an external device occurs via the Bluetooth protocol. It is enough to set the necessary settings once for the system to remember them.
If you wish, you can download music from external media to the internal memory of the radio or listen directly from a flash drive or phone. If the second is selected, then the sound comes from the speakers installed in the car or wireless headphones. When it comes to connecting memory cards, they must be formatted in a certain way - FAT16/FAT32. The connection connector is located on the back side.
Repair and warranty service are as follows. If the installation of the radio in Kalina was carried out correctly, then once a year it is necessary to do a preventive examination at a service center.
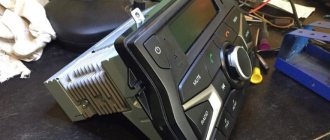
If the service period has passed, then everything can be done at home. All wires must be carefully disconnected. Using a screwdriver, loosen the fastenings and remove the radio. Then it is delivered to the workshop, where the failed element is replaced.
Review of the standard radio (MMC) of Lada Granta, Kalina 2 and Priora (luxury)
Currently, depending on the vehicle configuration, several types of 2 din radio can be installed.
The first is called “2 DIN audio system, without CD drive, without TouchScreen”, the other “multimedia system without CD drive, with a 7-inch display with TouchScreen” (MMC).
In the review we will talk about the MMC with a touch screen (LCD display), which is installed on the Granta (sedan and liftback), as well as on the Lada Kalina 2 and Lada Priora.
Catalog numbers MMS Lada:
Monoblock 2190-7900010-00 - MMC Lada Granta (luxury) and Lada Kalina 2 (standard) The screen is separated from the buttons 2192-7900200 - MMC Lada Kalina 2 (luxury) and Lada Priora (luxury)
MMC runs on the Windows CE 6 operating system. This is specially optimized for devices with a minimum amount of memory, by the way, in our case the memory is only 128MB. Despite this, turning on the radio does not take much time (about 2-3 seconds).
MMS screen
The display on the Granta and Kalina radio is resistive. Unlike a capacitive screen, it is able to work without failures in more severe conditions, for example, frost or heat. The display itself is quite bright and pressure sensitive. Due to the lack of a visor, there is glare in sunny weather, but not critical.
radio cassette player lada granta lux radio cassette player lada kalina 2 lux
What are the benefits of new technologies?
In the second generation Lada Kalina 2 there is a standard radio, or simply put, the car radio has a simple and understandable control system. One or two taps on the touch screen allow you to activate the desired function. Unlike the previous version of the radio, this device boasts improved characteristics and the ability to function in different temperature conditions.
Very frequent complaints from owners of LADA Kalina 2 were indications that in sunny weather operating the radio became very difficult. The fault lay in the numerous glares that appeared on the capacitive display, which did not allow the characters to be read correctly. When developing the new generation of MMC, the designers took this negative point into account. Also, owners now have access to a car radio with a practical visor that protects the screen from glare.
The maximum diagonal of the radio display used in the Lada Kalina 2 is 7 inches. The basis of its functionality is the Windows CE 6 software product. This version of the software is specially designed for MMS and has almost optimal parameters. The process of turning on the device will take a few seconds. RAM is characterized by a volume varying from 128 to 256 MB.
With the help of the new firmware, the developers managed to significantly improve the functionality. Now the options include:
- ability to support formats: “wav”, “wma” and “mp3”;
- availability of memorization of six “shades” of playing musical programs;
- the display contains information regarding the name of the composition and album;
- the device’s ability to read programs in the “wmv” format;
- maximum screen resolution is 320 x 240 pixels;
- compatibility with a convector that allows you to play video materials in other formats;
- built-in FM radio;
- ability to support micro SD cards;
- The firmware allows you to play images that were saved in various formats, for example: “jpg”, “bmp”, “gif”, “jpe” and “jpeg”;
- there is no limitation in terms of the maximum size of photos, although if the volume of a particular photo is over 2 MB, the firmware will allow it to be opened after some time (2-10 seconds).
- It is traditionally believed that the TRIALLI FR 774 clutch with a diameter of 215 mm is intended only for Lada cars... Lada Kalina II | Installing a reinforced clutch 4 ⌚4 months ago
- Heating element for mirrors Luxury for Lada Kalina, VAZ 1117, 1118, 1119, Lada Kalina 2 VAZ 2192, 2194, Lada ... Replacing the alternator belt Lada Kalina2 ⌚4 months ago
- If the turn signals are stuck on Lada Kalina 2, Granta, Priora, you don’t always need to change the entire TsBKE board, as is suggested in ... Lada Kalina 2, is it worth buying, which is better to choose 1,331 views ⌚4 months ago
- Many Lada Kalina 2 cars are equipped with plugs that are thrown away when installing the PTF.... Heating element for Lux mirrors for Lada Kalina, Kalina 2, Granta ⌚5 months ago
- Parking sensors for Kalina 2/Kalina 1/Grants/datsun on-do/datsun mi-do. Inexpensive parking sensors for Lada Kalina 2. Replacing the bts 5242 key in TsBKE Lada Kalina 2, Granta, Priora ⌚5 months ago
- For those who are interested) I don’t want to tell you much about installing a torpedo from Kalina 2 to Kalina 1)) So... PTF frames with DRLs and plugs on Lada Kalina 2 ⌚5 months ago
- Immediately sorry for the vertical angle. I made the video for Instagram, but I decided to post it here too. What if someone finds it useful? #Lada Kalina 2. Installation of parking sensors from China. Adding comfort to Kalindos. ⌚5 months ago
- My wonderful car. Torpedo Kalina 2 in Kalina 1 12 232 views ⌚5 months ago
- 2 din radio with navigation for Lada Granta 2 with Aliexpress. It is impossible to imagine a modern car without... Repair of suspension and brakes Lada Kalina 2 automatic transmission ⌚6 months ago
- Product demonstration. You can find out the price and buy at the link https://motorring.ru/product/15390 Online tuning store. Lada Kalina 2 five years old. ⌚6 months ago
- Clutch cable. REVIEW 2 DIN radio with navigation for LADA GRANTA 2 from Aliexpress. 2 ⌚6 months ago
- Lada Kalina 2 Eco-leather covers for Lada Kalina 2. Car Lada Kalina 2. Pre-vacuum the seats... Handbrake cover with cigarette lighter and cup holder for Lada Kalina, Kalina 2, Granta | MotoRRing.ru ⌚6 months ago
- https://avtoproblemy.ru/news/lada_kalina_2/2020-04-04-13 VAZ LADA Kalina 2nd generation detailed information about... Replacing the clutch cable on a Lada Kalina 2 with a Grant gearbox ⌚6 months ago
- Lada Kalina 2. The first problem with the EUR is that it jams during operation. A simple way to solve it. Wedges, not... Lada Kalina 2 Eco-leather covers for Lada Kalina 2 9 ⌚7 months ago
- Great car, comfortable ride over long distances. LADA Kalina 2 problems | Reliability of Lada Kalina II with mileage 10,553 views ⌚7 months ago
- Kalina 2 Sport - TM-Race receiver, Denfors shafts, Volgofors, 4-2-1 Stinger spider, modified cylinder head, etc. Link... #Lada Kalina 2. First problem with the electric booster. A simple way to solve it. 492 views ⌚7 months ago
- Product demonstration. You can find out the price and buy at the link https://motorring.ru/product/13744 Online tuning store. Lada Kalina 2 2014 in analysis ⌚8 months ago
- Lada Kalina 2. Station wagon. ⌚8 months ago
- KALINA 2 SPORT - CAME TO US for DEVICES from St. Petersburg... Part 1 17,294 views ⌚8 months ago
- Black aluminum sills for Lada Kalina 2, Granta, Datsun | MotoRRing.ru 421 views ⌚8 months ago
How to set up "GPS" on the firmware version of the multimedia?
Carrying out this action will not take much effort. The procedure involves preliminary switching with the GPS module and consists of the following algorithm of actions:
- go to the corresponding “Tools” menu;
- activating the display keyboard;
- direct module switching;
- route instructions: “staticstoredll232usb.dll”;
- continuously pressing the “OK” key after the prompt regarding driver selection is displayed on the screen.
If the indicated steps are completed correctly, then we proceed to the manipulations of setting up the navigation software. In the program, we select the “COM 5” port and the corresponding speed – 4800 bps.
Upon completion of the entire list of manipulations, we observe the operation of the system. Please pay attention to the presence of the configured Navitel program.
Nuances of multimedia firmware Grants (2190)
It is quite easy to carry out the firmware itself when installing the mms 2190 firmware. To do this, it will be necessary to use an SD card.
Among the common flaws that occur after the dashboard firmware is installed, even if it is the latest version, is the Lada logo freezing on the display of the head unit.
This moment can be provoked by the following factors:
- failure to comply with required formatting principles;
- the presence of an outdated version of the SD card that differs from “SDHC”.
After successfully formatting the card and selecting software (for example, “New Menu V7.391 Nitro”), you will need to acquire the latest firmware and unpack the product onto a previously prepared SD media.
Regarding the “Firm Ware” folder, note: the files located in it will need to be redirected to the root directory of the card itself. Upon completion of the copying process, disconnect the flash card from the PC, not forgetting about the safe removal technique.
Now we confidently insert the SD card with the prepared files present on it directly into the MMC. Then turn on the head unit. We wait for the full download to complete and by long pressing the volume button, we reboot.
The act of rebooting is characterized by four stages, the display of which is implemented in 4 lines of process status. After filling out these lines, the device starts in the usual mode, as evidenced by the appearance of the corresponding original menu. After a few seconds, the device transitions to the altmenu.
The USB splitter “DNS ATH-08” has acquired a significant advantage – multi-polarity. The GPS receiver and other USB modules connected to the “head” are combined with the altmenu, but become inactive.
After the MMS 2190 firmware is completed on a Lada Granta car, its display displays a new type of desktop, namely “Wince”. The 4 files previously mentioned and copied into the depths of the root directory of the map are “responsible” for the presence of the interface on the desktop.
The subsequent manipulation is associated with the need to configure new software in the standard multimedia device of the Lada Granta car. For these purposes, click the “Start” button, after which we follow the following route: “StartSettingControl Panel”. Sometimes owners complain about the slowness of the “Control Panel” opening process, but this phenomenon disappears after rebooting the MMC in forced mode.
When the control panel is open, in its interface click on the “Stylus/Calibration” symbol. With this action, the user of the new software gets the opportunity to calibrate the touch screen for response accuracy.
Upon completion of the simple calibration procedure, a timer appears; you should not wait for the completion of the counting process. Feel free to click on the screen.
Now the long-awaited time has come for the forced reboot process. Long and holding pressure on the volume key (10 seconds or more) allows you to implement this process in MMC. At this moment, the removable media, which contains the new software, continues to reside in the connector of the head unit of the Lada Granta car.
Having completed the reboot action, the device will first display the standard menu, and then, similar to the preparation procedure, the altmenu. If you need to return to the “native” menu, you should hold down the “Native” key.
The process of rebooting the device, after the dashboard firmware has been flashed, requires its connection via a USB splitter of the specified model with the Globalsat BU-353S4 GPS wave receiver. If there is none, then upon completion of the process itself the “head” will display the normal menu mode on the display.
Such common settings as sound, as well as audio or video, are present in any multimedia device in the domestic Lada Granta car.
“NewMenu V7.391Nitro” needs a manual way to install the indicated options, which will require:
- log in to the “soft/radio” folder;
- resort to activating the “start.exe” file.
The procedure will agree to associate present files with the extensions “exe” and “ahk”. This manipulation is quite important and allows you to achieve stable functionality of the MMC, which is used to flash the dashboard firmware.
Work order
The process itself is very simple. To use such a card, you must first format it in FAT16. During the flashing procedure, the Lada logo may freeze, this happens for the following reasons:
- Outdated map;
- The card was formatted in the wrong system as required.
Therefore, the procedure is simple, but it must be treated very carefully. You can download the new firmware on the official Lada website.
We connect the card to the multimedia system. Then we turn on the standard system itself. We wait for the system to start and then reboot the radio by pressing the volume key.
The program must go through four stages. Once enabled, you will see an alternative menu. This ends the preparatory stage. If everything is correct, you will see working Windows. Then all that remains is to install the software. Go to the folders Start – Setting – Control Panel.
If you experience freezing when moving from folder to folder, then simply reboot the system. Going to the panel, open the Stylus – Calibration icon. This menu will help you calibrate your screen.
Next, reboot the system again, press the volume key and hold for about ten seconds.
After turning it on again, open the Soft – radio folder and run the installation file.
These actions will help the system recognize files and stabilize the operation of your media system, as well as adjust the equalizer when you listen to the radio.
Then we set up a navigator if you need one. Go to the tools, connect the module, specify the path Staticstoredll2usb.dll. After finishing the search, press OK, and continue to press until the menu disappears from the display.
CAN recovery using USBDM.
The archive contains instructions and files. Tested for MMC grants. If Kalina, RESET, BKGD and GND are looked for on the side service connector, VDD is possible next to the CAN controller.
2) Just unpack the archive and transfer all the contents to SD. It should look like this:
sdmmc osfiles Start EndCalib.JPG S19FileDecoder.dll UPPwriter.exe, MMS_CAN_bootloader.s19
3) Get into the car with the SD, insert the SD, close all the doors, trunk, turn off the headlights, turn everything off and close. We go to the desktop, go to the SD in the Osfiles folder, launch UPPwriter there.
5) Completion. Now feel free to go to NM and test. Error reading only works on transitional NM 8.1
Source
Disadvantages and problems of the audio system in the Lada Granta
1. As you can see in the list of characteristics, the radio does not support reading compact discs; there is not even a connector for this case. This cannot be said to be a huge oversight, but this decision may still cause some inconvenience.
2. The Bluetooth function works quite slowly, and when transferring a large amount of information it may freeze completely.
3. Connoisseurs of pure sound in cars note the discrepancy between the output sound power of the radio and the 13-inch speakers provided for this. For the best sound effect, it is often necessary to replace speakers that simply do not perform well.
4. Poor video quality during playback, especially difficulties with the AVI 720 format.
5. Despite the built-in video input, connecting a rear view camera is impossible. However, this problem was successfully resolved in the firmware for the radio.
Description of types of firmware.
Versions 1.7 and 1.13 are stock. The navigation built into the car only works on 1.13, 1.23 and 1.24.
1.9, 1.10, 1.11 are based on 1.7; 1.23 is based on 1.13. In 1.7 there are only 11 IDs that can be forwarded to the COM port, no dividers, etc. no, and adding them is very difficult. In 1.13 there is an ID group (3 pieces 481, 551, 280) with dividers, an ID group without dividers (4Ax) and an ID group (8 pieces) without dividers disabled in the firmware. Also, information from some IDs is taken and processed inside the CAN controller. However, I don’t know how to get it. In 1.24 (modified 1.23) it was possible to receive IDs with a mask, that is, select the range of received IDs. I did this with the 7E8..7EF range to receive diagnostic requests from all controllers in our cars. ID 4A2 only for combinations with built-in GPS and only with a connected 6-button steering column switch.
Each version has its own pros and cons: Versions based on 1.7: + Reflashes well even with the engine running. — Data transmission is choked (if you often send data to the CAN controller, it stops being sent to the bus). — Not enough ID. Versions based on 1.13: + Data transfer does not choke. + Lots of IDs. + There are dividers (it really helps reduce the load, because ID: 180 messages are sent 100 times per second) - Flashing is very sensitive to bus activity, etc. (there have been cases of corruption).
Video instructions for flashing firmware for Lada head unit
If, after flashing the firmware, the radio does not boot, but freezes on the “LADA” logo:
- Make sure nothing is inserted into the USB port.
- Create an empty Explorer.txt file in the USB root. After rebooting, the WinCE desktop should load.
- Try turning off the power to the MMC (remove the battery terminal) for 5 minutes.
- Try formatting the SD card to a different file system (FAT32/exFAT/FAT) and reflash the radio again.
- Use another SD card to flash the radio firmware.
Let us remind you that we solve other problems of MMS related to its operation in this article.
The MMS Grant firmware makes it possible not only to expand the functionality of the system itself, but also the ability to connect a rear view camera to the standard multimedia.
Video on how to prepare an SD card for flashing the radio
Firmware order:
- Copy the firmware files (Chain.bin, chain.lst, NK.bin, TINYNK.bin) to the root of the SD card.
- Remove the flash drive from the USB port.
- Insert the SD card into the MMC.
- Restart the radio (for Lada Kalina 2/Priora - hold down the power button for 15 seconds, for Lada Granta hold down the volume button for 15 seconds).
- During the download, an update will occur, after which the radio will boot into desktop mode.
- Without rebooting the radio, go to the screen calibration mode (Start/Settings/Control Panel/Stilus/ to the Calibration/Recalibrate tab), then press the screen during the countdown.
- Reboot the MMS with the SD card inserted.
- The firmware of the radio is complete, the SD card can be removed.
